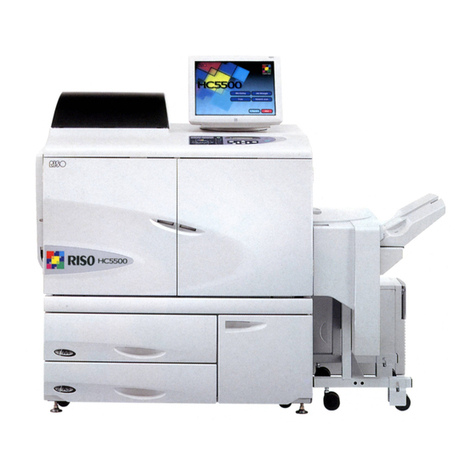
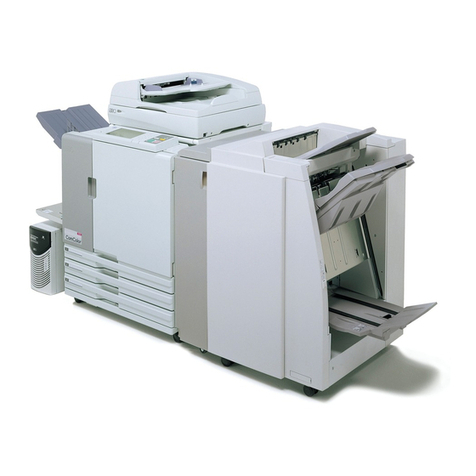
Riso HC Series Operating instructions

RISO KAGAKU CORPORATION
Overseas Technical Department
12 February 2008
Rev. 1.6


Before maintenance
Step1) Separation of RIP from HC main unit.
1) Separate RIP should be done before start repairing
- Now you can turn off HC main SW anytime you want without unexpected errors during repairing.
2) Remove a Power control cable to stop completely.
Step2) Cover the floor or carpet.
1) Putting curing mat to prevent floor or carpet from ink.
Power control cable

Index
For HC Printer
Item 1 Paper is stained with ink
Item 2 Image deformation
Item 3 White Line (Cleaning method of Print Head)
Item 4 Printed image is deformed diagonally
Item 5 S04-307 Overflow
Item 6 No ink
Item 7 W99-315
Item 8 Paper jam
Item 9 S03-243 (Belt platen operation error)
Item 10 Disordered paper stacking at paper ejection area
Item 11 X02-210 (Paper jam at main paper transfer section)
Item 12 Duplex unit cannot set smoothly
Item 13 S01-204 (Transfer belt unit sensor error)
Item 14 TR: 0031 error message (S04-300)
Item 15 S99-018
䌾
021 , S99-066
䌾
069
Item 16 S98-320 (Head voltage error)
Item 17 R98-142 For HS2000 (Scanner memory error)
Others
Item 18 Efficient procedure for installing machines
Item 19 Initialization Procedure
Item 20 Check point in periodical maintenance
Image adjustment
Item 21 Temporary image adjustment method
HC Finisher maintenance
Item 22 Stapling papers which are aligned not properly
Item 23 X19-711, 712 (Finisher eject sensor ON jam)
Item 24 Paper Jam at Finisher Transfer Unit
IS700C controller
Item 25 Calibrating the touch panel display for IS700C
Item 26 SERVICE mode for HS2000 + IS700C
Item 27 Upgrading procedure of IS700C

Paper is stained with ink
㩷㩷㩷㩷㩷㩷㩷㩷㩷㩷㩷㩷㩷㩷㩷㩷㩷㩷㩷㩷㩷㩷㩷㩷㩷㩷㩷
Item 1-1
Case Papers are stained with ink on the subsequent prints after Print Head cleaning action.
- Ink spill out to the transfer belt from Print Head, therefore the papers are stained.
- This trouble likely occurs after Print Head cleaning action.
- Misfire may occur instead of ink stain occasionally
Cause of the problem (1)
If the surface of SUS plate is dirty with remaining old ink, ink will spill out from Print Head along remaining ink.
Solutions
Remove remaining old ink on SUS plate manually with fresh ink.
Cause of the problem (2)
Maintenance parameter
- The compressed air in the Reservoir will be released at the end of Print Head cleaning action and to what extent this air
releasing is performed is affecting the ink meniscus of Print Head.
- You can change the air releasing level by SE mode 8.6.6 and there is a trade-off condition between the misfire and ink
spilling trouble.
Solutions
- Adjust the “CLEANING CONFIG” by SE mode 8.6.6 (HC5500)
- This parameter has the values of OFF(default), WEAK, NORMAL and HARD.(HC5500)
- When [ HARD ] is selected, the possibility of the ink spilling trouble will decrease but the possibility of misfire will increase.
Clean both Print Head and
SUS plate
Print Head
SUS plate
Print Head
SUS plate
Remaining Ink or scratch, scar If the surface of SUS plate is dirty with
remaining old ink, ink will spill out from Print
Head along remaining ink.
Ink

Print Head condition after cleaning
- If you adjust the parameter with HC5000, please refer to a following chart.
8-6-6 OFF(default) WEAK NORMAL HARD
8-6-6-5 50ms 150ms 250ms 350ms
8-6-6-9 50ms 50ms 100ms 100ms
Cause of the problem (3)
There is a problem in the Reservoir.
- Solenoid valve of Reservoir cannot work properly and cannot release compressed air in the Reservoir during Print Head
cleaning operation, it causes ink spilling out from Print Head.
Solutions
- Replace the Ink Reservoir.
HC5500 Ver2.00 or later
HC5000 Ver2.05 or later
Clear There are some ink drips; they
becoming bigger.
30sec later
Print Head Print Head
No problem Adjustment is required
After adjusting the parameter
If there are many ink drips on the Print Head even if
change parameter to “HARD”, it is necessary to replace
ink reservoir or to clean up the Print Head again.
Reference

Cause of the problem (4)
There is a problem in the Print Head.
- If there are some scratches on coating of surface of Print Head, ink will stick there after Print Head cleaning action and ink
will spill out from Print Head.
Solutions
- Replace the Print Head.
- You can not check this problem in field.
Cause of the problem (5)
There is a problem in the stopping position of maintenance unit.
- If the stopping position of maintenance unit is not proper during Print Head cleaning operation, Suction head cannot wipe
the surface of Print Head sufficiently.
- If there is a problem with the stopping position of maintenance unit, Ink might drop down from “Ink Pan” because the
“Suction Head” touches “Ink Pan”.
Solutions
- Repair the deformed unit or replace the unit.
Print Head
Suction Head
Straight!
㩷
Suction
Head
Ink Pan
Ink Touch!

Edgeofpaperisstainedwithink Item1-2
Case Edge of paper is stained with ink.
Cause of the problem (1)
Due to curled paper or waved paper, edge of paper is stained.
- If curled paper or waved paper is used for printing, the paper will touch the surface of Print Head slightly and the leading
edge of the paper will be stained with ink.
- In worse condition, the error X02-223 [Paper lift detection] will occur.
Solutions
- Change papers with non-curled and non-waved papers if possible.
- Change the paper feeding direction if the paper size is small or than A4. (Short edge paper feeding -> long edge paper
feeding)
- Use the paper feeding from Multi-Tray Paper Feed Tray to avoid influence of the outside air. And putting “silica gel” is
effective for fumidity.
- Remedy of paper curl.
A4 size, B5 size
Long edge paper feeding (better)
Short edge paper feeding㩷
Ink stain
Curl of paper Wave of paper
Recycle paper waves easily in humid condition.
Mated paper curls easily in dry condition.

Cause of the problem (2)
The gap between Print Head and the transfer belt is too far.
- Ink mist, a minute particle of ink, may be sometimes generated from Print Head during printing.
- Such ink mist drifts in the air and comes toward the transfer belt.
- Most of them reach to the paper on the transfer belt so it is a problem.
- But if the gap between Print Head and the transfer belt is too far, misting ink may reach to the transfer belt and it can be
misting a cause of the problem.
- As a result, the surface of the transfer belt becomes dirty with ink and the edge of paper gets stained with ink.
- If the margin around the printing paper is reduced by menu 4.10 [Print Area], this problem occurs easily.
The gap is small (Normal)
The gap is big
Solutions
- Adjust the gap by SE mode 5.9.1.32 for HC5000. (It is possible to widen with 0.1mm step)
- The gap is alternated automatically by the paper type. If you print normal paper with envelope setting, the gap becomes
too big.(HC5500)
- Adjust print area(margin) by menu 4.10.(HC5000, HC5500)
<Tips>
- Default margin of normal paper by menu 4.10 is 5mm.(HC5000, HC5500)
- Maximum margin of normal paper by menu 4.10 is 1mm.(HC5000, HC5500)
- Default margin of envelope by menu 4.10 is 10mm.(HC5500) HC5000 cannot print with envelope.
Print Head Print Head Print Head
Transfer Belt
Paper
Ink
Print Head Print Head Print Head
Transfer Belt
㪧㪸㫇㪼㫉㩷
Ink
Ink mist

Center area of paper is stained with ink Item 1-3
Case The center of a paper is stained with ink for the duplex printing.
Cause of the problem
The center portion of the switchback roller is dirty with ink.
Solutions
- Wipe off ink from the center portion of the switchback roller.
- The switchback roller needs to be cleaned every 300,000 sheets printing.
Switchback roller (metal roller)
㪧㫉㫀㫅㫋㩷㪻㫀㫉㪼㪺㫋㫀㫆㫅㩷
㪠㫅㫂㩷㫊㫄㫌㪻㪾㪼㩷
Print direction

Image deformation in the direction of paper feeding Item 2-1
Case Image deformation in the direction of paper feeding such as image shrink or image shift
- There is an image shrink partially in the direction of paper feeding.
- Colors of image don't align.
- Sometimes the edges of papers are stained with ink. (leading edge and trailing edge)
Cause of the problem (1)
The reverse surface of transfer belt is dirty with ink.
- The transfer belt cannot rotate smoothly because there is a friction due to ink on the reverse surface of the belt.
- This trouble may be caused by the problem of non-stable rotation speed of the transfer belt㩷and you can confirm whether
it is in correct condition with SE mode 8.1.3.1.
Solutions (Step1)
- Clean the belt with cleaning jig or replace the transfer belt.
Solutions (Step2)
- Adjust the motor speed by correct procedure again
- Adjust transfer motor speed at first. (SE mode 8.3.1)
- Adjust paper feed motor speed next. (SE mode 8.3.2)
Usually paper feed motor speed is adjusted around 99.0% to 99.5%.
If paper is having buckle with 95%(limit) or size of the buckle is not stable, clean the belt again or replace the BP unit.
(transfer belt unit)
Wrap the cleaning jig with paper and
moisten it with alcohol. Insert the jig under the transfer belt and clean the
transfer belt by move it in right and left.
Confirm if the BELT-FG speed is stable
Cleaning jig

Cause of the problem (2)
Due to the paper condition, image shift occurs.
- This trouble may occur due to the problem of paper.
- A printing paper is transferred by registration roller and transfer belt, paper’s transfer speed by transfer belt may become
slow due to the problem of paper.
- If there are some difference of paper’s transfer speed between roller and belt, image shift occurs between 1st color and
the other colors.
Colors of image don't align between black and the others (HC5000)
Colors of image don't align between cyan and the others (HC5500)
- If curled papers are used, the paper touches with paper guide under maintenance unit.
- Paper can not breathe enough by the transfer belt if stiff papers are used. (Cardboard, Envelope …etc)
Solutions
- If stiff papers are used, be careful the paper condition (curl or wave)
- Post-card printing, paper-size detection sensor should be covered to be skip-printing mode.
Cause of the problem (4)
Set-screw of the motor-gear loosens.
- If the set screw of the gear loosens, transfer belt does not carry a paper with stability.
Actual transfer speed of paper
㪮㪸㫍㪼㩷㫇㪸㫇㪼㫉Not enough breathe
Paper slips on the belt and the paper’s
transfer speed becomes slow.
Please check whether the set screw
does not loosen.
Transfer-belt speed

Image shift in vertical direction of paper feeding Item 2-2
Case Image is not printed in the center position in the vertical direction of paper feeding.
Cause of the problem (1)
Transfer belt skew.
- If transfer-belt skews, the print position is different between up side and reverse side of the paper.
- When customer cleans the transfer-belt, the belt may go over from side-plate.
- If the transfer-belt goes over, it skews.
Solutions
- Check if transfer-belt does not go over from side-plate.(belt onto side-plate)
- Confirm whether transfer-belt moves straight.(by SE mode 8.1.3.1)
Cause of the problem (2)
Side registration unit cannot detect the edge of printing paper correctly.
- Side registration unit detects the edge of printing paper and determines the printing position.
- If a dark-colored paper is used, the side registration unit cannot detect correctly the edge of the paper.
Solutions
- Clean the side registration unit.(CCD unit)
- If it is under repair works and the covers are removed, light from outside may affects the detection of the side registration
unit.
- If you have to use dark color paper, it is necessary to change CCD-mode by SE mode 5.9.*.39
SE-mode 5.9.1.39 (normal paper) 5.9.2.39 (thick paper) 5.9.3.39 (thin paper)
- If the CCD-mode is changed “OFF”, image-position is decided by width of paper-fence.
- If the CCD-mode is changed “OFF”, print-margin becomes from 5mm to 10mm. Then it is necessary to adjust
print-position by SE mode 8.5.2.7.x.
Side re
g
istration unit Ed
g
e of a
p
a
p
er
Ed
g
e of a
p
a
p
er cannot be detected.
Transfer belt
Dark color
paper
Side
p
late

White Line (Cleaning method of Print Head)
㩷 㩷
Item3-1
Case Cleaning method of Print Head which has stain of SUS plate problem. (magenta or yellow Head)
Solutions
Use fresh HC ink and wipe-stick
㪚㫃㪼㪸㫅㩷 㪼㫅㫆㫌㪾㪿㩷 㪹㫆㫋㪿㩷 㪧㫉㫀㫅㫋㩷
㪟㪼㪸㪻㩷㪸㫅㪻㩷㪪㪬㪪㩷㫇㫃㪸㫋㪼㩷
㪧㫉㫀㫅㫋㩷㪟㪼㪸㪻㩷
㪪㪬㪪㩷㫇㫃㪸㫋㪼㩷
㪧㫉㫀㫅㫋㩷㪟㪼㪸㪻㩷
㪪㪬㪪㩷㫇㫃㪸㫋㪼㩷
㪠㫅㫂㩷㫊㫋㪸㫀㫅㩷
㪠㫅㫂㩷
If the surface of the SUS plate is dirty with
remaining old ink, ink will spill out from Print
Head along the remaining ink.

White Line (Cleaning method of Print Head) Item3-2
Case Cleaning method of Print Head which has the mis-direction problem.
Solutions
[ In case of miss-direction ]
- Ink ejects down from all piezo-nozzle of Print Head but it seems that ink goes down in irregular direction.
- Use A and B cleaning fluid for Print Head cleaning.
[ In case of miss-fire ]
There is no phenomenon.
The phenomenon of the
trouble is recognized as
white lines.
The phenomenon of the
trouble is recognized as white
lines.
SE mode 9-1 NZL check
Test mode 9-1 NZL check
1) Apply ‘A’ fluid to the Print Head with a wipe stick.
(Don’t scrape)
2) Perform SE mode 5.5.4.2
3) Apply ‘B’ fluid to the Print Head with a wipe stick.
(Don’t scrape)
4) Perform SE mode 5.5.4.2
5) Check by SE mode 9.1
Same action should be repeated if not improved.
1) Apply HC fresh ink to the Print Head with a wipe stick.
2) Scrape 20-30 times with a wipe stick.
(Don’t scrape strongly)
3) Perform SE mode 5.5.4.x
4) Check by SE mode 9.1

White Line Item 3-3
Phenomenon
- “White line” occurs easily when beginning to use it in the morning.
- “White line” occurs easily with the same color.
- “White line” does not occur during a day after “Head maintenance” has been done.
Cause of the problem (1)
- When HC5500 wake-up 8 hours later, “Recovery Cleaning” will start in default setting.
- If “Recovery Cleaning setting” has been changed from default setting, this trouble occurs easily.
- Recovery Cleaning setting: SE mode 5.5.7.1
䌾
5.5.7.5 Default setting is all “ON”.
Cause of the problem (2)
- If “a thermistor of ID-unit” does not work normally, HC try to print with cold ink. Then “White line” occurs easily.
- 䌉䌦 “white line” occurs by the same color every time, it is necessary to replace ID-unit.
- You can check temperature of ID-unit by SE mode 8.2.8.5.
ID-unitThermistor
Heater

Printed image is deformed diagonally Item 4-1
Case The printing image is deformed in a series of papers.
Solutions
- Adjust spring pressure of registration roller.
- Do not adjust the position of registration roller for printing image trouble, “Ghosts image” may occur and it is hard to
restore the trouble. (Ref A)
- Adjustment range is about 2mm inA3 paper by spring pressure.
(Ref A)
Spring
Ghosts
Weaken the front side spring
Strengthen the rear side spring.
OR Image
Print direction Print direction
Lift up or down the plate and adjust
spring pressure.
Do not adjust
Image

Case The printing image is deformed in a series of papers fed from multi-tray.( paper skew)
Solutions
- Confirm whether Pickup roller and Stripper pad are not worn out.
- Confirm whether pressure of the pad is not too strong.
- Adjust the elevator upper limit position at multi-tray. (Ref B)
If the elevator upper limit position is adjusted high, the print image may be diagonally.
- Confirm whether bottom plate of the multi tray is stored horizontally. (Ref C)
If the plate is not proper condition, adjust it with putting a washer between the tray and the rail. (Ref D)
<Note>
Standard position of stripper pad is “3”.
When it is loaded with 500 sheets in the multi tray 1
When it is loaded with 250 sheets in the multi tray 2
Contact point of roller
and pad
Same height
It should be same height at that position.
Lift up the bottom plate by turning the pulley
Rear side of the tray
Confirm whether bottom plate of the multi tray is horizontal
Horizontal of the plate is adjusted by
mounted position of wire
Ref B
Ref C

- Insert a washer between the tray and rail to adjust the diagonal position of the tray.
Print direction
Image
Print direction
Insert a washer
Rail Tray
Washer
Ref D
Front side
Image

㩷
S04-307 Overflow (Ink flow from ID unit) Item5-1
Case Ink flow from ID unit. Ink flow from ID solenoid valve.
Cause of the problem
ĺFloat of ID unit malfunction
Solutions
ĺReplace ID unit
ID
Print Head
Reservoir
Pressure pump
Valve
Overflow tank Air
Overflow
Ink bottle
Ink float does not work
This manual suits for next models
2
Table of contents
Other Riso Printer manuals

Riso
Riso 9050 User guide

Riso
Riso ComColor 9150 User guide

Riso
Riso Print Gocco Arts User manual

Riso
Riso EZ Series User manual

Riso
Riso 9450 User manual

Riso
Riso HC5000 Product guide

Riso
Riso HC5500 User manual

Riso
Riso ComColor FW Series User manual

Riso
Riso MZ970 User manual

Riso
Riso GOCCOPRO QS200 User manual

Riso
Riso Comcolor Series Service manual

Riso
Riso ComColor 9150 Service manual

Riso
Riso ComColor FT Series User manual
Riso
Riso GR 3770 User manual

Riso
Riso ComColor FT Series User manual

Riso
Riso RZ9 Series User manual

Riso
Riso ComColor FW Series User manual

Riso
Riso HC5000T User manual
Riso
Riso ComColor 9150 Original instructions

Riso
Riso 9050 User manual