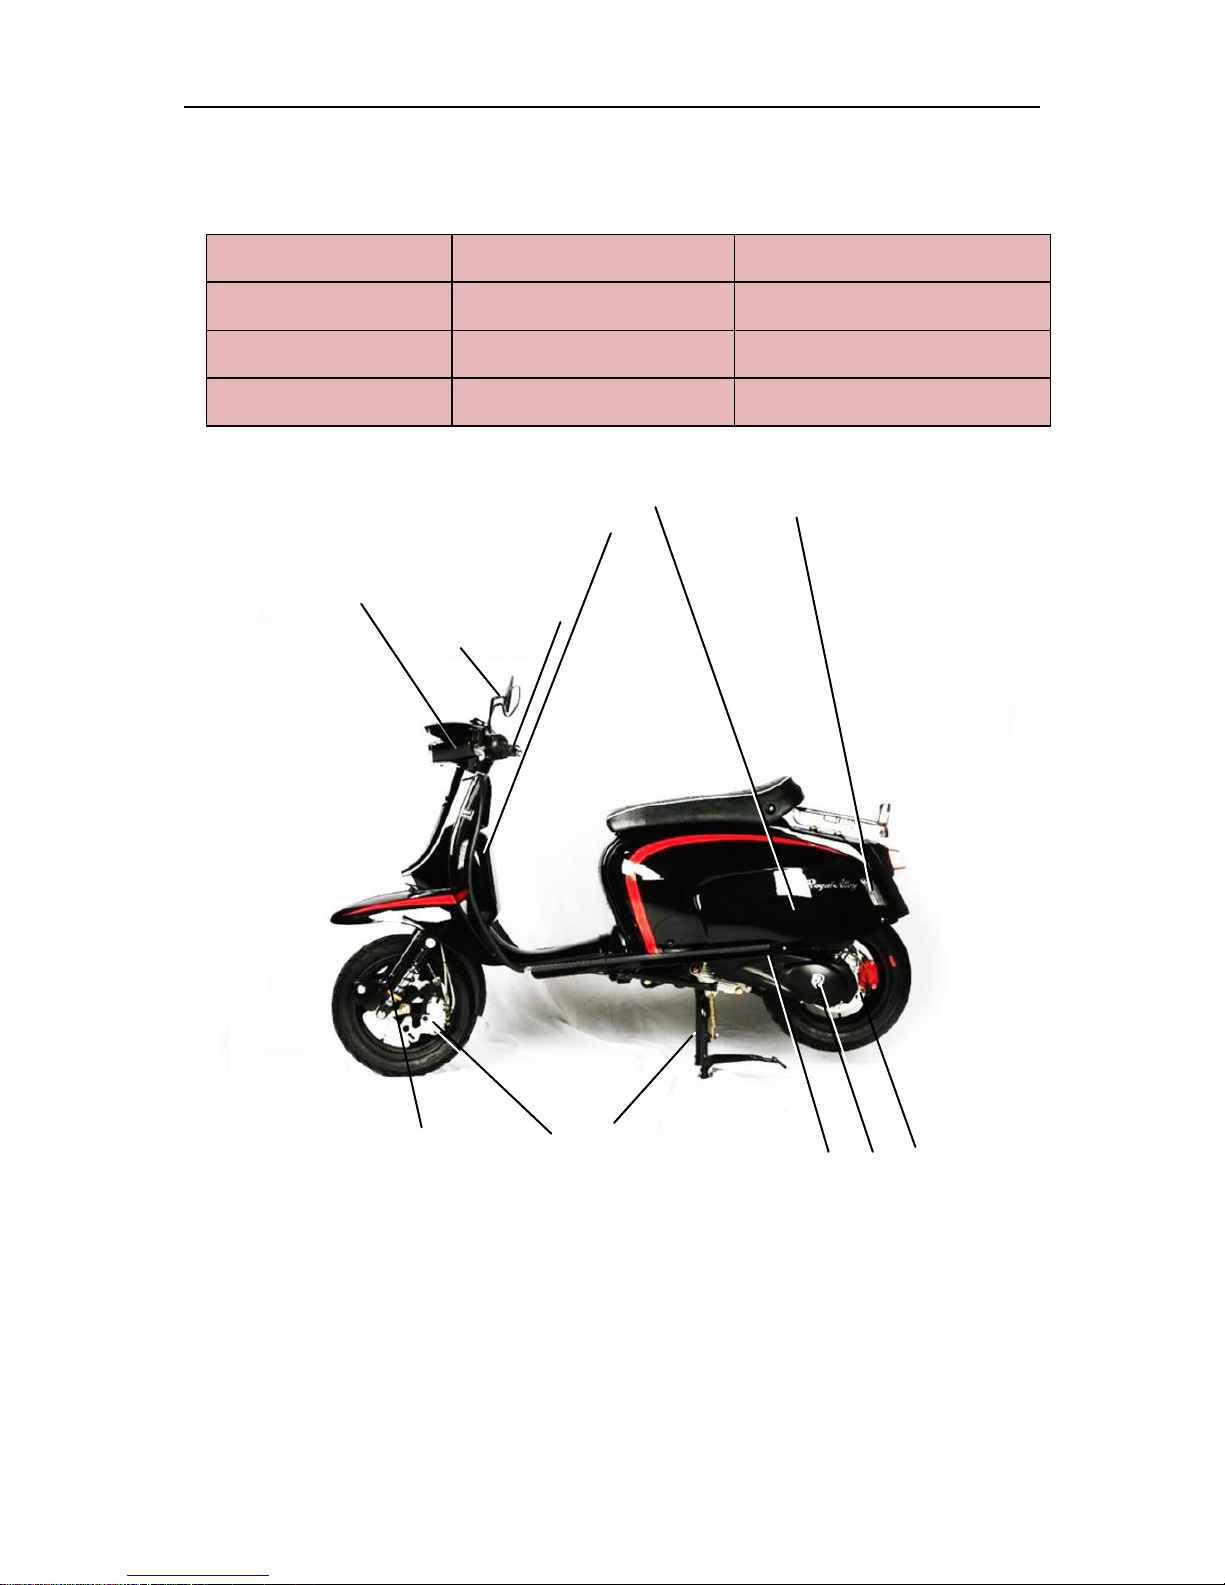
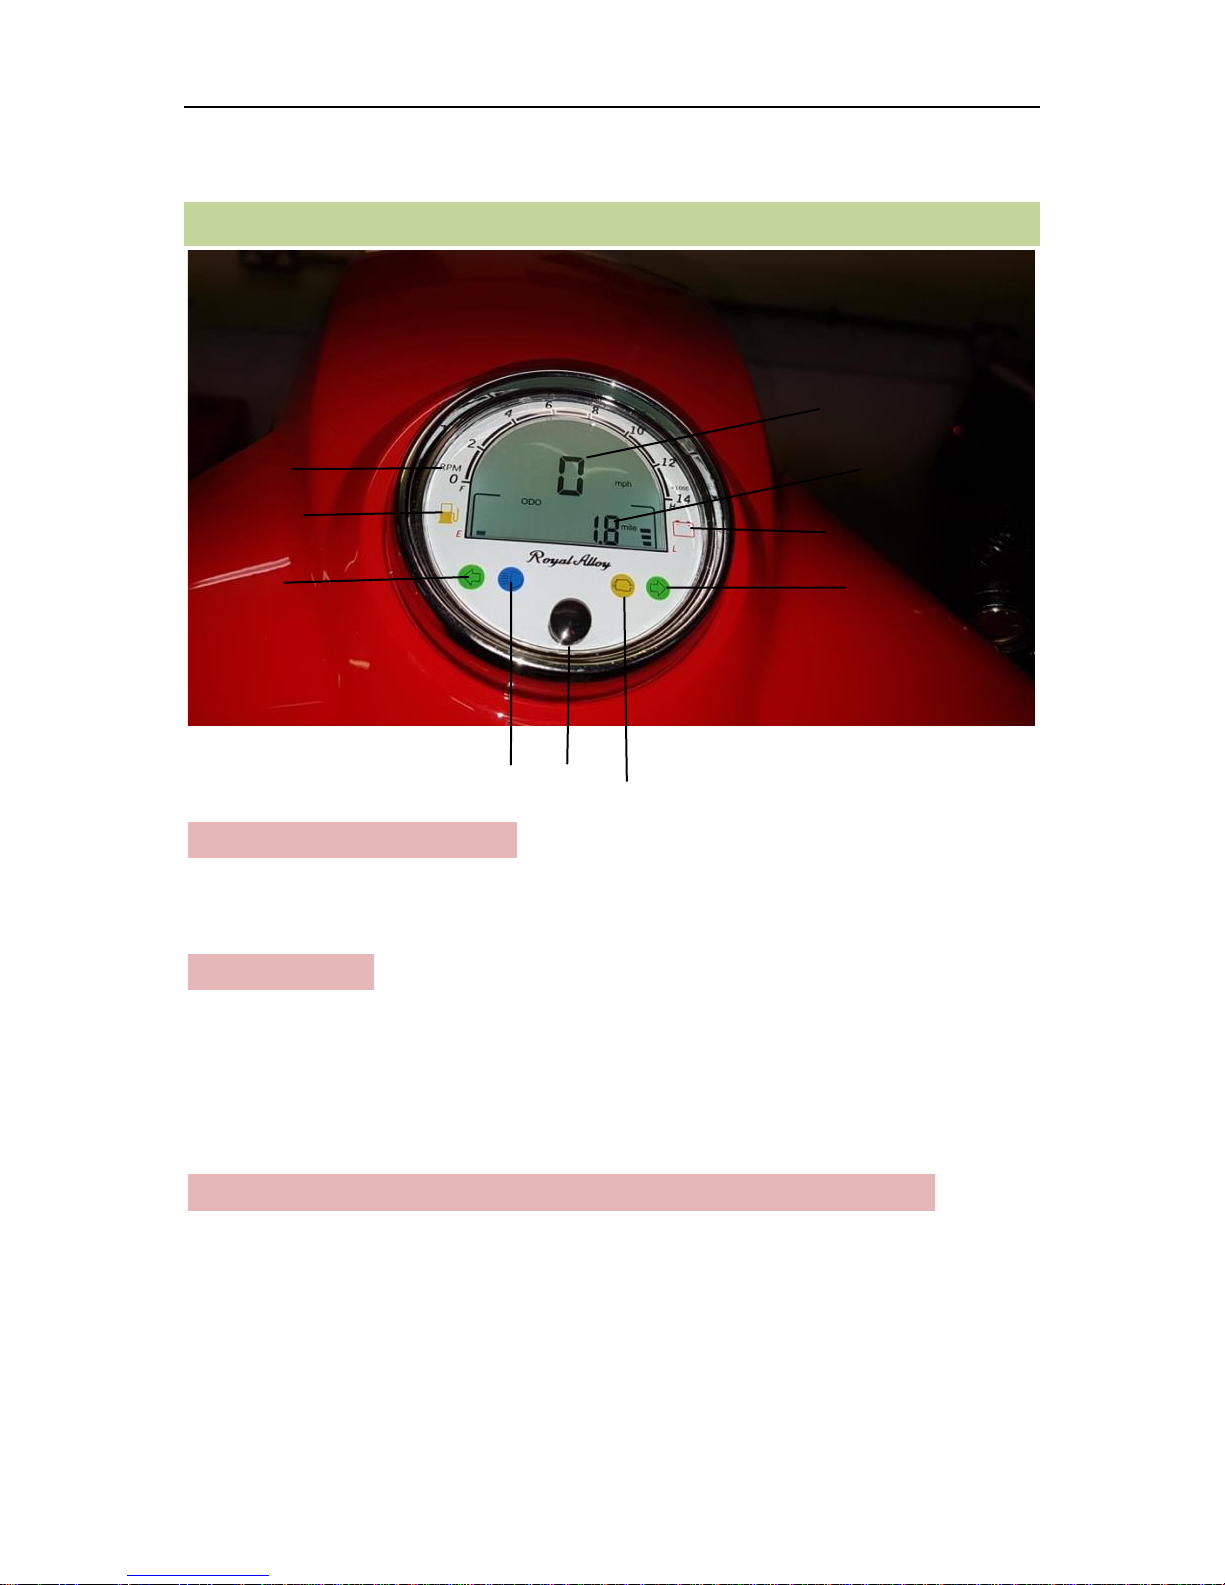
Precautions for Safe Riding
5
Precautions for Safe Riding
Please obey all local traffic regulations and consider safety prior to
riding. It is advised to control your speed to stay within safe limits.
Practice before Riding
Before riding the scooter in traffic, it is advised to practice your riding
at a spacious and traffic-free place so that you are skilled enough to
ride safely and are familiar with the scooter’s controls. Practice is
essential to safety. Please observe any special training and or
government test required before using your scooter on public
highways.
Knowing Your Safety Speed Limit
Safety speed limit varies in accordance with the road conditions,
riding skill and the weather. To be aware of speed limits is helpful to
avoid traffic accidents.
Be Careful on Rainy Days
It is dangerous to ride on damp or wet roads. Therefore, high speed
should be avoided and special care should be taken when turning.
Bear this in mind, the braking distance on rainy days can be twice as
much as on dry days.
Correct Wearing of Safety Helmet
Always wear a safety helmet whenever you ride, and make sure you
fasten the strap securely whenever you wear the helmet.
Safety clothing Recommendation
Bright-coloured and well-fitting clothes are recommended. Fitted with
EC protection. Always wear gloves.
Indispensable Maintenance and inspection
Caution High Temperature
The high temperature of the muffler may cause burns. Please park
your scooter to prevent the accidental chance of persons coming into
contact with the muffler.
No modifications allowable
Modification to the unit is prohibited as it may compromise safety
of riding.
The following items are indispensable:
Make safety checks before every journey.
Half-yearly thorough inspection.
One-year thorough serving.
Those listed in the Maintenance Schedule.