POUR DÉBUTER
L’UTILISATION
DU PRODUIT
AVERTISSEMENT : Le présent feuillet
intitulé « Pour débuter l’utilisation du produit » ne
remplace en aucune façon le manuel d’utilisation.
Pour réduire les risques de blessures et de
dommages matériels, l’utilisateur doit lire et
veiller à bien comprendre le manuel d’utilisation
avant d’employer ce produit.
CÓMO
COMENZAR
ADVERTENCIA: Comprender esta
hoja sobre Cómo comenzar no equivale a
leer el manual del operador. Para reducir el
riesgo de lesiones o daños a la propiedad, el
usuario debe leer y comprender el manual del
operador antes de usar este producto.
Para obtener instrucciones detalladas sobre cómo realizar
cualquiera de los siguientes pasos, consulte el manual del
operador.
Pour obtenir des directives détaillées sur l’exécution des
étapes suivantes, veuillez consulter le manuel d’utilisation.
POUR DÉBUTER
L’UTILISATION
DU PRODUIT
AVERTISSEMENT : Le présent feuillet
intitulé « Pour débuter l’utilisation du produit » ne
remplace en aucune façon le manuel d’utilisation.
Pour réduire les risques de blessures et de
dommages matériels, l’utilisateur doit lire et
veiller à bien comprendre le manuel d’utilisation
avant d’employer ce produit.
CÓMO
COMENZAR
ADVERTENCIA: Comprender esta
hoja sobre Cómo comenzar no equivale a
leer el manual del operador. Para reducir el
riesgo de lesiones o daños a la propiedad, el
usuario debe leer y comprender el manual del
operador antes de usar este producto.
Para obtener instrucciones detalladas sobre cómo realizar
cualquiera de los siguientes pasos, consulte el manual del
operador.
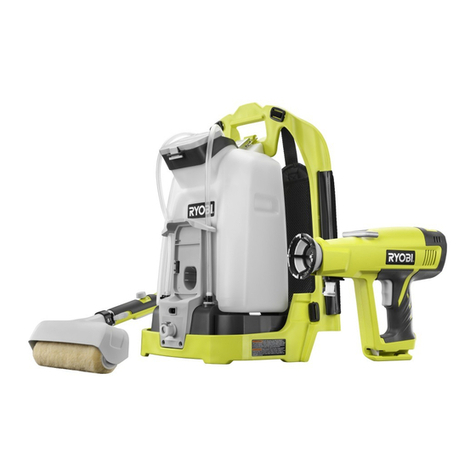
Fixer 4-doigt poignée pistolet pulvérisateur à tuyau à haute pression,
puis raccorder le tuyau à haute pression pour vanne de sortie sur le
pulvérisateur.
Place réservoir d’une capacité de 18,93 l (5 gal) ou 3,7 l (1 gal) sur l’unité.
Verrouiller la gâchette du pulvérisateur, puis retirer le dispositif de protection
de la buse et l’embout de pulvérisation du pulvérisateur.
Placer le tube d’admission dans le réservoir de la station de peinture et placer
le tube de retour dans un contenant à déchets.
Tourner le levier d’amorçage/de pulvérisation à la position « PRIME »
(Amorçage) et régler le régulateur de haute et de basse pression à la position
« LOW pressure » (Basse pression).
Brancher la station de peinture. Appuyer sur le bouton de la soupape de décharge
manuelle et régler l’interrupteur « ON/OFF » (Marche/arrêt) à la position « ON
» (MARCHE).
Quand la peinture ou la tache commence à couler par le tube de retour,
déplacer le tube de retour au le réservoir de la station de peinture.
Diriger le pulvérisateur (sans que le dispositif de protection et l’embout de
pulvérisation soient en place) dans le contenant à déchets. Tourner le levier
d’amorçage/de pulvérisation à la position « SPRAY » (Pulvérisation) et pulvériser
jusqu’à ce que de la peinture ou de la teinture pure soit expulsée.
Mettre l’unité à l’arrêt. Verrouiller la gâchette du pulvérisateur et installer le
dispositif de protection de l’embout et l’embout de pulvérisation désiré sur
le pulvérisateur.
Mettre l’unité en marche et tourner le régulateur de haute et de basse pression
de la position « LOW » (Basse) à la position « HIGH » (Haute)
Déverrouiller la gâchette du pulvérisateur. L’unité est prête à être utilisée.
*Pour l’installation en vue de l’emploi avec le rouleau à peindre,
veuillez consulter le manuel d’utilisation.
Pour obtenir des directives détaillées sur l’exécution des
étapes suivantes, veuillez consulter le manuel d’utilisation.
1
2
3
4
5
6
7
8
9
10
11
Coloque cuatro dedos pulverizador de pistola a la manguera de alta presión
y luego conecte la manguera de alta presión a la válvula de salida del
pulverizador.
Coloque un galón o contenedor de 18,93 l (5 gal) ou 3,7 l (1 gal) sen la unidad.
Trabe el gatillo del rociador y luego quite la protección de la punta de la boquilla
y la punta para rociar del rociador.
Coloque el tubo de entrada en el contenedor de la estación de pintura y el tubo
de retorno en el contenedor de desechos.
Coloque la palanca prime/spray (cebar/rociar) en CEBAR y el control de presión
High/Low (alta/baja) en presión BAJA.
Enchúfelo en la estación de pintura. Presione y suelte el botón de liberación de
válvula manual y coloque el interruptor ON/OFF (ENCENDIDO/APAGADO) en
ENCENDIDO.
Cuándo pintura o mancha comienzan a fluir por tubo de retorno, mueve tubo de
retorno al contenedor de la pintura.
Dirija el rociador (sin la protección ni la punta para rociar) hacia el contenedor de
desechos. Coloque la palanca prime/spray en ROCIAR y rocíe hasta que salga
pintura o barniz puros.
Apague la unidad. Trabe el gatillo del rociador e instale la protección de la punta
y la punta para rociar deseada en el rociador.
Encienda la unidad y gire el control de presión HIGH/LOW de BAJA a ALTA.
Destrabe el gatillo rociador. La unidad esta lista para rociar.
*Para montar cuando pinte con rodillo, consulte el manual del
usuario.
1
2
3
4
5
6
7
8
9
10
11
