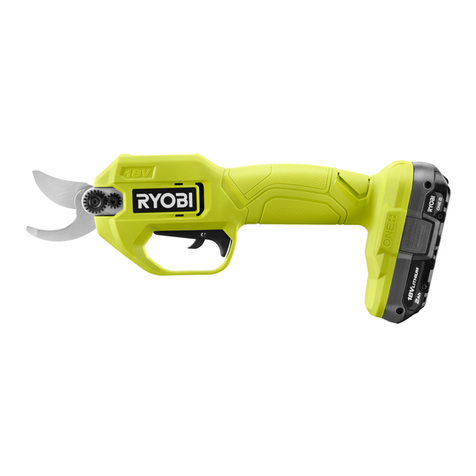
Ryobi TEK 4 User manual

Important! It is essential that you read the instructions in this manual before assembling, maintaining and
operating this tool.
RLP416
ÉBRANCHEUR TEK 4 MANUEL D’UTILISATION 1
TEK 4 LOPPER USER’S MANUAL 10
TEK 4 ASTSCHERE BEDIENUNGSANLEITUNG 18
TIJERA PODADORA TEK 4 MANUAL DE UTILIZACIÓN 28
TRONCARAMI TEK 4 MANUALE D’USO 38
TESOURA PODADORA TEK 4 MANUAL DE UTILIZAÇÃO 46
TEK 4 TONDEUSE GEBRUIKERSHANDLEIDING 55
TEK 4 TRÄDBESKÄRARE INSTRUKTIONSBOK 64
TEK 4 GRENSAKS BRUGERVEJLEDNING 73
TEK 4 GRENSAKS BRUKSANVISNING 82
TEK 4 KARSINTASAKSET KÄYTTÄJÄN KÄSIKIRJA 91
TEK 4 ÁGVÁGÓ HASZNÁLATI ÚTMUTATÓ 99
TEK 4 ELEKTRICKÉ NŮŽKY NÁVOD K OBSLUZE 108
СУЧКОРЕЗ TEK 4 êìäéÇéÑëíÇé èé ùäëèãìÄíÄñàà 117
FOARFECĂ DE GRĂDINĂRIT TEK 4 MANUAL DE UTILIZARE 127
SEKATOR TEK 4 PODRĘCZNIK OBSŁUGI 136
TEK 4 NAPRAVA ZA REZANJE VEJ UPORABNIŠKI PRIROČNIK 145
TEK 4 AKU ŠKARE ZA REZANJE GRANA KORISNI»KI PRIRU»NIK 154
TEK 4 OKSAKÄÄRID KASUTAJAJUHEND 163
TEK 4 GENĖTUVAS NAUDOJIMO VADOVAS 172
TEK 4 ATZAROTĀJS LIETOTĀJA ROKASGRĀMATA 181
ODVETVOVÁVAČ TEK 4 NÁVOD NA POUŽITIE 190
TEK 4 ИНСТРУМЕНТ ЗА КАСТРЕНЕ êöäéÇéÑëíÇé áÄ ìèéíêÖÅÄ 199
FR
EN
DE
ES
IT
PT
NL
SV
DA
NO
FI
HU
CS
RU
RO
PL
SL
HR
ET
LT
LV
SK
BG

Attention ! Il est indispensable que vous lisiez les instructions contenues dans ce manuel avant le
montage et la mise en service de l’appareil.
Important! It is essential that you read the instructions in this manual before operating this machine.
Wichtig! Es ist notwendig, dass Sie die Anweisungen in dieser Bedienungsanleitung lesen bevor
Sie das Gerät bedienen.
Importante: Es indispensable que lea las instrucciones detalladas en este manual antes de encender
la máquina.
Importante! Leggere attentamente le istruzioni contenute nel presente manuale prima di mettere in
funzione l’apparecchio.
Importante! É essencial que leia as instruções neste manual antes de começar a utilizar esta
máquina.
Belangrijk! Het is van essentieel belang dat u de instructies in deze gebruiksaanwijzing leest voordat
u dit toestel gebruikt.
Viktigt! Det är viktigt att du läser instruktionerna i denna manual innan du använder maskinen.
Vigtigt! Det er væsentlig at du læser anvisningerne I denne manual før du betjener denne
maskine.
Viktig! Det er meget viktig at du leser instruksjonene i denne brukerhåndboken før du bruker
denne maskinen.
Tärkeää! On tärkeää, että luet tämän oppaan ohjeet ennen koneen käyttöä.
Fontos! Fontos, hogy a gép használata előtt elolvassa a kézikönyvben található utasításokat.
Důležité! Nepoužívejte tento přístroj dříve, než si přečtete pokyny uvedené v tomto návodu.
Важно! Это существенно чтобы вы прочитали инструкции в этом руководстве перед
использованием этой машины.
Important! Este esenţial să citiţi instrucţiunile din acest manual înainte de operarea acestui produs.
Uwaga! Przed rozpoczęciem użytkowania koniecznie należy zapoznać się z niniejszą instrukcją
obsługi.
Pomembno! Bistvenega pomena je, da si pred uporabo naprave preberete ta navodila za uporabo.
Važno! Neophodno je da pročitate upute prije uporabe ovog uređaja.
Tähtis! On ülimalt tähtis, et te loeksite enne selle masina kasutamist seda kasutusjuhendit.
Svarbiinformacija! Prieš pradedant darbą su šiuo instrumentu, būtina perskaityti čia pateikiamas instrukcijas.
Svarīgi! Ir svarīgi, lai pirms mašīnas darbināšanas jūs izlasītu instrukcijas šajā rokasgrāmatā.
Dôležité! Je nevyhnutné si prečítať tento návod pred použitím výrobku.
Важно! От изключителна важност е да прочетете инструкциите в това ръководство,
преди да боравите с тази машина.

Sous réserve de modifications techniques / Subject to technical modifications / Technische Änderungen vorbehalten /
Bajo reserva de modificaciones técnicas / Con riserva di eventuali modifiche tecniche / Com reserva de modificações técnicas /
Technische wijzigingen voorbehouden / Med förbehåll för tekniska ändringar / Med forbehold for tekniske ændringer /
Med forbehold om tekniske endringer / Tekniset muutokset varataan /
A műszaki módosítás jogát fenntartjuk / Změny technických údajů vyhrazeny / åÓ„ÛÚ ·˚Ú¸ ‚ÌeÒeÌ˚ ÚeıÌ˘eÒÍËe ËÁÏeÌeÌËfl /
Sub rezerva modificaţiilor tehnice / Z zastrzeżeniem modyfikacji technicznych / Tehnične spremembe dopuščene
Podloæno tehniËkim promjenama / Tehnilised muudatused võimalikud /
Pasiliekant teisę daryti techninius pakeitimus / Paturam tiesības mainīt tehniskos raksturlielumus / Technické zmeny vyhradené
/ èÓ‰ÎÂÊË Ì‡ ÚÂıÌ˘ÂÒÍË ÏÓ‰ËÙË͇ˆËË

1
Français (Traduction à partir du mode d'emploi d'origine)
FR
EN DE ES IT PT NL SV DA NO FI HU CS RU RO PL SL HR ET LT LV SK BG
EN
FR DE ES IT PT NL SV DA NO FI
DE
FR EN ES IT PT NL SV DA NO FI
ES
FR EN DE IT PT NL SV DA NO FI
IT
FR EN DE ES PT NL SV DA NO FI
PT
FR EN DE ES IT NL SV DA NO FI
NL
FR EN DE ES IT PT SV DA NO FI
SV
FR EN DE ES IT PT NL DA NO FI
DA
FR EN DE ES IT PT NL SV NO FI
NO
FR EN DE ES IT PT NL SV DA FI
FI
FR EN DE ES IT PT NL SV DA NO
HU CS RU RO PL SL HR
ET LT LV SK BG
ET LT LV SK BG
ET LT LV SK BG
ET LT LV SK BG
ET LT LV SK BG
ET LT LV SK BG
ET LT LV SK BG
ET LT LV SK BG
ET LT LV SK BG
ET LT LV SK BG
FR EN DE ES IT PT NL SV DA NO FI
HU
CS RU RO PL SL HR ET LT LV SK BG
CS
HU RU RO PL SL HR
RU
HU CS RO PL SL HR
RO
HU CS RU PL SL HR
PL
HU CS RU RO SL HR
SL
HU CS RU RO PL HR
HR
HU CS RU RO PL SL
ET LT LV SK BG
ET LT LV SK BG
ET LT LV SK BG
ET LT LV SK BG
ET LT LV SK BG
ET LT LV SK BG
FR EN DE ES IT PT NL SV DA NO FI
HU CS RU RO PL SL HR
ET
LT LV SK BG
LT
ET LV SK BG
LV
ET LT SK BG
SK
ET LT LV BG
BG
ET LT LV SK
Votre souffleur a été conçu et fabriqué selon les hauts
standards de Ryobi en matière de fiabilité, de facilité
d'utilisation et de sécurité. Si vous en prenez soin, vous
pourrez l'utiliser sans problème durant des années.
Nous vous remercions d’avoir acheté un produit Ryobi.
UTILISATION PRÉVUE:
Ce produit sert à couper les branches d'un diamètre
maximal de 16mm (bois tendre) ou de 10mm (bois dur).
Ne coupez pas de branches épaisses. Cet outil n'a pas
été conçu pour une utilisation continue ou professionnelle.
Conservez ces avertissements et instructions pour
pouvoir vous y reporter ultérieurement.
RÈGLES POUR UNE UTILISATION EN TOUTE SÉCURITÉ
AVERTISSEMENT
Pour réduire les risques de blessures, l'utilisateur doit
lire et comprendre le manuel utilisateur.
AVERTISSEMENT
N'essayez pas d'utiliser cette machine avant d'avoir lu
attentivement et compris toutes les instructions, règles
de sécurité, etc. contenues dans ce manuel. Le non
respect de cet avertissement pourrait entraîner des
accidents tels que décharge électrique, incendie et/ou
graves blessures.
AVERTISSEMENT
Cette machine doit être utilisée avec le pack batterie.
Lors de l'utilisation de machines alimentées par
batterie, il convient de respecter certaines précautions
de sécurité de base afin de réduire les risques
d'incendie, de fuite de batterie et de blessures, y
compris les suivants.
SÉCURITÉ PERSONNELLE
■Cet ébrancheur est capable d'amputer les mains. Si
vous ne respectez pas toutes les instructions de
sécurité, vous risquez de graves blessures.
■Ne laissez jamais les enfants ou les personnes non
familiarisées avec ce manuel utiliser l'appareil. Les
réglementations locales sont susceptibles d'imposer
un âge minimum à l'utilisateur.
■Les personnes aux capacités physiques, sensorielles
ou mentales diminuées ne sont pas autorisées à
utiliser l'appareil, à moins qu'elles n'aient été initiées à
son utilisation et qu'elles ne soient surveillées par une
personne qualifiée.
■Restez vigilant. Regardez bien ce que vous faites et
faites preuve de bon sens lorsque vous utilisez un
outil électrique. N'utilisez pas votre outil électrique
lorsque vous êtes fatigué, si vous êtes sous l'emprise
de l'alcool ou de drogues, ou si vous prenez des
médicaments. N'oubliez jamais qu'il suffit d'une
seconde d'inattention pour vous blesser gravement.
■ Gardez à l'esprit que l'opérateur ou l'utilisateur est
responsable des accidents et des risques encourus
par les autres personnes ou leurs biens.
■ Portez un équipement de protection. Protégez
toujours vos yeux. Selon les conditions, portez
également un masque anti-poussière, des chaussures
antidérapantes, un casque ou des protections
auditives pour éviter les risques de blessures
corporelles graves.
■ Portez des vêtements adéquats. Ne portez pas de
vêtements amples ou de bijoux. Veillez à maintenir
vos cheveux, vos vêtements et vos mains éloignés
des pièces mobiles. Les vêtements amples, les bijoux
et les cheveux longs peuvent se prendre dans les
éléments en mouvement.
ENVIRONNEMENT DE TRAVAIL
■Ne travaillez jamais lorsque des personnes, en
particulier des enfants ou des animaux, se trouvent à
proximité.
■ Assurez-vous d'avoir un appui stable lorsque vous
utilisez l'ébrancheur. Lorsque vous utilisez une
échelle ou un escabeau, assurez-vous que ses pieds
sont stables et ne peuvent pas basculer. Gardez
toujours un bon équilibre lorsque vous utilisez
l'ébrancheur.
■ Veillez à maintenir votre espace de travail propre et
bien éclairé. Les espaces encombrés et sombres sont
propices aux accidents.
■ N'utilisez pas d'outils électriques dans un
environnement explosif, par exemple à proximité de
liquides, gaz ou poussière inflammables. Les
étincelles provenant des outils électriques peuvent
mettre le feu ou les faire exploser.
■ N'utilisez pas l'outil dans un environnement humide
ou trempé, ni sous la pluie.
SÉCURITÉ ÉLECTRIQUE
■Les fiches secteurs des outils électriques doivent
correspondre à la prise de courant. Ne modifiez
jamais la fiche secteur d'aucune façon. N'utilisez pas
d'adaptateurs avec les outils électriques reliés à la
terre. L'utilisation de fiches secteur non modifiées et
adaptées à la prise de courant réduit le risque de
décharge électrique.
■ Evitez tout contact du corps avec des surfaces reliées
à la terre, telles que tuyaux, radiateurs, cuisinières et
réfrigérateurs. Le risque de décharge électrique est
accru si votre corps est électriquement relié à la terre.
■N'exposez pas les outils électriques à la pluie ou à
des conditions humides. La pénétration d'eau dans un
outil électrique augmente le risque de décharge
électrique.

2
Français (Traduction à partir du mode d'emploi d'origine)
FR
EN DE ES IT PT NL SV DA NO FI HU CS RU RO PL SL HR ET LT LV SK BG
EN
FR DE ES IT PT NL SV DA NO FI
DE
FR EN ES IT PT NL SV DA NO FI
ES
FR EN DE IT PT NL SV DA NO FI
IT
FR EN DE ES PT NL SV DA NO FI
PT
FR EN DE ES IT NL SV DA NO FI
NL
FR EN DE ES IT PT SV DA NO FI
SV
FR EN DE ES IT PT NL DA NO FI
DA
FR EN DE ES IT PT NL SV NO FI
NO
FR EN DE ES IT PT NL SV DA FI
FI
FR EN DE ES IT PT NL SV DA NO
HU CS RU RO PL SL HR
ET LT LV SK BG
ET LT LV SK BG
ET LT LV SK BG
ET LT LV SK BG
ET LT LV SK BG
ET LT LV SK BG
ET LT LV SK BG
ET LT LV SK BG
ET LT LV SK BG
ET LT LV SK BG
FR EN DE ES IT PT NL SV DA NO FI
HU
CS RU RO PL SL HR ET LT LV SK BG
CS
HU RU RO PL SL HR
RU
HU CS RO PL SL HR
RO
HU CS RU PL SL HR
PL
HU CS RU RO SL HR
SL
HU CS RU RO PL HR
HR
HU CS RU RO PL SL
ET LT LV SK BG
ET LT LV SK BG
ET LT LV SK BG
ET LT LV SK BG
ET LT LV SK BG
ET LT LV SK BG
FR EN DE ES IT PT NL SV DA NO FI
HU CS RU RO PL SL HR
ET
LT LV SK BG
LT
ET LV SK BG
LV
ET LT SK BG
SK
ET LT LV BG
BG
ET LT LV SK
UTILISATION ET ENTRETIEN DES OUTILS ÉLECTR-
IQUES
■Avant utilisation, vérifiez toujours visuellement que les
lames, boulons de lame, et ensembles de coupe ne
sont ni usés ni endommagés. Gardez tous les écrous,
boulons et vis bien serrés pour assurer un
fonctionnement sûr à la machine.
■ Vérifiez fréquemment tout signe d'usure et de
détérioration de la lame.
■ Pour des raisons de sécurité, remplacez toute pièce
usée ou endommagée.
■ Ne faites pas forcer la machine. Elle effectuera un
meilleur travail dans de meilleures conditions de
sécurité si elle est utilisée dans les limites de ses
capacités.
■ N'utilisez pas un outil électrique si l'interrupteur ne
permet pas de le mettre en marche et de l'arrêter. Un
outil qui ne peut pas être allumé et éteint
correctement est dangereux et doit impérativement
être réparé.
■ Marchez, ne courrez jamais.
■ N'utilisez jamais la machine si un de ses carters ou
une des ses protections sont endommagés ou dont
les éléments de sécurité, tels que déflecteur et/ou
collecteur d'herbe ne sont pas en place.
■ Ne touchez pas les lames au cours de l'utilisation et
gardez vos doigts, vos cheveux, vos vêtements et
autres objets similaires éloignés des lames.
■ N'essayez pas de dégager les débris de coupe des
lames ou de maintenir des éléments à couper lorsque
les lames sont en mouvement, retirez les matériaux
coincés dans les lames après avoir arrêté la machine
et après en avoir retiré la batterie.
CONSIGNES DE SÉCURITÉ SPÉCIFIQUES AUX OUT-
ILS SANS FIL
■Utilisez l'appareil qui convient au travail à effectuer.
N'utilisez la machine pour aucun autre travail que
celui pour lequel elle a été conçue.
■ Gardez toujours les lames propres et affûtées.
■ Les outils non utilisés doivent être rangés à l'intérieur
en un endroit sec, verrouillé et hors de portée des
enfants.
■ Retirez toujours la batterie de l'ébrancheur lorsque
vous l'entretenez, lorsque vous le nettoyez, et lorsque
vous ne l'utilisez pas.
■ Suivez les recommandations du fabricant concernant
l’utilisation et l’installation correcte des accessoires.
N’utilisez que les accessoires recommandés par le
fabricant.
■ La valeur des vibrations réellement produites durant
l'utilisation de l'outil à moteur peuvent différer de la
valeur totale déclarée, en fonction de la manière dont
l'outil est utilisé.
■ Il a été reporté que les vibrations engendrées par les
outils à main peuvent contribuer à l'apparition d'un
état appelé le Syndrome de Raynaud chez certaines
personnes. Les symptômes peuvent comprendre des
fourmillements, un engourdissement et un
blanchiment des doigts, généralement par temps
froid. Des facteurs héréditaires, l'exposition au froid
et à l'humidité, le régime alimentaire, le tabagisme et
les habitudes de travail peuvent contribuer au
développement de ces symptômes. Certaines
mesures peuvent être prises par l'utilisateur pour
aider à réduire les effets des vibrations:
• Gardez votre corps au chaud par temps froid.
Lorsque vous utilisez l'appareil, portez des gants
afin de garder vos mains et vos poignets au
chaud. Le temps froid est considéré comme un
facteur contribuant très largement à l'apparition
du Syndrome de Raynaud.
• Après chaque session de travail, pratiquez des
exercices qui favorisent la circulation sanguine.
• Faites des pauses fréquentes. Limitez la quantité
d'exposition journalière.
Si vous ressentez l'un des symptômes associés à ce
syndrome, arrêtez immédiatement le travail et
consultez votre médecin pour lui en faire part.
ENTRETIEN
■Les réparations sur l'ébrancheur ne doivent être
confiées qu'à un réparateur qualifié. Les réparations
ou l'entretien effectués par du personnel non qualifié
peuvent entraîner des blessures ou endommager
l'appareil. Votre garantie pourrait également en être
annulée.
■ N'effectuez les réparations qu'en utilisant des pièces
détachées d'origine. L'utilisation de pièces détachées
non agréées peut entraîner un risque de blessures
graves ou endommager le produit.
RÈGLES DE SÉCURITÉ RELATIVES AUX BATTERIES
■Les appareils alimentés par batterie n'ont pas à être
branchés sur le secteur; ils sont donc en permanence
en état de fonctionner. Soyez conscient des risques
liés à l'appareil même lorsqu'il n'est pas en
fonctionnement.
■ Retirez le pack batterie avant toute opération de
réglage, de nettoyage, ou de retrait de corps
étrangers de l'outil.
■ Un pack batterie ne peut être rechargé qu'à l'aide du
chargeur préconisé par le fabricant. L'utilisation d'un
chargeur prévu pour un type de batterie avec un autre
type de batterie peut entraîner un risque d'incendie.
N'utilisez le pack batterie qu'avec le chargeur indiqué.
■ N'utilisez que le pack batterie spécifiquement prévu
pour la machine. L'utilisation de tout autre pack
batterie peut entraîner un incendie, une décharge
électrique, ou des blessures corporelles.
■ Lorsque le pack batterie n'est pas utilisé, éloignez-le
des autres objets métalliques tels que: trombones,
pièces de monnaie, clés, clous, vis, ou autres petits

3
Français (Traduction à partir du mode d'emploi d'origine)
FR
EN DE ES IT PT NL SV DA NO FI HU CS RU RO PL SL HR ET LT LV SK BG
EN
FR DE ES IT PT NL SV DA NO FI
DE
FR EN ES IT PT NL SV DA NO FI
ES
FR EN DE IT PT NL SV DA NO FI
IT
FR EN DE ES PT NL SV DA NO FI
PT
FR EN DE ES IT NL SV DA NO FI
NL
FR EN DE ES IT PT SV DA NO FI
SV
FR EN DE ES IT PT NL DA NO FI
DA
FR EN DE ES IT PT NL SV NO FI
NO
FR EN DE ES IT PT NL SV DA FI
FI
FR EN DE ES IT PT NL SV DA NO
HU CS RU RO PL SL HR
ET LT LV SK BG
ET LT LV SK BG
ET LT LV SK BG
ET LT LV SK BG
ET LT LV SK BG
ET LT LV SK BG
ET LT LV SK BG
ET LT LV SK BG
ET LT LV SK BG
ET LT LV SK BG
FR EN DE ES IT PT NL SV DA NO FI
HU
CS RU RO PL SL HR ET LT LV SK BG
CS
HU RU RO PL SL HR
RU
HU CS RO PL SL HR
RO
HU CS RU PL SL HR
PL
HU CS RU RO SL HR
SL
HU CS RU RO PL HR
HR
HU CS RU RO PL SL
ET LT LV SK BG
ET LT LV SK BG
ET LT LV SK BG
ET LT LV SK BG
ET LT LV SK BG
ET LT LV SK BG
FR EN DE ES IT PT NL SV DA NO FI
HU CS RU RO PL SL HR
ET
LT LV SK BG
LT
ET LV SK BG
LV
ET LT SK BG
SK
ET LT LV BG
BG
ET LT LV SK
objets susceptibles de court-circuiter les bornes de la
batterie. La mise en court-circuit des bornes de la
batterie pourrait causer des étincelles, des brûlures ou
un incendie.
■ Ne mettez pas les outils alimentés par batterie ou leur
batterie à proximité du feu ou d'une source de
chaleur. Vous réduirez ainsi les risques d'explosion et
de blessures.
■ N'ouvrez pas et n'abîmez pas le pack batterie. Les
fuites d'électrolyte sont corrosives et sont susceptibles
de causer des dommages aux yeux ou à la peau.
L'électrolyte peut être toxique en cas d'ingestion.
■ Ne court-circuitez pas le pack batterie. Il y aurait un
risque d'explosion.
■ Protégez le pack batterie de l'humidité et de l'eau. Ne
rechargez pas cet appareil en milieu humide ou
mouillé. Le respect de cette règle réduit le risque de
décharge électrique.
■ Si de l'électrolyte entre en contact avec la peau,
lavez-la immédiatement à grande eau.
■ Si de l'électrolyte entre en contact avec les yeux,
rincez-les immédiatement à grande eau. Contactez un
médecin.
■ Si la batterie est endommagée ou utilisée de façon
inappropriée, des vapeurs sont susceptibles d'être
émises. Aérez les lieux et contactez un médecin en
cas de gène. Les vapeurs peuvent irriter le système
respiratoire.
■ Ne laissez pas le pack batterie dans une voiture
durant l'été.
■ N'incinérez pas le pack batterie.
■ Ne rechargez, n'utilisez et ne stockez la batterie qu'à
une température ambiante comprise entre 0˚C et
40˚C.
■ Après une décharge complète, le pack batterie doit
être rechargé dans les deux mois. Le pack batterie
sera endommagé en cas de décharge trop profonde.
RÈGLES DE SÉCURITÉ RELATIVES AU CHARGEUR
■L'utilisation d'un accessoire ni recommandé ni vendu
par le fabricant du chargeur peut entraîner un
incendie, une décharge électrique, ou des blessures
corporelles. Le respect de cette règle diminue le
risque de décharge électrique, d'incendie ou de
blessures.
■ N'utilisez pas le chargeur lorsque la température est
supérieure à 40ºC ou inférieure à 0ºC.
■ N'utilisez pas un chargeur dont le câble d'alimentation
ou la fiche secteur seraient endommagés, ce qui
pourrait occasionner un court-circuit et une décharge
électrique. En cas de dommage, faites remplacer le
chargeur par du personnel agrée.
■ N'utilisez pas le chargeur s'il a reçu un choc sévère,
s'il est tombé ou s'il a été endommagé d'une
quelconque façon. Apportez-le chargeur à un service
après-vente agréé pour vérification électrique afin de
déterminer s'il est en bon état de fonctionnement.
■ Ne démontez pas le chargeur, apportez-le à un
réparateur agréé pour le faire entretenir ou réparer.
Un remontage incorrect peut entraîner un risque de
décharge électrique ou d'incendie.
■ Débranchez le chargeur du secteur avant toute
opération de maintenance ou de nettoyage pour
réduire le risque de décharge électrique.
■ Débranchez le chargeur de l'alimentation lorsque vous
ne l'utilisez pas pour éviter qu'il ne soit endommagé
par une éventuelle surtension du secteur.
■ N'exposez pas le chargeur à la pluie ou à des
conditions humides. La pénétration d'eau dans le
chargeur augmente le risque de décharge électrique.
■ Assurez-vous que le câble chemine de façon que l'on
ne puisse pas marcher dessus ou se prendre les
pieds dedans, qu'il n'entre pas en contact avec des
bords coupants ou des pièces en mouvement, et qu'il
ne puisse pas être forcé ou endommagé. Vous
réduirez ainsi les risques de chute accidentelle, ce qui
pourrait occasionner des blessures et endommager le
câble, ainsi qu'entraîner une décharge électrique.
■ Gardez le câble et le chargeur à l'abri de la chaleur
afin d'éviter d'endommager son boîtier et ses
composants internes.
■ Ne laissez pas de l'essence, de l'huile, des produits à
base de pétrole, etc. entrer en contact avec les parties
en plastique. Ils contiennent des produits chimiques
susceptibles d'endommager, d'affaiblir, ou de détruire
les plastiques.
■ N'alimentez le chargeur par l'intermédiaire d'une
rallonge électrique que lorsque cela est absolument
nécessaire. L'utilisation d'une rallonge inadaptée
pourrait entraîner un risque d'incendie et de décharge
électrique. Si vous devez absolument utiliser une
rallonge électrique, assurez-vous que:
• Les broches de la rallonge sont au même nombre
et ont les mêmes formes et dimensions que celles
du chargeur.
• La rallonge est correctement câblée et en bon
état électrique.
AVERTISSEMENT
Dans le cas où une pièce serait manquante, n’utilisez
pas cet outil avant de vous être procuré la pièce en
question. Le non-respect de cette consigne peut
entraîner des blessures corporelles graves.
CONSERVEZ CES CONSIGNES. CONSULTEZ-LES
RÉGULIÈREMENT ET EXPLIQUEZ-LES À TOUTE
PERSONNE SUSCEPTIBLE D'UTILISER CET OUTIL. SI
VOUS PRÊTEZ CET OUTIL, PRÊTEZ EGALEMENT CE
MANUEL D'UTILISATION.

4
Français (Traduction à partir du mode d'emploi d'origine)
FR
EN DE ES IT PT NL SV DA NO FI HU CS RU RO PL SL HR ET LT LV SK BG
EN
FR DE ES IT PT NL SV DA NO FI
DE
FR EN ES IT PT NL SV DA NO FI
ES
FR EN DE IT PT NL SV DA NO FI
IT
FR EN DE ES PT NL SV DA NO FI
PT
FR EN DE ES IT NL SV DA NO FI
NL
FR EN DE ES IT PT SV DA NO FI
SV
FR EN DE ES IT PT NL DA NO FI
DA
FR EN DE ES IT PT NL SV NO FI
NO
FR EN DE ES IT PT NL SV DA FI
FI
FR EN DE ES IT PT NL SV DA NO
HU CS RU RO PL SL HR
ET LT LV SK BG
ET LT LV SK BG
ET LT LV SK BG
ET LT LV SK BG
ET LT LV SK BG
ET LT LV SK BG
ET LT LV SK BG
ET LT LV SK BG
ET LT LV SK BG
ET LT LV SK BG
FR EN DE ES IT PT NL SV DA NO FI
HU
CS RU RO PL SL HR ET LT LV SK BG
CS
HU RU RO PL SL HR
RU
HU CS RO PL SL HR
RO
HU CS RU PL SL HR
PL
HU CS RU RO SL HR
SL
HU CS RU RO PL HR
HR
HU CS RU RO PL SL
ET LT LV SK BG
ET LT LV SK BG
ET LT LV SK BG
ET LT LV SK BG
ET LT LV SK BG
ET LT LV SK BG
FR EN DE ES IT PT NL SV DA NO FI
HU CS RU RO PL SL HR
ET
LT LV SK BG
LT
ET LV SK BG
LV
ET LT SK BG
SK
ET LT LV BG
BG
ET LT LV SK
Certains des symboles ci-après sont susceptibles de figurer sur cet appareil. Etudiez-les et apprenez leur signification.
Une interprétation correcte de ces symboles vous permettra d’utiliser votre appareil dans de meilleures conditions de
sécurité et de manière plus adéquate.
SYMBOLE DÉSIGNATION/EXPLICATION
Le courant fourni est de type à courant continu.
Indique des précautions à prendre pour votre sécurité
Lisez le manuel utilisateur et respectez tous les avertissements et toutes les consignes de
sécurité.
Portez toujours une protection oculaire équipée d'écrans latéraux répondant à la norme EN
166 ainsi qu'une protection auditive lorsque vous utilisez cet appareil.
Eloignez les Visiteurs
Portez des gants de protection solides et antidérapants.
Ne pas exposer à la pluie ou à des conditions humides.
Eloignez tous les passants de la zone de travail, en particulier les enfants et les animaux.
Débranchez immédiatement la fiche secteur de la prise de courant si le câble est coupé ou
endommagé.
Les appareils électriques hors d'usage ne doivent pas être jetés avec les ordures ménagères.
Recyclez-les lorsque cela est possible. Contactez les autorités locales ou votre revendeur pour
connaître les possibilités de recyclage.
Danger ! Lame rotative. Eloignez vos mains et vos pieds lorsque vous utilisez la machine.
La protection de cet outil contre les décharges électriques repose sur une isolation double ou
renforcée.
Les signaux et mots suivants sont destinés à indiquer le niveau de risque associé à cette machine.
SYMBOLE SIGNAL SIGNIFICATION
DANGER: Imminence d’un danger qui, si l’on n’y prend garde, peut
entraîner la mort ou de graves blessures.
AVERTISSEMENT: Situation potentiellement dangereuse qui, si l’on n’y prend
garde, peut entraîner la mort ou des blessures graves.
ATTENTION: Situation potentiellement dangereuse qui, si l’on n’y prend
garde, peut entraîner des blessures moyennes ou légères.
ATTENTION: (Sans symbole d’alerte de sécurité) Indique une situation
pouvant entraîner des dommages matériels.
SYMBOLES

5
Français (Traduction à partir du mode d'emploi d'origine)
FR
EN DE ES IT PT NL SV DA NO FI HU CS RU RO PL SL HR ET LT LV SK BG
EN
FR DE ES IT PT NL SV DA NO FI
DE
FR EN ES IT PT NL SV DA NO FI
ES
FR EN DE IT PT NL SV DA NO FI
IT
FR EN DE ES PT NL SV DA NO FI
PT
FR EN DE ES IT NL SV DA NO FI
NL
FR EN DE ES IT PT SV DA NO FI
SV
FR EN DE ES IT PT NL DA NO FI
DA
FR EN DE ES IT PT NL SV NO FI
NO
FR EN DE ES IT PT NL SV DA FI
FI
FR EN DE ES IT PT NL SV DA NO
HU CS RU RO PL SL HR
ET LT LV SK BG
ET LT LV SK BG
ET LT LV SK BG
ET LT LV SK BG
ET LT LV SK BG
ET LT LV SK BG
ET LT LV SK BG
ET LT LV SK BG
ET LT LV SK BG
ET LT LV SK BG
FR EN DE ES IT PT NL SV DA NO FI
HU
CS RU RO PL SL HR ET LT LV SK BG
CS
HU RU RO PL SL HR
RU
HU CS RO PL SL HR
RO
HU CS RU PL SL HR
PL
HU CS RU RO SL HR
SL
HU CS RU RO PL HR
HR
HU CS RU RO PL SL
ET LT LV SK BG
ET LT LV SK BG
ET LT LV SK BG
ET LT LV SK BG
ET LT LV SK BG
ET LT LV SK BG
FR EN DE ES IT PT NL SV DA NO FI
HU CS RU RO PL SL HR
ET
LT LV SK BG
LT
ET LV SK BG
LV
ET LT SK BG
SK
ET LT LV BG
BG
ET LT LV SK
CARACTÉRISTIQUES PRODUIT
moteur 4 volts
Vitesse à Vide 17000 rpm
Vitesse de coupe 30 cycle/min
Angle maxi de travail de
la lame 52˚
Capacité de Coupe
Maximum 16mm softwood / 10mm hardwood
Autonomie avec une
batterie complètement
chargée
500 cuts, 40 minutes
Poids avec Pack Batterie 700 g
Dimensions hors tout 29.3(L) x 12.1(W) x 5.6(H)
Niveau de pression sonore
mesuré LPA=63.5 dB(A), KPA=2.47 dB(A)
Niveau de puissance
sonore mesuré
LWA=74.5 dB(A), KWA=2.47
dB(A)
Niveau de vibration à la
poignée 1.8 m/s2
Incertitude de la mesure
des vibrations 1.5 m/s2
Poids du Chargeur 105g
Entrée 220V-240V, ~50Hz-60Hz, 2.8W
Sortie 4 volts, 400mA
Batterie
Température de
fonctionnement 0˚C - 40˚C
Tension de Sortie 4.0 V
Capacité 1.5Ah
Batterie Lithium Ion
Temps de charge 3-5 hours
Poids 63.5g
Chargeur
Tension nominale 4V
Courant de charge 400mA
Température de
fonctionnement 0˚C - 40˚C
Nombre d'heures de
charge 4 hours
Classe de protection / II
REMARQUES CONCERNANT LES CARACTÉRIS-
TIQUES:
■La valeur déclarée totale des vibrations a été mesurée
selon une méthode de test standardisée qui permet
de comparer un outil avec un autre.
■La valeur déclarée totale des vibrations peut
également être utilisée pour évaluer par avance le
niveau d'exposition aux vibrations.
■ La valeur des vibrations est mesurée selon EN ISO
5349.
CARACTÉRISTIQUES
1. Lame supérieure
2. Ecrou de lame
3. Batterie
4. Couvercle du compartiment batterie
5. Bouton de verrouillage de sécurité
6. Gâchette
7. Couvre-lame
8. Lame inférieure
9. Rondelle grover
MONTAGE
■Sortez délicatement le produit ainsi que tous ses
accessoires de l'emballage. Assurez-vous que tous
les éléments listés sont bien présents.
■ Vérifiez le produit avec soin afin de vous assurer qu'il
n'a pas été cassé ou endommagé durant le transport.
■ Ne jetez pas les éléments d’emballage avant d’avoir
bien vérifié la tronçonneuse et de l’avoir utilisée de
façon satisfaisante.
■ Si des pièces sont manquantes ou abîmées, veuillez
contacter votre service après-vente Ryobi pour obtenir
de l’aide.
UTILISATION
AVERTISSEMENT
Veuillez lire attentivement toutes les instructions de
sécurité et d'utilisation avant d'utiliser ce produit. Le
non-respect des avertissements et instructions peut
entraîner une décharge électrique, un incendie et/ou
de graves blessures. Conservez toutes les instructions
pour vous-y reporter dans le futur.
AVERTISSEMENT
Gardez toute partie du corps éloignée de la lame du
taille-haies. Ne retirez pas de parties coupées et ne
maintenez pas de parties à couper lorsque les lames
sont en mouvement. Assurez-vous que l’interrupteur
soit en position d’arrêt avant de retirer des débris qui
bloquent les lames. Un moment d’inattention lors de
l’utilisation du taille-haies peut entraîner de graves
blessures.

6
Français (Traduction à partir du mode d'emploi d'origine)
FR
EN DE ES IT PT NL SV DA NO FI HU CS RU RO PL SL HR ET LT LV SK BG
EN
FR DE ES IT PT NL SV DA NO FI
DE
FR EN ES IT PT NL SV DA NO FI
ES
FR EN DE IT PT NL SV DA NO FI
IT
FR EN DE ES PT NL SV DA NO FI
PT
FR EN DE ES IT NL SV DA NO FI
NL
FR EN DE ES IT PT SV DA NO FI
SV
FR EN DE ES IT PT NL DA NO FI
DA
FR EN DE ES IT PT NL SV NO FI
NO
FR EN DE ES IT PT NL SV DA FI
FI
FR EN DE ES IT PT NL SV DA NO
HU CS RU RO PL SL HR
ET LT LV SK BG
ET LT LV SK BG
ET LT LV SK BG
ET LT LV SK BG
ET LT LV SK BG
ET LT LV SK BG
ET LT LV SK BG
ET LT LV SK BG
ET LT LV SK BG
ET LT LV SK BG
FR EN DE ES IT PT NL SV DA NO FI
HU
CS RU RO PL SL HR ET LT LV SK BG
CS
HU RU RO PL SL HR
RU
HU CS RO PL SL HR
RO
HU CS RU PL SL HR
PL
HU CS RU RO SL HR
SL
HU CS RU RO PL HR
HR
HU CS RU RO PL SL
ET LT LV SK BG
ET LT LV SK BG
ET LT LV SK BG
ET LT LV SK BG
ET LT LV SK BG
ET LT LV SK BG
FR EN DE ES IT PT NL SV DA NO FI
HU CS RU RO PL SL HR
ET
LT LV SK BG
LT
ET LV SK BG
LV
ET LT SK BG
SK
ET LT LV BG
BG
ET LT LV SK
AVERTISSEMENT
Les éléments de coupe sont encore en mouvement
une fois le moteur coupé. Ne touchez pas les parties
coupantes avant leur arrêt complet.
AVERTISSEMENT
Lors de l'utilisation d'appareils, il convient de toujours
respecter certaines précautions de sécurité de base
afin de réduire les risques d'incendie, de décharge
électrique et de blessures. Veuillez également prêter
une grande attention aux conseils contenus dans les
instructions de sécurité.
AVERTISSEMENT
Gardez à l'esprit que l'opérateur ou l'utilisateur est
responsable des accidents et des risques encourus
par les autres personnes ou leurs biens.
MISE EN PLACE DU PACK BATTERIE
CF. FIGURE 2.
■Insérez le pack batterie dans l'ébrancheur. Alignez les
languettes du pack batterie avec les rainures de
l'ébrancheur. Tournez ensuite le couvercle du
compartiment batterie dans le sens des aiguilles d'une
montre jusqu'à ce qu'il soit bien serré.
MISE EN PLACE DU PACK BATTERIE
■Tournez le couvercle du compartiment batterie dans
le sens inverse des aiguilles d'une montre pour le
dévisser. Retirez ensuite le pack batterie de
l'ébrancheur.
ATTENTION
Lorsque vous insérez le pack batterie dans votre
ébrancheur, assurez-vous que les languettes du pack
batterie sont alignées avec les rainures de
l'ébrancheur. Un mauvais montage du pack batterie
peut endommager les composants internes.
RECHARGE DE LA BATTERIE
CF. FIGURE 2-3.
■Retirez l'ébrancheur et ses accessoires de
l'emballage. Eloignez les jeunes enfants des
matériaux d'emballage. Il y a risque d'étouffement!
■ Chargez la batterie avant la première utilisation.
■ La batterie est protégée électroniquement contre les
surcharges, les surchauffes et les décharges totales.
Il n'y a pas perte de charge. La batterie se caractérise
par une faible auto-décharge.
■ Une batterie entièrement chargée est toujours prête à
l'emploi, même si vous n'utilisez pas l'outil pendant
plusieurs mois.
FONCTIONS DES LEDs ETAT DE CHARGE
La LED inférieure clignote La charge de la batterie se
situe entre 0 et 1/3
La LED inférieure est allumée,
la LED centrale clignote
La charge de la batterie se
situe entre 1/3 et 2/3
Les LEDs centrale et inférieure
sont allumées, la LED
supérieure clignote
La charge de la batterie se
situe entre 2/3 et la charge
complète
Toutes les LEDs clignotent Batterie défectueuse
La LED inférieure clignote une
fois toutes les 5 secondes
Chargeur branché, batterie
non présente; ou, chargeur en
mode veille
Les LEDs inférieure et centrale
clignotent
La température de la batterie
est inférieure à 0˚C ou
supérieure à 55˚C
Toutes les LEDs sont allumées Charge complète
MISE EN MARCHE/ARRÊT DE L'ÉBRANCHEUR
CF. FIGURE 4.
■Enfoncez le bouton de verrouillage vers le bas en
position déverrouillée.
■ Appuyez sur la gâchette.
■ Si la lame n'est pas encore en position ouverte, elle y
retournera.
■ Si la lame est en position ouverte, elle se mettra en
mouvement pour couper la branche. Après la coupe,
la lame retournera automatiquement en position
ouverte et s'arrêtera. Au cours de la coupe, ne
relâchez pas la gâchette avant que la lame ne
retourne en position ouverte.
■ Relâchez la gâchette.
■ Répétez l'étape précédente pour couper de façon
continue.
■ Après utilisation, poussez le bouton de verrouillage
vers l'avant en position verrouillée.
RÉGLAGE DE LA LAME
CF. FIGURE 5.
Vérifiez toujours que l'écrou de lame est bien serré avant
chaque utilisation. Si la lame est lâche, l'efficacité de la
coupe est diminuée. La lame doit être réglée en serrant
son écrou.
REMPLACEMENT DE LA LAME
CF. FIGURE 6.
Lorsque la lame est trop émoussée ou endommagée,
elle doit être remplacée par une pièce détachée d'origine.
(Modèle d'accessoire RAC304)

7
Français (Traduction à partir du mode d'emploi d'origine)
FR
EN DE ES IT PT NL SV DA NO FI HU CS RU RO PL SL HR ET LT LV SK BG
EN
FR DE ES IT PT NL SV DA NO FI
DE
FR EN ES IT PT NL SV DA NO FI
ES
FR EN DE IT PT NL SV DA NO FI
IT
FR EN DE ES PT NL SV DA NO FI
PT
FR EN DE ES IT NL SV DA NO FI
NL
FR EN DE ES IT PT SV DA NO FI
SV
FR EN DE ES IT PT NL DA NO FI
DA
FR EN DE ES IT PT NL SV NO FI
NO
FR EN DE ES IT PT NL SV DA FI
FI
FR EN DE ES IT PT NL SV DA NO
HU CS RU RO PL SL HR
ET LT LV SK BG
ET LT LV SK BG
ET LT LV SK BG
ET LT LV SK BG
ET LT LV SK BG
ET LT LV SK BG
ET LT LV SK BG
ET LT LV SK BG
ET LT LV SK BG
ET LT LV SK BG
FR EN DE ES IT PT NL SV DA NO FI
HU
CS RU RO PL SL HR ET LT LV SK BG
CS
HU RU RO PL SL HR
RU
HU CS RO PL SL HR
RO
HU CS RU PL SL HR
PL
HU CS RU RO SL HR
SL
HU CS RU RO PL HR
HR
HU CS RU RO PL SL
ET LT LV SK BG
ET LT LV SK BG
ET LT LV SK BG
ET LT LV SK BG
ET LT LV SK BG
ET LT LV SK BG
FR EN DE ES IT PT NL SV DA NO FI
HU CS RU RO PL SL HR
ET
LT LV SK BG
LT
ET LV SK BG
LV
ET LT SK BG
SK
ET LT LV BG
BG
ET LT LV SK
AVERTISSEMENT
Poussez le bouton de verrouillage vers l'avant pour
verrouiller la gâchette. Retirez le pack batterie de
l'ébrancheur lorsque vous en changez la lame. Portez
toujours des gants lorsque vous remplacez la lame.
1. Desserrez l'écrou de la lame.
2. Retirez le couvre-lame et la rondelle grover.
3. Retirez la lame avec précaution.
4. Remplacez-la par une nouvelle lame et remettez le
couvre-lame en place, puis serrez l'écrou de lame à
un couple de serrage de 8 lbs-in à 12 lbs-in.
CONSEILS D’UTILISATION
AVERTISSEMENT
Gardez votre main libre à l'écart de la zone de coupe.
Ne touchez jamais les lames, elle sont très affûtées et
vous pourriez vous couper.
■Avant de mettre votre produit en marche, tenez-le
avec les lames dirigées vers l'avant par rapport à
vous. Utilisez toujours le produit de façon correcte.
■ N'essayez pas de couper des branches trop épaisses
ou trop dures. Vous pourriez émousser ou
endommager les lames, ce qui diminuerait les
performances de coupe.
■ Si les lames se coincent, ne relâchez pas la gâchette,
elle seront réinitialisées au bout de 1 - 2 sec.
■ Ne faites pas forcer le produit. Il effectuera un meilleur
travail et risquera moins de provoquer des blessures
si vous l'utilisez dans les limites de ses capacités.
■ Relâchez la gâchette, laissez le moteur s'arrêter et
retirez le pack batterie avant toute opération
d'entretien, de réparation, et avant d'effectuer tout
réglage.
■ N'utilisez l'ébrancheur que pour couper des branches
d'un diamètre maximal de 16mm (bois tendre) ou de
10mm (bois dur). Ne l'utilisez pour aucun autre travail.
■ Avant de mettre l'appareil en marche, assurez-vous
que les lames de coupe ne touchent rien. Si les lames
se sont emmêlées dans un objet étranger, arrêtez
immédiatement l'ppareil, retirez le pack batterie et
vérifiez les dommages. Ne reprenez pas le travail
avant d'avoir réparé les dommages. N'utilisez pas
l'appareil si certains de ses éléments sont lâches ou
endommagés.
■ Prenez garde à ce que vous faites. Faites preuve de
bon sens.
■ Entretenez soigneusement le produit. Gardez le
tranchant affûté et propre pour obtenir les meilleures
performances et réduire les risques de blessure.
Suivez les instructions concernant la lubrification et le
changement d'accessoires. Gardez les poignées
propres, sèches, et exemptes d'huile et de graisse.
■ Vérifiez qu'aucune pièce n'est endommagée. Avant
de continuer à utiliser l'appareil, toute pièce ou
protection endommagée doit être soigneusement
vérifiée afin de s'assurer qu'elle peut fonctionner
correctement et remplir sa fonction initiale. Vérifiez
que les pièces en mouvement sont bien alignées et
non tordues, qu'aucune pièce n'est cassée ou mal
montée, et qu'aucun autre problème n'est susceptible
d'affecter le bon fonctionnement de l'appareil. Une
protection ou toute autre pièce endommagée doit être
correctement remplacée ou réparée par un Service
Après-vente Agréé sauf avis contraire dans ce
manuel.
■ Risque de coupure. Gardez vos mains à l'écart des
lames. Ne tentez pas de retirer des matériaux coupés
ou de maintenir un élément à couper lorsque les
lames sont en mouvement. Assurez-vous que le pack
batterie est retiré et que la gâchette est relâchée
lorsque vous retirez des matériaux coincés dans les
lames. Ne saisissez pas les lames de coupe nues ou
leur tranchant lorsque vous soulevez l'appareil ou que
vous le tenez.
■ Tenez vos mains, votre visage et vos pieds éloignés
des pièces mobiles. N’essayez pas de toucher ou
d’arrêter la lame lorsque celle-ci est en mouvement.
■ Arrêtez toujours le moteur lorsque vous n’êtes pas en
train de couper ou lorsque vous vous déplacez d’une
zone de coupe à une autre.
■ Ne laissez pas des déchets de coupe ou autres
éléments s’accumuler sur l’outil. Ils pourraient
obstruer la lame.
■ Rangez votre outil dans un endroit sec, situé en
hauteur ou fermé à clé, pour éviter toute utilisation
abusive ou tout endommagement. Veillez à ce que
votre outil soit rangé hors de portée des enfants et
des personnes inexpérimentées.
■ Ne plongez jamais votre outil dans l’eau ou dans tout
autre liquide et ne l’aspergez pas. Veillez à ce que les
poignées soient toujours sèches et propres, sans
déchets de coupe. Nettoyez votre outil après chaque
utilisation. Reportez-vous aux consignes de la section
“Rangement”.
■ Assurez-vous de bien caler l’outil avant de le
transporter.
■ Conservez ces instructions. Consultez-les
régulièrement et utilisez-les pour informer d’autres
utilisateurs éventuels. Si vous prêtez votre outil,
prêtez également ce manuel d’utilisation.
■ Si les lames se coincent, ne relâchez pas la gâchette,
elle seront réinitialisées au bout de 1 - 2 sec.

8
Français (Traduction à partir du mode d'emploi d'origine)
FR
EN DE ES IT PT NL SV DA NO FI HU CS RU RO PL SL HR ET LT LV SK BG
EN
FR DE ES IT PT NL SV DA NO FI
DE
FR EN ES IT PT NL SV DA NO FI
ES
FR EN DE IT PT NL SV DA NO FI
IT
FR EN DE ES PT NL SV DA NO FI
PT
FR EN DE ES IT NL SV DA NO FI
NL
FR EN DE ES IT PT SV DA NO FI
SV
FR EN DE ES IT PT NL DA NO FI
DA
FR EN DE ES IT PT NL SV NO FI
NO
FR EN DE ES IT PT NL SV DA FI
FI
FR EN DE ES IT PT NL SV DA NO
HU CS RU RO PL SL HR
ET LT LV SK BG
ET LT LV SK BG
ET LT LV SK BG
ET LT LV SK BG
ET LT LV SK BG
ET LT LV SK BG
ET LT LV SK BG
ET LT LV SK BG
ET LT LV SK BG
ET LT LV SK BG
FR EN DE ES IT PT NL SV DA NO FI
HU
CS RU RO PL SL HR ET LT LV SK BG
CS
HU RU RO PL SL HR
RU
HU CS RO PL SL HR
RO
HU CS RU PL SL HR
PL
HU CS RU RO SL HR
SL
HU CS RU RO PL HR
HR
HU CS RU RO PL SL
ET LT LV SK BG
ET LT LV SK BG
ET LT LV SK BG
ET LT LV SK BG
ET LT LV SK BG
ET LT LV SK BG
FR EN DE ES IT PT NL SV DA NO FI
HU CS RU RO PL SL HR
ET
LT LV SK BG
LT
ET LV SK BG
LV
ET LT SK BG
SK
ET LT LV BG
BG
ET LT LV SK
ENTRETIEN
NETTOYAGE ET STOCKAGE
AVERTISSEMENT
Si vous n’utilisez pas votre outil pendant des périodes
prolongées, rechargez la batterie tous les mois ou tous
les deux mois. Cela prolongera la durée de vie de la
batterie.
Note: Pour assurer un fonctionnement fiable et durable,
effectuez régulièrement les opérations d'entretien
suivantes.
■Vérifiez l'absence de défauts évidents tels que lame
lâche, déboîtée ou endommagée, ou éléments
desserrés, usés ou endommagés.
■ Vérifiez que les carters et protections sont en bon état
et bien fixés. Effectuez les opérations d'entretien ou
les réparations nécessaires avant utilisation.
■ Si la machine venait à tomber en panne malgré le
soin apporté à sa fabrication et aux tests effectués,
faites-la réparer par un service après-vente agréé.
■ Nettoyez toujours les lames de coupe après utilisation.
■ Vérifiez visuellement l'état du tranchant de la lame de
coupe.
■ Avant de ranger l'appareil, nettoyez-le soigneusement
à l'aide d'une brosse souple et d'un chiffon. N'utilisez
ni eau, ni solvants, ni abrasifs. Retirez tous les débris.
■ Rangez et rechargez la batterie dans un endroit frais.
Les températures inférieures ou supérieures à une
température ambiante normale réduisent la durée de
vie d’une batterie.
■ Ne rangez jamais une batterie déchargée. Après
utilisation de l’outil, attendez que la batterie refroidisse
et rechargez-la immédiatement.
■ Toutes les batteries perdent de leur capacité de
charge avec le temps. Plus la température est élevée,
plus vite la batterie perd de sa capacité de charge. Si
vous n’utilisez pas votre outil pendant des périodes
prolongées, rechargez la batterie tous les mois ou
tous les deux
■ Rangez l'appareil en un lieu sec et sûr, hors de portée
des enfants. Ne placez aucun objet sur l'appareil.
MISE AU REBUT
Les outils, les accessoires, ainsi que les éléments
d'emballage doivent être triés pour être recyclés de façon
écologique.
Ne jetez pas les packs batterie / batteries avec les
ordures ménagères, dans l'eau ou au feu. Les packs
batterie/batteries doivent être collectés, recyclés ou mis
au rebut de façon respectueuse de l'environnement.
Ne jetez pas les outils électriques avec les
ordures ménagères. Faites-les recycler
dans des centres de recyclage. Contactez
les autorités ou votre revendeur pour
connaître la procédure de recyclage
adéquate.

9
Français (Traduction à partir du mode d'emploi d'origine)
FR
EN DE ES IT PT NL SV DA NO FI HU CS RU RO PL SL HR ET LT LV SK BG
EN
FR DE ES IT PT NL SV DA NO FI
DE
FR EN ES IT PT NL SV DA NO FI
ES
FR EN DE IT PT NL SV DA NO FI
IT
FR EN DE ES PT NL SV DA NO FI
PT
FR EN DE ES IT NL SV DA NO FI
NL
FR EN DE ES IT PT SV DA NO FI
SV
FR EN DE ES IT PT NL DA NO FI
DA
FR EN DE ES IT PT NL SV NO FI
NO
FR EN DE ES IT PT NL SV DA FI
FI
FR EN DE ES IT PT NL SV DA NO
HU CS RU RO PL SL HR
ET LT LV SK BG
ET LT LV SK BG
ET LT LV SK BG
ET LT LV SK BG
ET LT LV SK BG
ET LT LV SK BG
ET LT LV SK BG
ET LT LV SK BG
ET LT LV SK BG
ET LT LV SK BG
FR EN DE ES IT PT NL SV DA NO FI
HU
CS RU RO PL SL HR ET LT LV SK BG
CS
HU RU RO PL SL HR
RU
HU CS RO PL SL HR
RO
HU CS RU PL SL HR
PL
HU CS RU RO SL HR
SL
HU CS RU RO PL HR
HR
HU CS RU RO PL SL
ET LT LV SK BG
ET LT LV SK BG
ET LT LV SK BG
ET LT LV SK BG
ET LT LV SK BG
ET LT LV SK BG
FR EN DE ES IT PT NL SV DA NO FI
HU CS RU RO PL SL HR
ET
LT LV SK BG
LT
ET LV SK BG
LV
ET LT SK BG
SK
ET LT LV BG
BG
ET LT LV SK
PROBLÈME CAUSE POSSIBLE SOLUTION
Le moteur ne démarre pas.
Mauvais contact au niveau du fil
d'alimentation ou circuit imprimé
défectueux.
Faites remplacer le fil d'alimentation
ou le circuit imprimé par un
réparateur agréé.
Le moteur, l'interrupteur, ou le pack
batterie sont défectueux.
Contactez le fabricant ou un
Centre de Réparation (voir liste des
services après-vente).
La batterie ne peut pas être
rechargée.
la température est trop basse ou trop
élevée.
La température de charge se situe
entre 0˚C - 40˚C.
La batterie ou le chargeur sont
défectueux.
Contactez le fabricant ou un
Centre de Réparation (voir liste des
services après-vente).
La batterie ou le chargeur sont
défectueux. Le moteur démarre,
mais les lames de coupe restent
immobiles.
Engrenages ou lames endommagés.
Faites remplacer l'engrenage
principal ou les lames par un
réparateur agréé.
Faible capacité de coupe.
Lame émoussée. Affûtez ou remplacez les lames.
Lame desserrée. Affûtez ou remplacez les lames.
Batterie faible. Rechargez le pack batterie.
RÉSOLUTION DES PROBLÈMES

10
English (original instructions)
FR
EN DE ES IT PT NL SV DA NO FI HU CS RU RO PL SL HR ET LT LV SK BG
EN
FR DE ES IT PT NL SV DA NO FI
DE
FR EN ES IT PT NL SV DA NO FI
ES
FR EN DE IT PT NL SV DA NO FI
IT
FR EN DE ES PT NL SV DA NO FI
PT
FR EN DE ES IT NL SV DA NO FI
NL
FR EN DE ES IT PT SV DA NO FI
SV
FR EN DE ES IT PT NL DA NO FI
DA
FR EN DE ES IT PT NL SV NO FI
NO
FR EN DE ES IT PT NL SV DA FI
FI
FR EN DE ES IT PT NL SV DA NO
HU CS RU RO PL SL HR
ET LT LV SK BG
ET LT LV SK BG
ET LT LV SK BG
ET LT LV SK BG
ET LT LV SK BG
ET LT LV SK BG
ET LT LV SK BG
ET LT LV SK BG
ET LT LV SK BG
ET LT LV SK BG
FR EN DE ES IT PT NL SV DA NO FI
HU
CS RU RO PL SL HR ET LT LV SK BG
CS
HU RU RO PL SL HR
RU
HU CS RO PL SL HR
RO
HU CS RU PL SL HR
PL
HU CS RU RO SL HR
SL
HU CS RU RO PL HR
HR
HU CS RU RO PL SL
ET LT LV SK BG
ET LT LV SK BG
ET LT LV SK BG
ET LT LV SK BG
ET LT LV SK BG
ET LT LV SK BG
FR EN DE ES IT PT NL SV DA NO FI
HU CS RU RO PL SL HR
ET
LT LV SK BG
LT
ET LV SK BG
LV
ET LT SK BG
SK
ET LT LV BG
BG
ET LT LV SK
■ Keep in mind that the operator or user is responsible
for accidents or hazards occurring to other people or
their property.
■ Use personal protective equipment. Always wear eye
protection. Protective equipment such as dust mask,
non-skid safety shoes, hard hat or hearing protection
used for appropriate conditions will reduce personal
injuries.
■ Dress properly. Do not wear loose clothing or
jewellery. Keep your hair, clothing and gloves away
from moving parts. Loose clothes, jewellery or long
hair can be caught in moving parts.
WORK AREA SAFETY
■ Never use while people, especially children, or pets
are nearby.
■ Make sure to have a safety stand when operating the
lopper. When using ladder or scaffold, make sure the
stands are stable and cannot topple over. Always
keep yourself balanced when using the lopper.
■ Keep work area clean and well lit. Cluttered or dark
areas invite accidents.
■ Do not operate power tools in explosive atmospheres,
such as in the presence of flammable liquids, gases or
dust. Power tools create sparks which may ignite the
dust or fumes.
■ Do not operate the tool in damp, wet location or in the
rain.
ELECTRICAL SAFETY
■ Power tool plugs must match the outlet. Never modify
the plug in any way. Do not use any adapter plugs
with earthed (grounded) power tools. Unmodified
plugs and matching outlets will reduce risk of electric
shock.
■ Avoid body contact with earthed or grounded
surfaces, such as pipes, radiators, ranges and
refrigerators. There is an increased risk of electric
shock if your body is earthed or grounded.
■ Do not expose power tools to rain or wet conditions.
Water entering a power tool will increase the risk of
electric shock.
POWER TOOL USE AND CARE
■ Before using, always visually inspect to ensure
blades, blade bolts, and cutter assembly are not worn
or damaged. Check all nuts, bolts, and screws at
frequent intervals for proper tightness to be sure the
equipment is in safe working condition.
■ Check the cutting blade frequently for wear or
deterioration.
■ Replace worn or damaged parts for safety.
■ Do not force the machine. It will do the job better and
safer at the rate for which it was designed.
■ Do not use the power tool if the switch does not turn it
on and off. Any power tool that cannot be controlled
with the switch is dangerous and must be repaired.
Your product has been engineered and manufactured to
Ryobi's high standard for dependability, ease of operation,
and operator safety. When properly cared for, it will give
you years of rugged, trouble-free performance.
Thank you for buying a Ryobi product.
INTENDED USE:
This product is intended to use for cutting branches
with a diameter of up to 16mm (softwood) and 10mm
(hardwood). Do not cut thick branches. The tool is not
designed for continuous, professional use.
Save all warnings and instructions for future
reference.
RULES FOR SAFE OPERATION
WARNING
To reduce the risk of injury, the user must read and
understand the operator's manual.
WARNING
Do not attempt to operate this machine until you have
read thoroughly and understood completely all
instructions, safety rules, etc. contained in this manual.
Failure to comply may result in accidents involving
electric shock, fire, and/or serious personal injury.
WARNING
The machine should be operated with the battery
pack. When using battery operated machine, basic
safety precaution should always be followed to reduce
the risk of fire, leaking batteries and personal injury,
including the following.
PERSONAL SAFETY
■ This lopper is capable of amputating hands . Failure to
observe all safety instructions could result in serious
injury.
■ Never allow children or people unfamiliar with these
instructions to operate the tool. Local regulations may
restrict the age of the operator.
■ Persons with limited physical, sensorial or mental
abilities are not allowed to use the unit, unless they
are supervised and briefed for their safety by a
qualified person.
■ Stay alert, watch what you are doing and use common
sense when operating the tool. Do not operate the tool
while tired or under the influence of drugs, alcohol, or
medication. A moment of inattention while operating
the machine may result in serious personal injury.

11
English (original instructions)
FR
EN DE ES IT PT NL SV DA NO FI HU CS RU RO PL SL HR ET LT LV SK BG
EN
FR DE ES IT PT NL SV DA NO FI
DE
FR EN ES IT PT NL SV DA NO FI
ES
FR EN DE IT PT NL SV DA NO FI
IT
FR EN DE ES PT NL SV DA NO FI
PT
FR EN DE ES IT NL SV DA NO FI
NL
FR EN DE ES IT PT SV DA NO FI
SV
FR EN DE ES IT PT NL DA NO FI
DA
FR EN DE ES IT PT NL SV NO FI
NO
FR EN DE ES IT PT NL SV DA FI
FI
FR EN DE ES IT PT NL SV DA NO
HU CS RU RO PL SL HR
ET LT LV SK BG
ET LT LV SK BG
ET LT LV SK BG
ET LT LV SK BG
ET LT LV SK BG
ET LT LV SK BG
ET LT LV SK BG
ET LT LV SK BG
ET LT LV SK BG
ET LT LV SK BG
FR EN DE ES IT PT NL SV DA NO FI
HU
CS RU RO PL SL HR ET LT LV SK BG
CS
HU RU RO PL SL HR
RU
HU CS RO PL SL HR
RO
HU CS RU PL SL HR
PL
HU CS RU RO SL HR
SL
HU CS RU RO PL HR
HR
HU CS RU RO PL SL
ET LT LV SK BG
ET LT LV SK BG
ET LT LV SK BG
ET LT LV SK BG
ET LT LV SK BG
ET LT LV SK BG
FR EN DE ES IT PT NL SV DA NO FI
HU CS RU RO PL SL HR
ET
LT LV SK BG
LT
ET LV SK BG
LV
ET LT SK BG
SK
ET LT LV BG
BG
ET LT LV SK
■ Walk, never run.
■ Never operate the machine with defective guards or
shields, or without safety devices, for example
deflectors and/or grassboxes, in place.
■ Do not touch the blade set during use and keep
fingers, hair, clothing and similar objects away from
the blade set.
■ Do not attempt to remove cut material from the blades
or to hold material to be cut when the blade is running,
remove jammed material from the blades after
switching off and removing the battery.
■ Use the right appliance. Do not use the machine for
any job except that for which it is intended.
■ Always keep the blade set sharp and clean.
■ When not in use, tool should be stored indoors in a
dry, locked up place out of the reach of children.
■ When cleaning, maintaining and not in use, always
remove the battery from the lopper.
■ Follow manufacturer's instructions for proper
operation and installation of accessories. Only use
accessories approved by the manufacturer.
■ The vibration emission during actual use of the power
tool can differ from the declared total value depending
on the ways in which the tool is used.
■ It has been reported that vibrations from hand-held
tools may contribute to a condition called Raynaud’s
Syndrome in certain individuals. Symptoms may
include tingling, numbness and blanching of the
fingers, usually apparent upon exposure to cold.
Hereditary factors, exposure to cold and dampness,
diet, smoking and work practices are all thought to
contribute to the development of these symptoms. It is
presently unknown what, if any, vibrations or extent of
exposure may contribute to the condition. There are
measures that can be taken by the operator to
possibly reduce the effects of vibration:
yKeep your body warm in cold weather. When
operating the unit wear gloves to keep the hands
and wrists warm. It is reported that cold weather
is a major factor contributing to Raynaud’s
Syndrome.
yAfter each period of operation, exercise to increase
blood circulation.
yTake frequent work breaks. Limit the amount of
exposure per day.
If you experience any of the symptoms of this condition,
immediately discontinue use and see your physician about
these symptoms.
SERVICE
■ Service on unit must be performed only by qualified
repair personnel. Service or maintenance performed
by unqualified personnel could result in a risk of injury
to the user, or damage to the unit. It may also void
your warranty.
■ Use only authorized replacement parts when servicing
the product. Use of unauthorized parts may create a
risk of serious injury to the user, or damage to the
product.
BATTERY RULES FOR SAFETY
■ Battery operated units do not have to be plugged into
an electrical outlet; therefore, they are always in
operating condition. Be aware of possible hazards
even when unit is not operating.
■ Remove the battery pack before making any
adjustments, cleaning, or removing material from the
tool.
■ A battery pack must be recharged only with the
charger specified by the manufacturer. A charger that
may be suitable for one type of battery pack may
create a risk of fire when used with another battery
pack. Use battery pack only with charger listed.
■ Use only battery pack intended specifically for the
machine. Use of any other battery packs may result in
a risk of fire, electric shock, or injury to persons.
■ When battery pack is not in use, keep it away from
other metal objects like: paper clips, coins, keys, nails,
screws, or other small metal objects that can make a
connection from one terminal to another. Shorting the
battery pack terminals together may cause sparks,
burns, or fire.
■ Do not place battery tools or their batteries near fire or
heat. This will reduce the risk of explosion and
possible injury.
■ Do not open or mutilate the battery pack. Released
electrolyte is corrosive and may cause damage to the
eyes or skin. It may be toxic if swallowed.
■ Do not short-circuit the battery pack. There is danger
of explosion.
■ Protect the battery pack against moisture and water.
Do not charge unit in a damp or wet location.
Following this rule will reduce the risk of electric
shock.
■ If electrolyte contacts the skin, wash it off immediately
with water.
■ If electrolyte contacts the eyes, flush thoroughly and
immediately with water. Seek medical attention.
■ In case of damage and improper use of the battery,
vapour may be emitted. Provide for fresh air and seek
medical help in case of complaints. The vapour can
irritate the respiratory system.
■ Do not leave the battery pack in the car in the
summer.
■ Do not incinerate the battery.
■ Only charge, operate and store the battery at an
ambient temperature between 0˚C and 40˚C.
■ After full discharge, the battery pack must be
recharged in two months. The battery pack will be
damaged if over-discharged.

12
English (original instructions)
FR
EN DE ES IT PT NL SV DA NO FI HU CS RU RO PL SL HR ET LT LV SK BG
EN
FR DE ES IT PT NL SV DA NO FI
DE
FR EN ES IT PT NL SV DA NO FI
ES
FR EN DE IT PT NL SV DA NO FI
IT
FR EN DE ES PT NL SV DA NO FI
PT
FR EN DE ES IT NL SV DA NO FI
NL
FR EN DE ES IT PT SV DA NO FI
SV
FR EN DE ES IT PT NL DA NO FI
DA
FR EN DE ES IT PT NL SV NO FI
NO
FR EN DE ES IT PT NL SV DA FI
FI
FR EN DE ES IT PT NL SV DA NO
HU CS RU RO PL SL HR
ET LT LV SK BG
ET LT LV SK BG
ET LT LV SK BG
ET LT LV SK BG
ET LT LV SK BG
ET LT LV SK BG
ET LT LV SK BG
ET LT LV SK BG
ET LT LV SK BG
ET LT LV SK BG
FR EN DE ES IT PT NL SV DA NO FI
HU
CS RU RO PL SL HR ET LT LV SK BG
CS
HU RU RO PL SL HR
RU
HU CS RO PL SL HR
RO
HU CS RU PL SL HR
PL
HU CS RU RO SL HR
SL
HU CS RU RO PL HR
HR
HU CS RU RO PL SL
ET LT LV SK BG
ET LT LV SK BG
ET LT LV SK BG
ET LT LV SK BG
ET LT LV SK BG
ET LT LV SK BG
FR EN DE ES IT PT NL SV DA NO FI
HU CS RU RO PL SL HR
ET
LT LV SK BG
LT
ET LV SK BG
LV
ET LT SK BG
SK
ET LT LV BG
BG
ET LT LV SK
SAFETY RULES FOR CHARGER
■ Use of an attachment not recommended or sold by
the battery charger manufacturer may result in a risk
of fire, electric shock, or injury to persons. Following
this rule will reduce the risk or electric shock, fire, or
serious personal injury.
■ Do not use the charger when the ambient temperature
is above 40ºC or below 0ºC.
■ Do not operate charger with a damaged cable or plug,
which could cause shorting and electric shock. If
damaged, have the charger replaced by authorized
service personnel.
■ Do not operate charger if it has received a sharp blow,
been dropped, or otherwise damaged in any way.
Take it to an authorized service center for electrical
check to determine if the charger is in good working
order.
■ Do not disassemble charger, take it to a qualified
serviceman when service or repair is required.
Incorrect re-assembling may result in a risk of electric
shock or fire.
■ Unplug charger from outlet before attempting any
maintenance or cleaning to reduce the risk of electric
shock.
■ Disconnect charger from the power supply when not
in use to prevent damage to the charger during a
power surge.
■ Do not expose charger to wet or damp conditions.
Water entering charger will increase the risk of electric
shock.
■ Make sure cable is located so that it will not be
stepped on, tripped over, come in contact with sharp
edges or moving parts or otherwise subjected to
damage or stress. This will reduce the risk of
accidental falls, which could cause injury, and damage
to the cable, which could result in electric shock.
■ Keep cable and charger away from heat to prevent
damage to housing or internal parts.
■ Do not let gasoline, oils, petroleum-based products,
etc. come in contact with plastic parts. They contain
chemicals that can damage, weaken, or destroy
plastic.
■ An extension cable should not be used for the charger
unless absolutely necessary. Use of improper
extension cable could result in a risk of fire and
electric shock. If extension cable must be used, make
sure:
yThat pins on plug of extension cable are the
same number, size and shape as those of plug on
charger.
yThat extension cable is properly wired and in good
electrical condition.
WARNING
If any parts are missing, do not operate unit until the
missing parts are replaced. Failure to do so could
result in possible serious personal injury.
SAVE THESE INSTRUCTIONS. REFER TO THEM
FREQUENTLY AND USE THEM TO INSTRUCT OTHERS
WHO MAY USE THIS UNIT. IF YOU LOAN SOMEONE
THIS UNIT, LOAN THEM THESE INSTRUCTIONS ALSO.

13
English (original instructions)
FR
EN DE ES IT PT NL SV DA NO FI HU CS RU RO PL SL HR ET LT LV SK BG
EN
FR DE ES IT PT NL SV DA NO FI
DE
FR EN ES IT PT NL SV DA NO FI
ES
FR EN DE IT PT NL SV DA NO FI
IT
FR EN DE ES PT NL SV DA NO FI
PT
FR EN DE ES IT NL SV DA NO FI
NL
FR EN DE ES IT PT SV DA NO FI
SV
FR EN DE ES IT PT NL DA NO FI
DA
FR EN DE ES IT PT NL SV NO FI
NO
FR EN DE ES IT PT NL SV DA FI
FI
FR EN DE ES IT PT NL SV DA NO
HU CS RU RO PL SL HR
ET LT LV SK BG
ET LT LV SK BG
ET LT LV SK BG
ET LT LV SK BG
ET LT LV SK BG
ET LT LV SK BG
ET LT LV SK BG
ET LT LV SK BG
ET LT LV SK BG
ET LT LV SK BG
FR EN DE ES IT PT NL SV DA NO FI
HU
CS RU RO PL SL HR ET LT LV SK BG
CS
HU RU RO PL SL HR
RU
HU CS RO PL SL HR
RO
HU CS RU PL SL HR
PL
HU CS RU RO SL HR
SL
HU CS RU RO PL HR
HR
HU CS RU RO PL SL
ET LT LV SK BG
ET LT LV SK BG
ET LT LV SK BG
ET LT LV SK BG
ET LT LV SK BG
ET LT LV SK BG
FR EN DE ES IT PT NL SV DA NO FI
HU CS RU RO PL SL HR
ET
LT LV SK BG
LT
ET LV SK BG
LV
ET LT SK BG
SK
ET LT LV BG
BG
ET LT LV SK
Some of the following symbols may be used on this tool. Please study them and learn their meaning. Proper interpretation
of these symbols will allow you to operate the tool better and safer.
SYMBOL DESIGNATION/EXPLANATION
The power supplied is direct current power.
Precautions that involve your safety.
Read the operation manual and follow all warnings and safety instructions.
Always wear eye protection with side shields marked to comply with EN 166 as well as hearing
and head protection when operating this equipment.
Keep bystanders away.
Wear nonslip, heavy duty protective gloves.
Do not expose to rain or in damp conditions.
Keep all bystanders away from the operating area, especially children and pets.
Remove plug from the mains immediately if the cable is damaged or cut.
Waste electrical products should not be disposed of with household waste. Please recycle where
facilities exist. Check with your local authority or retailer for recycling advice.
Danger!
Rotating blade. Keep hands and feet away while operating the machine.
Tool in which protection against electric shock rely on double insulation or reinforced insulation.
The following signal words and meanings are intended to explain the levels of risk associated with this product.
SYMBOL SIGNAL MEANING
DANGER: Indicates an imminently hazardous situation, which, if not
avoided, will result in death or serious injury.
WARNING: Indicates a potentially hazardous situation, which, if not avoided,
could result in death or serious injury.
CAUTION: Indicates a potentially hazardous situation, which, if not avoided,
may result in minor or moderate injury.
CAUTION: (Without Safety Alert Symbol) Indicates a situation that may
result in property damage.
SYMBOLS

14
English (original instructions)
FR
EN DE ES IT PT NL SV DA NO FI HU CS RU RO PL SL HR ET LT LV SK BG
EN
FR DE ES IT PT NL SV DA NO FI
DE
FR EN ES IT PT NL SV DA NO FI
ES
FR EN DE IT PT NL SV DA NO FI
IT
FR EN DE ES PT NL SV DA NO FI
PT
FR EN DE ES IT NL SV DA NO FI
NL
FR EN DE ES IT PT SV DA NO FI
SV
FR EN DE ES IT PT NL DA NO FI
DA
FR EN DE ES IT PT NL SV NO FI
NO
FR EN DE ES IT PT NL SV DA FI
FI
FR EN DE ES IT PT NL SV DA NO
HU CS RU RO PL SL HR
ET LT LV SK BG
ET LT LV SK BG
ET LT LV SK BG
ET LT LV SK BG
ET LT LV SK BG
ET LT LV SK BG
ET LT LV SK BG
ET LT LV SK BG
ET LT LV SK BG
ET LT LV SK BG
FR EN DE ES IT PT NL SV DA NO FI
HU
CS RU RO PL SL HR ET LT LV SK BG
CS
HU RU RO PL SL HR
RU
HU CS RO PL SL HR
RO
HU CS RU PL SL HR
PL
HU CS RU RO SL HR
SL
HU CS RU RO PL HR
HR
HU CS RU RO PL SL
ET LT LV SK BG
ET LT LV SK BG
ET LT LV SK BG
ET LT LV SK BG
ET LT LV SK BG
ET LT LV SK BG
FR EN DE ES IT PT NL SV DA NO FI
HU CS RU RO PL SL HR
ET
LT LV SK BG
LT
ET LV SK BG
LV
ET LT SK BG
SK
ET LT LV BG
BG
ET LT LV SK
■ The declared vibration total value may also be used in
a preliminary assessment of exposure.
■ The declared vibration is measured according to EN
ISO 5349.
DESCRIPTION
1. Top blade
2. Blade nut
3. Battery
4. Battery compartment cap
5. Safety lock button
6. Trigger
7. Blade cover
8. Bottom blade
9. Spring washer
ASSEMBLY
■ Carefully remove the product and any accessories
from the box. Make sure all items listed in the packing
list are included.
■ Inspect the product carefully to make sure no
breakage or damage occurred during shipping.
■ Do not discard the packing material until you have
carefully inspected and satisfactorily operated the
product.
■ If any parts are damaged or missing, please call your
Ryobi service centre for assistance.
OPERATION
WARNING
Please read all of the safety and operating instructions
carefully before using this product. Failure to follow the
warnings and instructions may result in electric shock,
fire and/or serious injury. Save all instructions for
future reference.
WARNING
Keep all parts of the body away from the cutter blade.
Do not remove cut material or hold material to be cut
when blades are moving. Make sure the switch is off
when clearing jammed material. A moment of
inattention while operating the machine may result in
serious personal injury.
WARNING
Cutting means continuing to run after the motor is
switched off. Do not contact cutting means until it stop
completely.
SPECIFICATIONS
Motor 4 volts
No Load Speed 17000 rpm
Cutting speed 30 cycle/min
Blade max operating
angle 52˚
Maximum Cutting
Capacity 16mm softwood / 10mm hardwood
Operating time with
fully charged battery 500 cuts, 40 minutes
Weight with battery 700 g
Overall dimensions 29.3(L) x 12.1(W) x 5.6(H)
Sound pressure level LPA=63.5 dB(A), KPA=2.47 dB(A)
Sound power level LWA=74.5 dB(A), KWA=2.47 dB(A)
Handle vibration Level 1.8 m/s2
Uncertainty of vibration
measurement 1.5 m/s2
Charger Weight 105g
Input 220V-240V, ~50Hz-60Hz, 2.8W
Output 4 volts, 400mA
Battery
Operating Temperature 0˚C - 40˚C
Output Voltage 4.0 V
Capacity 1.5Ah
Battery Lithium Ion
Charging Time 3-5 hours
Weight 63.5g
Charger
Rated voltage 4V
Charging current 400mA
Operating temperature 0˚C - 40˚C
Charging hours 4 hours
Protection class / II
REMARKS TO THE SPECIFICATIONS:
■ The declared vibration total value has been measured
in accordance with a standard test method and may
be used for comparing one tool with another.

15
English (original instructions)
FR
EN DE ES IT PT NL SV DA NO FI HU CS RU RO PL SL HR ET LT LV SK BG
EN
FR DE ES IT PT NL SV DA NO FI
DE
FR EN ES IT PT NL SV DA NO FI
ES
FR EN DE IT PT NL SV DA NO FI
IT
FR EN DE ES PT NL SV DA NO FI
PT
FR EN DE ES IT NL SV DA NO FI
NL
FR EN DE ES IT PT SV DA NO FI
SV
FR EN DE ES IT PT NL DA NO FI
DA
FR EN DE ES IT PT NL SV NO FI
NO
FR EN DE ES IT PT NL SV DA FI
FI
FR EN DE ES IT PT NL SV DA NO
HU CS RU RO PL SL HR
ET LT LV SK BG
ET LT LV SK BG
ET LT LV SK BG
ET LT LV SK BG
ET LT LV SK BG
ET LT LV SK BG
ET LT LV SK BG
ET LT LV SK BG
ET LT LV SK BG
ET LT LV SK BG
FR EN DE ES IT PT NL SV DA NO FI
HU
CS RU RO PL SL HR ET LT LV SK BG
CS
HU RU RO PL SL HR
RU
HU CS RO PL SL HR
RO
HU CS RU PL SL HR
PL
HU CS RU RO SL HR
SL
HU CS RU RO PL HR
HR
HU CS RU RO PL SL
ET LT LV SK BG
ET LT LV SK BG
ET LT LV SK BG
ET LT LV SK BG
ET LT LV SK BG
ET LT LV SK BG
FR EN DE ES IT PT NL SV DA NO FI
HU CS RU RO PL SL HR
ET
LT LV SK BG
LT
ET LV SK BG
LV
ET LT SK BG
SK
ET LT LV BG
BG
ET LT LV SK
START/STOP THE LOPPER
See gure 4
■ Push lock button backward to unlock position.
■ Press the trigger.
■ If the blade is not already in the open position, the
blade will move back to the open position.
■ If the blade is in the open position, the blade will move
to cut the branch. After cutting, the blade will return
automatically and stop when the blade has opened
completely. While cutting, do not release the trigger
until the blade returns to the open position.
■ Release the trigger.
■ Repeat the step above for continuous cutting.
■ Push lock button forward to lock position after use.
ADJUST THE BLADE
See gure 5
Always verify that the blade nut is properly tightened
before each use. If the blade is loose cutting efciency will
be decreased. The blade should be adjusted by tightening
the blade nut.
REPLACE THE BLADE
See gure 6
When the blade is too dull or damaged, the blade should
be replaced with manufacturer's original parts. (Accessory
model RAC304)
WARNING
Push the lock button forward to lock the trigger.
Remove the battery pack from the lopper when
replacing the blade. Always wear gloves when
replacing the blade.
1. Loosen the blade nut.
2. Remove the blade cover and spring washer.
3. Take off the blade carefully.
4. Replace with a new blade and put the blade cover on,
fasten the blade nut with a torque 8 lbs-in to 12 lbs-in.
OPERATING TIPS
WARNING
Keep your free hand away from cutting area. Never
touch the blades, it is very sharp and you may cut
yourself.
■ Before starting your lopper, hold the unit with the
cutting blades directed away from you. Always use the
unit properly.
■ Do not attempt to cut branches that are too thick and
too hard. This can cause the blades to become dull or
damaged, reducing the cutting efficiency.
■ If blades do become jammed, do not release the
WARNING
When using appliance, basic safety precautions
should always be taken to reduce the risk of fire,
electric shock and personal injury. Please read and
heed the advice given in the safety instructions.
WARNING
Keep in mind that the operator or user is responsible
for accidents or hazards occurring to other people or
their property.
INSTALLING THE BATTERY PACK
See Figure 2
■ Place the battery pack in the lopper. Align raised rib
on battery pack with groove in lopper. Then rotate
battery compartment cap clockwise until tight.
REMOVING THE BATTERY PACK
■ Rotate battery compartment cap counterclockwise to
loosen. Then remove battery pack from lopper.
CAUTION
When placing battery pack in your lopper, make sure
raised rib on battery pack aligns with groove in lopper.
Improper assembly of battery pack can cause damage
to internal components.
CHARGING BATTERY
See Figure 2 - 3
■ Remove the lopper and accessories from the
package. Keep packaging materials out of reach of
small children. There is risk of suffocation!
■ Charge the battery before first use.
■ The electronics protect the battery from over-charging,
over heating and total discharge. There is no loss of
charge. The battery is characterised by low self-
discharge.
■ A fully charged battery is always ready for use, even if
you do not use the tool for months.
LED FUNCTIONS CHARGE STATUS
Bottom LED flashing Battery is 0 - 1/3 charged
Bottom LED on, center LED
flashing Battery is 1/3 - 2/3 charged
Bottom and center LEDs on,
top LED flashing
Battery 2/3 charged - fully
charged
All LEDs flashing Defective battery
Bottom LED flashes once
every 5 seconds
Charger plugged in, no battery
pack in port; or, charger is in
sleep mode
Bottom and center LED
flashing
Battery temperature is below
0˚C or above 55˚C
All LEDs on Fully charged

16
English (original instructions)
FR
EN DE ES IT PT NL SV DA NO FI HU CS RU RO PL SL HR ET LT LV SK BG
EN
FR DE ES IT PT NL SV DA NO FI
DE
FR EN ES IT PT NL SV DA NO FI
ES
FR EN DE IT PT NL SV DA NO FI
IT
FR EN DE ES PT NL SV DA NO FI
PT
FR EN DE ES IT NL SV DA NO FI
NL
FR EN DE ES IT PT SV DA NO FI
SV
FR EN DE ES IT PT NL DA NO FI
DA
FR EN DE ES IT PT NL SV NO FI
NO
FR EN DE ES IT PT NL SV DA FI
FI
FR EN DE ES IT PT NL SV DA NO
HU CS RU RO PL SL HR
ET LT LV SK BG
ET LT LV SK BG
ET LT LV SK BG
ET LT LV SK BG
ET LT LV SK BG
ET LT LV SK BG
ET LT LV SK BG
ET LT LV SK BG
ET LT LV SK BG
ET LT LV SK BG
FR EN DE ES IT PT NL SV DA NO FI
HU
CS RU RO PL SL HR ET LT LV SK BG
CS
HU RU RO PL SL HR
RU
HU CS RO PL SL HR
RO
HU CS RU PL SL HR
PL
HU CS RU RO SL HR
SL
HU CS RU RO PL HR
HR
HU CS RU RO PL SL
ET LT LV SK BG
ET LT LV SK BG
ET LT LV SK BG
ET LT LV SK BG
ET LT LV SK BG
ET LT LV SK BG
FR EN DE ES IT PT NL SV DA NO FI
HU CS RU RO PL SL HR
ET
LT LV SK BG
LT
ET LV SK BG
LV
ET LT SK BG
SK
ET LT LV BG
BG
ET LT LV SK
trigger, it will automatically reset after 1 - 2 sec.
■ Do not force the lopper. It will do the job better and
with less likelihood of a risk of injury at the rate of
which it was designed.
■ Release the trigger, allow the motor to stop and
remove the battery pack before performing
maintenance, repair, or making adjustments.
■ Use the lopper to cut branches with up to 16mm (soft
wood) or 10mm (hard wood) only. Do not use for any
other purpose.
■ Before starting the unit, make sure the cutting blades
will not come in contact with anything. If your blades
have become entangled with foreign objects, stop the
unit immediately, remove the battery pack and check
for damage. Do not operate before repairing damage.
Do not operate the unit with loose or damaged parts.
■ Watch what you are doing. Use common sense.
■ Maintain lopper with care. Keep cutting edge sharp
and clean for best performance and to reduce the risk
of injury. Follow instructions for lubricating and
changing accessories. Keep handles dry, clean, and
free from oil and grease.
■ Check damaged parts. Before further use of the
lopper, a guard or other part that is damaged should
be carefully checked to determine that it will operate
properly and perform its intended function. Check for
alignment of moving parts, binding of moving parts,
breakage of parts, mounting, and any other condition
that may affect its operation. A guard or other part that
is damaged should be properly repaired or replaced
by an Authorised Service Centre unless indicated
elsewhere in the manual.
■ Risk of cut. Keep hands away from blades. Do not
attempt to remove cut material or hold material to be
cut when blades are moving. Make sure battery pack
is removed and the trigger is released when clearing
jammed material from blades. Do not grasp the
exposed cutting blades or cutting edges when picking
up or holding the unit.
■ Keep hands, face, and feet at a safe distance from
moving parts. Do not touch or try to stop the cutting
blades when they are moving.
■ Always stop the motor when cutting is delayed or
when walking from one cutting location to another.
■ Keep unit clean of wood clippings and other materials.
They may become lodged in the cutting blades.
■ Store the unit inside in a dry place, either locked up or
up high to prevent unauthorized use or damage. Keep
out of the reach of children or untrained individuals.
■ Never douse or squirt the unit with water or any other
liquid. Keep handles dry, clean and free from debris.
Clean after each use, see Storage instructions.
■ Be sure to secure the unit while transporting.
■ Keep these instructions. Refer to them often and use
them to instruct other users. If you loan someone this
unit, also loan them these instructions.
MAINTENANCE
CLEANING AND STORAGE
CAUTION
If you store your unit for long periods of time without
using it, recharge the batteries every month or two.
This practice will prolong battery pack life.
Note: To ensure long and reliable service, carry out the
following maintenance regularly.
■ Check for obvious defects such as loose, dislodged or
damaged blade, loose fixings and worn or damaged
components.
■ Check that covers and guards are undamaged and
correctly fitted. Carry out necessary maintenance or
repairs before using.
I■ f the machine should happen to fail despite the care
taken in manufacturing and testing, repair should be
carried out by an authorized customer service agent.
■ Always clean the cutting blades after operation.
■ Visually check the condition of the cutting edges of the
cutting blade.
■ Clean the unit thoroughly before storing with a soft
brush and cloth. Do not use water, solvents or
polishes. Remove all debris.
■ Store and charge your batteries in a cool area.
Temperatures above or below normal room
temperature will shorten battery pack life.
■ Never store batteries in a discharged condition. Wait
for battery pack to cool and charge immediately.
■ All batteries gradually lose their charge. The higher
the temperature, the quicker they lose their charge. If
you store your unit for long periods of time without
using it, recharge the batteries every month or two.
This practice will prolong battery pack life.
■ Store the unit in a secure dry place out of reach of
children. Do not place objects on top of the unit.
DISPOSAL
Tools, accessories and packaging should be sorted to
environmentally friendly recycling.
Do not dispose of battery packs / batteries into household
waste, water or re. Battery packs/batteries must be
collected, recycled or disposed of in an environmentally
friendly way.
Waste electrical products should not be
disposed of together with household waste.
Please recycle where facilities exist. Check
with your local authority or retailer for recycling
advice.

17
English (original instructions)
FR
EN DE ES IT PT NL SV DA NO FI HU CS RU RO PL SL HR ET LT LV SK BG
EN
FR DE ES IT PT NL SV DA NO FI
DE
FR EN ES IT PT NL SV DA NO FI
ES
FR EN DE IT PT NL SV DA NO FI
IT
FR EN DE ES PT NL SV DA NO FI
PT
FR EN DE ES IT NL SV DA NO FI
NL
FR EN DE ES IT PT SV DA NO FI
SV
FR EN DE ES IT PT NL DA NO FI
DA
FR EN DE ES IT PT NL SV NO FI
NO
FR EN DE ES IT PT NL SV DA FI
FI
FR EN DE ES IT PT NL SV DA NO
HU CS RU RO PL SL HR
ET LT LV SK BG
ET LT LV SK BG
ET LT LV SK BG
ET LT LV SK BG
ET LT LV SK BG
ET LT LV SK BG
ET LT LV SK BG
ET LT LV SK BG
ET LT LV SK BG
ET LT LV SK BG
FR EN DE ES IT PT NL SV DA NO FI
HU
CS RU RO PL SL HR ET LT LV SK BG
CS
HU RU RO PL SL HR
RU
HU CS RO PL SL HR
RO
HU CS RU PL SL HR
PL
HU CS RU RO SL HR
SL
HU CS RU RO PL HR
HR
HU CS RU RO PL SL
ET LT LV SK BG
ET LT LV SK BG
ET LT LV SK BG
ET LT LV SK BG
ET LT LV SK BG
ET LT LV SK BG
FR EN DE ES IT PT NL SV DA NO FI
HU CS RU RO PL SL HR
ET
LT LV SK BG
LT
ET LV SK BG
LV
ET LT SK BG
SK
ET LT LV BG
BG
ET LT LV SK
PROBLEM POSSIBLE CAUSE SOLUTION
Motor will not start.
Connection lead wire or electrical
circuit board defect.
Replace lead wire or electrical circuit
board by an authorized customer
service agent.
Motor, switch, or battery pack defect.
Contact the manufacturer or Service
Center (see customer service list).
Battery cannot be recharged.
The temperature is too low or high. The charging temperature is between
0˚C - 40˚C.
Battery or charger defect.
Contact the manufacturer or Service
Center (see customer service list).
Motor can start, but cutting blades do
not run. Gear or blade assembly damaged.
Replace lead gear or blade
assembly by an authorized
customer service agent.
Cutting capacity low.
Blade dull. Sharpen or replace the blade.
Blade loose. Fasten the blade nut.
Battery low. Recharge the battery.
TROUBLESHOOTING
This manual suits for next models
1
Table of contents
Languages:
Other Ryobi Power Tools manuals

Ryobi
Ryobi JS451L Quick setup guide

Ryobi
Ryobi EJ700L User manual

Ryobi
Ryobi XAI-8800 Operation manual

Ryobi
Ryobi JS651L User manual

Ryobi
Ryobi CP-180M User manual

Ryobi
Ryobi P521 User manual

Ryobi
Ryobi JS451L User manual

Ryobi
Ryobi RY40006VNM User manual

Ryobi
Ryobi MT100 User manual

Ryobi
Ryobi YN500A User manual

Ryobi
Ryobi EOJ550K Operation manual

Ryobi
Ryobi LCS-180 User manual

Ryobi
Ryobi EHG2002RG Operation manual

Ryobi
Ryobi R18MT3 User manual

Ryobi
Ryobi R18RT User manual

Ryobi
Ryobi JM81-1 User manual

Ryobi
Ryobi DP103L User manual

Ryobi
Ryobi PBLIW01 User manual

Ryobi
Ryobi EVT400K Operation manual

Ryobi
Ryobi PRT100 User manual