manuals.online logo
Brands
  1. Home
  2. •
  3. Brands
  4. •
  5. S.R.Smith
  6. •
  7. Lighting Equipment
  8. •
  9. S.R.Smith SWIM CLUB II FUNSLIDE User manual

S.R.Smith SWIM CLUB II FUNSLIDE User manual

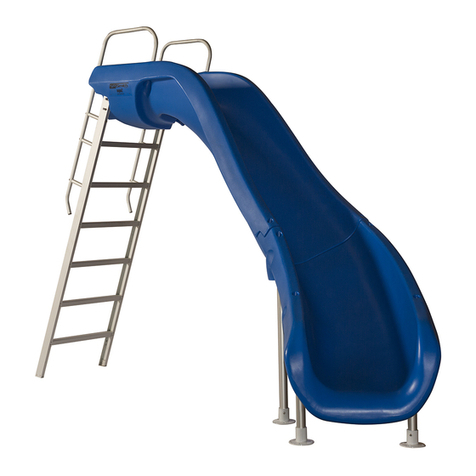
THE SWIM CLUB IITM FUNSLIDETM
SLIDE OWNER’S MANUAL
* * C A U T I O N * *
S.R. SMITH SWIM CLUB IITM FUNSLIDESTM ARE MANUFACTURED
FOR INSTALLATION AND USE ON INGROUND POOLS ONLY. SWIM
CLUB IITM FUNSLIDESTM ARE NEVER TO BE INSTALLED AND USED
ON ABOVEGROUND POOLS, ONGROUND POOLS, HOUSEBOATS,
BOAT DOCKS, FLOATING DOCKS OR PLATFORMS.
CORPORATE HEADQUARTERS
WESTERN SALES AND MANUFACTURING PLANT
P.O. Box 400 •1017 SW Berg Parkway
Canby, Oregon 97013
(503) 266-2231 •(503) 266-4334
06-655 ©S.R. SMITH, LLC 2003 OCT
2
Table of Contents
Topic Page #
Introduction………………………………………………………….. 2
Applicable Standards and Codes…………………………………. 2
Installation……………………………………………………….…… 2
Drawings……………………………………………………………… 2
Subsequent Owner’s………………………………………………… 2
Manufacturer’s Placement Instructions…………………………… 3
Installed Slide’s Structural & Installation Checklist………………. 5
Intended Use Instructions………………………………………….. 5
Sitting Slide Position………………………………………………… 6
Do Not Slide Head First…………………………………………….. 7
Daily/Weekly Maintenance Of Slide………………………………... 7
Cleaning Instructions………………………………………………… 8
INTRODUCTION
S.R. Smith Swim Club IITM FunSlidesTM are manufactured for installation and use on
inground swimming pools only. S.R. Smith Swim Club IITM FunSlidesTM are NEVER to
be installed and used on aboveground pools, onground pools, houseboats, boat docks,
floating docks or platforms.
APPLICABLE STANDARDS AND CODES
1. All S.R. Smith Swim Club IITM FunSlidesTM are manufactured in accordance with
Consumer Products Safety Commission STANDARD FOR SWIMMING POOL SLIDES, 16
CFR Ch. 11 Part 1207 (latest edition).
2. Installer must comply with all applicable governmental and building codes.
ASSEMBLY AND INSTALLATION
All S.R. Smith Swim Club II FunSlidesTM are inspected prior to shipment from the
factory. Proper assembly and installation is mandatory. Improper assembly and
installation voids S.R. Smith’s warranty and may affect the safety of the user. S.R.
Smith cannot and does not guarantee customer’s concrete deck.
DRAWINGS
All drawings in this Slide Owner’s Manual (FIGURES I through O) are for illustration
purposes only and are NOT TO SCALE.
SUBSEQUENT OWNER’S
The Owner’s Manual must remain with the owner of the slide. If the owner changes, the
Owner’s Manual shall be brought to the attention of the new owner.
MANUFACTURER’S PLACEMENT INSTRUCTIONS
The Swim Club IITM FunSlideTM owner must confirm that the Manufacturer’s
Placement Instructions have been followed by the Installer.
1. The critical dimensions for placement of the slide are as shown in FIGURES I and J.
A. The slide exit runway surface shall not exceed twenty inches (20”) above the
water surface and not less than eight inches (8”) above the deck/coping surface.
(see Figure I)
B. The slide shall be positioned so that all water flowing off the runway exit drops
into the pool.
C. The minimum depth of water below the exit lip of the slide shall be three feet (3’)
and increases to four feet six inches (4’-6”) at Pt. A which is a distance of four
feet six inches (4’-6”) from the exit lip of the slide. (see Figure I)
D. A minimum depth of four feet six inches (4’-6”) shall be maintained at a distance
of nine feet (9’) along the extended centerline of the slide from Pt. A. (see
FIGURE I)
2. A minimum clearance area in front of the slide shall be
maintained away from the coping, another slide, a diving
board or a rope and float line. (see FIGURE L)
3
A. The minimum clearance distance on either side of the
extended centerline of the slide runway shall not be
less than three feet six inches (3’-6”) at a point no
less than two feet six inches (2’-6”) from the exit of
the slide and extending a distance of thirteen feet six
inches (13’-6”) in front of the slide. (see FIGURE J)
B. The minimum clearance area in front of a diving
board is a minimum distance of three feet six inches
(3’-6”) on either side of the board’s centerline. Pt.C
FIGURE J
FIGURE I
extends a minimum distance of “C” from the tip end of the board. The width
distance “W” on either side of Pt.C is given in CHART 1 and shown in FIGURE K.
CHART 1
BOARD MINIMUM CLEARANCE AREA
TYPE “C” DIMENSION “W” DIMENSION
I 14’-6” 5’-0”
II 14’-6” 6’-0”
III 16’-6” 6’-0”
IV 18’-6” 7’-6”
V 21’-0” 7’-6”
VI 18’-6” 9’-0”
VII 21’-0” 10’-0”
VIII 25’-0” 11’-0”
IX 31’-6” 12’-0”
Residential Pools are Types I-V. Public Pools are Types VI -IX
See ANSI/NSPI-5 2003 STANDARD FOR RESIDENTIAL
INGROUND SWIMMING POOLS Article 5.9 Drawings and
Diagrams of Type I-V Diving Equipment Pools or ANSI/NSPI-1
1991 STANDARD FOR PUBLIC SWIMMING POOLS Article
4.6 Minimum Dimensions for Diving Portion of Class B and C
Pools.
4
“C” DIMENSION FOR BOARD = AB + BC or L2 + L3
“W” DIMENSION FOR BOARD = WIDTH AT PT.C
C. The minimum clearance area of a slide or diving board shall not intersect any
coping or rope and
float line. (see
FIGURE L)
The minimum
clearance area
of a slide or
diving board
may intersect
each other
provided that
they are not
used
simultaneously.
FIGURE K
FIGURE L
5
INSTALLED SLIDES’ STRUCTURAL & INSTALLATION CHECKLIST
After installation and prior to the first use of the Swim Club IITM FunslideTM and
periodically thereafter the owner must:
1. Inspect the runway for visible cracks or tears.
2. Inspect the slide for sharp edges, protrusions, cracks or tears.
3. Inspect all attachment flanges for loose or corroded fasteners.
4. Inspect all ladder tread or step-attachment points for evidence of shear, bending
yield, or fatigue in the ladder steps, rails, or attachments means. Yield is
evidenced by crystallization or fine cracking of the ladder tread and/or surface.
5. Inspect the ladder handrails for rigidity and attachment. (Can they be pulled out
of their sockets?)
6. Measure the following dimensions and compare with the Manufacturer’s
Placement Instructions on pages 3 and 4.
• Measure the depth of water in front of the slide exit. (4-1/2’ min. depth 4-
1/2’ from exit end of slide.)
• Measure the height of the slide runway exit above the water. (20” max.)
• Measure the distance between the slide centerline and the edge of other
pool equipment.
7. Observe the position of the exit of the slide as shown in FIGURES J, K and L on
pages 3 and 4.
INTENDED USE INSTRUCTIONS
* * IMPORTANT * *
READ AND FOLLOW THE SIMPLE SAFETY RULES BELOW.
MAKE SURE THAT EVERYONE WHO USES THE SWIM CLUB IITM FUNSLIDETM
KNOWS AND FOLLOWS THESE RULES.
ENFORCE THESE RULES WITH ADULT SUPERVISION
Installed and used properly, the Swim Club IITM FunSlideTM will give the user many
hours of enjoyment. Like any other piece of equipment however, the Swim Club IITM
FunSlideTM can be misused in such a way as to cause the user injury, even serious and
crippling injury. As the owner of a Swim Club IITM FunSlideTM it is your responsibility to
do the following:
1. Only one person allowed on the slide at any given time.
2. Roughhousing or horseplay on the slide is strictly forbidden.
3. Do not use the slide as a diving platform. The slide is made for sliding only, not
diving.
4. Before sliding, always be sure that the water lubrication is turned on.
5. Familiarize yourself with the shape of the pool bottom and the water depth before
you slide. Use the correct slide configuration shown on the ladder when sliding.
6. Avoid sliding until all submerged obstacles, surface objects or other swimmers
are clear of the slider’s pathway.
7. Don’t slide at or through objects such as inner tubes, as they force the slider
deeper increasing the potential of a crippling injury.
8. Don’t drink alcoholic beverages and slide.
9. Don’t slide alone; use the buddy system.
10.The slide is a deep water slide and should be installed only according to the
instructions on pages 3 and 4 of this manual. Don’t allow children to use the
slide without adequate supervision. Users must be swimmers.
11.Take your time in preparing to slide. Move forward slowly and get yourself
positioned properly before starting the slide.
12.Handicapped persons should use caution and may require supervision.
13.Do not use the slide if any part of it becomes damaged, weakened, or broken.
Don’t take chances. Have the slide inspected and, if necessary, repaired by a
competent professional, who is familiar with acrylic water slides before using the
Swim Club II™water slide again. See INSTALLED SLIDES’ STRUCTURAL &
INSTALLATION CHECKLIST on page 5.
14.Individuals who exhibit frailty due to age should not use the slide.
15.People with history of back problems, heart conditions or fear of heights should
not use the slide.
16.People who weigh over 250 pounds should not use the slide.
17.Women who are pregnant should not use the slide.
18.Don’t use any other sliding technique, other than the following:
SITTING SLIDE POSITION
In sitting slides, face forward on the slide holding the legs and arms straight out with the
palms of your hands tilted upward. (see FIGURE M).
* * IMPORTANT * *
In order for a person to minimize the possibility of injury, HEAD FIRST SLIDES ARE
STRICTLY PROHIBITED. (see FIGURE N below). It is necessary that the user know
that the chief danger of this type of slide is serious spinal injury. Injuries to the spine
may result in temporary or permanent paralysis or even death. Research studies have
shown that you cannot rely on the water to slow you down sufficiently to avoid injury.
FIGURE M
6
As a Swim Club IITM FunSlideTM owner, it is your responsibility to explain the nature of
this danger to all persons who may use your Swim Club IITM FunSlideTM, since they may
not otherwise appreciate the dangers of performing head first slides.
DAILY/WEEKLY MAINTENANCE OF THE SWIM CLUB IITM FUNSLIDETM
DO NOT SLIDE HEAD FIRST
FIGURE N
1. When hosing down the deck, hose your Swim Club IITM FunSlideTM to wash away
any dust, dirt or other debris, which may have accumulated.
2. Be sure that water fittings are not leaking, and clean spray nozzles periodically to
permit water to be sprayed on the slide runway.
3. All stainless steel parts require periodic maintenance. Polishing with a cotton
cloth and a Windex-type product restores luster.
4. While cleaning stainless steel parts, check and see that all nuts and bolts are
tight and secure.
5. The
INTENDED USE LABELS shall be maintained on the ladder and the transom of
the slide entrance as indicated to the right. If they become faded or unreadable
they should be replaced. Additional labels are available from S.R. Smith upon
request. (see FIGURE O)
CORRECT
SITTING SLIDE
LOOKOUT FOR PEOPLE AND OBJECTS BELOW
ONLY ONE PERSON AT A TIME
CAUTION
WARNING
250 LBS. WEIGHT LIMIT
IN SEATED POSITION
SLIDE FEET & ARMS FIRST
FIGURE O
7
8
CLEANING INSTRUCTIONS
Use Nonabrasive soap and water when possible. In addition, you may safely use:
Windex® With Ammonia Formula 409 ® Fantastik ®
Spiffits Bath Scrubfree Tackle ®
Spic and Span ® Powder Calgon ® Bath Topjob ®
Clorox ® Bleach Glass Plus ® Tilex ®
Always read the label instructions on any cleaner carefully before applying it to a
Plexiglas ® DR ® acrylic surface.
AVOID HARSH CHEMICALS AND DISINFECTANTS. DO NOT USE:
Dow with Scrubbing Bubbles ® Lysol ® Disinfectant Ajax ® Cleanser
Windex ® With Vinegar White Cap ® Ajax ® Liquid
White Cap ® Soft Scrub ®

Other S.R.Smith Lighting Equipment manuals

S.R.Smith pLX-PL60 Quick start guide

S.R.Smith

S.R.Smith pLX-PL60 Quick start guide

S.R.Smith TURBOTWISTER Instruction manual

S.R.Smith

S.R.Smith TURBOTWISTER Instruction manual

S.R.Smith R Series User manual

S.R.Smith

S.R.Smith R Series User manual

S.R.Smith PT-6001 Power Tower User manual

S.R.Smith

S.R.Smith PT-6001 Power Tower User manual

S.R.Smith FRONTIER II User manual

S.R.Smith

S.R.Smith FRONTIER II User manual

S.R.Smith 6004 Series User manual

S.R.Smith

S.R.Smith 6004 Series User manual

S.R.Smith PAL Series User manual

S.R.Smith

S.R.Smith PAL Series User manual

S.R.Smith rogue2 User manual

S.R.Smith

S.R.Smith rogue2 User manual

S.R.Smith ROGUE GRAND RAPIDS User manual

S.R.Smith

S.R.Smith ROGUE GRAND RAPIDS User manual

S.R.Smith AQUABLAST User manual

S.R.Smith

S.R.Smith AQUABLAST User manual

S.R.Smith multiLift 2 Guide

S.R.Smith

S.R.Smith multiLift 2 Guide

S.R.Smith TYPHOON Instruction manual

S.R.Smith

S.R.Smith TYPHOON Instruction manual

S.R.Smith VORTEX Instruction manual

S.R.Smith

S.R.Smith VORTEX Instruction manual

S.R.Smith rogue2 User manual

S.R.Smith

S.R.Smith rogue2 User manual

S.R.Smith heliX2 Instruction manual

S.R.Smith

S.R.Smith heliX2 Instruction manual

S.R.Smith Star Series User manual

S.R.Smith

S.R.Smith Star Series User manual

S.R.Smith SRS-TX-30 User manual

S.R.Smith

S.R.Smith SRS-TX-30 User manual

S.R.Smith Power Tower PT-6002 User manual

S.R.Smith

S.R.Smith Power Tower PT-6002 User manual

S.R.Smith SlideAway Installation guide

S.R.Smith

S.R.Smith SlideAway Installation guide

S.R.Smith LM10 User manual

S.R.Smith

S.R.Smith LM10 User manual

S.R.Smith CYCLONE Instruction manual

S.R.Smith

S.R.Smith CYCLONE Instruction manual

S.R.Smith EDGE 6 Programming manual

S.R.Smith

S.R.Smith EDGE 6 Programming manual

S.R.Smith BYOS 2 Programming manual

S.R.Smith

S.R.Smith BYOS 2 Programming manual

Popular Lighting Equipment manuals by other brands

Martin FiberSource QFX 150 user manual

Martin

Martin FiberSource QFX 150 user manual

Elation PROTEUS RAYZOR BLADE L user manual

Elation

Elation PROTEUS RAYZOR BLADE L user manual

JONATHAN Y JYL1044A Product Assembly

JONATHAN Y

JONATHAN Y JYL1044A Product Assembly

Robus RVR1840-01 instruction manual

Robus

Robus RVR1840-01 instruction manual

EuroLite LED Techno Strobe 250 EC user manual

EuroLite

EuroLite LED Techno Strobe 250 EC user manual

Stoane Lighting BPX Installation and maintenance instructions

Stoane Lighting

Stoane Lighting BPX Installation and maintenance instructions

Portfolio MAP7 installation instructions

Portfolio

Portfolio MAP7 installation instructions

FLEXSTAR 240W DIMMABLE instruction manual

FLEXSTAR

FLEXSTAR 240W DIMMABLE instruction manual

Rebel ZAR0544 instructions

Rebel

Rebel ZAR0544 instructions

thomann Stairville Outdoor Stage PAR user manual

thomann

thomann Stairville Outdoor Stage PAR user manual

Oliver Bonas LUCE FLOOR LIGHT quick start guide

Oliver Bonas

Oliver Bonas LUCE FLOOR LIGHT quick start guide

Olafus 3-LBG80KB quick start guide

Olafus

Olafus 3-LBG80KB quick start guide

Daniamant SL-400 Installation and maintenance instructions

Daniamant

Daniamant SL-400 Installation and maintenance instructions

Conrad 57 19 00 operating instructions

Conrad

Conrad 57 19 00 operating instructions

elektraLite Theatrical White Dazer user manual

elektraLite

elektraLite Theatrical White Dazer user manual

LUMEN CENTER ITALIA ICEGLOBE 02G quick start guide

LUMEN CENTER ITALIA

LUMEN CENTER ITALIA ICEGLOBE 02G quick start guide

Lightronics FXLD548C4O owner's manual

Lightronics

Lightronics FXLD548C4O owner's manual

Generac Power Systems Link Tower 4x185W LED owner's manual

Generac Power Systems

Generac Power Systems Link Tower 4x185W LED owner's manual

manuals.online logo
manuals.online logoBrands
  • About & Mission
  • Contact us
  • Privacy Policy
  • Terms and Conditions

Copyright 2025 Manuals.Online. All Rights Reserved.