8 MXD-300 SATEL
not received, select a different mounting location and repeat the test. Sometimes, it is
sufficient to shift the detector ten or twenty centimeters.
8. Remove the front cover.
9. If detectors or flood probe are to be connected to the input terminals, make a hole in the
enclosure base, run wires through the hole and secure them to the terminals.
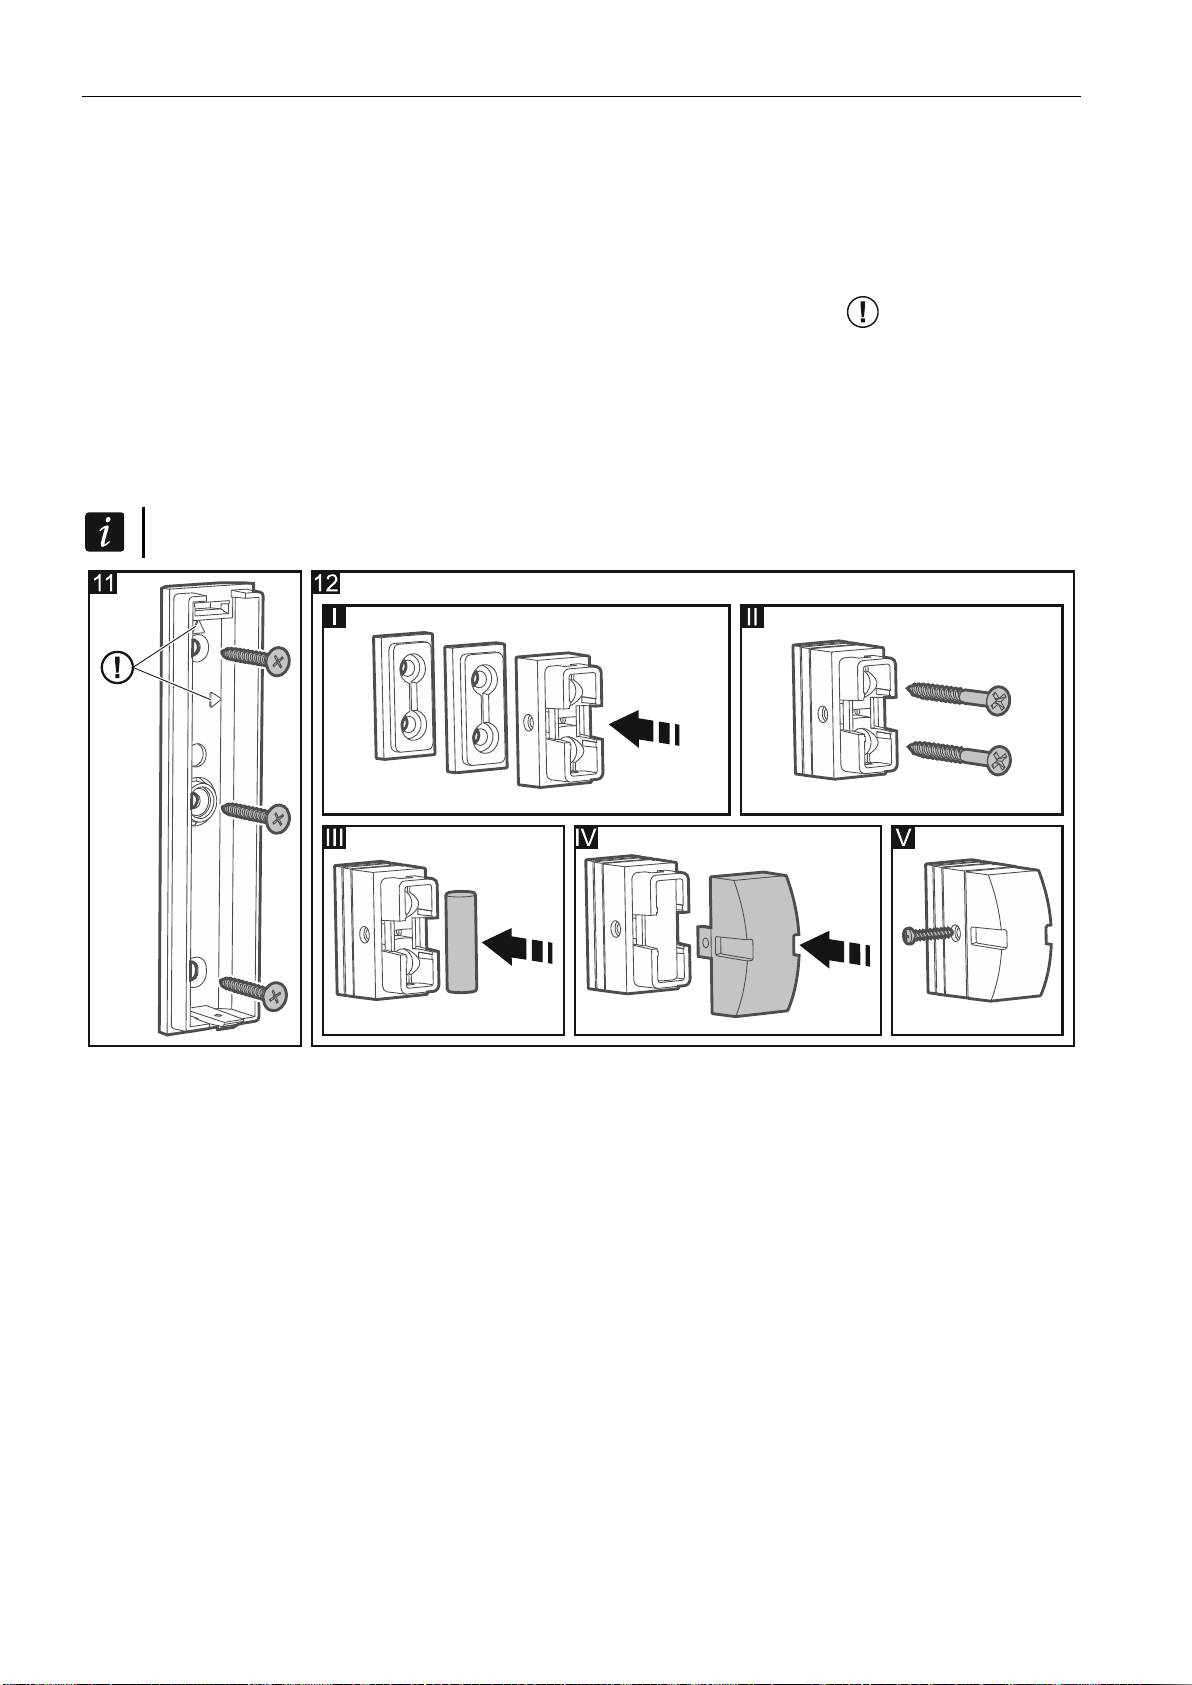
10.Use wall plugs (anchors) and screws to secure the enclosure base to the mounting
surface (Fig. 11 –location of the reed switches is marked with the symbol). The wall
plugs delivered with the device are intended for concrete, brick, etc. For other types of
surface (drywall, styrofoam), use the appropriately selected wall plugs.
11.In the case of the magnetic contact, secure the magnet (Fig. 12). taking into account the
maximum permissible distance from the reed switch (Fig. 13 and 14). The distance shown
applies to the magnet located at the height of the reed switch. Location of the reed switch
in the enclosure is shown in Fig. 10.
To make the hole for flush magnet, use the ø9 mm drill bit.
12.Press and release the tamper switch to start the test mode and close the detector
enclosure.
13.Depending on the detector type and configuration, make sure that the LED comes on:
Magnetic contact:
–after moving the magnet away (opening the window or door),
–after violating the detector connected to the additional input M.
Magnetic contact with input for roller shutter detector:
–after moving the magnet away (opening the window or door),
–after violating the detector connected to the additional input M,
–after raising / lowering the roller shutters supervised by the roller shutter detector.
Shock detector –after impact against the surface protected by the detector.
Shock detector and magnetic contact:
–after moving the magnet away (opening the window or door),
–after impact against the surface protected by the detector.
Water flood detector –after submerging the flood probe contacts in water.