manuals.online logo
Brands
  1. Home
  2. •
  3. Brands
  4. •
  5. Sauder
  6. •
  7. Indoor Furnishing
  8. •
  9. Sauder Briarbrook 430070 User manual

Sauder Briarbrook 430070 User manual

sauder.com
NOTE: THIS INSTRUCTION
BOOKLET CONTAINS IMPORTANT
SAFETY INFORMATION.
PLEASE READ AND KEEP FOR
FUTURE REFERENCE.
sauder.com
CONTACT US FIRST
BEFORE MAKING ANY RETURNS TO THE STORE.
sauder.com
CONTACT US FIRST
BEFORE MAKING ANY RETURNS TO THE RETAILER.
Visit sauder.com/service to order replacement parts, view video assembly tips, or chat with a live rep.
Prefer the phone? Give us a ring at 1-800-445-1527.
Customer Service is available Monday-Friday - 9 a.m. to 5:30 p.m. EST (except holidays)
Sauder.com
Share your journey!
English pg 1-28
Français pg 29-32
Español pg 33-36
Lot # 573631 10/26/21
Purchased: __________________
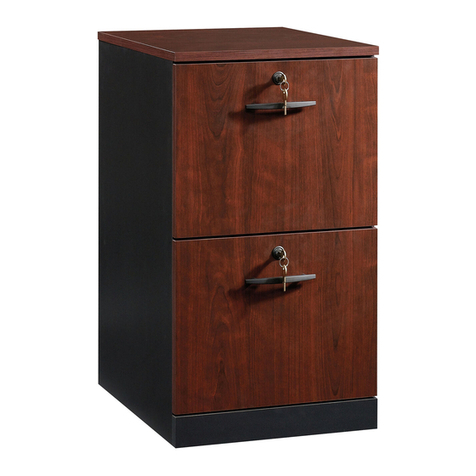
Lateral File
Briarbrook Collection | Model 430070
Get all organized
and stu.
Part Identification
Hardware Identification
Hardware Usage Guide
Assembly Steps
Français
Español
Safety
Warranty
No. 2 Phillips Screwdriver
Tip Shown Actual Size
Table of Contents Assembly Tools Required
3
4
5
6-28
29-32
33-36
37-38
39
Page 2 www.sauder.com/service 430070
Part Identification
åWhile not all parts are labeled, some of the parts will have a label or an inked letter on the edge
to help distinguish similar parts from each other. Use this part identification to help identify similar parts.
Now you know
our ABCs.
A TOP (1)
B BOTTOM (1)
C LEFT END (1)
D RIGHT END (1)
E LEFT BACK (1)
F RIGHT BACK (1)
G BALLAST (2)
H UPPER DRAWER FRONT (1)
J LEFT DRAWER SIDE (2)
K RIGHT DRAWER SIDE (2)
L DRAWER BACK (2)
M DRAWER BOX FRONT (2)
N DRAWER BRACE (2)
P DRAWER BOTTOM (2)
Q LOWER DRAWER FRONT (1)
R LEFT FRAME (1)
S RIGHT FRAME (1)
A
B
C
D
E
F
G
G
H
J
K
L
M
N
P
J
K
L
M
N
P
Q
R
S
Page 3www.sauder.com/service430070
Hardware Identification
åScrews are shown actual size. You may receive extra hardware with your unit.
1/2" HEX HEAD SCREW - 8
25
SILVER 1/2" FLAT HEAD SCREW - 9
24 BLACK 1/2" FLAT HEAD SCREW - 28
26
1-9/16" PAN HEAD SCREW - 2
18 1-3/16" PAN HEAD SCREW - 4
19
HIDDEN
CAM - 16
3
1EXTENSION RAIL - 4 2EXTENSION SLIDE - 4 CAM
SCREW - 16
4
7/8" PAN HEAD SCREW - 12
21
1-3/16" FLAT HEAD SCREW - 16
20
1/2" PAN HEAD SCREW - 4
23
13/16" FLAT HEAD SCREW - 6
22
CATCH - 1
9
L-WRENCH - 1
5PAD CARD - 1
8
6INTERLOCK
MECHANISM - 1 7DRAWER
ACTUATOR - 2
LARGE WOOD
DOWEL - 18
15
SMALL WOOD
DOWEL - 20
14 16 HOLE
PLUG - 4 17 LOCK - 1
12 SHORT FILE GLIDE - 4 13 LONG FILE GLIDE - 4
PULL - 2
10 11 FILE HANGER - 2
Page 4 www.sauder.com/service 430070
Hardware Usage Guide
HOW TO USE A HIDDEN CAM & CAM SCREW OR CAM DOWEL
NOTE: Various CAM SCREWS or a CAM DOWEL may be used.
Cam Screws Cam Dowel
Turn the CAM SCREW or
gently tap the CAM DOWEL
until the shoulder is against
the surface of the part.
1.
Hidden Cam
Arrow
Push a HIDDEN CAM into
the part. The arrow in the
HIDDEN CAM must point
toward the hole in the
edge of the board.
Hole
2.
3.
1
2
Insert the CAM SCREW or CAM DOWEL into the
HIDDEN CAM. Tighten the HIDDEN CAM.
Page 5www.sauder.com/service430070
Step 1
å Assemble your unit on a carpeted floor or on the empty
carton to avoid scratching your unit or the floor.
å Push four HIDDEN CAMS (3) into the BOTTOM (B).
Look for this icon. It means a video assembly tip is
available at www.sauder.com/service/tips
Find the numbered video or scan the QR code.
B
1
3
Arrow
Arrow
3
Page 6 www.sauder.com/service 430070
å Insert two LARGE WOOD DOWELS (15) into the BACK (F).
å Push the BACK (E) onto the WOOD DOWELS (15) in
the BACK (F).
å Push four HIDDEN CAMS (3) into the BACKS (E and F).
Step 2
E
F
3
Arrow 3
Arrow
Arrow
3
15
Page 7www.sauder.com/service430070
å Insert a LARGE WOOD DOWEL (15) into each BACK (E and F).
å Fasten the BOTTOM (B) to the BACKS (E and F). Use two
1-9/16" PAN HEAD SCREWS (18).
å NOTE: Be sure the LARGE WOOD DOWELS in the BACKS
insert into the BOTTOM.
Step 3
E
F
B
Do not stand the unit upright without the
BACK fastened. The unit may collapse.
Caution
1-9/16" PAN HEAD SCREW
(2 used in this step)
18
15
Page 8 www.sauder.com/service 430070
Step 4
C
å Turn three CAM SCREWS (4) into the LEFT END (C).
å Push two HIDDEN CAMS (3) into the LEFT END (C).
å Fasten the INTERLOCK MECHANISM (6) to the LEFT END (C).
Use three SILVER 1/2" FLAT HEAD SCREWS (24).
4
1
Arrow
36
SILVER 1/2" FLAT HEAD SCREW
(3 used in this step)
24
Page 9www.sauder.com/service430070
Just think. The sooner
you do this, the sooner
you do something else.
Step 5
D
å Turn three CAM SCREWS (4) into the RIGHT END (D).
å Push two HIDDEN CAMS (3) into the RIGHT END (D).
4
3
Arrow
1
Page 10 www.sauder.com/service 430070
Step 6
D
C
å Separate the EXTENSION SLIDES (2) from the EXTENSION RAILS (1) as shown in the upper diagram below. Be
prepared, the parts are greasy.
å Fasten the EXTENSION RAILS (1) to the ENDS (C and D). Use sixteen BLACK 1/2" FLAT HEAD SCREWS (26).
å NOTE: For each EXTENSION RAIL, turn a SCREW into the hole shown in the enlarged diagram. Then, slide the inner cartridge
of the EXTENSION RAIL in to find the other holes that line up with the holes in the ENDS. Turn a SCREW into these holes.
å NOTE: The EXTENSION SLIDES will be used later for the DRAWERS.
Push the black lever and pull the
SLIDE from the RAIL.
Use these holes.
1
1
1
1
1
2
Open end
Open end
Page 11www.sauder.com/service430070
BLACK 1/2" FLAT HEAD SCREW
(16 used in this step)
26
å Insert four LARGE WOOD DOWELS (15) into the
RIGHT END (D).
å Fasten the RIGHT END (D) to the BOTTOM (B) and
RIGHT BACK (F). Tighten three HIDDEN CAMS.
å NOTE: Be sure the LARGE WOOD DOWELS in the RIGHT
END insert into the BOTTOM and BACK.
Step 7
Do not stand the unit upright without the
BACK fastened. The unit may collapse.
Caution
D
B
F
15
15
1
Page 12 www.sauder.com/service 430070
å Insert four LARGE WOOD DOWELS (15) into the
LEFT END (C).
å Fasten the LEFT END (C) to the BOTTOM (B) and
LEFT BACK (E). Tighten three HIDDEN CAMS
å NOTE: Be sure the LARGE WOOD DOWELS in the LEFT
END insert into the BOTTOM and BACK.
Step 8
C
B
E
D
15
15
1
Page 13www.sauder.com/service430070
Step 9
A
å Turn six CAM SCREWS (4) into the TOP (A).
å Fasten the CATCH (9) to the TOP (A). Use two 13/16"
FLAT HEAD SCREWS (22).
4
13/16" FLAT HEAD SCREW
(2 used in this step)
22
9
Page 14 www.sauder.com/service 430070
1
å Insert six LARGE WOOD DOWELS (15) into the TOP (A).
å Fasten the TOP (A) to the ENDS (C and D). Tighten six
HIDDEN CAMS.
å NOTE: Be sure the LARGE WOOD DOWELS in the TOP
insert into the ENDS.
Step 10
A
C
D
15
15
The CATCH must be here.
Page 15www.sauder.com/service430070
1
å Fasten the BALLASTS (G) to the BACKS (E and F). Use
four 1-3/16" PAN HEAD SCREWS (19).
Step 11
G
G
F
E
1-3/16" PAN HEAD SCREW
(4 used in this step)
19
Page 16 www.sauder.com/service 430070
Step 12
R
S
C
D
å Fasten the LEFT FRAME (R) to the LEFT END (C).
Tighten four 1/2" HEX HEAD SCREWS (25) using
the L-WRENCH (5).
å Fasten the RIGHT FRAME (S) to the RIGHT END (D).
Tighten four 1/2" HEX HEAD SCREWS (25) using
the L-WRENCH (5).
å NOTE: You should start each SCREW a few turns
before completely tightening any of them.
å Peel the PADS from a PAD CARD (8) and apply
them to the bottom of the FRAMES (R and S).
5
1/2" HEX HEAD SCREW
(8 used in this step)
25
25
Page 17www.sauder.com/service430070
Now might be a
good time to refresh
your drink.
8
Step 13
L
L
N
N
4
Arrow
3
3
Arrow
å Turn two CAM SCREWS (4) into the DRAWER BACKS (L).
å Push four HIDDEN CAMS (3) into the DRAWER BRACES (N).
Page 18 www.sauder.com/service 430070
1
å Insert two SMALL WOOD DOWELS (14) into a
DRAWER BACK (L) and two SMALL WOOD DOWELS (14)
into a DRAWER BOX FRONT (M).
å Fasten a RIGHT DRAWER SIDE (K) and a LEFT DRAWER
SIDE (J) to the DRAWER BACK (L) and the DRAWER BOX
FRONT (M). Use eight 1-3/16" FLAT HEAD SCREWS (20).
å NOTE: Be sure the SMALL WOOD DOWELS in the
DRAWER BACK and DRAWER BOX FRONT insert into the
DRAWER SIDES.
å Repeat this step for the remaining drawer.
Step 14
J
K
L
M
14
14
1-3/16" FLAT HEAD SCREW
(8 used in this step)
20
Page 19www.sauder.com/service430070
Groove
Groove
Groove
20
å Turn a drawer box onto its DRAWER BACK (L).
å Slide a DRAWER BOTTOM (P) into the grooves of the DRAWER SIDES (J and K) and DRAWER BACK (L).
å Insert a SMALL WOOD DOWEL (14) into the DRAWER BACK (L).
å Fasten a DRAWER BRACE (N) to the DRAWER BACK (L). Tighten the HIDDEN CAM.
å NOTE: Be sure the WOOD DOWEL in the DRAWER BACK inserts into the DRAWER BRACE.
å Repeat this step for the remaining drawer.
Step 15
J
J
K
K
L
L
M
N
P
14
Groove
Unfinished surface
Page 20 www.sauder.com/service 430070
1

Other Sauder Indoor Furnishing manuals

Sauder Trestle 424128 User manual

Sauder

Sauder Trestle 424128 User manual

Sauder 409064 User manual

Sauder

Sauder 409064 User manual

Sauder Library 412177 User manual

Sauder

Sauder Library 412177 User manual

Sauder Portage Park 427478 User manual

Sauder

Sauder Portage Park 427478 User manual

Sauder 409937 User manual

Sauder

Sauder 409937 User manual

Sauder Palladia Lateral File User manual

Sauder

Sauder Palladia Lateral File User manual

Sauder Carson Forge 412921 User manual

Sauder

Sauder Carson Forge 412921 User manual

Sauder Cannery Bridge 429512 User manual

Sauder

Sauder Cannery Bridge 429512 User manual

Sauder Hammond 431249 User manual

Sauder

Sauder Hammond 431249 User manual

Sauder Boulevard Cafe 422420 User manual

Sauder

Sauder Boulevard Cafe 422420 User manual

Sauder Costa 428724 User manual

Sauder

Sauder Costa 428724 User manual

Sauder Adept Storage 418141 User manual

Sauder

Sauder Adept Storage 418141 User manual

Sauder Worksense BERGEN CIRCLE 426459 User manual

Sauder

Sauder Worksense BERGEN CIRCLE 426459 User manual

Sauder Hudson Court 425833 User manual

Sauder

Sauder Hudson Court 425833 User manual

Sauder 424273 User manual

Sauder

Sauder 424273 User manual

Sauder Palladia 422002 User manual

Sauder

Sauder Palladia 422002 User manual

Sauder 426930 User manual

Sauder

Sauder 426930 User manual

Sauder Palladia 413998 User manual

Sauder

Sauder Palladia 413998 User manual

Sauder Credenza 420723 User manual

Sauder

Sauder Credenza 420723 User manual

Sauder Entertainment Credenza User manual

Sauder

Sauder Entertainment Credenza User manual

Sauder 418735 User manual

Sauder

Sauder 418735 User manual

Sauder 413678 User manual

Sauder

Sauder 413678 User manual

Sauder North Avenue 420035 User manual

Sauder

Sauder North Avenue 420035 User manual

Sauder 419409 User manual

Sauder

Sauder 419409 User manual

Popular Indoor Furnishing manuals by other brands

National Public Seating SLT3-2448P Assembly instructions

National Public Seating

National Public Seating SLT3-2448P Assembly instructions

pureHeat Table owner's manual

pureHeat

pureHeat Table owner's manual

Pfister UFFICIO 90686 manual

Pfister

Pfister UFFICIO 90686 manual

Ameriwood HOME 5997333WCOM manual

Ameriwood HOME

Ameriwood HOME 5997333WCOM manual

Dorel Home Products DA6297 Assembly

Dorel Home Products

Dorel Home Products DA6297 Assembly

Serta NILES Assembly instructions

Serta

Serta NILES Assembly instructions

VITRA OnTable Electrification Assembly instructions

VITRA

VITRA OnTable Electrification Assembly instructions

Nienkamper Metronome installation guide

Nienkamper

Nienkamper Metronome installation guide

Coaster Eastern 300260KE B1 Assembly instructions

Coaster

Coaster Eastern 300260KE B1 Assembly instructions

HULALA HOME SBRB0947 Assembly instructions

HULALA HOME

HULALA HOME SBRB0947 Assembly instructions

Safavieh Furniture Ellicott ACC4604A manual

Safavieh Furniture

Safavieh Furniture Ellicott ACC4604A manual

Gioteck RC-1 manual

Gioteck

Gioteck RC-1 manual

Next MALVERN 76992 Assembly instructions

Next

Next MALVERN 76992 Assembly instructions

NextGen ROOM DIVIDER Assembly manual

NextGen

NextGen ROOM DIVIDER Assembly manual

TUHOME Furniture ST. CLAIRE Assembly instructions

TUHOME Furniture

TUHOME Furniture ST. CLAIRE Assembly instructions

HA-CO HAZ2002-0012-2 installation guide

HA-CO

HA-CO HAZ2002-0012-2 installation guide

CONFORAMA FLAMINGO Assembling instructions

CONFORAMA

CONFORAMA FLAMINGO Assembling instructions

Furinno FM6012 quick guide

Furinno

Furinno FM6012 quick guide

manuals.online logo
manuals.online logoBrands
  • About & Mission
  • Contact us
  • Privacy Policy
  • Terms and Conditions

Copyright 2025 Manuals.Online. All Rights Reserved.