manuals.online logo
Brands
  1. Home
  2. •
  3. Brands
  4. •
  5. Sauder
  6. •
  7. Indoor Furnishing
  8. •
  9. Sauder Tremont Row 427970 User manual

Sauder Tremont Row 427970 User manual

sauder.com
NOTE: THIS INSTRUCTION
BOOKLET CONTAINS IMPORTANT
SAFETY INFORMATION.
PLEASE READ AND KEEP FOR
FUTURE REFERENCE.
sauder.com
CONTACT US FIRST
BEFORE MAKING ANY RETURNS TO THE STORE.
sauder.com
CONTACT US FIRST
BEFORE MAKING ANY RETURNS TO THE RETAILER.
Visit sauder.com/service to order replacement parts, view video assembly tips, or chat with a live rep.
Prefer the phone? Give us a ring at 1-800-445-1527.
Customer Service is available Monday-Friday - 9 a.m. to 5:30 p.m. EST (except holidays)
Sauder.com
Share your journey!
Enlish p 1-25
Français p 26-28
Español p 29-31
Lot # 553605 09/22/20
Purchased: __________________
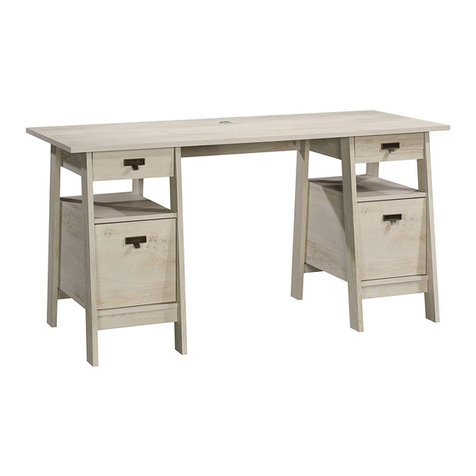
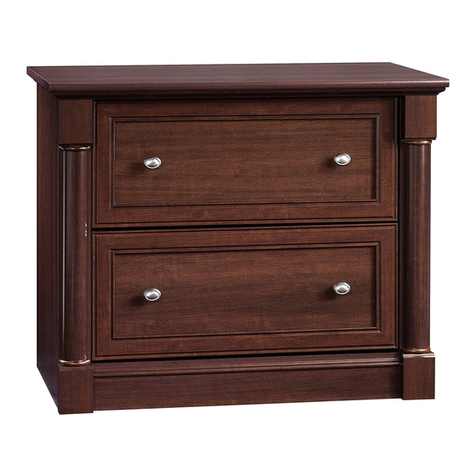
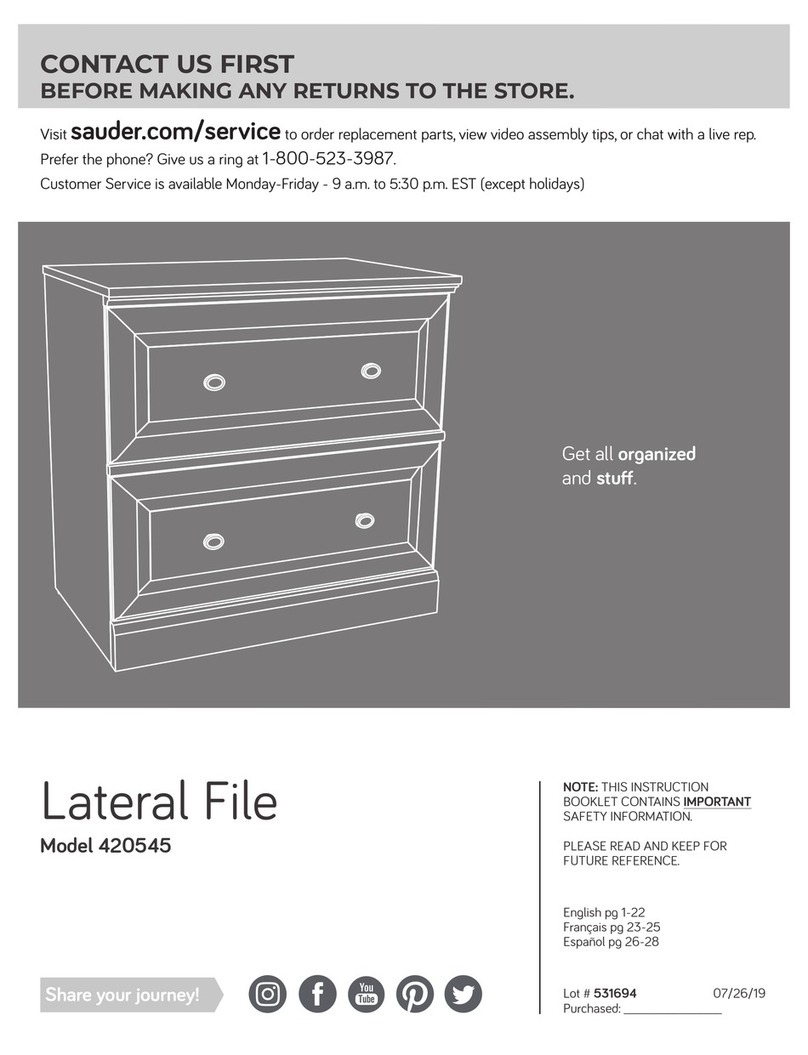
Lateral File
Tremont Row Collection | Model 427970
Congratulations. You
are now an adult.
Part Identification
Hardware Identification
Hardware Usage Guide
Assembly Steps
Français
Español
Safety
Warranty
Hammer
Not actual size
No. 2 Phillips Screwdriver
Tip Shown Actual Size
Table of Contents Assembly Tools Required
3
4
5
6-25
26-28
29-31
32-34
35
Pae 2 www.sauder.com/service 427970
Part Identification
åWhile not all parts are labeled, some of the parts will have a label or an inked letter on the edge
to help distinguish similar parts from each other. Use this part identification to help identify similar parts.
Now you know
our ABCs.
A TOP (1)
B BOTTOM (1)
C LEFT END (1)
D RIGHT END (1)
E BRACE (1)
F BACK (2)
G DRAWER BACK (2)
H DRAWER BOX FRONT (2)
J RIGHT DRAWER SIDE (2)
K DRAWER FRONT (2)
L DRAWER BOTTOM (2)
N DRAWER BRACE (2)
O LEFT DRAWER SIDE (2)
P FOOT (2)
Q FRONT/BACK BRACE (2)
R MIDDLE BOTTOM BRACE (1)
S TOP BRACE (1)
A
B
C
D
E
F
G
H
J
K
L
N
O
P
Q
R
S
F
P
Q
Pae 3www.sauder.com/service427970
Hardware Identification
åScrews are shown actual size. You may receive extra hardware with your unit.
(EXTENSION SET SHOWN SEPARATED)
EXTENSION RAIL - 4
1EXTENSION SLIDE - 4
2HIDDEN CAM - 14
3CAM SCREW - 14
4
WOOD DOWEL - 32
56FILE
HANGER  2 PULL - 2
87 SHORT FILE
GLIDE - 4
L-WRENCH - 1
910 INTERLOCK MECHANISM - 1 DRAWER
ACTUATOR - 2
11 12 LONG FILE
GLIDE - 4
1-9/16" FLAT HEAD SCREW - 4
13 1-1/4" MACHINE SCREW - 4
14
1-3/16" FLAT HEAD SCREW - 16
15 16 1" HEX HEAD SCREW - 10
7/8" PAN HEAD SCREW - 12
17 1/2" PAN HEAD SCREW - 9
18
19 1/2" HEX HEAD SCREW - 4 3/8" PAN HEAD SCREW - 28
20
Pae 4 www.sauder.com/service 427970
Hardware Usage Guide
HOW TO USE A HIDDEN CAM & CAM SCREW OR CAM DOWEL
NOTE: Various CAM SCREWS or a CAM DOWEL may be used.
Cam Screws Cam Dowel
Turn the CAM SCREW or
gently tap the CAM DOWEL
until the shoulder is against
the surface of the part.
1.
Hidden Cam
Arrow
Push a HIDDEN CAM into
the part. The arrow in the
HIDDEN CAM must point
toward the hole in the
edge of the board.
Hole
2.
3.
1
2
Insert the CAM SCREW or CAM DOWEL into the
HIDDEN CAM. Tighten the HIDDEN CAM.
Pae 5www.sauder.com/service427970
Step 1 Look for this icon. It means a video assembly tip is
available at www.sauder.com/service/tips
Find the numbered video or scan the QR code.
å Assemble your unit on a carpeted floor or on the empty
carton to avoid scratchin your unit or the floor.
å Push four HIDDEN CAMS (3) into the ENDS (C and D).
å Turn six CAM SCREWS (4) into the ENDS (C and D).
4
1
C
D
3
Arrow
Arrow
3
Pae 6 www.sauder.com/service 427970
Some assembly
(and snacks) required.
å Fasten the INTERLOCK MECHANISM (10) to the LEFT END (C). Use
three BLACK 1/2" PAN HEAD SCREWS (18).
Step 2
C
10
1/2" PAN HEAD SCREW
(3 used in this step)
18
Pae 7www.sauder.com/service427970
å Separate the EXTENSION SLIDES (2) from the EXTENSION RAILS (1) as shown in
the upper diaram below. Be prepared, the parts are reasy.
å Fasten the EXTENSION RAILS (1) to the ENDS (C and D). Use sixteen 3/8" PAN
HEAD SCREWS (20) throuh the holes shown in the enlared diaram.
å NOTE: For each EXTENSION RAIL, turn a SCREW into the hole shown in the
enlared diaram. Then, slide the inner cartride of the EXTENSION RAIL in to find
the other hole that lines up with the hole in the END. Turn a SCREW into this hole.
å NOTE: The EXTENSION SLIDES will be used later for the DRAWERS.
Step 3
C
D
Open end
Open end
1
1
1
1
7
1
2
Open end
Push the black lever in and pull the SLIDE from the RAIL.
3/8" PAN HEAD SCREW
(16 used in this step)
20
Pae 8 www.sauder.com/service 427970
å Push six HIDDEN CAMS (3) into the BRACE (E),
and BACKS (F).
å Insert two WOOD DOWELS (5) into one of the BACKS (F).
å Push the BACKS (F) toether.
å NOTE: Be sure the WOOD DOWELS in the BACK insert
into the other BACK.
Step 4
E
F
F
1
3
Arrow
Arrow
3
5
Pae 9www.sauder.com/service427970
å Insert six WOOD DOWELS (5) into the ENDS (C and D).
å Fasten the ENDS (C and D) to the BRACE (E) and BACKS (F).
Tihten six HIDDEN CAMS.
å NOTE: Be sure the WOOD DOWELS in the ENDS insert into
the BRACE and BACKS.
Step 5
C
D
E
F
F
Surface with
HIDDEN CAMS
Surface with
HIDDEN CAMS
Surface with HIDDEN CAMS
Surface without HIDDEN CAMS
1
Surface with
HIDDEN CAMS
5
(6 used)
Pae 10 www.sauder.com/service 427970
å Turn four CAM SCREWS (4) into the TOP (A).
Step 6
A
4
1
Pae 11www.sauder.com/service427970
å Insert two WOOD DOWELS (5) into the TOP (A).
å Fasten the TOP (A) to the ENDS (C and D). Tihten four
HIDDEN CAMS.
å NOTE: Be sure the WOOD DOWELS in the TOP insert
into the ENDS.
Step 7
A
C
D
5
Surface with CAM SCREWS
1
Pae 12 www.sauder.com/service 427970
å Insert two WOOD DOWELS (5) into the BOTTOM (B).
å Fasten the BOTTOM (B) to the ENDS (C and D). Use four
1-9/16" FLAT HEAD SCREWS (13).
å NOTE: Be sure the WOOD DOWELS in the BOTTOM
insert into the ENDS.
Step 8
C
D
B
1-9/16" FLAT HEAD SCREW
(4 used in this step)
13
5
(2 used)
Surface with more holes
Pae 13www.sauder.com/service427970
å Fasten the FEET (P) to the BRACES (Q and R). Tihten six
1" HEX HEAD SCREWS (16) usin the L-WRENCH (9).
å NOTE: You should start each SCREW a few turns before
completely tihtenin any of them.
Step 9
P
Q
R
P
Q
91" HEX HEAD SCREW
(6 used in this step)
16
16
Pae 14 www.sauder.com/service 427970
å Fasten the FRONT/BACK BRACES (Q) to the BOTTOM (B). Tihten four 1" HEX HEAD SCREWS (16) usin
the L-WRENCH (9).
å NOTE: You should start each SCREW a few turns before completely tihtenin any of them.
å Fasten the TOP BRACE (S) to the TOP (A) and ENDS (C and D). Tihten four 1/2" HEX HEAD SCREWS (19)
usin the L-WRENCH (9).
å NOTE: You should start each SCREW a few turns before completely tihtenin any of them.
Step 10
A
B
S
Q
Q
1" HEX HEAD SCREW
(4 used in this step)
16
9
1/2" HEX HEAD SCREW
(4 used in this step)
19
19
C
D
Pae 15www.sauder.com/service427970
Step 11
å Push two HIDDEN CAMS (3) into the DRAWER BRACE (N).
å Turn two CAM SCREWS (4) into the DRAWER BACK (G) and DRAWER FRONT (K).
å Repeat this step for the remainin DRAWER BACK (G), DRAWER FRONT (K), and
DRAWER BRACE (N).
G
K
N
1
Arrow
3
3
Arrow (4 used)
4
(4 used)
Pae 16 www.sauder.com/service 427970
Step 12
With the palm of your hand,
tap the DRAWER BOTTOM
down into the roove.
å Insert four WOOD DOWELS (5) into the
DRAWER SIDES (J and O).
å NOTE: Be sure the WOOD DOWELS in the DRAWER SIDES
insert into the DRAWER BACK and DRAWER BOX FRONT.
å Fasten the DRAWER SIDES (J and O) to the DRAWER
BACK (G) and DRAWER BOX FRONT (H). Use eiht 1-3/16"
FLAT HEAD SCREWS (15).
å Slide a DRAWER BOTTOM (L) into the rooves
in the DRAWER SIDES (J and O) and
DRAWER BACK (G).
1 2
3
GH
J
O
Unfinished ede
5
(8 used)
1-3/16" FLAT HEAD SCREW
(16 used in this step)
15
G
J
O
L
å Flip the DRAWER onto into its bottom edes.
å Push the FILE GLIDES (7 and 12) onto the DRAWER BACK (G), DRAWER BOX FRONT (H),
and DRAWER SIDES (J and O).
å Repeat this step for the remainin drawer.
G
H
J
O
7
7
12
12
Groove
Pae 17www.sauder.com/service427970
å Carefully flip your drawer onto the DRAWER BACK (G).
å Insert five WOOD DOWELS (5) into the DRAWER BACK (G) and DRAWER SIDES (J and O).
å Fasten the DRAWER BRACE (N) to the DRAWER BACK (G). Tihten a HIDDEN CAM.
å NOTE: Be sure the WOOD DOWELS in the DRAWER BACK insert into the DRAWER BRACE.
å Insert a WOOD DOWEL (5) into the DRAWER BRACE (N) and DRAWER SIDES (J and O).
å Fasten the DRAWER FRONT (K) to the DRAWER SIDES (J and O) and DRAWER BRACE (N). Tihten a
HIDDEN CAM.
å NOTE: Be sure the WOOD DOWELS in the DRAWER BRACE and DRAWER SIDES insert into the
DRAWER FRONT.
å Repeat this step for the remainin drawer.
Step 13
Be sure the
DRAWER
BOTTOM inserts
into the DRAWER
BACK roove.
J
O
N
K
G
L
5
1
Surface with
HIDDEN CAMS
(12 used)
Pae 18 www.sauder.com/service 427970
å Carefully flip your drawer onto the DRAWER FRONT (K).
å Fasten the DRAWER FRONT (K) to the DRAWER BOX
FRONT (H). Use six 7/8" PAN HEAD SCREWS (17).
å Repeat this step for the remainin drawer.
Step 14
H
K
7/8" PAN HEAD SCREW
(12 used in this step)
17
Pae 19www.sauder.com/service427970
Now miht be a
ood time to refresh
your drink.
å Fasten a PULL (8) to the DRAWER FRONT (K). Use two
1-1/4" MACHINE SCREWS (14).
å Repeat this step for the remainin drawer.
Step 15
1-1/4" MACHINE SCREW
(4 used in this step)
14
K
8
Pae 20 www.sauder.com/service 427970

Other Sauder Indoor Furnishing manuals

Sauder East Canyon Series User manual

Sauder

Sauder East Canyon Series User manual

Sauder 422357 User manual

Sauder

Sauder 422357 User manual

Sauder 422290 User manual

Sauder

Sauder 422290 User manual

Sauder 411312 User manual

Sauder

Sauder 411312 User manual

Sauder Night Stand 423434 User manual

Sauder

Sauder Night Stand 423434 User manual

Sauder Shoal Creek 408920 User manual

Sauder

Sauder Shoal Creek 408920 User manual

Sauder 419119 User manual

Sauder

Sauder 419119 User manual

Sauder 158085 User manual

Sauder

Sauder 158085 User manual

Sauder Palladia Collection 412902 User manual

Sauder

Sauder Palladia Collection 412902 User manual

Sauder Pogo 417146 User manual

Sauder

Sauder Pogo 417146 User manual

Sauder Briarbrook 430072 User manual

Sauder

Sauder Briarbrook 430072 User manual

Sauder 420449 User manual

Sauder

Sauder 420449 User manual

Sauder Whitaker Point Hutch 429371 User manual

Sauder

Sauder Whitaker Point Hutch 429371 User manual

Sauder Cottage Road 420136 User manual

Sauder

Sauder Cottage Road 420136 User manual

Sauder 408951 User manual

Sauder

Sauder 408951 User manual

Sauder 412314 User manual

Sauder

Sauder 412314 User manual

Sauder 426932 User manual

Sauder

Sauder 426932 User manual

Sauder Pacific View 427044 User manual

Sauder

Sauder Pacific View 427044 User manual

Sauder Pallada Series 411843 User manual

Sauder

Sauder Pallada Series 411843 User manual

Sauder OfficeWorks AFFIRM 426284 User manual

Sauder

Sauder OfficeWorks AFFIRM 426284 User manual

Sauder Soft Modern 414969 User manual

Sauder

Sauder Soft Modern 414969 User manual

Sauder Craft Pro 421405 User manual

Sauder

Sauder Craft Pro 421405 User manual

Sauder 413118 User manual

Sauder

Sauder 413118 User manual

Sauder Lateral File Boulevard Cafe 427345 User manual

Sauder

Sauder Lateral File Boulevard Cafe 427345 User manual

Popular Indoor Furnishing manuals by other brands

Reshable MRP0010 user manual

Reshable

Reshable MRP0010 user manual

BEKA Easel Quick start quide

BEKA

BEKA Easel Quick start quide

Woodman 38869034 Assembly instructions

Woodman

Woodman 38869034 Assembly instructions

Royal Catering RC-BIS70FB user manual

Royal Catering

Royal Catering RC-BIS70FB user manual

Moderno JONAS 2 Assembly instructions

Moderno

Moderno JONAS 2 Assembly instructions

TIMBER ART DESIGN TV 900014 Assembly instructions

TIMBER ART DESIGN

TIMBER ART DESIGN TV 900014 Assembly instructions

VERTBAUDET 705011596 Assembly instructions

VERTBAUDET

VERTBAUDET 705011596 Assembly instructions

Kensington 60038 instructions

Kensington

Kensington 60038 instructions

4D Concepts BOLTZERO DINING SET 159956 manual

4D Concepts

4D Concepts BOLTZERO DINING SET 159956 manual

Habitat Theo 815786 Assembly instructions

Habitat

Habitat Theo 815786 Assembly instructions

LDI Spaces Safco Poise 6300 Assembly instructions

LDI Spaces

LDI Spaces Safco Poise 6300 Assembly instructions

Elle Decor LARA Assembly instructions and warranty information

Elle Decor

Elle Decor LARA Assembly instructions and warranty information

biodex 846 Installation & operation manual

biodex

biodex 846 Installation & operation manual

Furinno FM6011R-4 installation manual

Furinno

Furinno FM6011R-4 installation manual

Twin-Star International TC60-1066 owner's manual

Twin-Star International

Twin-Star International TC60-1066 owner's manual

FMD Furniture NONA 4 Assembly instruction

FMD Furniture

FMD Furniture NONA 4 Assembly instruction

Score Mobility Work Chair 2300 manual

Score

Score Mobility Work Chair 2300 manual

modway EEI-3901 manual

modway

modway EEI-3901 manual

manuals.online logo
manuals.online logoBrands
  • About & Mission
  • Contact us
  • Privacy Policy
  • Terms and Conditions

Copyright 2025 Manuals.Online. All Rights Reserved.