manuals.online logo
Brands
  1. Home
  2. •
  3. Brands
  4. •
  5. Sauder
  6. •
  7. Indoor Furnishing
  8. •
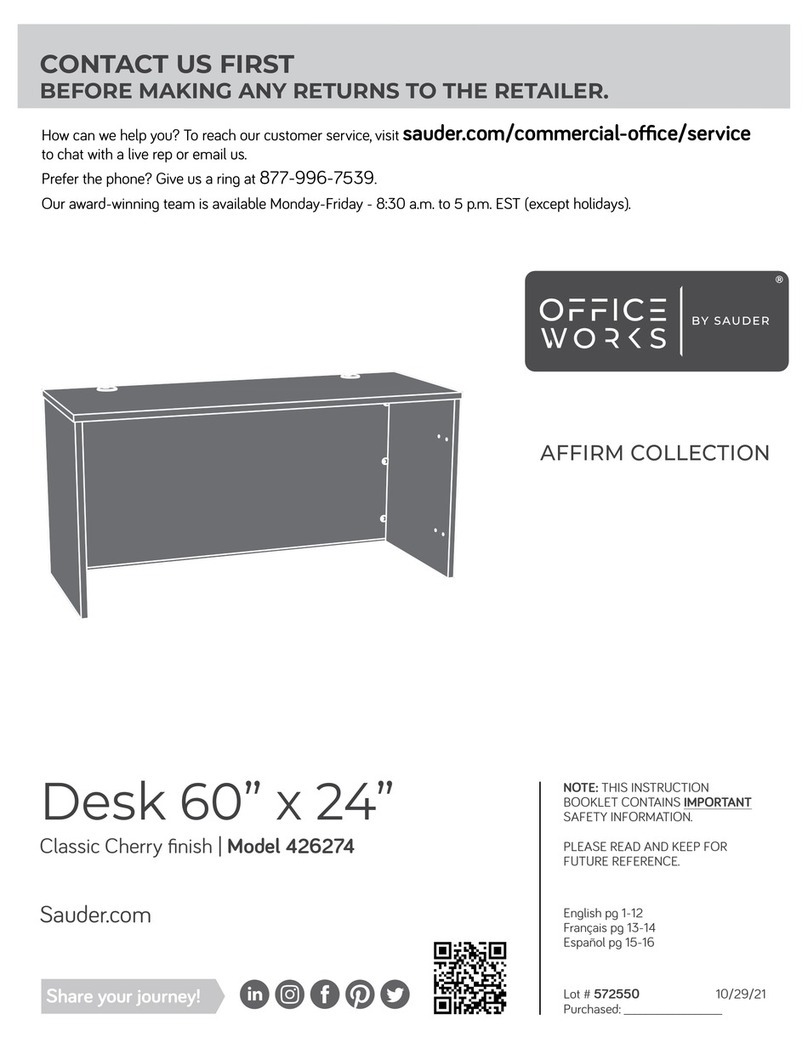
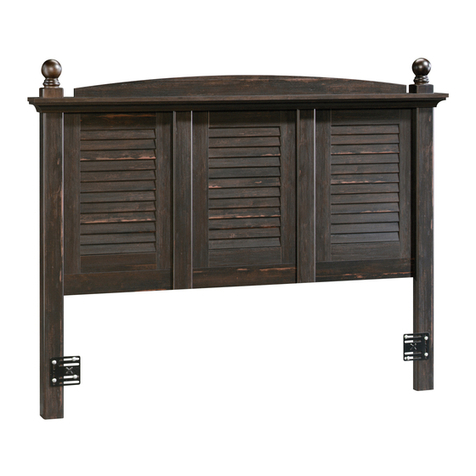
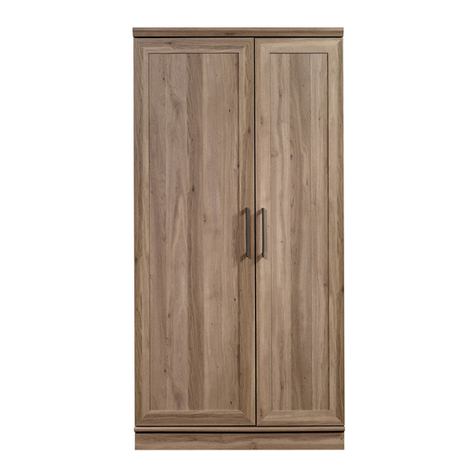
  9. Sauder Harbor View Armoire 415003 User manual

Sauder Harbor View Armoire 415003 User manual

PLEASE CONTACT US
BEFORE RETURNING
YOUR UNIT TO THE STORE
1-800-523-3987
www.sauder.com
Made in the USA
Archbold, OH
NOTE: THIS INSTRUCTION BOOKLET CONTAINS
IMPORTANT SAFETY INFORMATION.
PLEASE READ AND KEEP FOR FUTURE REFERENCE.
English.................... Page 1-26
Français...............Pages 27-29
Espanol.............Páginas 30-32
Lot #: 363415 07 / 14 / 14
Date Purchased: ____________________
415003
Armoire
Harbor View Collection
ADULT ASSEMBLY REQUIRED
TABLE OF CONTENTS
Part Identification...................3-4
Hardware Identification .............5
Assembly Steps....................6-26
Français..............................27-29
Espanol...............................30-32
Safety .................................33-34
Warranty...................................35
39-1/2"
35"
50 lbs.
ASSEMBLY TOOLS REQUIRED
Hammer
No. 2 Phillips Screwdriver
Tip Shown Actual Size
Use of a TV that is too heavy or large is hazardous. A TV that is too heavy will create a risk of a tip-over that can cause severe injury
or death. ATV that is too large for the available space might be accidentally pushed or bumped off the furniture, or subject to tip-over.
• Check the size and weight of your TV. Compare it to the diagram below – before you begin assembly!
• This Sauder unit is designed for use with televisions weighing less than 50 pounds. Never use with a TV that weighs more.
• The size of the television, front-to-back and side-to-side, must fit within the space defined in the diagram.
• Never place the front edge of the TV past the front edge of the TV support shelf (or stop molding – if equipped)
• Never allow the sides of the TV to extend past the side edges of the TV support surface.
• If the TV has a CRT picture tube, the picture tube cone may extend past the rear of the support shelf.
• Be sure to apply the warning label as instructed in the last assembly step. The label provides important safety related information.
WARNING
Page 2 www.sauder.com/services 415003
Short Screwdriver
(provided)
PART IDENTIFICATION: While not all parts are labeled, some of the parts will have a label or an inked
letter on the edge to help distinguish similar parts from each other. Use this PART IDENTIFICATION to help
identify similar parts.
A RIGHT END 1
B LEFT END 1
C UPRIGHT 1
D TOP 1
E SHELF 1
F BOTTOM 1
G TV SHELF 1
H LOWER BACK 1
I BACK 1
L SKIRT 1
O RIGHT MOLDING 1
P LEFT MOLDING 1
Q FRONT MOLDING 1
R BOTTOM MOLDING 1
S SHELF MOLDING 1
V ROD 1
W FOOT 2
Page 3
www.sauder.com/services415003
A
B
C
D
E
F
G
H
I
L
PQ
R
S
V
W
O
W
PART IDENTIFICATION:
J RIGHT DOOR 1
K LEFT DOOR 1
M LOWER DRAWER FRONT 1
N UPPER DRAWER FRONT 1
T DOOR MOLDING 2
U DRAWER BRACE 2
D30 RIGHT DRAWER SIDE 2
D31 LEFT DRAWER SIDE 2
D194 DRAWER BACK 2
D618 DRAWER BOTTOM 2
Page 4 www.sauder.com/services 415003
TWIST-LOCK®
FASTENER - 17
10F
7A ROD HANGER - 2 SLIDE CAM - 4
10A HIDDEN CAM - 2
1F CAM DOWEL - 2
2F
35GA CABINET RIGHT - 2 35GB CABINET LEFT - 2 35GC DRAWER RIGHT - 2 35GD DRAWER LEFT - 2
HARDWARE IDENTIFICATION
D194 D30
D31 D31
D194
D618
D30
J
KT
T
M
NU
U
D618
HARDWARE IDENTIFICATION
Screws are shown actual size. You may receive extra hardware with your unit.
Page 5
www.sauder.com/services415003
WARNING
Never use this furniture with a TV that is
too large or too heavy. Severe injury or
death can occur.The TV and furniture
will be unstable and may tip.
-The TV must less than 50 lbs.
-The base of the TV must be able to sit
completely on this shelf.
Refer to instruction book for complete
safety information.
Note: This is a permanent label. Do not
try to remove. Surface will be damaged.
08/05 2 6 9 2 2 0 269220
TV WARNING LABEL - 1
1L
(Refer to step 20 for proper location and application)
MAGNETIC CATCH - 1
1I
ANGLE BRACKET - 3
27G
FOOT SCREW - 2
23F
KNOB - 2
5K
30H HINGE - 6 PULL - 4
98K
MOLDING CONNECTOR - 2
16F
STRIKE PLATE - 2
6I
SAFETY BRACKET - 1
1G
BLACK 2-1/4" FLAT HEAD SCREW - 4
26S
SILVER 2" FLAT HEAD SCREW - 7
57S
BLACK 1-7/8" FLAT HEAD SCREW - 9
2S
SILVER 3/4" MACHINE SCREW - 8
20S
SILVER 1-1/8" FLAT HEAD SCREW - 4
10S
52S SILVER 3/4" PAN HEAD SCREW - 6
BLACK 9/16" LARGE HEAD SCREW - 33
1S
BLACK 9/16" PAN HEAD SCREW - 2
25S
BLACK 1/2" FLAT HEAD SCREW - 2
11S
NAIL - 39
1N
GOLD 5/16" FLAT HEAD SCREW - 16
3S
BLACK 1-9/16" FLAT HEAD SCREW - 10
30S GOLD 1" MACHINE SCREW - 2
50S
5L WARNING LABEL - 1
WARNING
!
Serious or fatal crushing injuries can
occur from furniture tip-over. To help
prevent tip-over:
• Place heaviest items in the lowest drawers.
• Unless specifically designed to accommodate, do not
set TVs or other heavy objects on top of this product.
• Never allow children to climb or hang on drawers,
doors, or shelves.
• Never open more than one drawer at a time.
• If equipped with a drawer interlock system, do not
defeat or remove it.
Use of tip-over restraints may only reduce,
but not eliminate, the risk of tip-over.
This is a permanent label. Do not attempt to remove!
04/10 332296
(Refer to step 19 for proper location and application)
Look for this icon. It means a video
assembly tip is available at:
www.sauder.com/services/tips
1
1
S
t
e
p
Page 6 www.sauder.com/services 415003
Do not tighten the TWIST-LOCK® FASTENERS in this step.
Assemble your unit on a carpeted floor or on the empty carton to avoid scratching your unit or the floor.
To begin assembly, push a SAUDER TWIST-LOCK® FASTENER (10F) into the large holes in the BOTTOM (F) and TV SHELF (G).
Repeat this step for the UPRIGHT (C) and SHELF (E).
F
G
10F
10F
(17 used)
2
2
S
t
e
p
Page 7
www.sauder.com/services415003
Push two HIDDEN CAMS (1F) into the DRAWER BRACES (U). Then, insert the metal end of a CAM DOWEL (2F) into each
HIDDEN CAM.
Do not tighten the HIDDEN CAMS in this step.
Arrow
1F
2F
Insert the metal end of the CAM
DOWEL into the HIDDEN CAM.
Arrow
U
U
3
3
S
t
e
p
Page 8 www.sauder.com/services 415003
Fasten two CABINET RIGHTS (35GA) to the RIGHT END (A) and two CABINET LEFTS (35GB) to the LEFT END (B). Use eight
GOLD 5/16" FLAT HEAD SCREWS (3S) through holes #1 and #3.
Fasten a ROD HANGER (7A) to each END (A and B). Use two BLACK 9/16" LARGE HEAD SCREWS (1S).
123
3
21
A
B3
21
Roller end
123
Roller end
GOLD 5/16” FLAT HEAD SCREW
(8 used for the RAILS)
3S
7A
BLACK 9/16" LARGE HEAD SCREW
(2 used for the ROD HANGERS)
1S
Finished edge
Finished edge
Surface with holes
Surface with holes
4
4
S
t
e
p
Page 9
www.sauder.com/services415003
Tap two MOLDING CONNECTORS (16F) into the notches in the MOLDINGS (O, P, and Q).
Flat end Flat end
16F 16F
Use your hammer to tap the MOLDING CONNECTOR (16F) into the notches in the MOLDINGS.
Q
O
P
5
5
S
t
e
p
Page 10 www.sauder.com/services 415003
Fasten the TV SHELF (G) to the RIGHT END (A). Tighten two TWIST-LOCK®FASTENERS.
How to use the SAUDER TWIST-LOCK®FASTENER
1. Insert the dowel end of the FASTENER into the
hole of the adjoining part.
NOTE: The dowel end of the FASTENER must remain
fully inserted in the hole of the adjoining part while
locking the FASTENER.
2. Tighten the FASTENER with a Phillips screwdriver
as tight as possible.
Dowel end
A
G
Surface with
TWIST-LOCK®
FASTENERS
Finished edge
Surface with holes
Fasten the RIGHT MOLDING (O) to the RIGHT END (A). Use two BLACK 2-1/4" FLAT HEAD SCREWS (26S).
6
6
S
t
e
p
Page 11
www.sauder.com/services415003
BLACK 2-1/4" FLAT HEAD SCREW
(2 used in this step)
26S
A
O
Q
P
7
7
S
t
e
p
Page 12 www.sauder.com/services 415003
Fasten the UPRIGHT (C) to the TV SHELF (G). Tighten two TWIST-LOCK®FASTENERS.
GC
Finished edge
Surface without
TWIST-LOCK®
FASTENERS
8
8
S
t
e
p
Page 13
www.sauder.com/services415003
C
E
H
Surface with
TWIST-LOCK®
FASTENERS
Fasten the SHELF (E) to the RIGHT END (A). Tighten two TWIST-LOCK®FASTENERS.
Fasten the SHELF (E) to the UPRIGHT (C). Use two BLACK 1-7/8" FLAT HEAD SCREWS (2S).
Fasten three ANGLE BRACKETS (27G) to the SHELF (E) and LOWER BACK (H). Use six BLACK 9/16" LARGE HEAD
SCREWS (1S).
A
Edge with
TWIST-LOCK®
FASTENERS
BLACK 9/16" LARGE HEAD SCREW
(6 used for the BRACKETS)
1S 27G
BLACK 1-7/8" FLAT HEAD SCREW
(2 used for the SHELF)
2S
Surface
with
holes
9
9
S
t
e
p
Page 14 www.sauder.com/services 415003
NOTE: You may need to use the provided SHORT SCREWDRIVER in this step.
Fasten the BOTTOM (F) to the RIGHT END (A). Tighten two TWIST-LOCK®FASTENERS.
Fasten the BOTTOM (F) to the LOWER BACK (H). Use three BLACK 1-7/8" FLAT HEAD SCREWS (2S).
Fasten LEFT END (B) to the LEFT MOLDING (P). Use two BLACK 2-1/4" FLAT HEAD SCREWS (26S).
Fasten the LEFT END (B) to the SHELVES (E and G) and BOTTOM (F). Tighten six TWIST-LOCK®FASTENERS.
BLACK 2-1/4" FLAT HEAD SCREW
(2 used for the LEFT MOLDING)
26S
P
B
E
H
A
F
Surface with
TWIST-LOCK®
FASTENERS
G
Finished edge
These holes
must be here.
BLACK 1-7/8" FLAT HEAD SCREW
(3 used for the LOWER BACK)
2S
10
10
S
t
e
p
Page 15
www.sauder.com/services415003
Fasten TOP (D) to the MOLDINGS (O, P, and Q). Use seven SILVER 2" FLAT HEAD SCREWS (57S).
Fasten the SHELF MOLDING (S) to the SHELF (E). Tighten three TWIST-LOCK®FASTENERS.
P
QO
D
S
E
SILVER 2" FLAT HEAD SCREW
(7 used in this step)
57S
Rounded edge
Surface
with holes
These edges should
be almost even.
AThe extra hole
should be located
closer to END (A).
11
11
S
t
e
p
Page 16 www.sauder.com/services 415003
Fasten the SKIRT (L) to the BOTTOM MOLDING (R). Use three BLACK 1-7/8" FLAT HEAD SCREWS (2S).
BLACK 1-7/8" FLAT HEAD SCREW
(3 used for the SKIRT)
2S
Flat surface
Rounded edge
Unfinished
surface
L
R
Fasten the BOTTOM MOLDING (R) to the BOTTOM (F). Use four SILVER 1-1/8" FLAT HEAD SCREWS (10S).
Fasten the MAGNETIC CATCH (1I) to the FRONT MOLDING (Q). Use two BLACK 9/16" PAN HEAD SCREWS (25S).
12
12
S
t
e
p
Page 17
www.sauder.com/services415003
R
BLACK 9/16" PAN HEAD SCREW
(2 used for the MAGNETIC CATCH)
25S
Rounded edge
SILVER 1-1/8" FLAT HEAD SCREW
(4 used in this step)
10S
Q
1I
F
13
13
S
t
e
p
Page 18 www.sauder.com/services 415003
Carefully turn your unit over onto its front edges. Unfold the BACK (I) and lay it over your unit.
Make equal margins along all four edges of the BACK (I). Push on opposite corners of your unit if needed to make it “square”.
Fasten the BACK (I) to your unit using the NAILS (1N).
NOTE: Be sure to tap NAILS into the holes that line up over the TV SHELF (G).
NOTE: Perforations have been provided for access through the BACK. Carefully cut out the holes needed.
Carefully turn two FOOT SCREWS (23F) a few turns into the BOTTOM MOLDING (R).
Next, turn a FOOT (W) onto the other end of each FOOT SCREW (23F). Turn the FEET clockwise until the FOOT SCREW is tight
in the BOTTOM MOLDING (R) and each FOOT.
NOTE: Do not overtighten the FOOT SCREWS.
Do not stand the unit upright without the
BACK fastened. The unit may collapse.
Caution
NAIL
(39 used in this step)
1N
Unfinished
surface
These holes must line up
over the TV SHELF (G).
The large hole
should be here.
23F
I
R
W
W
Fasten three HINGES (30H) to each DOOR (J and K). Use twelve BLACK 9/16" LARGE HEAD SCREWS (1S).
Fasten a STRIKE PLATE (6I) to each DOOR (J and K). Use two BLACK 1/2" FLAT HEAD SCREWS (11S).
NOTE: The surfaces of the STRIKE PLATES with "SAUDER" should be facing up. Be sure to position the STRIKE PLATES
as shown.
14
14
S
t
e
p
Page 19
www.sauder.com/services415003
J
K
6I
30H
30H
BLACK 9/16" LARGE HEAD SCREW
(12 used for the HINGES)
1S
BLACK 1/2" FLAT HEAD SCREW
(2 used for the STRIKE PLATES)
11S
Carefully stand your unit upright.
Fasten the LEFT DOOR (K) to the LEFT END (B). Use six BLACK 9/16" LARGE HEAD SCREWS (1S).
NOTE: To make adjustments to the DOOR, loosen the SCREWS in the HINGES, make needed adjustments, and tighten the SCREWS.
Fasten a KNOB (5K) to the LEFT DOOR (K). Use a GOLD 1" MACHINE SCREW (50S).
Fasten a DOOR MOLDING (T) to the LEFT DOOR (K). Use three SILVER 3/4" PAN HEAD SCREWS (52S).
NOTE: Be sure the indicated hole in the DOOR MOLDING (T) is positioned toward the top of the DOOR.
Repeat this step for the RIGHT DOOR (J).
15
15
S
t
e
p
Page 20 www.sauder.com/services 415003
K
B
T
5K
This hole
must be here.
BLACK 9/16" LARGE HEAD SCREW
(12 used for the HINGES)
1S
52S
SILVER 3/4" PAN HEAD SCREW
(6 used for the DOOR MOLDINGS)
GOLD 1" MACHINE SCREW
(2 used for the KNOBS)
50S

Other Sauder Indoor Furnishing manuals

Sauder Briarbrook 430070 User manual

Sauder

Sauder Briarbrook 430070 User manual

Sauder Manhattan Gate 429250 User manual

Sauder

Sauder Manhattan Gate 429250 User manual

Sauder Armoire Harbor View 401322 User manual

Sauder

Sauder Armoire Harbor View 401322 User manual

Sauder Edge Water Credenza 415321 User manual

Sauder

Sauder Edge Water Credenza 415321 User manual

Sauder 423032 User manual

Sauder

Sauder 423032 User manual

Sauder Cannery Bridge 418326 User manual

Sauder

Sauder Cannery Bridge 418326 User manual

Sauder 420174 User manual

Sauder

Sauder 420174 User manual

Sauder Hythe 5426439 User manual

Sauder

Sauder Hythe 5426439 User manual

Sauder 419119 User manual

Sauder

Sauder 419119 User manual

Sauder Cottage Road 418072 User manual

Sauder

Sauder Cottage Road 418072 User manual

Sauder 423399 User manual

Sauder

Sauder 423399 User manual

Sauder North Avenue 420275 User manual

Sauder

Sauder North Avenue 420275 User manual

Sauder Shoal Creek 411222 User manual

Sauder

Sauder Shoal Creek 411222 User manual

Sauder Carson Forge 414444 User manual

Sauder

Sauder Carson Forge 414444 User manual

Sauder Via 422624 User manual

Sauder

Sauder Via 422624 User manual

Sauder Edge Water Series User manual

Sauder

Sauder Edge Water Series User manual

Sauder Anda Norr 427346 User manual

Sauder

Sauder Anda Norr 427346 User manual

Sauder Boone Mountain 416971 User manual

Sauder

Sauder Boone Mountain 416971 User manual

Sauder 413678 User manual

Sauder

Sauder 413678 User manual

Sauder worksense PALO ALTO 427796 User manual

Sauder

Sauder worksense PALO ALTO 427796 User manual

Sauder 426927 User manual

Sauder

Sauder 426927 User manual

Sauder Via 419642 User manual

Sauder

Sauder Via 419642 User manual

Sauder Via 419708 User manual

Sauder

Sauder Via 419708 User manual

Sauder Office Port 408293 User manual

Sauder

Sauder Office Port 408293 User manual

Popular Indoor Furnishing manuals by other brands

OSP Designs BRT432-CHY operating instructions

OSP Designs

OSP Designs BRT432-CHY operating instructions

Furniture of America Ann CM3752PT-5PK Assembly instructions

Furniture of America

Furniture of America Ann CM3752PT-5PK Assembly instructions

Style selections ROWAN 30AW COMBO installation manual

Style selections

Style selections ROWAN 30AW COMBO installation manual

Classic Exhibits LT-116 quick start guide

Classic Exhibits

Classic Exhibits LT-116 quick start guide

symbiosis KUBE 8490 IA Assembling instructions

symbiosis

symbiosis KUBE 8490 IA Assembling instructions

YitaHome FTOFOD-0010 Assembly instructions

YitaHome

YitaHome FTOFOD-0010 Assembly instructions

Article CONAN Assembly instructions

Article

Article CONAN Assembly instructions

Lightolier Xceed 1050RNSLW_3D specification

Lightolier

Lightolier Xceed 1050RNSLW_3D specification

Furniture of America CM6149 Assembly instructions

Furniture of America

Furniture of America CM6149 Assembly instructions

Coaster 509363 Assembly instructions

Coaster

Coaster 509363 Assembly instructions

SAUTHON easy JAZZY JF161A Technical manual

SAUTHON easy

SAUTHON easy JAZZY JF161A Technical manual

Ty Pennington Style PALMETTO Use and care guide

Ty Pennington

Ty Pennington Style PALMETTO Use and care guide

Otto 14441838 Assembly instructions

Otto

Otto 14441838 Assembly instructions

NEXERa 220303 Assembly instructions

NEXERa

NEXERa 220303 Assembly instructions

American Signature VCF WA-8215-QB Assembly instructions

American Signature

American Signature VCF WA-8215-QB Assembly instructions

Nightingale NXO 6401 Series User handbook

Nightingale

Nightingale NXO 6401 Series User handbook

Cooper Lighting METALUX 2HB15 Specification sheet

Cooper Lighting

Cooper Lighting METALUX 2HB15 Specification sheet

Techni Mobili RTA-3240 Assembly instructions

Techni Mobili

Techni Mobili RTA-3240 Assembly instructions

manuals.online logo
manuals.online logoBrands
  • About & Mission
  • Contact us
  • Privacy Policy
  • Terms and Conditions

Copyright 2025 Manuals.Online. All Rights Reserved.