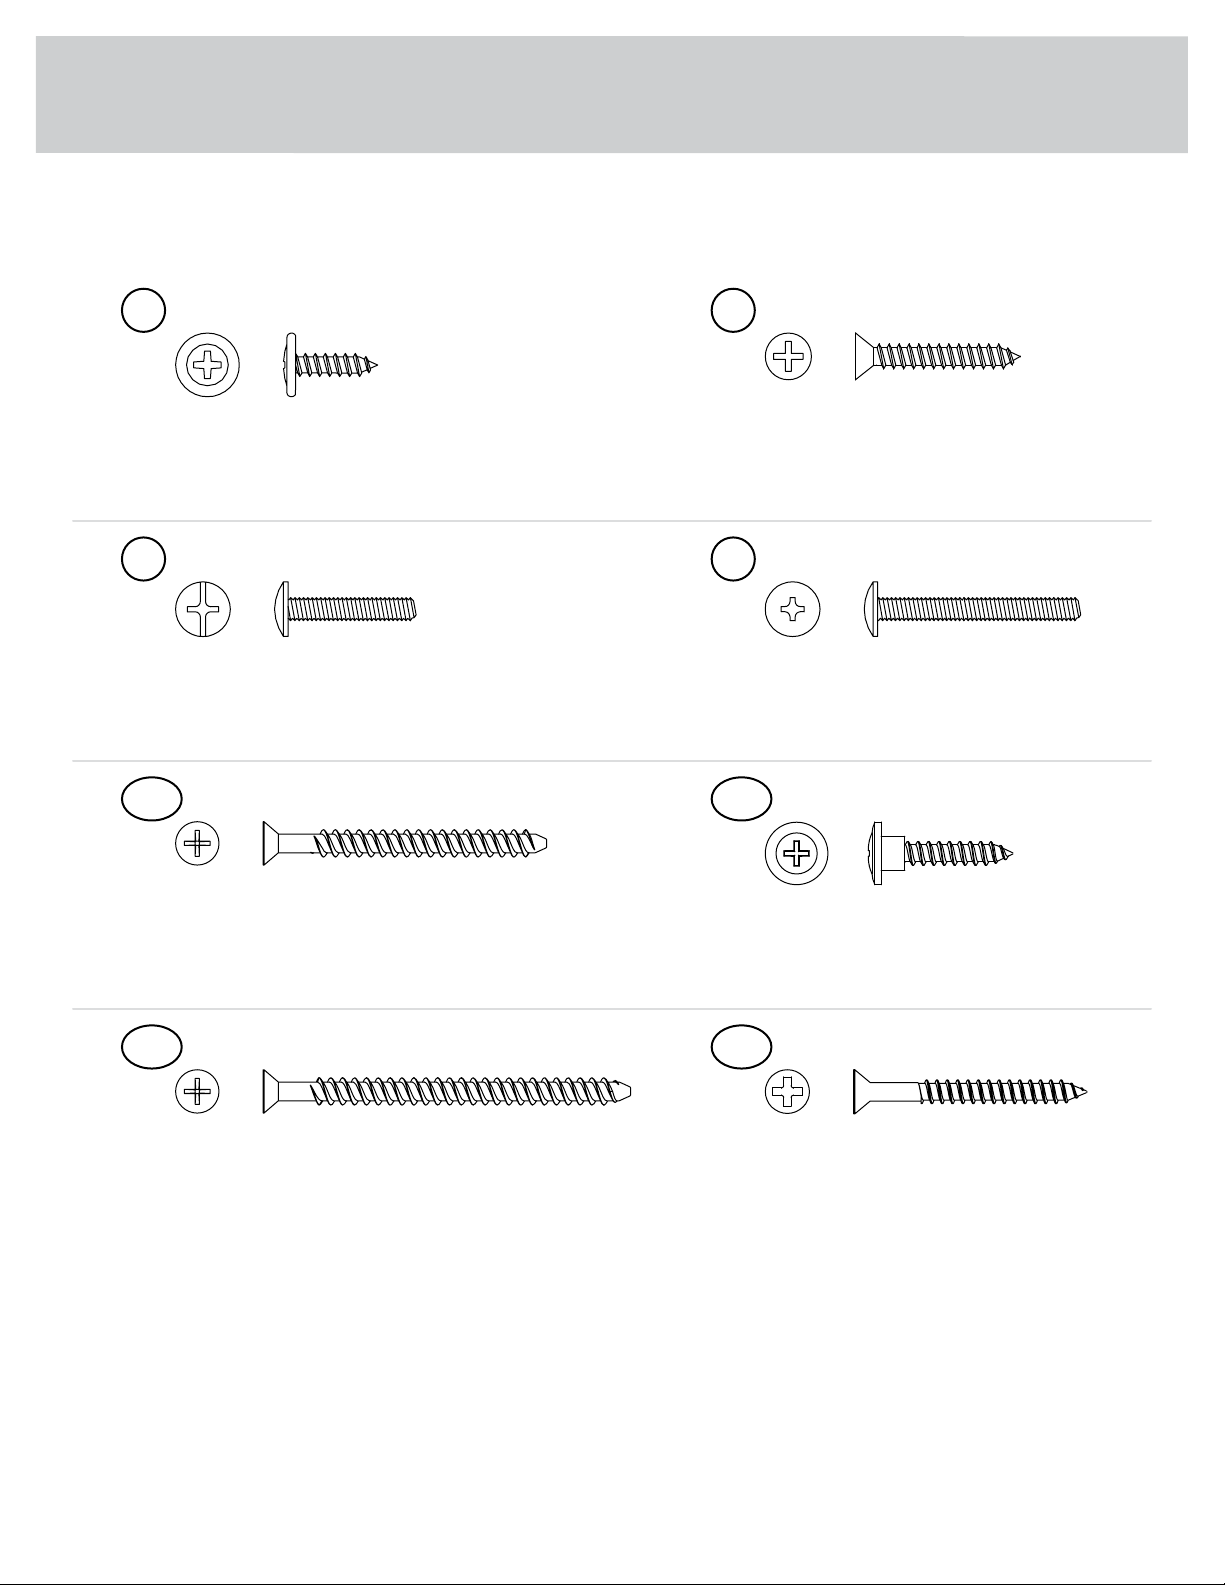
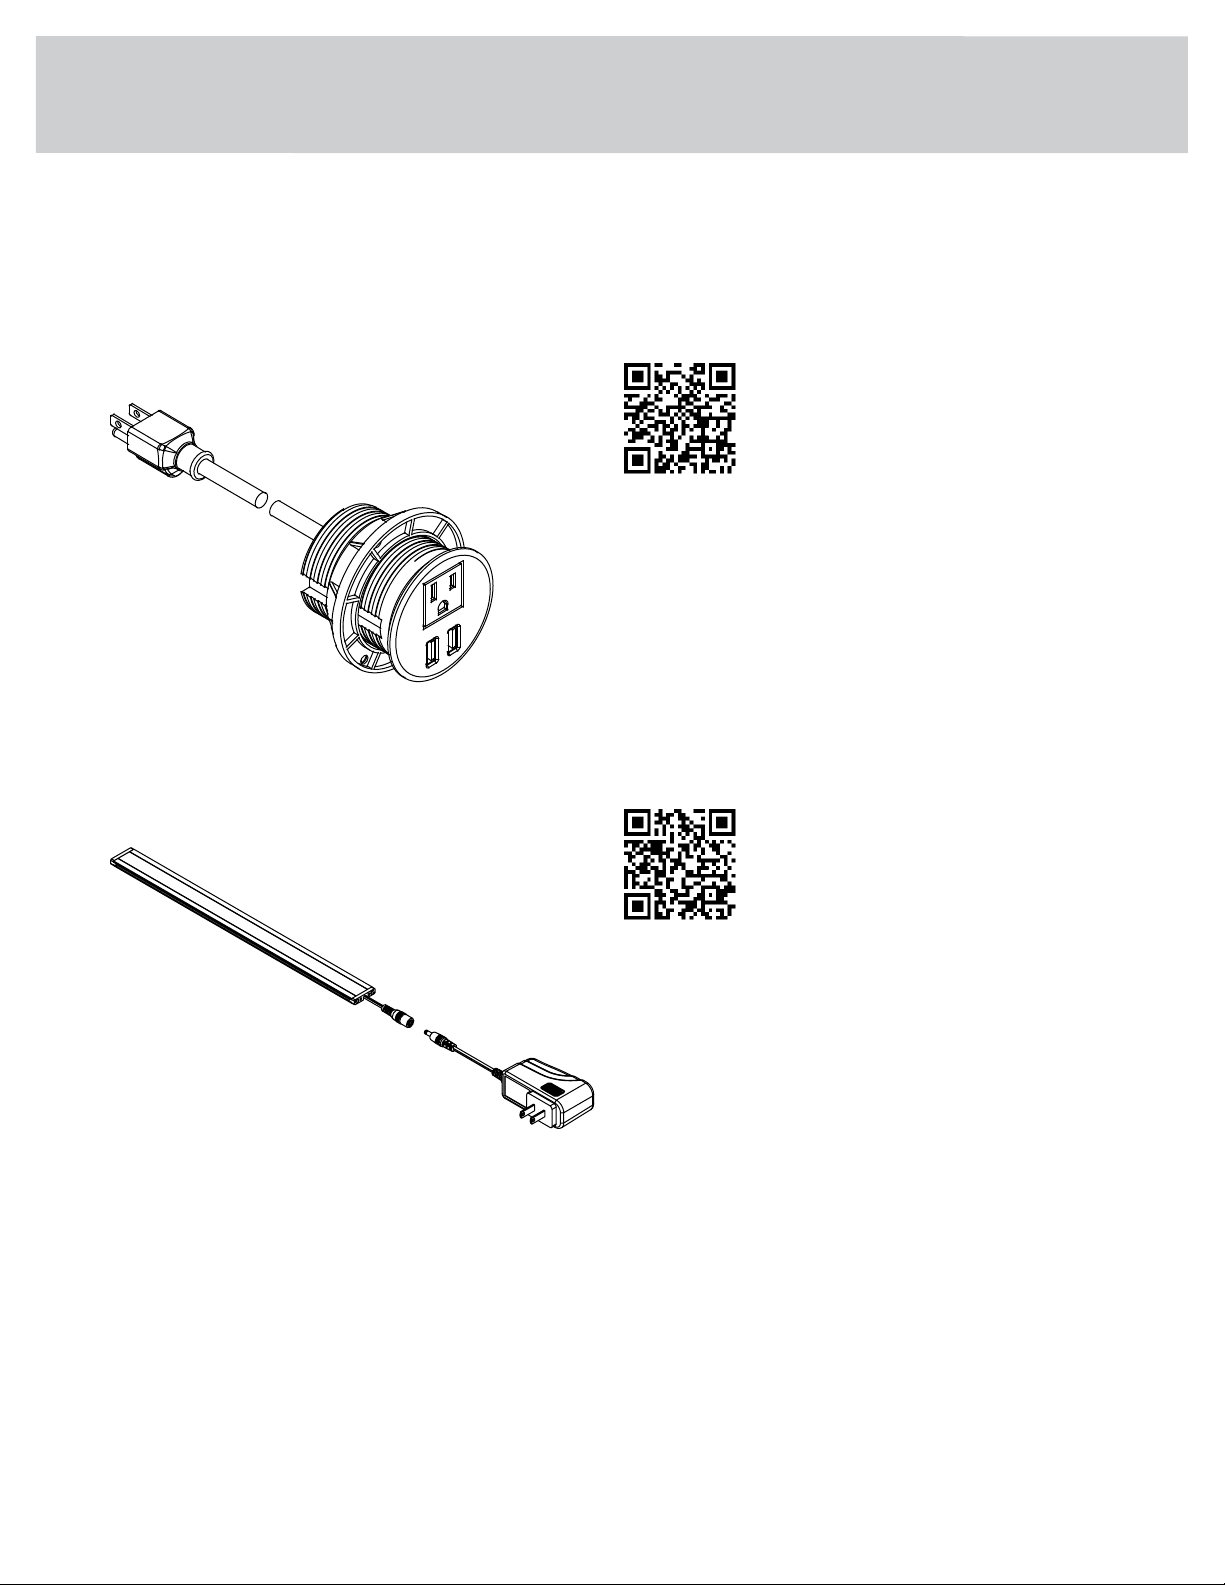
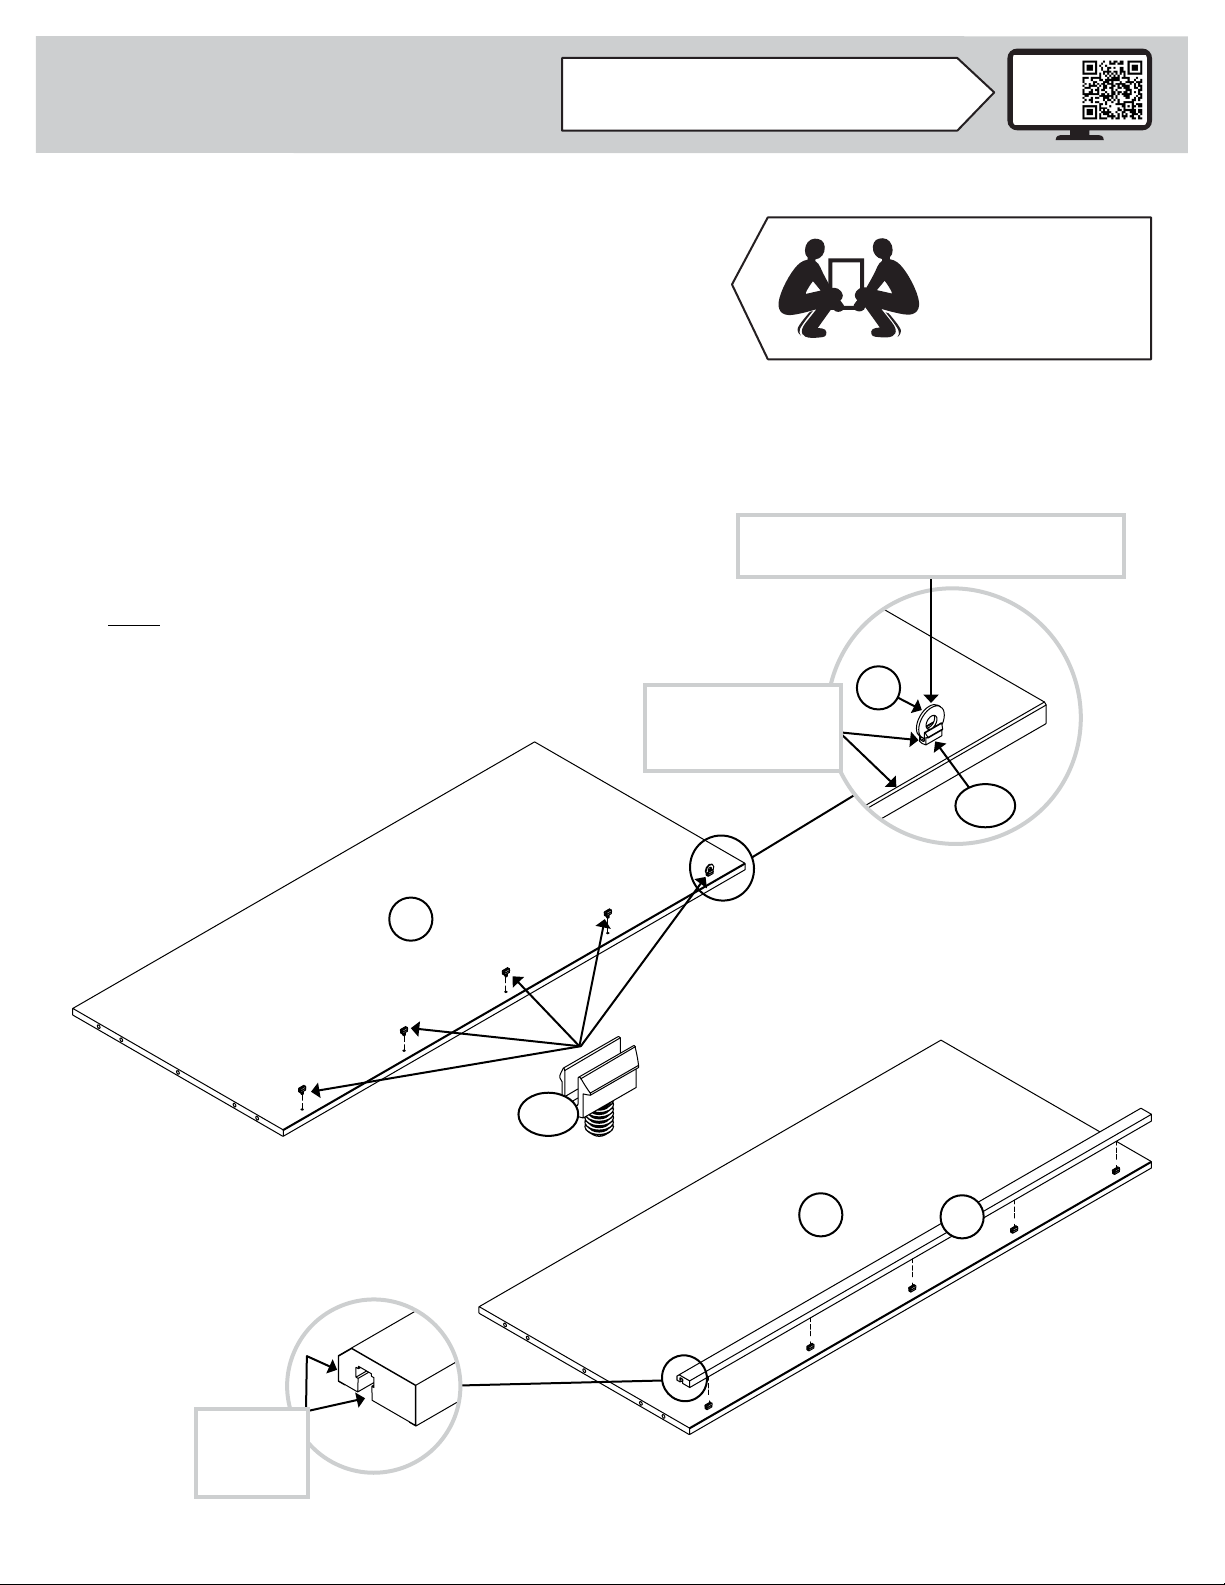
Sauder worksense MASON PEAK 427807 User manual
Other Sauder Indoor Furnishing manuals

Sauder
Sauder Englewood 426918 User manual

Sauder
Sauder Clifford Place 433364 User manual

Sauder
Sauder 403785 User manual

Sauder
Sauder 417714 User manual

Sauder
Sauder 424273 User manual

Sauder
Sauder Via 401446 User manual

Sauder
Sauder Office Port 408293 User manual

Sauder
Sauder Dakota Pass 422596 User manual

Sauder
Sauder Edge Water 414856 User manual

Sauder
Sauder International Lux 417828 User manual

Sauder
Sauder Embassy Point 414192 User manual

Sauder
Sauder beginnings 413324 User manual

Sauder
Sauder worksense BERGEN CIRCLE 427464 User manual

Sauder
Sauder Englewood 426484 User manual

Sauder
Sauder 419954 User manual

Sauder
Sauder 426928 User manual

Sauder
Sauder 401804 User manual

Sauder
Sauder 412301 User manual

Sauder
Sauder August Hill 426133 User manual

Sauder
Sauder worksense MASON PEAK Credenza 427805 User manual


Popular Indoor Furnishing manuals by other brands

Regency
Regency LWMS3015 Assembly instructions

Furniture of America
Furniture of America CM7751C Assembly instructions

Safavieh Furniture
Safavieh Furniture Estella CNS5731 manual

PLACES OF STYLE
PLACES OF STYLE Ovalfuss Assembly instruction

Trasman
Trasman 1138 Bo1 Assembly manual

Costway
Costway JV10856 manual