manuals.online logo
Brands
  1. Home
  2. •
  3. Brands
  4. •
  5. Schlage
  6. •
  7. Door Lock
  8. •
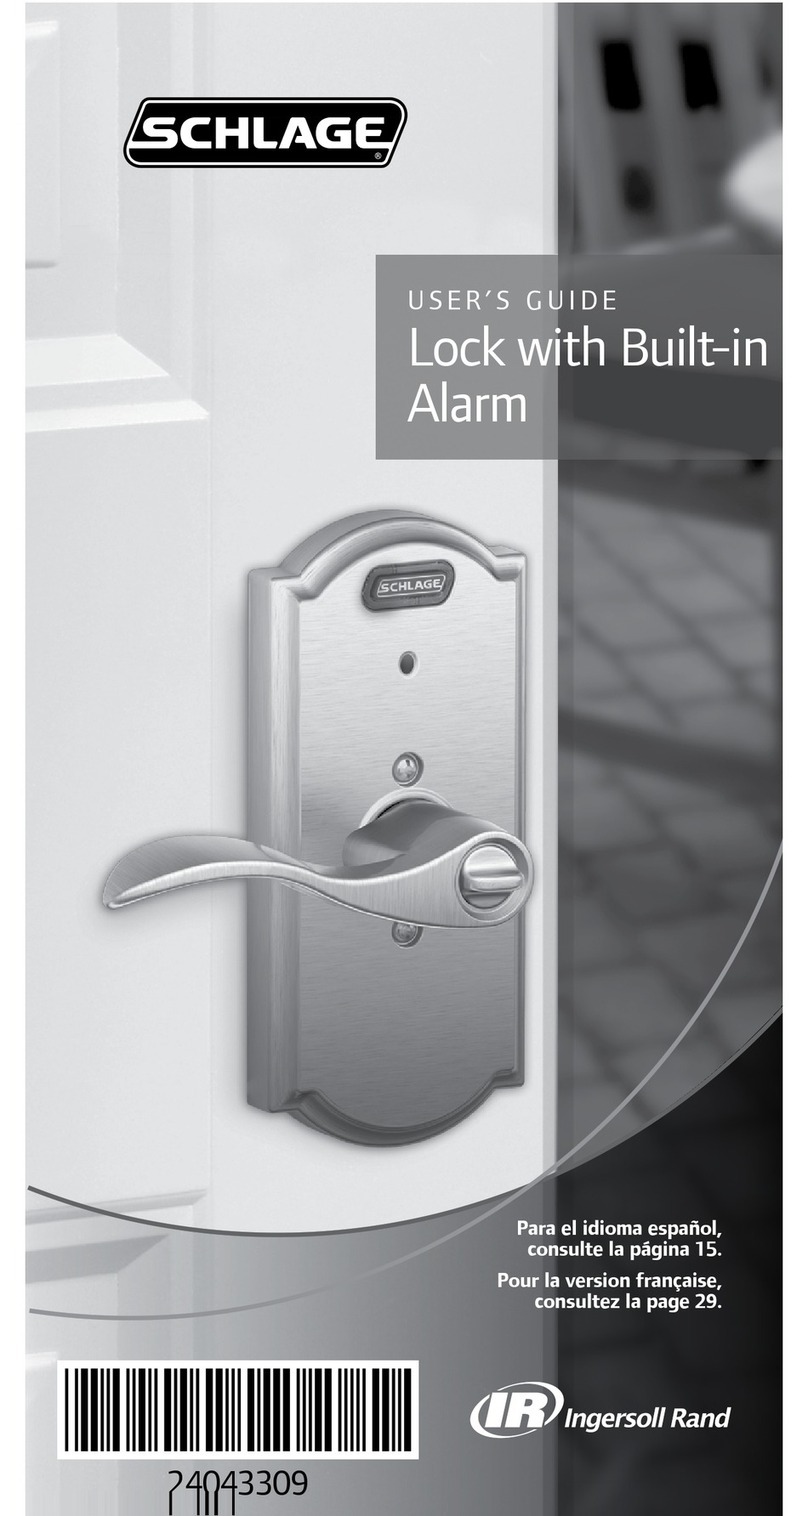
  9. Schlage S-5600 User manual

Schlage S-5600 User manual

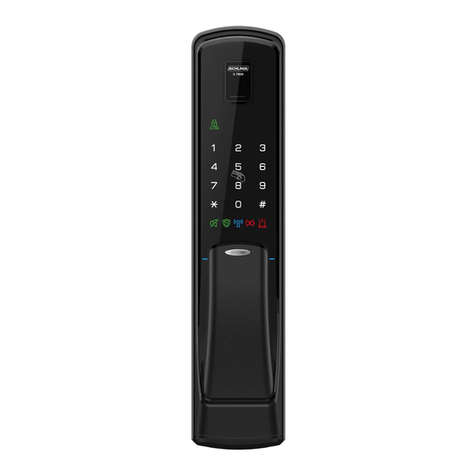
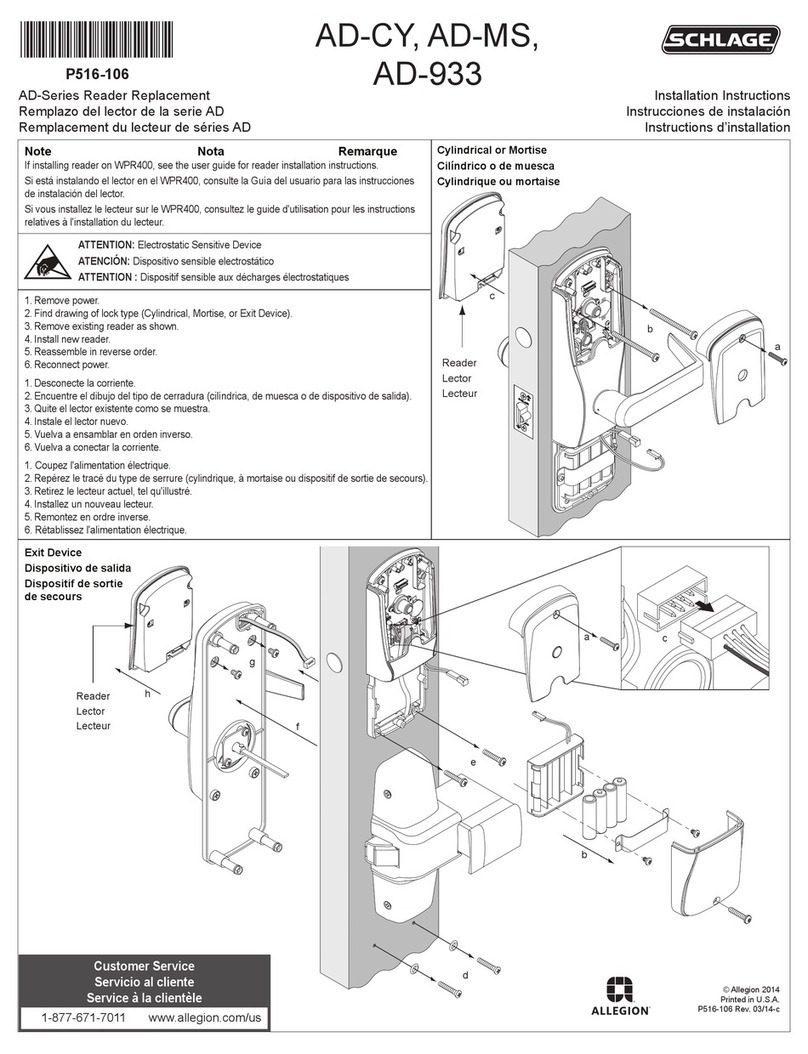
Name and function of each part

Can open the door at anytime only
by pulling down this handle.
󾖴
Push up to open the battery cover.
󾖴󾖴
󾖴󾖽󾖴󾖴󾖴
󾗁󾖴󾗂󾖴
door will be locked automatically
after closing.
󾗁󾖴󾗂󾖴
door will be locked with pressing
manual lock button after closing.
󾖴
󾗁󾖴󾗂󾖴
Button to lock the door by manual at
manual locking mode.
󾗁󾖴󾗂󾖴
Button to set double locking mode.
1. Front Ass`y
2. Back Ass`y
Name Product speci󽗉cation Remark
① Front Ass`y
84mm(W) x 260mm(H) x 21mm(D)
Including rubber
pad
②
Back Ass`y
82mm(W) x 242mm(H) x 34mm(D)
③ Back bracket 70mm(W) x 119.5mm(H) x 6.6mm(D)
④ Strike 35mm(W) X 106mm(H) X 6.3mm(D)
⑤ Strike housing 21mm(W) X 106mm(H) X 19.5mm(D)
⑥ Mortise lock
105.4mm(W) X 110mm(H) X 25mm(D)
⑦ Card key ISO card, Tag key, Mobile tag key
⑧ Handle shaft 96mm(W) X 8mm(H) X 8mm(D)
⑨ Handle shaft clip 2 EA
⑩ Emergency key 3 EA
⑪ Battery 1.5V 'AA' Size LR6 Alkaline, 4ea(DC 6V)
⑫ Screws 1 set
⑬ User manual Main User manual
⑭ Installation template
Using for making hole at the door
⑮ Communication pack
Communication pack
Optional
⑯ Remote key Remote key Optional
※ Installation condition Door thickness 40~80mm
󾖻
󾖴󾖴󾖴
It facilitates escapes while in danger opening easily with a simple
action of lever down.
󾖴󾖴󾖴󾖴󾖴
It has hight reliability mechanical mortise lock type with
installing the locking device on door body inside.
󾖻󾖴󾖴󾖴
The mortise lock of this product facilitates easy adjusting to left
or right handle direction
.
󾖻󾖴
If users do not open the door after unlocking, it is to be locked
automatically for higher security.
󾖴
8 levels of volume.
󾖴󾖴󾖴
Open the door in quite not to interrupt neighbor without any
operating sound temporarily.
󾖴󾖴󾖴󾖴󾖴󾖴󾖴
󾖴
Low battery indicator with alarm sound shows battery
replacements time.
󾖴󾖴
When the door is opened by force with hammer or other lock is
suspended with alarm sound.
󾖴󾖴󾖴
With 5 times of abnormal try with wrong number, function of
door lock is suspended for a while with alarm sound.

󾖴
󾖸
󾖴
󾖺󾖴󾖴󾖺󾖴󾖴󾖹
Available to use one solution of PIN code, card key, 
emergency key.
󾖴󾖴󾖴󾖴󾖴󾖴󾖴󾖴
Automatically, deleted old PIN code or card key information
when registering new one.
󾖴󾖴󾖴
When you enter your home with someone, you don`t want to
show PIN code to them. In his case, you may press any number
randomly without limitation and then enter your PIN code at
final. Then you can open the door without revealing your PIN
code.
󾖴󾖴
When the door is closed, to be locked status automatically.
① ③②
⑬
⑭
Screws
User
manual
⑫
④ ⑤ ⑥
⑨
⑪⑩
⑧
Installation
template
Factory setting
Item Setting Status Ref.page
Auto/Manual lock mode [Auto-lock] 8
Beef sound level (1~8 level) 8 level 7
Factory setting PIN code 123456 -
USER MANUAL
Notice
Please read this manual before installation and
operation.
Safety precautions Product features
󾖴󾖴󾖴󾖴󾖴󾖴󾖼
Assembling or disassembling the door lock may damage the product.
Damages to the product caused by unauthorized persons may result
in damages to your property. Please contact our customer service.
󾖴󾖴󾖴󾖴󾖴󾖴󾖴
󾖼
Please remove the batteries immediately from the product, if you
do not take this step immediately, the product may suffer server
damage.
󾖴󾖴󾖴󾖴󾖴󾖴󾖴󾖴󾖴
󾖼
If the product is exposed to salty water or liquids, please wipe off the
moisture with a soft cloth. If moisture or foreign materials penetrate
the product, remove the batteries immediately and contact the
service agency or customer service center for advice. Using a product
contaminated with foreign may cause problems.
󾖴󾖴󾖴󾖴󾖴󾖴󾖴
󾖴󾖴󾖴󾖴󾖴󾖴󾖴󾖴󾖴󾖴
󾖴󾖴󾖴󾖼
If leakage is discovered, please wipe out with a dry cloth and replace
the new batteries. In case of exposure to leakage, wash with soap
and water immediately.
󾖴󾖴󾖴󾖴󾖴󾖴󾖴
󾖴󾖴󾖴󾖺󾖴󾖴󾖴󾖼
Such materials may damage the surface or cause a fire.
󾖴󾖴󾖴󾖴󾖴󾖴󾖴󾖴
󾖴󾖴󾖼
Batteries should not be exposed directly to heat source or flames or
submerged in water, because they may leak or explode, resulting in
severe damage. Please do not use damaged batteries.
󾖴󾖴󾖴󾖴󾖴󾖴󾖴󾖴
󾖴󾖴󾖴󾖴󾖼
As the battery may overheats, cause explosion or severe damage.
󾖴󾖴󾖴󾖴󾖴󾖴󾖴󾖴󾖴󾖴
󾖴󾖴󾖼
It may damage the product or cause a malfunction.
󾖴󾖴󾖴󾖴󾖴󾖴󾖴󾖼󾖴
It may damage the product or cause a malfunction.
󾖴󾖴󾖴󾖴󾖴󾖴󾖴󾖴󾖴󾖴
󾖴󾖼
The battery life is getting shorter and it may cause a leaks or
explosions.
󾖴󾖴󾖴󾖴󾖴󾖴󾖴󾖴󾖴
󾖴󾖴󾖴󾖼
Dew condensation; small drops of water that form when warm air
touches a cold surface. Please check the environment for install
area. Heavy dew condensation may damage the product or cause a
malfunction.
Product composition and components
Remote key 
(RP-20)
Communication pack
(RXP-10)
Optional parts
⑮ ⑯
⑦
ISO
CARD
Tag
key
M
key

Can open the door by pushing
down it after pressing PIN code or
touching card key.
󾖴
Indicate operation status and
checking battery capacity.
˙ Remaining battery 20%
˙ Remaining battery 50%
˙ Remaining battery 80%
󾖴󾖴
󾖴
open the door with override
key by manual.
󾖴󾖴󾖴
󾖴
When battery does not operate,
product may be operated and
unlocked by contacting 9V on
terminal located outside.
󾖴󾖴󾖴
Touch the registered card key to
open the door.
󾖴
󾖴󾖽󾖴󾖴
Indicate lock / unlock status.
󾖴󾖴

When the battery is low, red light
flickers. Please change batteries.
󾗁󾗂󾖺󾖴󾗁󾗂󾖺󾖴󾗁 󾗂󾖴
˙[N] : Registration or deletion of PIN
code, Card in normal mode
˙[S] : Registration or deletion of PIN
code, Card in safety mode
˙[ ] : To register or delete optional
RF communicatio module.
Description shortcut icons
Mobile access Set-up and use
Normal mode
Safety mode
ㆍPIN code : 10 entries (6~12 digits) / Card key : 20 entries
: [N] button
RC :
Registration new code
: Card key
123456789
REG.
PIN code
RC ㆍㆍㆍ
Card key
ㆍㆍㆍ
DEL. All Card key
8#
3"sec
※ Repeat highlighted part of diagram above for continuous register or delete
How to unlock / lock from outdoor
How to unlock from outdoor
PIN code CCard key
How to unlock from outdoor (Mute function)
PIN code 3"sec

OFF C
Card key 3"sec

OFF
How to lock [Auto lock / Manual lock] from out door
Auto lock ※ If the door is not closed correctly, warning sound can be
caused. Please check and con󽗉rm the door closing status.
Manual lock
0
How to set auto-locking / manual-locking
Auto lock
In 󾖴 mode, door will be locked automatically after
closing.
In 󾖴 mode, door will be locked with pressing manual
lock button after closing.
* Please do the change/registration of new code at door opened
status to prevent unintentional locking.
Manual lock
How to replace battery
If battery lamp in RED is 󽗊ickering with sound, separate battery cover, and replace all 4 battery
to new one, 6V(1.5V "AA" size LR6 Alkaline)
Additional function
How to control operation volume
Vol. up
#C or #
3
Vol. down 2
Guest PIN code (Temporary use)
REG. #C or #7RC #RC #
Warning function against mischief or hacking
Operate
Wrong 󾖴󾖴󾖴 or unregistered 󾖴󾖴󾖴
Warning alarm function against trespassing by force
PIN code CCard key
˙
Press 1 to make maximum level and press 0 to make mute in one time.
˙
After setting, pull down the handle and close the door.
Note
How to open from indoor
󾗊󾖴󾖴󾗋
Just pulling down the handle, door lock is opened anytime.
󾖷󾖴󾖶󾖴󾖶󾗀󾖴
Door can be opened with simple action of pulling down the
handle. Even the door lock is out of order, people can escape
easily in the emergency such as fire etc.
˙ [Double locking] mode shall be installed after door is closed.
˙ Even in [Double locking] mode, it is available to open the door from in door by pulling down handle.
˙
With pulling down handle from indoor, [Double locking] mode shall be released automatically.
˙ Even in [Double locking] mode, intrusion warning is working properly.
˙ If the sound is set to mute, there is no status sound. Only indicating lamp is 󽗊ickering.
Note
How to set double locking function
1.
[Double locking] Set-up
2.
[Double locking] Cancel
[Open/Close], 
[Double lock]
button press 3 sec
Press [Open/Close],
[Double lock] button
or pulling down the
handle.
~Biririk↑ ~Biririk↓
Note
˙
Before closing the door, make sure that deadbolt is not extrude.
※ If the door is not closed correctly, warning sound can be caused.
Please check and con󽗉rm the door closing status.
How to unlock / to lock from Indoor
1. In Auto-locking mode
When the door is closed, 
door is locked with 
beep sound automatically.
2. In manual locking mode
After closing door, 
press [open/close] button, 
then door is locked 
with beep sound.
Press manual lock button,
then door is locked.
Press manual lock button,
then door is locked.
: [N] button
C
: PIN code : Trespass alarm
:
[S] button
: Card key : Unlock
: [ ] button
:
9V alkaline battery(6LF22) : Lock
#
: [#] button
UC
: User code : Smartphone
application
: Touch the front
pad
MC : Manager code
: Authentication
code
: [Communication
function] button
RC
: Registration new code : Open button on
application
RAN
DOM
CODE
: Random code
※ Normal mode : [N] button / Safety mode : [S] button
ㆍSecret code: 10 EA (6-12 digits) / Card key: 50 EA
Safety mode
1 2 3 4 5 6 7 8 9 10 11 12
REG.
Secret
code
1 4 MC
or
#RC
Card key
1 5 MC
or
#
Card
Registration
Number(2digits)
#
DEL.
All 
Card key
2 5 MC
or
#
Individual
Card key
3 5 MC
or
#
Card
Registration
Number(2digits)
#
Safety mode (Manager)
Change Manager
code
8 4 MC
or
#RC #RC #
REG.
Manager
Card key
8 5 MC
or
# #
DEL.
All
manager 
Card key
8 6 MC
or
#5
※ Repeat highlighted part for continuous register or delete
Warning : Please do not forget manager code. 
If you forget this number should contact to your local agency.
How to use random security coding function
Usage
RAN
DOM
CODE C
How to apply external power in the emergency
PIN code C#Card key
ㆍ Normal mode : ideal for new users or low security environments
ㆍ Safety mode : higher security level via use of a manager Secret code. Provides individual register and delete
function
: [N] button : [S] button : Card key
UC : User code MC : Manager code RC :
Registration
n
ew code
How to change from normal mode to safety mode
12345678910
Safety mode
3"Sec UC #MC #MC #
How to change from safety mode to normal mode
Normal mode
3"Sec MC #UC #UC #
How to change Normal mode / Safety mode
Auto locking function / Auto relocking system
When the door is closed, it will be locked
automatically.
If the door is not opened within 7 seconds after
input PIN code or card key it will be relocked
automatically to protect user`s property.
1. Auto-locking function 2. Auto-relocking system
2. How to register remote key & to unlock / to lock
ㆍRemote key : 5 EA
: [N] button : Remote unlock : Remote lock
To register / delete remote key (Communication pack)
REG. Remote key
or
DEL. All
remote key
9#
3"sec
How to lock/unlock by remote key
Unlock Lock
※ Repeat highlighted part for continuous register or delete.
1. How to install the communication pack
Communication pack
(RXP-10)
※ 1 ea battery is equipped.
※ To replace battery, open the back cover.
Purchase the wireless communication
pack and remote key separately and plug 
the pack in the socket located below the
batteries.
Remote key
(RP-20)
1.5v ‘AAA’ size
alkaline
battery 1 ea
Indicate lamp
[Lock] button
[Unlock] button
Communication pack / Remote key
Installing communication / Mobile Access pack
1. Open the inner battery cover then remove the battery.
2. Plug in the communication pack into the terminal in the
socket.
3. Insert batteries after confirming the direction of 
and .
4. Sound is heard when mounted correctly.
Caution
Please fit the socket in the correct
orientation.
Rev.00
: [Communication function] button
C
: PIN code
: Smartphone application : Authentication code
: Open button on application
Smartphone
REG. 1 C # #
ALL DEL.
2 C #
Send family key
Send
#C#6#
※ Please follow detailed instructions given on the smartphone application for highlighted parts.
How to unlock with mobile key (using smartphone)
Open in safe mode
Safe mode ※ Click [ ] open button on smartphone application
to unlock the door
※ Wireless connection between smartphone and door lock may result in distance and/or time
di󽗈erences based on your network connection.
How to set up smartphone to use mobile key
1. Download Schlage Access application on your smartphone from the app store.
2. Register and log into the app.
3. Follow instructions from the app installation guide to register the door lock.
4. When you unlock the door lock using the app for the 󽗉rst time, press [ ] open button on
the app, followed by 1 on door lock’s numeric pad to check connection.
Caution
󾖴󾖴󾖴󾖷󾖴󾖴󾖴󾖴󾖴󾖴󾖴󾖴󾖴
˙ Make sure smartphone power is “on”.
˙ Make sure you’re logged into the app, and it’s active.
˙ Make sure your smartphone’s Bluetooth function is on
※ If you activate or deactivate the app and/or Bluetooth function, the app disconnects from the
lock and deactivates the mobile key.

If you wish to reuse the mobile key, turn on the app and the Bluetooth function, press [ ]
open button on the app, followed by 1 on door lock's numeric pad to reconnect and activate
the mobile key.
※ You must keep the app “on” and Bluetooth “on” at all times to use the mobile key without
reconnection.
© 2019 Allegion

Other Schlage Door Lock manuals

Schlage B360/F User manual

Schlage

Schlage B360/F User manual

Schlage B660 User manual

Schlage

Schlage B660 User manual

Schlage LE User manual

Schlage

Schlage LE User manual

Schlage DCT-A00XP14-00 User manual

Schlage

Schlage DCT-A00XP14-00 User manual

Schlage ND10 User manual

Schlage

Schlage ND10 User manual

Schlage BE365 User manual

Schlage

Schlage BE365 User manual

Schlage AD-200 User manual

Schlage

Schlage AD-200 User manual

Schlage FE576 User manual

Schlage

Schlage FE576 User manual

Schlage BE468 series User manual

Schlage

Schlage BE468 series User manual

Schlage F-Series User manual

Schlage

Schlage F-Series User manual

Schlage BE469 User manual

Schlage

Schlage BE469 User manual

Schlage LM9300 User manual

Schlage

Schlage LM9300 User manual

Schlage Ease S2 User manual

Schlage

Schlage Ease S2 User manual

Schlage S-260 User manual

Schlage

Schlage S-260 User manual

Schlage BE365 User manual

Schlage

Schlage BE365 User manual

Schlage S-510 User manual

Schlage

Schlage S-510 User manual

Schlage Connect BE469ZP User manual

Schlage

Schlage Connect BE469ZP User manual

Schlage AD-Series User manual

Schlage

Schlage AD-Series User manual

Schlage V10 User manual

Schlage

Schlage V10 User manual

Schlage KING COBRA-2 KC5196-2-R Operating instructions

Schlage

Schlage KING COBRA-2 KC5196-2-R Operating instructions

Schlage D-Series User manual

Schlage

Schlage D-Series User manual

Schlage Touch FE695 Lever User manual

Schlage

Schlage Touch FE695 Lever User manual

Schlage CO-Series User manual

Schlage

Schlage CO-Series User manual

Schlage A Series User manual

Schlage

Schlage A Series User manual

Popular Door Lock manuals by other brands

Colzer SL-1 user guide

Colzer

Colzer SL-1 user guide

SINGGATE FR058 user manual

SINGGATE

SINGGATE FR058 user manual

Locinox FREE VINCI LFKQ X2L user guide

Locinox

Locinox FREE VINCI LFKQ X2L user guide

Hydro WICONA WICLINE evo Hardware installation

Hydro

Hydro WICONA WICLINE evo Hardware installation

LOCKEY SUMO GL2LINX installation instructions

LOCKEY

LOCKEY SUMO GL2LINX installation instructions

Kaba Mauer 71111 President A Mounting instructions

Kaba Mauer

Kaba Mauer 71111 President A Mounting instructions

LOCKLY GUARD DEADBOLT 728F ZU user manual

LOCKLY GUARD

LOCKLY GUARD DEADBOLT 728F ZU user manual

Salto AF i 0 Series installation guide

Salto

Salto AF i 0 Series installation guide

Lamp XL-MT120-U01 installation instructions

Lamp

Lamp XL-MT120-U01 installation instructions

Kwikset Kevo Installation and user guide

Kwikset

Kwikset Kevo Installation and user guide

Yale YMF40+ user guide

Yale

Yale YMF40+ user guide

Easy Access Easy-809 manual

Easy Access

Easy Access Easy-809 manual

HES KS100-640 Aperio installation instructions

HES

HES KS100-640 Aperio installation instructions

Assa Abloy HES 9400 Installation Instructions and Frame Preparation

Assa Abloy

Assa Abloy HES 9400 Installation Instructions and Frame Preparation

CDVI CZ3000 installation manual

CDVI

CDVI CZ3000 installation manual

Dormakaba Saffire EVO user guide

Dormakaba

Dormakaba Saffire EVO user guide

Simons Voss Technologies SmartHandle 3062RRMO instructions

Simons Voss Technologies

Simons Voss Technologies SmartHandle 3062RRMO instructions

Dormakaba RCI 4 Series installation instructions

Dormakaba

Dormakaba RCI 4 Series installation instructions

manuals.online logo
manuals.online logoBrands
  • About & Mission
  • Contact us
  • Privacy Policy
  • Terms and Conditions

Copyright 2025 Manuals.Online. All Rights Reserved.