manuals.online logo
Brands
  1. Home
  2. •
  3. Brands
  4. •
  5. Scosche
  6. •
  7. Automobile Accessories
  8. •
  9. Scosche GM1583 User manual

Scosche GM1583 User manual

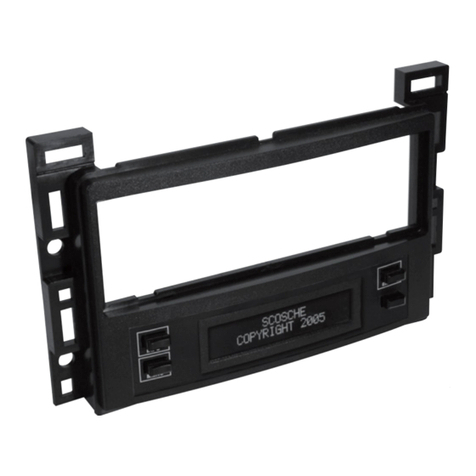
IN-DASH INSTALLATION KIT FOR
SELECT 1992-UP GENERAL MOTORS/HUMMER/
ISUZU VEHICLES WITH OVERSIZE RADIO/M3000
If you have any further questions, call:
©2005 SCOSCHE INDUSTRIES, INC.
TECH HELP 1-800-621-3695, ext. 3
SI 06/05-GM1583 (3000369)
GM1583
BUICK
1997-UP CENTURY ..................... 2
1995-99 LE SABRE .................... 3
1995-UP PARK AVE ..................... 3
2004-UP RAINIER ....................... 6
1997-04 REGAL .......................... 3
1995-96 REGAL .......................... 3
1996-98 RIVIERA ........................ 3
1995-96 ROADMASTER ............. 3
1996-98 SKYLARK ...................... 4
CADILLAC
1992-95 ELDORADO .................. 4
2003-UP ESCALADE ................... 4
2003-UP ESCALADE ESV ........... 4
2003-UP ESCALADE EXT ........... 4
1992-95 SEVILLE ........................ 4
CHEVROLET
2003-UP AVALANCHE ................ 4
2000-05 CAVALIER .................... 4
2004 CLASSIC ...................... 5
2004-UP COLORADO ................. 4
CHEVROLET (Cont'd)
2001-UP EXPRESS ..................... 4
2000-05 IMPALA ......................... 5
2001-03 MALIBU ........................ 5
2000-05 MONTE CARLO ............ 5
2002-03 S-10 PICKUP ................ 5
2003-UP SILVERADO .................. 4
2004-UP SSR ............................... 5
2003-UP SUBURBAN .................. 4
2002-UP TRAILBLAZER .............. 5
2000-UP VENTURE ..................... 5
GMC
2004-UP CANYON ....................... 4
2002-UP ENVOY .......................... 6
2001-UP SAVANA ........................ 4
2003-UP SIERRA ......................... 4
2003-UP YUKON ......................... 4
2003-UP YUKON XL .................... 4
HUMMER
2003-UP H1 ................................. 6
2003-UP H2 ................................. 6
VEHICLE APPLICATIONS:
ISUZU
2003-UP ASCENDER .................. 6
OLDSMOBILE
1996-98 ACHIEVA ...................... 4
1995-00 ALERO .......................... 6
1995-00 AURORA ....................... 6
2002-04 BRAVADA ..................... 6
1995-97 CUTLASS ..................... 3
SUPREME
1994-99 EIGHTY-EIGHT ............. 7
1998-02 INTRIGUE ..................... 7
1994-99 LSS ............................... 7
1994-96 NINETY-EIGHT ............. 7
1994-98 REGENCY .................... 7
2000-UP SILHOUETTE ............... 5
PONTIAC
2000-UP BONNEVILLE ............... 7
2001-05 GRAND AM .................. 7
2000-UP MONTANA .................... 5
2000-UP SUNFIRE ...................... 4
MOUNTING
PANEL
RADIO'S
SLEEVE
DIN RADIO
OPTIONAL
ISO DIN
TRIM
LIABILITY DISCLAIMER
This instruction booklet is based on carefully documented data and research of automobile dash disassembly, wire harness/codes and
information pertaining to installation of this kit (#GM1583) in 1992-UP Select General Motors Vehicles with oversize radio/M3000.
Scosche Industries, Inc. can not be held responsible for discrepancies/inconsistencies that may occur due to the automobile during the
installation of components while using this booklet.
VARIOUS
REAR
SUPPORT
STRAPS
POCKET
LEFT
SPACER
RIGHT
SPACER
ASSEMBLING THE KIT
CAUTION:
REAR SUPPORTING THE RADIO
ADDS TO THE INSTALLATION'S
STRUCTURAL INTEGRITY.
2
FACTORY WIRING CODES
For Factory Wiring Codes go to: www.scosche-cars.com
This premium installation kit is for 1992-UP General Motors vehicles with oversize radio/M3000. Included are all the
parts you need to mount your car stereo.cassette or CD player into your vehicle's dash. Refer to the individual instruction
in this manual to remove your vehicle's factory radio and assemble this kit.
CAUTION:
DISCONNECT YOUR VEHICLE'S NEGATIVE BATTERY TERMINAL BEFORE THE INSTALLATION TO HELP
PREVENT ELECTRICAL DAMAGE. WE RECOMMEND THE USE OF A VOLT/OHM METER OVER A TEST
LIGHT TO CHECK WIRING. A TEST LIGHT OR GROUNDED WIRE PROBE CAN CAUSE DAMAGE TO THE
VEHICLE'S COMPUTER AND/OR DIAGNOSTIC SYSTEMS. AVOID ALL FACTORY AIR BAG WIRING - AIR
BAGS CAN ACCIDENTALLY DEPLOY CAUSING SERIOUS INJURY OR DEATH.
NOTES:
•See your vehicle's instructions for any special tools your installation might require.
•Read all instructions accompanying your car stereo/cassette player for proper wiring and mounting instructions.
INTRODUCTION / PRELIMINARY
GM1583 POCKET PREPARATION
1. Cut along dotted line to remove middle
screw mounting tab. (Illustration "A")
ILLUSTRATION "A"
2. Attach pocket to kit for added pocket
strength, attach screw as shown in
illustration (Illustration "B")
FRONT VIEW OF POCKET
ILLUSTRATION "B"
BOTTOM
VIEW OF KIT
FRONT
OF KIT
1997-UP Buick Century
RADIO REMOVAL:
1. Extract (1) screw from bottom lower dash panel at right of glove box.
2. Open glove box and pop out small lower dash panel along the right side.
3. Carefully pop out fuse box cover at right side of dash and extract (1) screw from the
dash bezel at the right of the air vent.
4. Extract (2) screws at the bottom of the lower ashtray/lighter dash section pop out and remove.
5. Extract (1) screw from the right driver’s side lower dash panel and one panel popper from the left side.
6. Carefully pop out the driver’s side lower dash panel and remove.
7. Put the vehicle into first or low gear, and tilt the steering column adjustment all the way down and pull outward on
the complete dash panel to unsnap, unplug, and remove panel.
8. Extract (3) 7 MM screws holding radio, unplug connector, antenna cable and remove radio.
3
1995-96 Buick Roadmaster
RADIO REMOVAL:
1. Remove side dash panels by carefully pulling outward on them to release fastening clips.
2. Carefully pull out on underdash panel below steering column to release fastening clips,
and remove panel.
3. Carefully pull outward on lower panel at right of glove box to release fastening clips,
and remove panel.
4. Extract (2) 7 MM screws above instrument cluster.
5. Make sure the parking brake is on, then insert the key and turn to the "on" position.
6. Put the vehicle into first or low gear, and tilt the steering column adjustment all the way down and pull outward on
the complete instrument panel around gauges and along top of glovebox. Panel clips will release and dash panel
can be removed.
7. Extract (3) 7 MM screws holding radio, unplug connector, antenna cable and remove radio.
1996-98 Buick Riviera
RADIO REMOVAL:
1. Gently pull outward on Left and Right windshield pillar panels to release (2) snap clips
and extract each one.
2. Unsnap side dash panels and remove (1) 7 MM screw from behind each.
3. Extract (6) plastic push-pin fasteners from under front edge of upper dash pad.
Pull outward to remove the bottom panel of the upper dash pad.
4. Extract (5) 7-MM screws securing upper dash pad, lift up and outward to remove pad.
5. Carefully pull outward on dash/instrument bezel to release clips, unplug and remove bezel.
6. Extract (3) 7-MM screws from climate control module, unplug and remove module.
7. Extract (4) 7-MM screws securing radio, unplug connectors, antenna lead, and remove radio.
1997-04 Buick Regal
RADIO REMOVAL:
1. Unsnap gear selector trim bezel, unplug and remove the bezel. Extract (2) 10 MM
bolts from metal console bracket.
2. Open armrest storage, lift up rubber mat and extract (2) 10 MM bolts from underneath.
3. Extract (2) 10 MM bolts from the front sides of the console, which are concealed up
under the dash.
4. Slide shifter back into low gear, push down on spring-loaded shifter trim and pull complete center console to rear
of the vehicle, allowing the center lower dash section (attached) to unsnap from the dash.
5. Extract (1) screw from bottom lower dash panel at right of glove box.
6. Open glove box and pop out small lower dash panel along the right side.
7. Carefully pop out fuse box cover at right side of dash and extract (1) screw from the dash bezel at the right of the
air vent.
8. Extract (1) screw from the lower right of driver’s side lower dash panel and one panel popper from the left side.
9. Carefully pop out the driver’s side lower dash panel and remove.
10. Extract (3) 7 MM screws holding radio, unplug connector, antenna cable and remove radio.
1995-96 Buick Regal
1995-97 Oldsmobile Cutlass Supreme
RADIO REMOVAL:
1. Tilt steering column down to lowest position.
2. Unsnap dash bezel and remove.
3. Extract (3) 7MM screws securing radio, unplug connectors, antenna lead and remove
radio.
NOTE: Back of dash cavity may need modification.
1995-99 Buick Le Sabre
1995-UP Buick Park Avenue
RADIO REMOVAL:
1. Pop out small narrow trim panel around trunk/fuel door buttons and extract on screw
at left.
2. Carefully pop out small narrow trim panel around a/c heater controls and bottom of
passenger airbag. Extract (1) screw at far right and (1) screw above glove box.
3. Using a panel removal tool or small flat-blade screwdriver pop out all (4) dash vents and
remove (1) screw behind each vent.
4. Make sure the parking brake is on, then insert the key and turn to the "on" position.
5. Put the vehicle into first or low gear, and tilt the steering column adjustment all the way down and pull outward on
the complete dash panel.
6. Extract (3) 7 MM screws holding radio, unplug connector, antenna cable and remove radio.
4
1996-98 Buick Skylark
1996-98 Oldsmobile Achieva
RADIO REMOVAL:
1. Twist and release fasteners holding drivers and passengers under dash covers,
and remove.
2. Open glove box, push stopper tabs inward, open all the way down, and remove glove box.
3. Extract (6) 9/32" Hex screws from glove box area.
4. Extract (2) 9/32" Hex screws from plastic tube in glove box area and extract (2) from just below plastic tube.
5. Extract (2) 9/32" Hex screws from driver's side bottom dash.
6. Open and remove fuse panel access door.
7. Carefully grasp complete dash/radio bezel, pull out to release clips and remove.
8. Extract (3) screws holding radio in, unplug connector and remove.
1992-95 Cadillac Eldorado
1992-95 Cadillac Seville
RADIO REMOVAL:
1. Using a panel removal tool, carefully pry outward to
release the
trim ring around the radio and remove.
2. Carefully pry up on the ash tray/shifter bezel trim to release.
CAUTION: WOOD TRIM BEZEL, USE EXTREME CARE.
3. Extract (2) at the bottom edge of the radio, slide radio out, unplug and remove.
NOTE: Secure the mounting panel to the dash with the supplied Carriage Bolts and Hex Flange Nuts.
FRONT VIEW
SIDE VIEW
DASH
CARRIAGE
BOLT
HEX
FLANGE
NUT
2000-05 Chevrolet Cavalier
2000-UP Pontiac Sunfire
RADIO REMOVAL:
1. Open glove box and remove (5) 9/32" screws.
2. Remove side panels from drivers side dash and passengers side dash,
and extract (1) 9/32" screw from each side.
3. Remove 1 Phillips head screw at top center of air vent.
4. Extract (2) screws under vent panel, carefully remove top of dash.
5. Extract (3) screws from the top of the front dash panel, disconnect and remove.
2003-UP Cadillac Escalade
2003-UP Cadillac Escalade ESV
2003-UP Cadillac Escalade EXT
2003-UP Chevrolet Avalanche
RADIO REMOVAL:
1. Turn ignition on and shift vehicle into first gear.
2. Unsnap trim bezel by pulling firmly.
3. Using a 7mm socket, remove (3) bolts from radio, disconnect and remove.
2004-UP Chevrolet Colorado
2004-UP GMC Canyon
RADIO REMOVAL:
1. Unsnap dash bezel and lift away, disconnect and remove.
2. Unscrew (3) hex bolts securing radio, lift away, disconnect and remove.
2001-UP Chevrolet Express
2001-UP GMC Savana
RADIO REMOVAL:
1. Carefully pry out on dash bezel to release, unplug and remove.
2. Remove three (3) 7MM hex screws holding radio, unplug and remove.
2003-UP Chevrolet Silverado
2003-UP Cevrolet Suburban
2003-UP GMC Sierra
2003-UP GMC Yukon
2003-UP GMC Yukon XL
5
2000-05 Chevrolet Impala
RADIO REMOVAL:
1. Extract (2) 9/32" hex screws from above instrument panel.
2. Remove fuse panel cover and extract (1) 9/32" hex screw from behind.
3. Remove passenger side fuse cover and extract (1) 9/32" screw from behind.
4. Drop underdash covering using panel removal tool and extract (2) 9/32" screws from
behind.
5. Remove (1) 9/32" screw from left side trim, tilt wheel down, and pull away dash bezel,
disconnect and remove.
6. Remove (3) 9/32" screws securing the radio, disconnect and remove from dash.
2000-05 Chevrolet Monte Carlo
RADIO REMOVAL:
1. Extract (1) Phillips head screw from glove box.
2. Remove cylinder cover from around ignition keyhole.
3. Extract (2) Phillips head screw from beneath steering column plate, and remove cover.
4. Remove fuse access cover and remove (1) Phillips head screw from behind.
5. Adjust steering wheel column down and remove dash trim bezel. Disconnect hazard switch and remove
panel.
2001-03 Chevrolet Malibu
2004 Chevrolet Classic
RADIO REMOVAL:
1. Use a small flat blade or pick to remove ignition switch collar.
2. Using panel removal tool, pry out dash bezel, disconnect and remove.
3. Remove three (3) 7MM screws securing radio, disconnect and remove.
2004-UP Chevrolet SSR
RADIO REMOVAL:
1. Using a panel removal tool remove the aluminum trim that separates the dash.
2. Remove six (6) 7MM hex screws securing the dash panel.
3. Remove the dash by pulling towards you. Use caution when removing the dash around
the passenger’s air bag. Bend the sides of the passenger air bag cover to release the
passenger side of the dash.
4. Remove three (3) 7MM hex screws securing radio to the dash. Disconnect and remove the radio.
2002-03 Chevrolet S-10 Pickup
RADIO REMOVAL:
1. Turn ignition ON and shift vehicle into first if an automatic.
2. Extract (1) 9/32" screw from above gauge cluster.
3. Extract (5) 9/32" screws from unerdash pane; and remove.
4. Extract (2) 9/32" screws from bottom of dash bezel, and carefully pry out bezel.
CAUTION: WHEN YOU GO TO PULL BEZEL OVER HAZARD SWITCH BE VERY CAREFUL NOT TO BREAK
SWITCH. DISCONNECT AND REMOVE BEZEL.
5. Extract (3) 9/32" screws securing radio, disconnect, and remove.
2002-UP Chevrolet Trailblazer
RADIO REMOVAL:
1. Extract (2) Phillips screws from above instrument panel.
2. Extract (1) Phillips screw from under AC controls.
3. Extract (2) Phillips screws from lower dash panel above brake panel.
4. Carefully pull dash bezel off, disconnect and pull away.
5. Extract (2) 9/32" hex screws, disconnect and remove radio.
1995-00 Oldsmobile Aurora
RADIO REMOVAL:
1. Carefully unsnap dash bezel and remove.
2. Extract (3) 7MM screws securing radio, unplug connectors, antenna lead and remove
radio.
1995-00 Oldsmobile Alero
RADIO REMOVAL:
1. Unsnap shifter panel and leave it loose.
2. Using a panel removal tool remove radio trim bezel (there are a total of six snaps)
unplug and remove.
3. Extract (3) 9/32" screws holding radio, unplug and remove.
2002-UP GMC Envoy
2004-UP Buick Rainier
2003-UP Isuzu Ascender
RADIO REMOVAL:
1. Open center console lid and extract (2) Phillips screws from front of console, lift out
rubber pads and extract (4) more Phillips screws from under. Remove console insert.
2. Extract (2) 9/32" screws from console cavity.
3. Remove rubber pad from front cup holder and extract (1) 9/32" screw from under.
4. Extract (4) Phillips screws from sides of carpeted panel directly under radio and climate controls, pull it down and
out of the way.
5. Pull center console back and down to get to (2) Phillips screws on bottom of radio bezel. Pry bezel out from top to
bottom, disconnect and remove.
6. Extract (3) 9/32" screws securing radio.
2003-UP Hummer H1
RADIO REMOVAL:
1. Remove (4) Screws securing radio/dash bezel & remove.
2. Remove (3) 7MM hex screws holding radio, unplug and remove.
2003-UP Hummer H2
RADIO REMOVAL:
1. Open center console storage and extract 4 screws securing hinged lid.
2. Remove Torx lock nut holding Shift lever (Nut is facing forward) and Slide shift lever off.
3. Use a panel removal tool to carefully pop up cup holder/gear indicator plate.
4. Extract (2) 7mm hex screws at bottom of center dash bezel (revealed in previous step #3).
5. Extract (2) 7mm hex screws from center dash bezel (near each vent).
6. Carefully pry out on center dash bezel to unsnap, unplug and remove.
7. Extract (3) 7mm hex screws holding radio, unplug and remove.
6
2000-UP Chevrolet Venture
2000-04 Oldsmobile Silhouette
2000-UP Pontiac Montana
RADIO REMOVAL:
1. Remove ashtray and extract (2) Phillips head screws from behind.
2. Unsnap perimeter of radio trim bezel, lift away and remove. Extract (3) Phillips head
screws
securing radio, lift away, disconnect and remove.
1994-99 Oldsmobile Eighty-Eight
1994-99 LSS
1994-96 Oldsmobile Ninety-Eight\Regency
RADIO REMOVAL:
1. Open glove box, and remove (2) 9/32" Hex head screws at edge of Woodgrain panel.
2. Carefully pull out Woodgrain trim to release remaining snap clips and remove.
3. Extract (2) 9/32" Hex screws from bottom edge of center dash/radio bezel.
4. Carefully lift up and out on center dash/radio bezel, unsnap (3) clips from the top, and remove the bezel.
5. Extract (3) 9/32" Hex screws holding radio, unplug connector, antenna and remove radio.
1998-02 Oldsmobile Intrigue
RADIO REMOVAL:
1. Using panel removal tool, pry off radio bezel and remove.
2. Extract (3) 9/32" screws securing radio, disconnect and remove.
2000-UP Pontiac Bonneville
RADIO REMOVAL:
NOTE: The factory stereo provision is for a Double DIN radio.
1. Remove (2) plastic fasteners from dash bezel above instrument cluster.
2. Pull bezel out and up, disconnect and remove. Pull radio out by depressing finger tabs,
and remove.
2001-05 Pontiac Grand Am
RADIO REMOVAL:
1. Use a panel removal tool to pry out radio dash bezel, unplug electrical connectors and
remove bezel.
2. Extract (3) 7MM screws from radio.
7
2002-04 Oldsmobile Bravada
RADIO REMOVAL:
1. Open arm rest and remove both rubber screw covers.
2. Remove (6) Phillips head screws.
3. Carefully pull up console and shift gear to first.
4. Locate and remove (2) Phillips head screws at bottom of center dash panel.
5. Carefully pull away center dash.
6. Remove (3) 9/32" screws.
8

Other Scosche Automobile Accessories manuals

Scosche ITCGM01B User manual

Scosche

Scosche ITCGM01B User manual

Scosche AU2392B User manual

Scosche

Scosche AU2392B User manual

Scosche FD5000SW User manual

Scosche

Scosche FD5000SW User manual

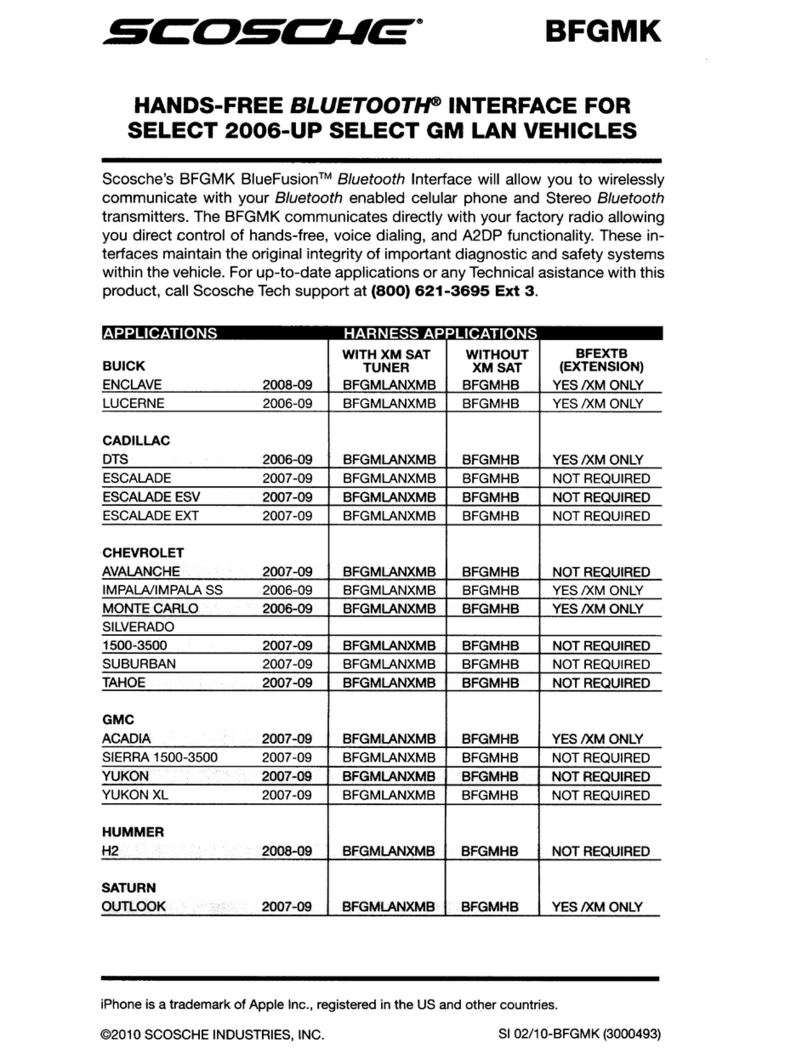
Scosche BFGMK Series User manual

Scosche

Scosche BFGMK Series User manual

Scosche MAGICMOUNT MPQ2V User manual

Scosche

Scosche MAGICMOUNT MPQ2V User manual

Scosche HA1573 User manual

Scosche

Scosche HA1573 User manual

Scosche IPFMRDS User manual

Scosche

Scosche IPFMRDS User manual

Scosche HY1602 User manual

Scosche

Scosche HY1602 User manual

Scosche HAQ04 User manual

Scosche

Scosche HAQ04 User manual

Scosche BTFREQ PRO BTFMPD3SR User manual

Scosche

Scosche BTFREQ PRO BTFMPD3SR User manual

Scosche HY1600 Service manual

Scosche

Scosche HY1600 Service manual

Scosche MagicMount MAGDBASE-2PKBP0 User manual

Scosche

Scosche MagicMount MAGDBASE-2PKBP0 User manual

Scosche FCJ1275A User manual

Scosche

Scosche FCJ1275A User manual

Scosche MA1535 User manual

Scosche

Scosche MA1535 User manual

Scosche GOBAT 2600 PBC71 User manual

Scosche

Scosche GOBAT 2600 PBC71 User manual

Scosche ITCFDOSB User manual

Scosche

Scosche ITCFDOSB User manual

Scosche CIVIC 4-DR 2001 User manual

Scosche

Scosche CIVIC 4-DR 2001 User manual

Scosche DASHMOUNT HDM User manual

Scosche

Scosche DASHMOUNT HDM User manual

Scosche MAGIC GRIP MGQWDDP User manual

Scosche

Scosche MAGIC GRIP MGQWDDP User manual

Scosche HUD580GC User manual

Scosche

Scosche HUD580GC User manual

Scosche POWERUP 400 User manual

Scosche

Scosche POWERUP 400 User manual

Scosche MagicGrip MGQWD-XTET User manual

Scosche

Scosche MagicGrip MGQWD-XTET User manual

Scosche HAQ03 User manual

Scosche

Scosche HAQ03 User manual

Scosche BT1000 User manual

Scosche

Scosche BT1000 User manual

Popular Automobile Accessories manuals by other brands

Ranger design C12-E installation guide

Ranger design

Ranger design C12-E installation guide

Connects2 Aerpro APVAU12 instruction manual

Connects2

Connects2 Aerpro APVAU12 instruction manual

Eling GR01 Quick user guide

Eling

Eling GR01 Quick user guide

bosal 045272 FITTING INSTRUCTION

bosal

bosal 045272 FITTING INSTRUCTION

Whispbar K077W Fitting Instructions for Basic Carrier

Whispbar

Whispbar K077W Fitting Instructions for Basic Carrier

Westin 25-0760 instructions

Westin

Westin 25-0760 instructions

Metra Electronics 95-5817 installation instructions

Metra Electronics

Metra Electronics 95-5817 installation instructions

HUSKY LINERS 6250 Care and use instructions

HUSKY LINERS

HUSKY LINERS 6250 Care and use instructions

NavLinkz RL4-MZD88 manual

NavLinkz

NavLinkz RL4-MZD88 manual

Seat Dataplug Operating and installation instructions

Seat

Seat Dataplug Operating and installation instructions

Directed Directechs DB3 installation guide

Directed

Directed Directechs DB3 installation guide

Rockinger RO 400 Installation and operating instructions

Rockinger

Rockinger RO 400 Installation and operating instructions

Techart 086.530.200.001 RDW Mounting instructions

Techart

Techart 086.530.200.001 RDW Mounting instructions

Havis-Shields P-MFK-5 Install instructions

Havis-Shields

Havis-Shields P-MFK-5 Install instructions

STO N SHO SNS 289D Installation procedures

STO N SHO

STO N SHO SNS 289D Installation procedures

Holman 4A91H Instruction guide

Holman

Holman 4A91H Instruction guide

Whispbar K855W Fitting instructions

Whispbar

Whispbar K855W Fitting instructions

Jaeger 21010516J Fitting instructions

Jaeger

Jaeger 21010516J Fitting instructions

manuals.online logo
manuals.online logoBrands
  • About & Mission
  • Contact us
  • Privacy Policy
  • Terms and Conditions

Copyright 2025 Manuals.Online. All Rights Reserved.