manuals.online logo
Brands
  1. Home
  2. •
  3. Brands
  4. •
  5. SCREENLINE
  6. •
  7. Projection Screen
  8. •
  9. SCREENLINE Maximilian 2.0 Pro User manual

SCREENLINE Maximilian 2.0 Pro User manual

Maximilian 2.0 Pro
aximilian
Indice/Index:
1. Disegni tecnici, tabelle pesi, avvertenze
Technical drawings, weight charts, warning pag. 2
2. Modalità di installazione
Installation instructions pag. 6
2.1 Installazione staffa a golfare
Eyebolt brackets pag. 6
2.2 Installazione staffa a soffitto
Ceiling bracket installation pag. 7
2.3 Installazione staffa a soffitto con barre filettate
Threaded rod ceiling bracket installation pag. 9
2.4 Installazione staffa aliscaf
Aliscaf bracket installation pag. 11
3. Modalità di sollevamento
Hoisting methods pag. 13
3.1 Sollevamento a catene
Chain hoisting pag. 13
3.2 Sollevamento con paranco a catene elettrico
Electric chain hoisting pag. 14
4. Centralina - Control unit pag. 15
5. Uso e manutenzione pag. 16
2
1. Disegni tecnici, tabelle pesi, avvertenze
Technical drawings, weight charts, warning
MISURE (m)
MEASURES (m) A (cm) a (cm) PESO MAXIMILIAN(kg)
MAXIMILIAN WEIGHT (kg)
PESO IMBALLATO (kg)
WEIGHT PACKAGING (kg)
8,0 850 910
8,5 900960
9,0 9501010
9,5 10001060
10,0 10501110
10,5 11001160
11,0 11501210
11,5 12001260
12,0 12501310
200428
447
467
485
242 506
526
264 546
274 565
285 585
3
Luce di proiezione / viewing area
Lunghezza tubo: luce di proiezione + 133 mm (5,2") / Tube lenght: viewing area + 133 mm (5,2")
Ingombri totali: luce di proiezione + 633,6 (24,9") / Overall width: viewing area + 633,6 mm (24,9")
134 [5,26]
TUBE: 150 mm (5,9")
200 [7,89]
263 [10,33]
557[21,93]
600[23,61]
350 [13,80]
263 [10,34]
180 [7,09]
4
A-A ( 1 : 10 )
B ( 1
A
A
B
45[1,77]
23[0,89]
17[0,66]
4[0,17]
53 [2,09]
104 [4,10]
45 [1,77]
8[0,33]
14[0,54]
5
ATTENZIONE / WARNING!
!FRONT SIDE!
BE SURE TO TAKE INTO CONSIDERATION THIS DISPLAY
Posizionare l’imballo all’interno della sala di installazione assicurandosi di preparare lo schermo con il verso nella giusta direzione.
Place the empty packaging in the installation room making sure that the screen is positioned with its front side in the right direction.
L’Installazione deve essere eseguita da personale esperto: la squadra competente dovrà occuparsi dello scarico, del sollevamento,
dell’ancoraggio e del collegamento elettrico.
The installation must be carried out by qualified staff: the team in charge will have to unload, hoist and anchor the screen and connect the wiring.
! L’installazione del sistema non corretto può danneggiare il motore e il sistema di controllo. La mancata osservanza delle istruzioni di
installazione farà decadere ogni garanzia.!
! The improper installation of the system may damage the motor and the control system. The installation not in compliance with the given i
nstructions will nullify the warranty!
DURANTE LA MANOVRA DI SOLLEVAMENTO È ASSOLUTAMENTE VIETATO PER CHIUNQUE OCCUPARE O TRANSITARE NELL'AREA SOTTOSTANTE
LO SCHERMO. QUALSIASI ERRORE NEL MONTAGGIO DEL SISTEMA DI SOLLEVAMENTO POTREBBE AVERE CONSEGUENZE FATALI!
DURING THE HOISTING PROCESS IT IS STRICTLY FORBIDDEN TO WALK IN THE AREA UNDERNEATH THE SCREEN. ANY MISTAKE IN THE INSTALLATION
OF THE SYSTEM COULD BE FATAL!
Tutte le procedure di installazione non conformi o che differiscono dalle metodologie descritte nel presente manuale non saranno coperte
da garanzia.
Any divergence from the procedures laid out in this manual will not be covered by the warranty.
Il sollevamento dello schermo obbligariamente deve essere effettuato mediante 3 punti di ancoraggio
l’azienda si rilleva sollevata da qualsiasi responsabilità nel caso in cui il sollevamento venga effetuato con soli 2 punti di ancoraggio.
The liſting of the screen must be done through 3 anchoring points.
The company is relieved of any responsibility in the event that the liſting is carried out with only 2 anchoring points.
6
2. Modalità di installazione - Installation instructions
2.1 Staffe a golfare - Eyebolt brackets
N. 3 staffe a golfare sempre incluse: utilizzabili come gancio per il sollevamento con paranco a catene. Three eyebolt brackets are always
included: they can be used just as as a hook for hoisting.
9 [ 0,33]
25 [0,98] 120 [4,72] 25 [0,98]
28[1,08]
50[1,97]
85 [3,35]
45[1,77]
9 [ 0,33]
9 [ 0,33]
9 [ 0,33]
10 X 45°
5[0,20]
R15 [R0,59]
65[2,57]
170 [6,69]
B
A/2-10
A
C
B ( 1 : 15 )
124 [4,89]
MIN: 508 [20]
MAX: 606 [23,8]
C ( 1 : 10)
7
2.2 Installazione staffa a soffitto
Ceiling bracket installation
N. 3 staffe a soffitto. Per installazioni aderenti al soffitto. Three ceiling
brackets for ceiling installations.
STAFFA A SOFFITTO/CEIILING BRACKET
La capacità di sollevamento dello schermo dovrà raggiungere un altezza pari o superiore alla posizione delle staffe installate a soffitto.
Si consiglia di procedere all’installazione delle staffe a soffitto dopo aver sollevato sufficentemente lo schermo. Questo, per individuare
più efficacemente la poszione dell’accoppiamento staffa-schermo.
The hoisting capacity needed for the screen must reach the same height or higher than the position of the brackets mounted on the ceiling. We recommend to mount the ceiling brackets aſter the
screen has been sufficiently liſted in order to better locate the position of the brackets.
IN PRESENZA DI UN SOFFITTO IN CEMENTO ARMATO OGNI STAFFA DEVE ESSERE FISSATA MEDIANTE 4 VITI CON TASSELLO IN ACCIAIO M10.
LE VITI USATE PER LE STAFFE ANCORATE AL SOFFITTO DEVONO AVERE UN CARICO DI ROTTURA A TRAZIONE DI ALMENO 4 KN PER SINGOLA VITE.
SE IL SOFFITTO FOSSE DI NATURA DIVERSA ADOTTARE UN SISTEMA DI ANCORAGGIO CHE GARANTISCA LO STESSO FATTORE DI SICUREZZA.
WHEN FIXING THE BRACKETS TO A REINFORCED CONCRETE CEILING, EACH BRACKET MUST BE FIXED USING FOUR M10 SCREWS WITH GUSSET.
THE BOLTS USED FOR ANCHORING THE BRACKETS TO THE CEILING MUST HAVE A TRACTION BREAKING STRENGTH OF AT LEAST 4 KN PER BOLT.
SHOULD THE CEILING BE OF DIFFERENT NATURE, USE AN ANCHORING SYSTEM ABLE TO GUARANTEE THE SAME SAFETY FACTOR.
405 [15,94]
50[1,97]
50[1,97]
188 [7,40]
63 [2,46]
4[0,16]
120 [4,72]
100[3,94]
280 [11,02]
75[2,95]23[0,89]
23[0,89]
44 [1,73]
100 [3,94]
44 [1,73]
12[0,47]
23 [0,89]
60[2,36]
230 [9,06]
13 [ 0,51]
8
B
A/2-10
A/2+10
A
B ( 1 : 15 )
124 [4,89]
MIN: 238 [9,3]
MAX: 336 [13,2]
MIN: 508 [20]
MAX: 606 [23,8]
C ( 1 : 10 )
C
9
2.3 Installazione staffa a soffitto con barre filettate
Threaded rod ceiling bracket installation
N. 3 staffe a soffitto. Per installazioni aderenti al soffitto. Three ceiling
brackets for ceiling installations.
STAFFA A SOFFITTO CON BARRE FILETATTE
CEILING BRACKETS WITH THREADED ROD WEIGHTS
Si consiglia di procedere all’installazione delle staffe a soffitto con barre filetatte dopo aver sollevato
sufficentemente lo schermo. Questo, per individuare più efficacemente la poszione dell’accoppiamento staffa-schermo.
We recommend to mount the threaded rod weight ceiling brackets aſter the screen has been sufficiently
liſted in order to better locate the position of the bracket-screen matching point.
IN PRESENZA DI UN SOFFITTO IN CEMENTO ARMATO OGNI STAFFA DEVE ESSERE FISSATA MEDIANTE 4 VITI CON TASSELLO IN ACCIAIO M10.
LE VITI USATE PER LE STAFFE ANCORATE AL SOFFITTO DEVONO AVERE UN CARICO DI ROTTURA A TRAZIONE DI ALMENO 4 KN PER SINGOLA VITE.
SE IL SOFFITTO FOSSE DI NATURA DIVERSA ADOTTARE UN SISTEMA DI ANCORAGGIO CHE GARANTISCA LO STESSO FATTORE DI SICUREZZA.
WHEN FIXING THE BRACKETS TO A REINFORCED CONCRETE CEILING, EACH BRACKET MUST BE FIXED USING FOUR M10 SCREWS WITH GUSSET.
THE SCREWS USED FOR ANCHORING THE BRACKETS TO THE CEILING MUST HAVE A TRACTION BREAKING STRENGTH OF AT LEAST 4 KN PER SCREW.
SHOULD THE CEILING BE OF DIFFERENT NATURE, USE AN ANCHORING SYSTEM ABLE TO GUARANTEE THE SAME SAFETY FACTOR.
188 [7,40]
280 [11,02]
405 [15,94]
4[0,16]
63 [2,46]
50[1,97]
120 [4,72]
VARIABLE,ONREQUEST
50[1,97]
280 [11,02]
230 [9,06]
13 [0,51]
23[0,89]75[2,95]23[0,89]
44 [1,73]100 [3,94]44 [1,73]
23 [0,89]
60[2,36]
12 [0,47]
10
B ( 1 : 15 )
126 [4,96]
MIN: 170 [6,99]
MAX: 270 [10,7]
MIN: 440 [17,32]
MAX: 540 [21,3]
B
A
A/2+10
A/2-10
C
C ( 1 : 10 )
N. 3 staffe aliscaf per installazioni su americane. Staffe regolabili per americane da 200cm a 400cm. Three adjustable aliscaf brackets for
trusses from 200 cm to 400 cm.
2.4 Installazione staffa aliscaf
Aliscaf bracket installation
STAFFA ALISCAF/ALISCAF BRACKET
11
250 [9,85]
405 [15,94]
60 [2,36]
173[6,81]
50[1,97]
120 [4,72]
4[0,16]
180 [7,09] 45 [1,77] 180 [7,09]
25 [ 0,98] 9 [ 0,33]
R6 [R0,24]
60[2,36]
47 [1,84] 76 [2,98] 160 [6,30] 47 [1,84]
76 [2,98]
18[0,69]
18[0,69]85[3,35]
12
B ( 1 : 15 )
126 [4,96]
MIN: 440 [17,32]
MAX: 540 [21,3]
MIN: 170 [6,99]
MAX: 270 [10,7]
B
A
A/2-10
A/2+10
C
C ( 1 : 10 )
13
3. Modalità di sollevamento
Hoisting methods
3.1 Sollevamento con paranco a catene
Chain hoisting
Screenline consiglia il sollevamento di Maximilian mezzo n.3 paranchi a catene. Disponibili su ordinazione. Utilizzabili con le staffe a golfare in
dotazione con Maximilian.
Screenline recommends liſting Maximilian using 3 chain hoists available on request.
They can be used with the eyebolt brackets provided with the screen.
+
Per le modalità di installazione e utilizzo dei paranchi a catena si rimanda alle istruzioni allegate al prodotto o disponibili sul nostro sito web www.screenline.it
As to installation procedures and the use of chain hoists, see the instructions which come with the product or consult our website screenline.it
Se si utilizza un argano non acquistato presso Screenline, scegliere il medesimo assicurandosi che abbia portata minima di 500 Kg per singolo paranco.
If you do not use a Screenline hoist, choose one aſter verifying the payload which must be of at least 500 kg each one.
Assicurarsi che i punti di ancoraggio siano adeguati e con portata minima di 500Kg. Make sure that the anchor points
are adequate and enough for liſting at least 500 kg.
Durante il sollevamento è indispensabile che lo schermo mantenga una posizione orizzontale.
During the hoisting process the screen must be horizontal.
Durante la manovra di sollevamento è assolutamente vietato occupare o transitare nell’area sottostante lo schermo.
Qualsiasi errore nel montaggio del sistema di sollevamento potrebbe avere conseguenze fatali.
During the hoisting process it is strictly forbidden to walk in the area underneath the screen. Any mistake in the installation of the
system could be fatal.
Screenline si solleva da ogni responsabilità in caso di danni allo schermo, a terzi e a cose di terzi durante la manovre di sollevamento
e di installazione di esso.
Screenline is not responsible for any damage caused to the screen, to third parties or to third parties' things occurred during the hoisting
and installation process.
Il sollevamento dello schermo obbligariamente deve essere effettuato mediante 3 punti di ancoraggio
l’azienda si rilleva sollevata da qualsiasi responsabilità nel caso in cui il sollevamento venga effetuato con soli 2 punti di ancoraggio The liſting of the screen must be done
through 3 anchoring points.
The company is relieved of any responsibility in the event that the liſting is carried out with only 2 anchoring points.
14
3.2 Sollevamento con paranco a catene elettrico
Electric chain hoisting
Maximilian può essere sollevato mezzo n. 3 paranchi a catene ellettrici. Utilizzabili con le staffe a
golfare in dotazione con Maximilian.
Maximilian can be liſted by means of two electric chain hoists.
They can be used with the eyebolt brackets included in your Maximilian order.
Assicurarsi che i punti di ancoraggio siano adeguati e con portata minima di 500 Kg. Make sure that the anchor
points are adequate and enough for liſting at least 500 kg.
Durante il sollevamento è indispensabile che lo schermo mantenga una perfetta posizione orizzontale. During the hoisting process the
screen must be horizontal.
Durante la manovra di sollevamento è assolutamente vietato per chiunque occupare o
transitare nell’area sottostante lo schermo.Qualsiasi errore nel montaggio
del sistema di sollevamento potrebbe avere conseguenze fatali.
During the hoisting process it is strictly forbidden to walk in the area underneath the screen.
Any mistake in the installation of the system could be fatal.
Screenline si solleva da ogni responsabilità in caso di danni allo schermo,
a terzi e a cose di terzi durante la manovre di sollevamento e di installazione di esso.
Screenline is not responsible for any damage caused to the screen, to third parties or to
third parties' things occurred during the hoisting and installation process.
Per le modalità di installazione e utilizzo dei paranchi a catena elettrici si
rimanda alle istruzioni del produttore allegate al prodotto in vostro possesso.
As to installation procedures and the use of electric chain hoists, see the
manufacturer's instructions which come with your product.
Scegliere il paranco a catena elettrico verificando che la portata minima sia di 500 Kg per singolo paranco. Choose the electric chain hoist aſter
verifying the payload which must be of at least 500 kg.
15
L’installazione del sistema a 230V è permesso solo a elettricisti qualificati e autorizzati.
Tutte le istruzioni di installazione e gli schemi di cablaggio devono essere visionati da un elettricista qualificato prima dell'installazione.
!L’installazione del sistema non corretto può danneggiare il motore e il sistema di controllo. La mancata osservanza delle istruzioni di installazione farà cadere ogni garanzia.!
4. Centralina - Control unit
Centralina a uomo presente. Installazione cabina a parete. Wall mounted
momentarily switched control unit.
The installation of the system at 230V is only permitted to qualified and authorized electricians.
All installation instructions and wiring diagrams must be viewed by a qualified electrician prior to installation.
La manomissione o la modifica dell’impianto elettrico relativo alla centralina o ai fine corsa del motore, farà decadere la garanzia dello schermo ed ogni responsabilità da parte di
Screenline.
Ogni modifica dovrà essere preventivamente concordata con Screenline.
Any tampering or modifications to the electrical system related to the control unit or to the end stroke will nullify the warranty of the screen and any responsibility for Screenline.
In ogni caso, l’altezza della tela non potrà mai essere aumentata ma solamente ridotta (al massimo di 50 cm).
Note, the given height of the fabric cannot be increased, only reduced of 50 cm at the maximum.
Dimensioni 350 x 200 x 135 mm (AxL x P)
Tensione di esercizio 1 ~ 230V AC (+/- 10%) 50/60Hz
Tensione di comando 24 V DC carico max. 250mA
12 V DC carico max. 100mA
Protezione tensione di comando 125 mA T
Potenza di collegamento 1,5 kW/2 kVA max.
Classe di protezione IP54
350[13,78]
201 [7,89] 135 [5,31]
30 mt.
16
4.1Installazione centralina - Control box installation
X7
X10
NPE PE L1
X2 X3
X6
X4
X8
1PE 4
5
+
-
A
B
PE
U
V
W
123 4
1
1
4
5
PE PE
cable length 30 m
230V
manual control
cable length
as requested
cable
length as
requested
motor
control unit
manual control
on request
blinking lamp included
X7
X10
NPE PE L1
X2 X3
X6
X4
X8
1PE 4
5
+
-
A
B
PE
U
V
W
123 4
1
1
4
5
PE PE
lunghezza cavo 30 mt.
230V
lunghezza
cavo telecomando
su richiesta
lunghezza
cavo su
richiesta
motore
centralina
Telecomando manuale
su richiesta
lampeggiante
incluso
Note
_______________________________________________________________________________________
_______________________________________________________________________________________
_______________________________________________________________________________________
_______________________________________________________________________________________
_______________________________________________________________________________________
_______________________________________________________________________________________
_______________________________________________________________________________________
_______________________________________________________________________________________
_______________________________________________________________________________________
_______________________________________________________________________________________
_______________________________________________________________________________________
_______________________________________________________________________________________
_______________________________________________________________________________________
_______________________________________________________________________________________
_______________________________________________________________________________________
_______________________________________________________________________________________
_______________________________________________________________________________________
_______________________________________________________________________________________
_______________________________________________________________________________________
_______________________________________________________________________________________
_______________________________________________________________________________________
_______________________________________________________________________________________
_______________________________________________________________________________________
_______________________________________________________________________________________
_______________________________________________________________________________________
_______________________________________________________________________________________
_______________________________________________________________________________________
_______________________________________________________________________________________
_______________________________________________________________________________________
_______________________________________________________________________________________
_______________________________________________________________________________________
_______________________________________________________________________________________
_______________________________________________________________________________________
_______________________________________________________________________________________
_______________________________________________________________________________________
screenline.it
Screenline Srl - Via Nazionale 1/n IT38060 Besenello (TN) Italy
el +39 0464 830003 - www.screenline.it - [email protected]

Other SCREENLINE Projection Screen manuals
SCREENLINE Lodo Evolution User manual

SCREENLINE

SCREENLINE Lodo Evolution User manual

SCREENLINE New Big Frame User manual

SCREENLINE

SCREENLINE New Big Frame User manual

SCREENLINE WAVE BIFORMAT User manual

SCREENLINE

SCREENLINE WAVE BIFORMAT User manual

SCREENLINE INCEILING User manual

SCREENLINE

SCREENLINE INCEILING User manual

SCREENLINE Lodo Evolution User manual

SCREENLINE

SCREENLINE Lodo Evolution User manual

SCREENLINE Living User manual

SCREENLINE

SCREENLINE Living User manual

SCREENLINE Lodo Evolution Inceiling User manual

SCREENLINE

SCREENLINE Lodo Evolution Inceiling User manual

SCREENLINE Big Lodo Evolution User manual

SCREENLINE

SCREENLINE Big Lodo Evolution User manual

SCREENLINE WAVE Plus User manual

SCREENLINE

SCREENLINE WAVE Plus User manual

SCREENLINE Vertikal User manual

SCREENLINE

SCREENLINE Vertikal User manual

SCREENLINE Amleto User manual

SCREENLINE

SCREENLINE Amleto User manual

SCREENLINE MOT User manual

SCREENLINE

SCREENLINE MOT User manual

SCREENLINE INCEILING MULTIFORMAT User manual

SCREENLINE

SCREENLINE INCEILING MULTIFORMAT User manual

SCREENLINE MotIC1610335-C User manual

SCREENLINE

SCREENLINE MotIC1610335-C User manual

SCREENLINE Big Lodo Evolution User manual

SCREENLINE

SCREENLINE Big Lodo Evolution User manual

SCREENLINE COPERNICO BIFORMAT User manual

SCREENLINE

SCREENLINE COPERNICO BIFORMAT User manual

SCREENLINE Living 200 User manual

SCREENLINE

SCREENLINE Living 200 User manual

SCREENLINE LODO User manual

SCREENLINE

SCREENLINE LODO User manual

SCREENLINE Maximilian User manual

SCREENLINE

SCREENLINE Maximilian User manual

SCREENLINE WAVE BIFORMAT User manual

SCREENLINE

SCREENLINE WAVE BIFORMAT User manual

SCREENLINE Big Lodo Evolution User manual

SCREENLINE

SCREENLINE Big Lodo Evolution User manual

SCREENLINE WAVE User manual

SCREENLINE

SCREENLINE WAVE User manual

SCREENLINE COPERNICO MULTIFORMAT User manual

SCREENLINE

SCREENLINE COPERNICO MULTIFORMAT User manual

SCREENLINE New Only White User manual

SCREENLINE

SCREENLINE New Only White User manual

Popular Projection Screen manuals by other brands

EluneVision In Ceiling Motorized product manual

EluneVision

EluneVision In Ceiling Motorized product manual

JAROLIFT Profi Line 4250558262931 Original instructions

JAROLIFT

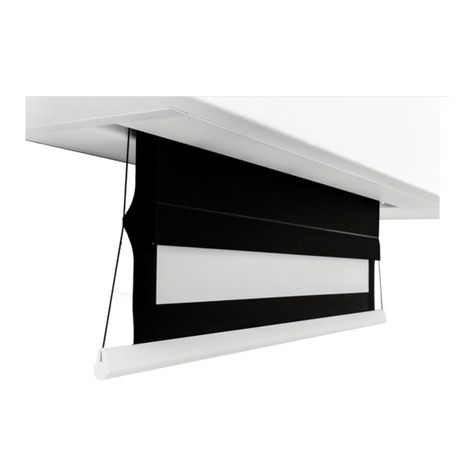
JAROLIFT Profi Line 4250558262931 Original instructions

Elite Screens 2 CLR Series user guide

Elite Screens

Elite Screens 2 CLR Series user guide

RUSTA 626701450101 manual

RUSTA

RUSTA 626701450101 manual

Da-Lite ExecutiveElectrol Instruction book

Da-Lite

Da-Lite ExecutiveElectrol Instruction book

Elite Screens AR2 Series user manual

Elite Screens

Elite Screens AR2 Series user manual

Grandview FC-FHP-MI Series installation manual

Grandview

Grandview FC-FHP-MI Series installation manual

EluneVision Atlas Series user manual

EluneVision

EluneVision Atlas Series user manual

Ambirad SmartCom2 RECOVERY PROCEDURE

Ambirad

Ambirad SmartCom2 RECOVERY PROCEDURE

Grandview LF-Mxx instruction manual

Grandview

Grandview LF-Mxx instruction manual

OS РХ-090Н user manual

OS

OS РХ-090Н user manual

FONESTAR PPEL-43200-BA instruction manual

FONESTAR

FONESTAR PPEL-43200-BA instruction manual

Remaco SAS-1515 installation guide

Remaco

Remaco SAS-1515 installation guide

DNP Supernova Core installation guide

DNP

DNP Supernova Core installation guide

Philips HTS2200 quick start

Philips

Philips HTS2200 quick start

Elite Screens TE100HC2 user guide

Elite Screens

Elite Screens TE100HC2 user guide

Draper Ultimate Access E INSTRUCTIONS INSTALLATION & OPERATION

Draper

Draper Ultimate Access E INSTRUCTIONS INSTALLATION & OPERATION

Crystal Screen S80V2.5P user guide

Crystal Screen

Crystal Screen S80V2.5P user guide

manuals.online logo
manuals.online logoBrands
  • About & Mission
  • Contact us
  • Privacy Policy
  • Terms and Conditions

Copyright 2025 Manuals.Online. All Rights Reserved.