Sealey TC115 User manual

Ø115MM PORTABLE TILE CUTTER
MODEL NO: TC115
Thank you for purchasing a Sealey product. Manufactured to a high standard, this product will, if used according to these
instructions, and properly maintained, give you years of trouble free performance.
I
MP
PO
R
RTA
TA
NT:
PLEA
S
E READ THE
S
E IN
S
TRU
C
TI
O
N
S
C
AREFULLY. N
O
TE THE
S
AFE
O
PERATI
O
NAL RE
Q
UIREMENT
S
, WARNIN
GS
&
C
AUTI
O
N
S
. U
S
E
TH
HE
P
PR
O
ODU
C
T
CO
RRE
C
TLY AND WITH
C
ARE F
O
R THE P
U
RP
OS
E F
O
R WHI
C
H IT I
S
INTENDED. FAIL
U
RE T
O
D
O
SO
MAY
C
A
US
E DAMA
G
E AND
/O
R
PE
ER
S
SON
N
AL IN
JU
RY AND WILL INVALIDATE THE WARRANTY. KEEP TH
ESE
IN
STR
UCT
ION
S S
AFE
FO
R F
U
T
U
RE
USE
.
1. SAFETY
1.1. ELECTRICAL SAFETY
WARNING! It is the user’s responsibility to check the following:
Check all electrical equipment and appliances to ensure that they are safe before using. Inspect power supply leads, plugs and all
electrical connections for wear and damage. Sealey recommend that an RCD (Residual Current Device) is used with all electrical
products. You may obtain an RCD by contacting your local Sealey stockist.
If the product is used in the course of business duties, it must be maintained in a safe condition and routinely PAT (Portable
Appliance Test) tested.
Electrical safety information: it is important that the following information is read and understood.
1.1.1. Ensure that the insulation on all cables and on the appliance is safe before connecting it to the power supply.
1.1.2. Regularly inspect power supply cables and plugs for wear or damage and check all connections to ensure that they are secure.
1.1.3. Important: Ensure that the voltage rating on the appliance suits the power supply to be used and that the plug is fitted with the
correct fuse - see fuse rating in these instructions.
DO NOT pull or carry the appliance by the power cable.
DO NOT pull the plug from the socket by the cable.
DO NOT use worn or damaged cables, plugs or connectors. Ensure that any faulty item is repaired or
replaced immediately by a qualified electrician.
1.1.4. This product is fitted with a BS1363/A 13 Amp 3 pin plug.
If the cable or plug is damaged during use, switch the electricity supply and remove from use.
Ensure that repairs are carried out by a qualified electrician.
Replace a damaged plug with a BS1363/A 13 Amp 3 pin plug. If in doubt contact a qualified electrician.
A) Connect the GREEN/YELLOW earth wire to the earth terminal ‘E’.
B) Connect the BROWN live wire to the live terminal ‘L’.
C) Connect the BLUE neutral wire to the neutral terminal ‘N’.
Ensure that the cable outer sheath extends inside the cable restraint and that the restraint is tight.
Sealey recommend that repairs are carried out by a qualified electrician.
1.2. GENERAL SAFETY
Familiarise yourself with the application, limitations and potential hazards of the tile cutter.
WARNING! Disconnect the cutter from the mains power before changing accessories, servicing or performing any maintenance.
The machine must only be serviced by a qualified person or service agent. Contact your Sealey stockist for information.
Place the cutter on a supporting surface strong enough to take the weight of the machine and work piece during operation.
Keep the work area clean and tidy and free from unrelated materials. Ensure there is adequate lighting.
Inhaling dust can be harmful - always wear respiratory protection and ensure that there is adequate ventilation.
Maintain the cutter in good condition, check moving parts alignment regularly. Keep cutting disc clean and in good condition.
Replace or repair damaged parts. Use recommended parts only. Unauthorised parts may be dangerous and will invalidate the warranty.
WARNING! Keep all guards and holding screws in place, tight and in good working order. Check regularly for damaged parts.
A guard, or any other part, that is damaged must be repaired or replaced before the tool is next used. The safety guard is a
mandatory fitting when the cutter is used on premises covered by the Health & Safety at Work Act.
Before commencing work, ensure the cutting disc is mounted correctly, securely fastened and is compatible with the machine, spindle
speed and the material to be cut. Never use a cutting disc which is damaged, bent or warped. Use only recommended cutting discs.
Remove adjusting keys and wrenches from the machine and the vicinity before turning it on.
WARNING! Wear approved safety eye protection, ear defenders and respiratory protection.A full range of personal safety equipment is
available from your Sealey stockist.
Remove ill-fitting clothing, ties, watches, rings and other loose jewellery and contain long hair.
Maintain correct balance and footing. Ensure the floor is not slippery and wear non-slip shoes.
Keep children and unauthorised persons away from the work area.
Avoid unintentional starting and never leave the cutter running unattended.
DO NOT use the cutter for a task for which it is not designed.
DO NOT get cutter wet or use in damp or wet locations or areas where there is condensation.
DO NOT use cutter where there are flammable liquids, solids or gases such as paint solvents and including waste wiping or cleaning
rags etc.
DO NOT operate the cutter if any parts are damaged or missing as this may cause failure and/or personal injury.
Replacement fuse
rating: 5A
TC115 Issue 1 19/02/21
Original Language Version
© Jack Sealey Limited
Refer to
instructions
Wear eye
protection
Wear protective
gloves
Wear ear
protection
Wear safety
footwear
Wear protective
clothing
Wear a mask Indoor use
only

TC115 Issue 1 19/02/21
Original Language Version
© Jack Sealey Limited
DO NOT operate the cutter when you are tired or under the influence of alcohol, drugs or intoxicating medication.
Dispose of waste water in accordance with local authority regulations.
1.3. SPECIFIC SAFETY RULES
WARNING! Before each use, check that the cutting disc is secure and not worn or damaged.
Hold the work piece firmly against the fence.
Only feed the work piece into the cutting disc against the rotation of the blade.
Avoid subjecting the cutting disc to excessive strain, never force the work piece. Maintain a controlled progression.
Should the cutting disc jam switch the power off immediately to prevent damage to the motor.
1.4. TO AVOID WORK PIECE “KICKBACK” (when a work piece is violently thrown back towards you):
1.4.1. Keep the cutting disc in good condition.
1.4.2. Keep fence parallel to the cutting disc.
DO NOT release work piece until it is clear of the cutting disc.
DO NOT attempt to cut a work piece that does not have a straight edge to guide along the fence.
Use a push stick when cutting narrow work pieces.
DO NOT use your hands (“free-hand”) to guide the work piece. Hold the work piece firmly against the fence to guide it into the cutting
disc.
DO NOT place yourself in an awkward operating position where a slip could cause your hand to move into the cutting disc.
DO NOT stand, or have any part of your body, in line with the plane of the cutting disc.
DO NOT hold what will become the off-cut (the waste part of the work piece).
DO NOT reach over or behind the cutting disc.
DO NOT attempt to free a jammed cutting disc without first switching off or removing the plug from the mains power supply.
DO NOT cut any materials other than ceramic, porcelain, quarry, slate and natural stone tile.
DO NOT use solvents to clean plastic parts as they may be damaged. Use a soft damp cloth only.
Store cutting disc in a safe, dry, childproof location.
When not in use, switch off the cutter and remove the plug from the power supply.
2. INTRODUCTION
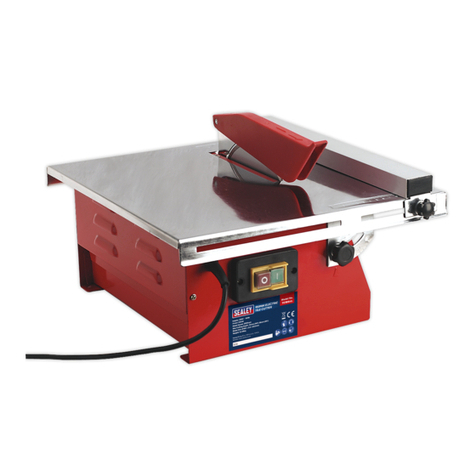
Lightweight portable wet tile cutter. Powered by 500W - 230V electric motor with low-voltage release switch in case of power failure. The
table tilts from 0°-45° and is fitted with adjustable parallel cutting fence. Also includes 45° cutting guide. Supplied with Ø115mm continuous
rimmed diamond cutting blade suitable for glazed ceramic, porcelain, quarry, slate and natural stone tiles. Incorporates 3.5L capacity water
reservoir for blade cooling. Fitted with handy storage area for 2m of cable and 3-pin plug.
3. SPECIFICATION
Model no: .....................................................................TC115
Blade size/Bore:................................. Ø115mm x Ø22.23mm
Replacement Blade:................................................. TC115.B
Maximum cutting depth 90º:......................................... 25mm
Maximum cutting depth 45º:......................................... 16mm
Motor power:....................................................... 500W-230V
Noise level: ............................................................ 95.2dB(A)
Speed: ..................................................................... 5400rpm
Table size:.........................................................30cm x 36cm
4. ASSEMBLY
4.1. ATTACH CUTTING DISC COVER
4.1.1. Remove fixing screw (fig 1 - 8) from tile cutter.
4.1.2. Position the cover support bracket (fig 1 - 9), in-line with the cutting disc (fig 1 - 13) and attach with fixing screw (fig 1 - 8).
4.1.3. Place the cutting disc cover (fig 1 - 11) onto cover support bracket and secure with star thumb screw (fig 1 - 12) and nut (fig 1 - 10).
NOTE: The cutting disc cover is designed to be left loose and to lay on the tile cutter work surface.
4.2. ATTACH THE FENCE
4.2.1. Insert and locate one end of the fence (fig 1 - 3) into the guide groove on side of the tile cutter.
4.2.2. With care ease other end of fence into guide groove on opposite side of tile cutter.
4.2.3. Thread fence star thumb screw (fig 1 - 6) through one end of fence. Repeat on opposite end.
4.2.4. Position angle cutting guide (fig 1 - 4) onto fence (fig 1 - 3).
fig.1

5. MOUNTING
5.1. The cutter should be securely placed on a sturdy workbench (or similar). Ensure that the supporting surface is strong enough to
take the weight of the cutter and the work piece during the cutting operation.
6. OPERATION
WARNING! Ensure that you read and understand and apply all safety instructions listed in Section 1 before using tile cutter.
Failure to do so may cause serious damage and/or personal injury and may invalidate your warranty.
WARNING! Disconnect the tile cutter from the mains power before making adjustments or changing cutting discs.
WARNING! The cutting disc cover must be down before turning on the tile cutter.
DO NOT use your hands (“free-hand”) to guide the work piece. Hold the work piece firmly against the fence to guide it into the cutting
disc.
6.1. FILLING THE WATER RESERVOIR
6.1.1. Lift up the tilted table (fig 1 - 2) to its maximum height and secure into position with the two stays.
6.1.2. Ensure the drain plug (fig 3 - 1) is firmly fixed into the drain hole (fig 3 - 2).
6.1.3. Fill the water reservoir (fig 1 - 15) with water to the maximum level line (fig 2 - 8) on cover plate (fig 2 - 6).
6.1.4. Lower the tilting table to the flat position.
6.1.5. The water helps cool and lubricate the cutting disc during cutting and also helps to suppress the dust.
6.2. ON/OFF SWITCH
6.2.1. The ON/OFF switch (fig 1 - 1) is located on the front right hand side of the tile cutter.
Push the “I” button for ON and the “O” button for OFF.
WARNING! DO NOT start any cutting until the cutting disc has reached its maximum speed.
▲DANGER! The cutting disc will to continue to run after it has been turned offwith the risk of possible injury.
6.3. CUTTING A TILE
6.3.1. Ensure that all clamps, screws and nuts are secure and that the blade is in good condition and correctly mounted.
6.3.2. Hold the tile firmly against the fence (fig 1 - 3) and flat to the table.
6.3.3. Slowly move the tile forward into the rotating cutting disc.
6.3.4. Continue holding the tile firmly until the cut is complete.
WARNING! Hold the main section, not the part that will become the cut-off.
6.4. BEVEL CUTTING
6.4.1. Lift up the tilted table (fig 1 - 2) and select one of the two bevel angle positions and secure with the two stays.
6.4.2. On completion of bevel cutting, lower the tilted table by placing the stays into the underside of the tilted table and then lower into
the flat position (fig 1 - 2).
6.5. ADJUSTING THE FENCE
6.5.1. Loosen the fence star thumb screws (fig 1 - 6) and adjust the fence (fig 1 - 3) to the required position using the graduation scale
(fig 1 - 7) along the tile cutter table and re-tighten star thumb screws, ensuring the fence is parallel to the cutting disc.
6.6. ATTACHING THE ANGLE CUTTING GUIDE
6.6.1. Place the angle cutting guide (fig 1 - 4) onto the fence (fig 1 - 3).
6.6.2. Loosen the locking screw (fig 1 - 5) and rotate the guide to the required angle. Re-tighten locking screw.
fig.2
fig.3
TC115 Issue 1 19/02/21
Original Language Version
© Jack Sealey Limited

Sealey Group, Kempson Way, Suffolk Business Park, Bury St Edmunds, Suffolk. IP32 7AR
01284 757500 01284 703534 sales@sealey.co.uk www.sealey.co.uk
Note: It is our policy to continually improve products and as such we reserve the right to alter data, specifications and component parts without prior
notice.
Important: No Liability is accepted for incorrect use of this product.
Warranty: Guarantee is 12 months from purchase date, proof of which is required for any claim.
WEEE REGULATIONS
Dispose of this product at the end of its working life in compliance with the EU Directive on Waste Electrical and Electronic Equipment
(WEEE). When the product is no longer required, it must be disposed of in an environmentally protective way. Contact your local solid
waste authority for recycling information.
ENVIRONMENT PROTECTION
Recycle unwanted materials instead of disposing of them as waste. All tools, accessories and packaging should be sorted, taken to
a recycling centre and disposed of in a manner which is compatible with the environment. When the product becomes completely
unserviceable and requires disposal, drain any fluids (if applicable) into approved containers and dispose of the product and fluids
according to local regulations.
7. MAINTENANCE
WARNING! Ensure the tile cutter is disconnected from the electrical mains before performing any maintenance.
7.1. Should the motor, on/offswitch or the power lead require service or maintenance contact your local Sealey stockist.
7.2. CHANGING THE CUTTING DISC
WARNING! Ensure the tile cutter is disconnected from the electrical mains before changing the cutting disc.
7.2.1. Lift up and remove tilted table (fig 1 - 2) from main tile cutter body.
7.2.2. Slacken retaining screw (fig 2 - 7) on the cover plate (fig 2 - 6) and remove by sliding cover to the left, and tilting it outwards and
lifting upwards and out of the water reservoir (fig 1 - 15).
7.2.3. Using shaft wrench and nut wrench (not shown) slacken and remove retaining nut (fig 2 - 5) and cutting disc washer (fig 2 - 1).
NOTE: The mounting flange (fig 2 - 4) remains on the shaft (fig 2 - 3).
7.2.4. Position new cutting disc (fig 2 - 2) and blade washer onto the shaft.
WARNING! When fitting the new cutting disc care should be taken to ensure the rotation arrows on the blade match the rotation
direction arrow (fig 1 - 14) on the cutter table.
7.2.5. Re-attach the cutting disc cover and re-tighten the retaining screw.
7.2.6. Re-attach the tilted table into position and lower into place.
7.3. CLEANING THE TILE CUTTER
7.3.1. Use a soft damp cloth and mild detergent to clean the tile cutter.
DO NOT use solvents, petroleum, paint thinner or abrasive cleaners to clean the tile cutter.
DO NOT store the tile cutter when wet.
TC115 Issue 1 19/02/21
Original Language Version
© Jack Sealey Limited
Table of contents
Other Sealey Cutter manuals

Sealey
Sealey POWER TOOLS SA25T User manual

Sealey
Sealey AK860CT User manual

Sealey
Sealey DC16 User manual

Sealey
Sealey TC180.V2 User manual

Sealey
Sealey SX299RR User manual

Sealey
Sealey SA56 User manual

Sealey
Sealey TC314 User manual

Sealey
Sealey PC40.V2 User manual

Sealey
Sealey TC100 User manual

Sealey
Sealey TC414 User manual

Sealey
Sealey GSA26 User manual

Sealey
Sealey DC16 User manual

Sealey
Sealey PL120/1.V2 User manual

Sealey
Sealey PC40.V2 User manual

Sealey
Sealey SX299JAG User manual

Sealey
Sealey PC35 User manual

Sealey
Sealey PP35PLUS User manual

Sealey
Sealey VS16371 User manual

Sealey
Sealey AK860CT User manual

Sealey
Sealey GSA25.V2 User manual