manuals.online logo
Brands
  1. Home
  2. •
  3. Brands
  4. •
  5. Sealey
  6. •
  7. Jack
  8. •
  9. Sealey 10Q User manual

Sealey 10Q User manual

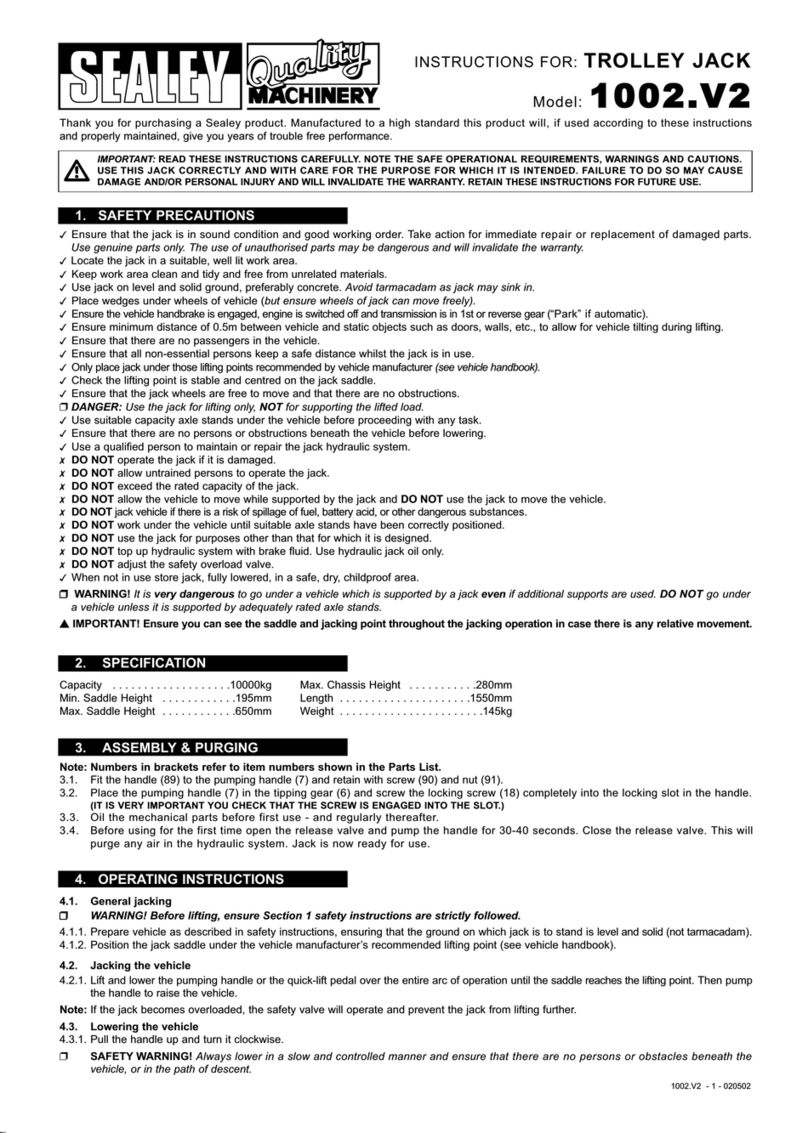
INSTRUCTIONS FOR :TROLLEY JACK
MODEL NO :1
1
0
0
Q
Q
10Q
Note: Numbers in brackets refer to item numbers shown in the Parts List.
3.1. Place the pumping handle (7) in the tipping gear (6) and screw the locking screw (18) completely into the locking slot in the handle.
( IT IS VERY IMPORTANT YOU CHECK THAT THE SCREW IS ENGAGED INTO THE SLOT.)
3.2. Oil the mechanical parts before first use - and regularly thereafter.
3.3 Before using for the first time open the release valve and pump the handle for 30-40 seconds. Close the release valve. This will
purge any air in the hydraulic system. Jack is now ready for use.
Thank you for purchasing a Sealey product. Manufactured to a high standard this product will, if used according to these instructions
and properly maintained, give you years of trouble free performance.
IMPORTANT: READ THESE INSTRUCTIONS CAREFULLY. NOTE THE SAFE OPERATIONAL REQUIREMENTS, WARNINGS AND CAUTIONS.
USE THIS JACK CORRECTLY AND WITH CARE FOR THE PURPOSE FOR WHICH IT IS INTENDED. FAILURE TO DO SO MAY CAUSE
DAMAGE AND/OR PERSONAL INJURY AND WILL INVALIDATE THE WARRANTY. RETAIN THESE INSTRUCTIONS FOR FUTURE USE.
1. SAFETY PRECAUTIONS
3. ASSEMBLY & PURGING
2. SPECIFICATIONS
Capacity . . . . . . . . . . . . . . . . . . .10000kg
Min. Saddle Height . . . . . . . . . . . .195mm
Max. Saddle Height . . . . . . . . . . . .650mm
Max. Chassis Height . . . . . . . . . . .280mm
Length . . . . . . . . . . . . . . . . . . . . .1550mm
Weight . . . . . . . . . . . . . . . . . . . . . . .145kg
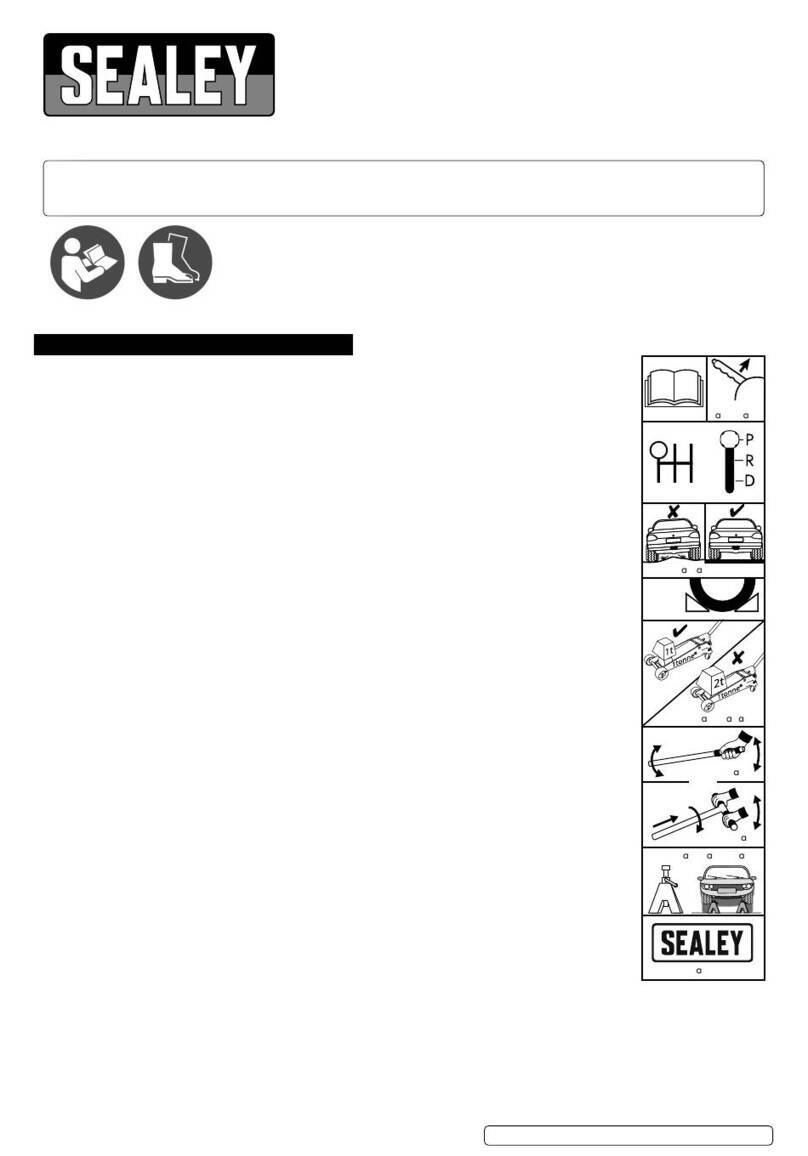
3Ensure the jack is in sound condition and good working order. Take action for immediate repair or replacement of damaged parts.
Use genuine parts only. The use of unauthorised parts may be dangerous and will invalidate the warranty.
3Locate the jack in a suitable, well lit work area.
3Keep work area clean and tidy and free from unrelated materials.
3Use jack on level and solid ground, preferably concrete. Avoid tarmacadam as jack may sink in.
3Place wedges under wheels of vehicle (but ensure wheels of jack can move freely).
3Ensure the vehicle handbrake is engaged, engine is switched off and transmission is in 1st or reverse gear (PARK if automatic).
3Ensure minimum distance of 0.5m between vehicle and static objects such as doors, walls, etc., to allow for vehicle tilting.
3Ensure there are no passengers in the vehicle.
3Ensure all non-essential persons keep a safe distance whilst the jack is in use.
3Only place jack under those lifting points recommended by vehicle manufacturer (see vehicle handbook).
3Check the lifting point is stable and centred on the jack saddle.
3Ensure the jack wheels are free to move and that there are no obstructions.
p DANGER: Use the jack for lifting only, NOT for supporting the lifted load.
3Use suitable capacity axle stands under the vehicle before proceeding with any task.
3Ensure there are no persons or obstructions beneath the vehicle before lowering.
3Use a qualified person to maintain or repair the jack hydraulic system.
7 DO NOT operate the jack if damaged.
7 DO NOT allow untrained persons to operate the jack.
7 DO NOT exceed the rated capacity of the jack.
7 DO NOT allow the vehicle to move while supported by the jack, nor use the jack to move the vehicle.
7 DO NOT jack vehicle if there is a risk of spillage of fuel, battery acid, or other dangerous substance.
7 DO NOT work under the vehicle until axle stands have been correctly positioned.
7 DO NOT use the jack for purposes other than that for which it is designed.
7 DO NOT top up hydraulic system with brake fluid. Use hydraulic jack oil only.
7 DO NOT adjust the safety overload valve.
3When not in use store jack, fully lowered, in a safe, dry, childproof area.
p
p
p
WARNING! It is very dangerous to go under a vehicle which is supported by a jack even if additional supports are used. DO NOT go under a
vehicle unless it is supported by adequately rated axle stands.
s
s
s
IMPORTANT! Ensure you can see the saddle and jacking point throughout the jacking operation in case there is any relative movement.
4. OPERATING INSTRUCTIONS
4.1. General jacking
p
p
p
WARNING! Before lifting, ensure Section 1 safety instructions are strictly followed.
4.1.1. Prepare vehicle as described in safety instructions ensuring the ground on which jack is to stand is level and solid (not tarmacadam).
4.1.2. Position the jack saddle under the vehicle manufacturers recommended lifting point (see vehicle handbook).
4.2. Jacking the vehicle
4.2.1. Lift and lower the pumping handle or the quick-lift pedal over its entire arc of operation until the saddle reaches the lifting point. Then pump
the handle to raise the vehicle.
Note: If the jack becomes overloaded, the safety valve will operate and prevent the jack from lifting further.
4.3. Lowering the vehicle
4.3.1. Pull the handle and turn it clockwise.
p SAFETY WARNING! Always lower in a slow and controlled manner and ensure that there are no persons or obstacles beneath the
vehicle, or in the path of descent.
10Q - 0070 - (2) - 121101
Lifting Operations and Lifting Equipment Regulations (LOLER) 1998.
This jack, depending on use, may fall within the scope of LOLER. It is the owners responsibility to determine whether or not it does
and, if so, to comply with any applicable requirements, in LOLER, for having the jack thoroughly examined.
IMPORTANT: Only fully qualified personnel should attempt maintenance or repair.
6.1. When the jack is not in use, the ram should be in the lowest position to minimise corrosion. Remove the handle to inactivate the jack.
6.2. Keep the jack clean and lubricate all moving parts with oil on a regular basis.
6.3. The pump and cylinder form a closed hydraulic system and refilling with oil is only necessary in exceptional cases. To check oil level:
1) Place jack on a level surface with the saddle fully lowered.
2) Remove filler screw (52) and check that level is 20mm below top of filler hole. Add hydraulic oil if necessary.
NOTE: Use a good quality jack oil, such as SEALEY HYDRAULIC JACK OIL.
p
p
p
WARNING: DO NOT use brake fluid, or any fluid other than hydraulic jack oil as this will cause serious damage to the jack
and will invalidate the warranty!
6.4. Before each use check for broken, cracked, bent, or loose parts, or any visible damage to ram, pump, saddle, lifting arm, frame and all
parts including nuts, bolts, pins and other fasteners. If any suspect item is found, remove jack from service and take the necessary action
to remedy the problem.
DO NOT use the jack if it is believed to have been subjected to abnormal or shock loading. Inspect and take appropriate action.
6.5. Periodically check the pump piston and the ram for signs of corrosion. Clean exposed areas with a clean cloth and jack oil.
IMPORTANT: NO RESPONSIBILITY IS ACCEPTED FOR INCORRECT USE OF THIS PRODUCT.
Hydraulic products are repaired by local service agents only. We have service/repair agents in all parts of the UK.
DO NOT RETURN JACKS TO US. Please telephone us on 01284 757500 to obtain the address and telephone number of your local agent.
If jack is under guarantee you can also contact your local dealer.
De-commissioning
Should the jack become completely unserviceable, draw off the oil into an approved container and dispose of the jack and the oil according to
local regulations.
6. MAINTENANCE
5. OPTIONAL EQUIPMENT
7. TROUBLESHOOTING
8. DECLARATION OF CONFORMITY
PROBLEM POSSIBLE CAUSE REMEDY
Jack will not lift
the load properly
or will not hold
raised load.
Jack will not lower
1) Be sure to use jack with adequate capacity.
2) Check and close release valve.
3) Open release valve and pump the handle a few times. Close valve and re-try.
4) Check level and replenish if necessary. Use only hydraulic jack oil.
5) Contact Service Agent.
1) Oil all external moving parts.
2) Contact local Service Agent.
3) Replace damaged parts or contact Service Agent.
4) Open release valve and pump the handle a few times. Close valve and re-try.
5) Check and fully open release valve.
6) Clean release valve.
1) Overloaded
2) Release valve not closed
3) Air in system
4) Low oil level
5) Internal defect
1) Unit requires lubrication
2) Piston rod bent or damaged
3) Jack frame/link system distorted due
to overloading/poor positioning
4) Air in system
5) Release valve partially closed
6) Release valve blocked
Declaration of Conformity We, the sole importer into the UK, declare that the product listed below is in conformity with the following standards and directives.
The construction files for this product is held by the Manufacturer and may be inspected, by a
national authority, upon request to Jack Sealey Ltd.
For Jack Sealey Ltd. Sole importer into the UK of Sealey Quality Machinery.
Trolley Jack
Models : 10Q
98/37/EC Machinery Directive
93/68/EEC CE Marking Directive
12th November 2001
01284 757500
E-mail:
sales@sealey.co.uk
01284 703534
Sole U.K. Distributor,
Sealey Group,
Bury St. Edmunds, Suffolk.
Signed by Mark Sweetman
NOTE: It is our policy to continually improve products and as such we reserve the right to alter data, specifications and component parts without prior notice.
IMPORTANT: No liability is accepted for incorrect use of this product.
WARRANTY: Guarantee is 12 months from purchase date, proof of which will be required for any claim.
INFORMATION: For a copy of our latest catalogue and promotions call us on 01284 757525 and leave your full name and address, including postcode.
10Q - 0070 - (2) - 121101
Optional rubber positioning wheels, which bolt to the side of the jack, greatly assist when moving the unladen jack around. When jacking, the
rubber wheels compress and the load goes through the main wheels, as normal. These wheels, model number 100/G1, are available through
your local Sealey dealer.
PARTS DIAGRAM FOR:
HYDRAULIC JACK
Model No: 10Q
NOTE:
It is our policy to continually improve products and as such we reserve the right to alter data, specifications and component parts without prior notice.
Issue No: 2
Date Issued : 12/11/01
Sole U.K. Distributor, Sealey Group, Bury St. Edmunds, Suffolk.
Item Part No. Description
1 100/3700100 Base Frame
2 100/3700200 Lifting Arm
3 100/3700300 Axle, Base/Frame Lifting Arm
4 100/3700400 Axle, Cylinder/Lifting Arm
5 100/3700500 Axle, Tipping Gear
6 100/3700600 Tipping Gear
7 100/3700700 Pumping Handle
8 100/3700800 Cover
9 100/3700900 Quick Lift Pedal
11 100/3701300 Steering Rods
12 100/3400200 Saddle
13 100/3702800 Wheels, 130mm dia.
15 100/3702100 Release Bracket
16 100/3201300 Hinged Joint
17 100/3201500 Axle, Hinged Joint
18 100/3201800 Locking Screw
19 100/3400900 Revolving Wheel
20 100/9002500 Pump, Complete
21 100/9002600 Pump Housing
22 100/9003000 Oil Tube
23 100/9003100 Piston Rod, Quick Lift
24 100/9003300 Cylinder Nut
25 100/9003700 Valve Plug
26 100/9004000 Plastic Hose
27 100/9005000 Cylinder, Complete
28 100/9005100 Cylinder
29 100/9005200 Piston
30 100/9005300 Piston Rod
31 100/9005400 Cylinder Nut
32 100/9020100 Valve Plug
33 100/90204 Spring Screw
34 100/90205 Release Shaft
35 100/9021100 Pump Rod
36 100/9022800 Release valve, Complete
37 100/01004 O-Ring 
38 100/01010 O-Ring 
39 100/01017 O-Ring 
40 100/01032 O-Rings 
41 100/01036 O-Ring 
42 100/01040 O-Ring 
43 100/01103 Oil Seal 
44 100/01109 Oil Seal 
45 100/01117 Oil Seal 
Item Part No. Description
46 100/01151 Seal 
47 100/01225 Nylon Gland 
48 100/01258 Scraper Ring 
49 100/01267 Scraper Rings 
50 100/02002 Nuts
51 100/02014 Nuts
52 100/02023 Filling Screw
53 100/02025 Adjusting Screw
54 100/02031 Valve Spring
55 100/02037 Spring
56 100/02038 Safety Valve Spring
57 100/02043 Springs
58 100/02045 Spring
59 100/02051 Spring
60 100/02103 Spring Washers
61 100/02115 Washer Plate
62 100/02126 Copper Washer 
63 100/02127 Copper Washer 
64 100/02135 Circlips
65 100/02205 Circlips
66 100/02206 Circlips
67 100/02210 Circlips
68 100/02221 Circlips
69 100/02223 Locking Washer
70 100/02229 Rivet
71 100/02234 Pin
72 100/02248 Rivets
73 100/02290 Ball 
74 100/02292 Balls, 6.2mm 
75 100/02293 Balls, 7.5mm
76 100/02295 Balls, 11mm 
77 100/02296 Balls, 18mm 
78 100/02334 Bolts
79 100/02340 Ball Pad
80 100/02350 Screws
81 100/01083 O-Ring 
82 100/02400 Hose Clips
100/02044 Tipping Gear Spring
100/34013 Revolving Wheel, Complete
100/GI Wheels, Transport, Complete
 10Q/RK Repair Kit (contains items
marked )
PARTS LISTING FOR
:
HYDRAULIC JACK
Model No: 10Q
Sole U.K. Distributor, Sealey Group, Bury St. Edmunds, Suffolk.
01284 757500
E-mail:
sales@sealey.co.uk
01284 703534
Sole U.K. Distributor,
Sealey Group,
Bury St. Edmunds, Suffolk.

Other Sealey Jack manuals

Sealey 500GTA User manual

Sealey

Sealey 500GTA User manual

Sealey TSJ12 User manual

Sealey

Sealey TSJ12 User manual

Sealey WS570.V2 User manual

Sealey

Sealey WS570.V2 User manual

Sealey 4040AG User manual

Sealey

Sealey 4040AG User manual

Sealey PTBJ5S User manual

Sealey

Sealey PTBJ5S User manual

Sealey Quality MACHINERY YAJ30H User manual

Sealey

Sealey Quality MACHINERY YAJ30H User manual

Sealey AS20 User manual

Sealey

Sealey AS20 User manual

Sealey Quality Machinery 2080CX User manual

Sealey

Sealey Quality Machinery 2080CX User manual

Sealey 2200HL.V3 User manual

Sealey

Sealey 2200HL.V3 User manual

Sealey 10QJ.V3 User manual

Sealey

Sealey 10QJ.V3 User manual

Sealey SJ30.V3 User manual

Sealey

Sealey SJ30.V3 User manual

Sealey 3000HLC.V2 User manual

Sealey

Sealey 3000HLC.V2 User manual

Sealey SJ50 User manual

Sealey

Sealey SJ50 User manual

Sealey 3000ES User manual

Sealey

Sealey 3000ES User manual

Sealey AS3G User manual

Sealey

Sealey AS3G User manual

Sealey 1510HL User manual

Sealey

Sealey 1510HL User manual

Sealey WS650.V2 User manual

Sealey

Sealey WS650.V2 User manual

Sealey 2001LEHV.V3 Series User manual

Sealey

Sealey 2001LEHV.V3 Series User manual

Sealey ITJ10 User manual

Sealey

Sealey ITJ10 User manual

Sealey 2200HL.V2 User manual

Sealey

Sealey 2200HL.V2 User manual

Sealey SJBEX200LP User manual

Sealey

Sealey SJBEX200LP User manual

Sealey 1000E.V2 User manual

Sealey

Sealey 1000E.V2 User manual

Sealey AS2500 User manual

Sealey

Sealey AS2500 User manual

Sealey 500CEW User manual

Sealey

Sealey 500CEW User manual

Popular Jack manuals by other brands

Meganex MEG82 instruction manual

Meganex

Meganex MEG82 instruction manual

Draper TJ100B user manual

Draper

Draper TJ100B user manual

Power Fist 8003605 user manual

Power Fist

Power Fist 8003605 user manual

Power Fist 8823304 user manual

Power Fist

Power Fist 8823304 user manual

SFA OMEGA 21030B Operating instructions & parts manual

SFA

SFA OMEGA 21030B Operating instructions & parts manual

RAWLINK 56692 instruction manual

RAWLINK

RAWLINK 56692 instruction manual

Manupro MPRCLTT400 Instruction booklet

Manupro

Manupro MPRCLTT400 Instruction booklet

Surewerx Strongarm 806B Operator's manual

Surewerx

Surewerx Strongarm 806B Operator's manual

Durapac RG Series instruction manual

Durapac

Durapac RG Series instruction manual

Weaver WA-72B Operation and service instructions

Weaver

Weaver WA-72B Operation and service instructions

Tronair 02-7802C0111 Operation & service manual

Tronair

Tronair 02-7802C0111 Operation & service manual

Beta 3010V 680 Instructions for use

Beta

Beta 3010V 680 Instructions for use

Performance Tool W1645 owner's manual

Performance Tool

Performance Tool W1645 owner's manual

Omega Lift Equipment 18124C Operating instructions & parts manual

Omega Lift Equipment

Omega Lift Equipment 18124C Operating instructions & parts manual

Cattini YAK 215/N Operating and maintenance manual

Cattini

Cattini YAK 215/N Operating and maintenance manual

AFF 202HD owner's manual

AFF

AFF 202HD owner's manual

Ranger RFJ-2TX Installation and operation manual

Ranger

Ranger RFJ-2TX Installation and operation manual

Clarke Strong Arm CTJ1250AB Operating & maintenance instructions

Clarke

Clarke Strong Arm CTJ1250AB Operating & maintenance instructions

manuals.online logo
manuals.online logoBrands
  • About & Mission
  • Contact us
  • Privacy Policy
  • Terms and Conditions

Copyright 2025 Manuals.Online. All Rights Reserved.