manuals.online logo
Brands
  1. Home
  2. •
  3. Brands
  4. •
  5. Sealey
  6. •
  7. Paint Sprayer
  8. •
  9. Sealey HVLP2000.V2 User manual

Sealey HVLP2000.V2 User manual

Thank you for purchasing a Sealey product. Manufactured to a high standard, this product will, if used according to these
instructions, and properly maintained, give you years of trouble free performance.
I
MPORTANT:
PLEASE READ THESE INSTRUCTIONS CAREFULLY. NOTE THE SAFE OPERATIONAL REQUIREMENTS, WARNINGS & CAUTIONS. USE
THE PRODUCT CORRECTLY AND WITH CARE FOR THE PURPOSE FOR WHICH IT IS INTENDED. FAILURE TO DO SO MAY CAUSE DAMAGEAND/OR
PERSONAL INJURY AND WILL INVALIDATE THE WARRANTY. KEEP THESE INSTRUCTIONS SAFE FOR FUTURE USE.
1. SAFETY
1.1. Electrical Safety
WARNING! It is the user’s responsibility to check the following:
1.1.1. Check all electrical equipment and appliances to ensure that they are safe before using. Inspect power supply leads, plugs and
all electrical connections for wear and damage. Sealey recommend that an RCD (Residual Current Device) is used with
all electrical products. You may obtain an RCD by contacting your local Sealey dealer.
1.1.2. If the spray gun is used in the course of business duties, it must be maintained in a safe condition and routinely PAT (Portable
Appliance Test) tested.
Electrical safety information, it is important that the following information is read and understood.
1.1.3. Ensure that the insulation on all cables and on the appliance is safe before connecting it to the power supply.
1.1.4. Regularly inspect power supply cables and plugs for wear or damage and check all connections to ensure that they are secure.
1.1.5. Important
correct fuse - see fuse rating in these instructions.
8DO NOT pull or carry the appliance by the power cable.
8DO NOT pull the plug from the socket by the cable. Remove the plug from the socket by maintaining a

8DO NOT use worn or damaged cables, plugs or connectors. Ensure that any faulty item is repaired or

1.1.6. 
If the cable or plug is damaged during use, switch the electricity supply and remove from use.

Class II products are wired with live (brown) and neutral (blue) only are marked with the Class II symbol;


C) After wiring, check that there are no bare wires and ensure that all wires have been correctly connected.
Ensure that the cable outer sheath extends inside the cable restraint and that the restraint is tight.
8DO NOT connect either wire to the earth terminal.

1.2. General Safety
Familiarise yourself with the application, limitations and potential hazards peculiar to the spray gun.
WARNING! Disconnect the spray gun from the air hose before changing accessories, servicing or performing any maintenance.
9Maintain the spray gun in good condition (use an authorised service agent).
9Replace or repair damaged parts. Use recommended parts only. Unauthorised parts may be dangerous and will invalidate the
warranty.
9Keep the spray gun clean for best and safest performance.
9 
9Remove ill fitting clothing. Remove ties, watches, rings, and other loose jewellery, and tie back long hair.
9 
adequate ventilation and lighting.
9Keep children and unauthorised persons away from the working area.
9Avoid unintentional operation.
8DO NOT point spray gun at yourself, other persons or animals.
8DO NOT carry the spray gun by the hose, or yank the hose from the air outlet.
8DO NOT use the spray gun for any purpose other than for which it is designed.
8DO NOT allow untrained persons to operate the spray gun.
8DO NOT get the spray gun wet and DO NOT use outside or in damp or wet locations or areas where there is condensation.
8DO NOT
8DO NOT direct air from the air hose at yourself, other persons or animals..
9 
Refer to
Instruction
Manual
H
Original Language Version

ear eye
Protection ear
Respiratory
Protection

HVLP SPRAY GUN KIT 600W230V
HVLP2000.V2
Recommended fuse rating
5Amp
8DO NOT use the machine in the presence of flammable liquids or gases, or on premises where explosive substances are stored.
8DO NOT open the main unit or loosen or remove any of its retaining screws.
8DO NOT wipe plastic parts with any solvents such as petrol, thinners, carbon tetrachloride, alcohol or ammonia.
8DO NOT mix or thin paint in an area where there may be functioning appliances producing a naked flame or electrical sparking. This
includes equipment that is electric motor powered.
8DO NOT switch on the spray gun when paint is being mixed or thinned.
9Ensure that any vapours have dispersed before switching on the spray gun.
9Tightly recap all containers immediately after thinning or mixing paint, and store away from the spraying area.
8DO NOT spray near any sources of ignition such as an open fire, cigarettes, cigars or pipes, sparks, glowing wires or hot surfaces
or naked lighting.
9Ensure that the air hose is firmly connected to the unit and the gun to avoid the possibility of any spilt material being drawn into the unit.
9
2. in INTRODUCTION

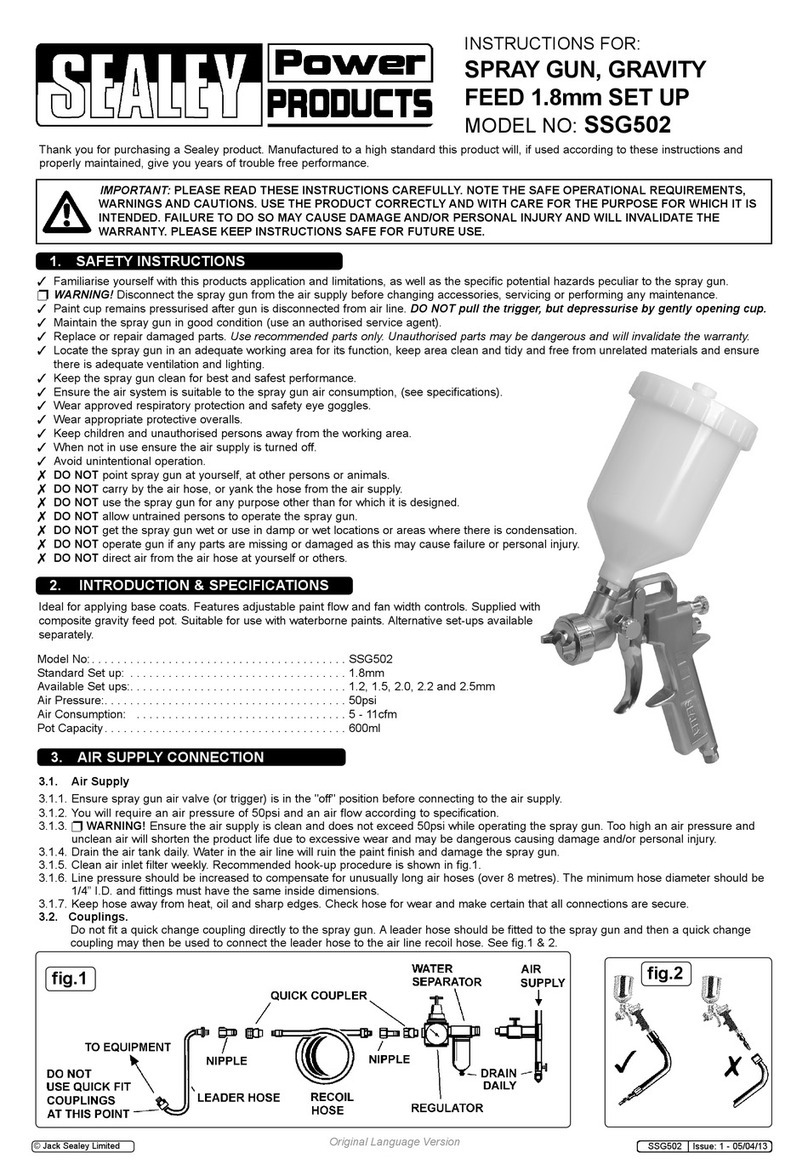
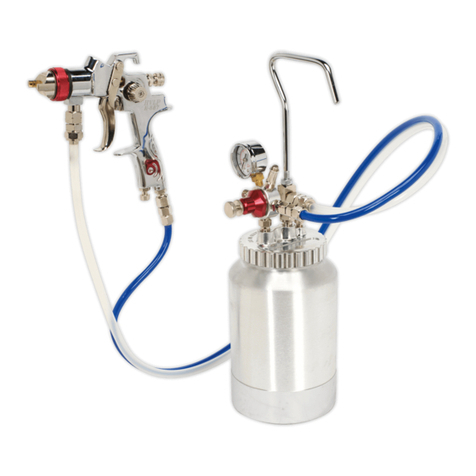
low affinity for paint, enabling quick and easy cleaning. Gun includes air and paint controls for fine adjustment of spray pattern. Suitable for interior
and exterior use, applying water and oil based paints, lacquers and stains. Supplied with air hose, viscosity cup and shoulder strap.
3. s i SPECIFICATION
Model no:........................................................ HVLP2000.V2
S ..........................................................2mm
Pot Capacity:.................................................................
Voltage:...........................................................................
Power Consumption:.....................................................
A............................................................. 2.4m
eight: ...........................................................................2.7kg
4. s i PAINT PREPARATION
4.1. Checking paint viscosity.
As most paints are made for brush or roller, it will normally be necessary to thin the paint to achieve proper atomisation and good

it and then time how long it takes for the paint to flow out again (fig.1). If the paint is the correct viscosity, the flow time should be

slightly and retest until the flow time is within the limits stated. If the flow time is less than eight seconds the paint is too thin.
4.2. Paint condition.
Any debris in the paint will clog the spray gun, which will then require a complete strip down and clean, before the spray gun will
function again properly. This is particularly important when using paint that has previously been opened. The paint should be

The paint should be strained into a clean container and if any paint is left over, it should be stored in a clean container.
5. ASSEMBLY / PREPARATION
5.1. Remove the spray gun from the unit and adjust the air cap by rotating it (or move the spray jets) to give the required spray pattern as
shown in fig.2.
5.2.  
and tighten. 
end of the hose to the spray gun.
5.3. Plug the unit into the mains supply and switch it on. The unit is now ready to use.
fig.1
fig.2
H
Original Language Version

6. OPERATION
6.1. The gun must be cleaned immediately after finishing using it. 
as this may make the gun unusable. Switch off the unit and disconnect from the mains supply before performing any maintenance or
cleaning.
6.2. Empty the paint container immediately and flush it out. If using a water based paint, refill with clean water and operate the gun
until it is spraying clean water only. If using an oil based paint, stain, or lacquer, clean the paint container with the appropriate
thinning medium, then refill the container with the medium and operate the gun until all residue has been flushed out.
6.3. Clean the outside of the gun and the main unit with a soft cloth soaked in warm soapy water.
6.3.1. To maintain the spray gun in peak operational condition, the main parts should be regularly inspected and cleaned. Plastic parts can
 
disintegrate.
6.4.  
6.5. The fluid tube is a push fit into the main body of the gun. To remove for cleaning, simply pull it out of its seating.
6.6.  
maintenance, be sure to take care when screwing parts together. DO NOT use excessive force when reassembling.
6.7. Should any deterioration in the performance of the spray gun occur, refer first to the trouble shooting guide, or return it to a Sealey
service agent.
6.8. The air filter should be cleaned on a regular basis. Remove the filter cover by sliding it away from the unit and remove the foam filter.
6.9. If using water based paints clean the filter in mild soapy water and remove excess water by pressing in a soft cloth. Allow to dry
before reinstalling. Slide the filter cover back into position.
 here a build-up of non-water soluble paint has occurred, the filter cannot be cleaned and will have to be replaced. To prolong filter
life, place the main unit as far away as possible from the spraying area.
7. c CLEANING
7.1.  
as this may make the gun unusable. Switch off the unit and disconnect from the mains supply before performing any maintenance or
cleaning.
7.2. Empty the paint container immediately and flush it out. If using a water based paint, refill with clean water and operate the gun until it
is spraying clean water only. If using an oil based paint, stain, or lacquer, clean the paint container with the appropriate
thinning medium, then refill the container with the medium and operate the gun until all residue has been flushed out.
7.3. Clean the outside of the gun and the main unit with a soft cloth soaked in warm soapy water.
7.4. To maintain the spray gun in peak operational condition, the main parts should be regularly inspected and cleaned. Plastic parts can
 
disintegrate.
7.5.  
7.6. The fluid tube is a push fit into the main body of the gun. To remove for cleaning, simply pull it out of its seating.
7.7.  
maintenance, be sure to take care when screwing parts together. DO NOT use excessive force when reassembling.
7.8. Should any deterioration in the performance of the spray gun occur, refer first to the trouble shooting guide, or return it to a Sealey
service agent.
7.9. The air filter should be cleaned on a regular basis. Remove the filter cover by sliding it away from the unit and remove the foam filter.
If using water based paints clean the filter in mild soapy water and remove excess water by pressing in a soft cloth. Allow to dry before
reinstalling. Slide the filter cover back into position.
fig.3
fig.4
H
Original Language Version

NOTE: It is our policy to continually improve products and as such we reserve the right to alter data, specications and component parts without prior notice.
IMPORTANT:
WARRANTY: Guarantee is 12 months from purchase date, proof of which will be required for any claim.
S
K
ury St. Edmunds, Suffolk.
IP32 7AR
www.sealey.co.uk
sales@sealey.co.uk


Web
Environmental Protection
Recycle unwanted materials instead of disposing of them as waste. All tools, accessories and packaging should be sorted,
taken to a recycling centre and disposed of in a manner which is compatible with the environment.
WEEE Regulations
D

Contact your local solid waste authority for recycling information.
7.11. here a build-up of non-water soluble paint has occurred, the filter cannot be cleaned and will have to be replaced. To prolong filter life,
place the main unit as far away as possible from the spraying area.
8. tr TROUBLESHOOTING
Problem Cause Solution
Poor atomisation, heavy centre
pattern. F 
control knob.
2. Fluid could be too thick, dilute.
Heavy atomisation, poor centre
pattern. Fluid is too thin. 
thinning medium.
Intermittant spray pattern. A 1. Tighten the connection between the
cup and the gun.
2. Check if paint pot is empty.
Heavy right or left side pattern. ne of the horn holes blocked (A). 1. Place the nozzle in cleaning
solution.
2. Clean hole with compressed air
or with a soft probe. DO NOT use a
metal probe which will damage the
hole.
Top heavy or bottom heavy pattern. P
nozzle and needle. 
that they match correctly.
2. Check needle for damage.
H
Original Language Version


Other Sealey Paint Sprayer manuals

Sealey SG139.V2 User manual

Sealey

Sealey SG139.V2 User manual

Sealey POWER PRODUCTS SG14.V3 User manual

Sealey

Sealey POWER PRODUCTS SG14.V3 User manual

Sealey SSG401.V2 Firmware update

Sealey

Sealey SSG401.V2 Firmware update

Sealey HVLP742 Firmware update

Sealey

Sealey HVLP742 Firmware update

Sealey CP20VGBS User manual

Sealey

Sealey CP20VGBS User manual

Sealey SG4 User manual

Sealey

Sealey SG4 User manual

Sealey HVLP3000 User manual

Sealey

Sealey HVLP3000 User manual

Sealey S713G Manual

Sealey

Sealey S713G Manual

Sealey SSG1/GX User manual

Sealey

Sealey SSG1/GX User manual

Sealey HVLP-79/P.V2 User manual

Sealey

Sealey HVLP-79/P.V2 User manual

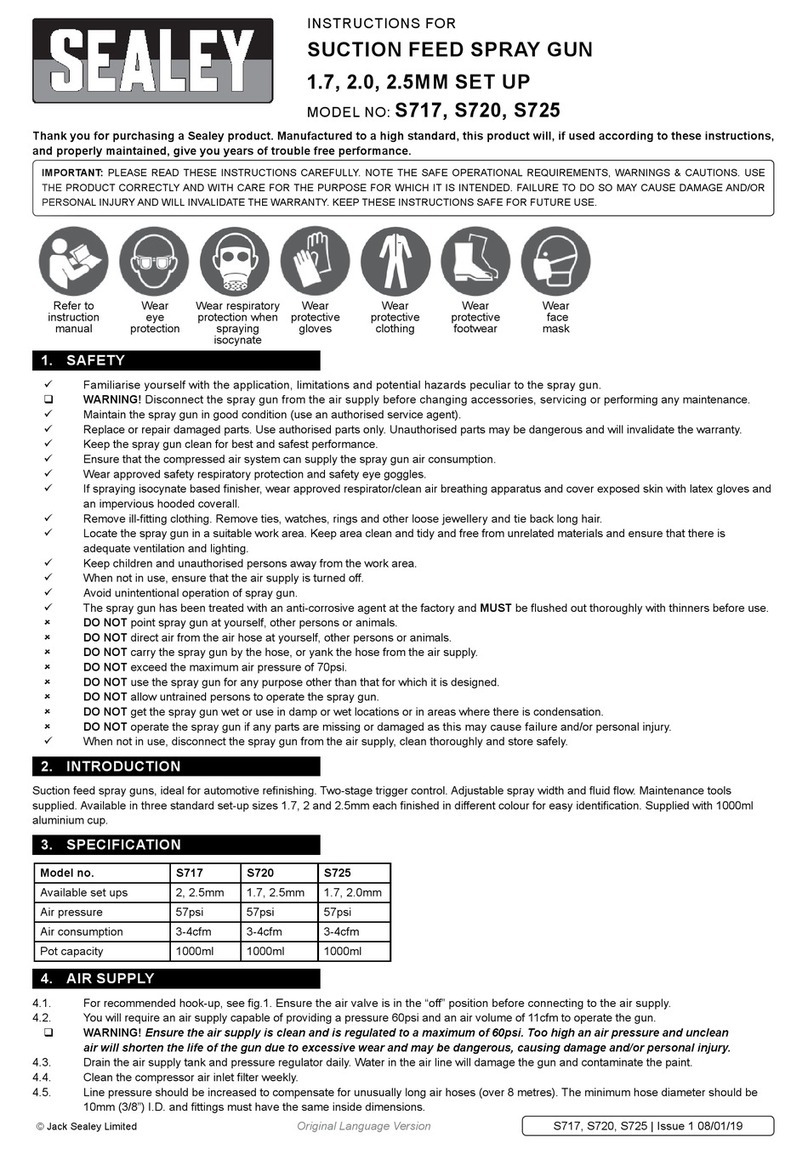
Sealey S717 User manual

Sealey

Sealey S717 User manual

Sealey SSG1.V2 User manual

Sealey

Sealey SSG1.V2 User manual

Sealey HVLP-750.V2 User manual

Sealey

Sealey HVLP-750.V2 User manual

Sealey S701G User manual

Sealey

Sealey S701G User manual

Sealey SG14.V3 User manual

Sealey

Sealey SG14.V3 User manual

Sealey SG1.7S User manual

Sealey

Sealey SG1.7S User manual

Sealey HVLP736 User manual

Sealey

Sealey HVLP736 User manual

Sealey HVLP-79/P1.V3 User manual

Sealey

Sealey HVLP-79/P1.V3 User manual

Sealey SIEGEN S775 User manual

Sealey

Sealey SIEGEN S775 User manual

Sealey HVLP746 User manual

Sealey

Sealey HVLP746 User manual

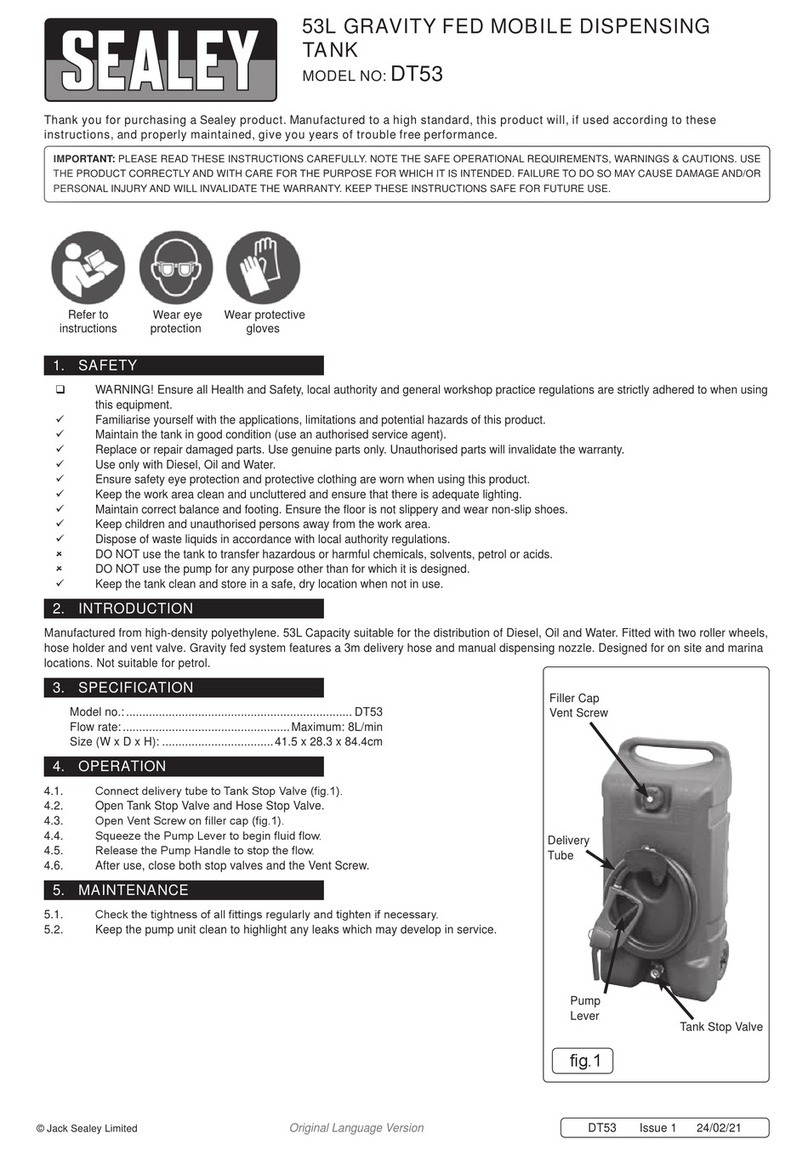
Sealey DT53 User manual

Sealey

Sealey DT53 User manual

Sealey HVLP-750.V3 User manual

Sealey

Sealey HVLP-750.V3 User manual

Sealey HVLP732 User manual

Sealey

Sealey HVLP732 User manual

Sealey HVLP01.V2 User manual

Sealey

Sealey HVLP01.V2 User manual

Popular Paint Sprayer manuals by other brands

Larius K-2 Operating and maintenance instruction

Larius

Larius K-2 Operating and maintenance instruction

Curtis Dyna-Fog TWISTER XL 3 4 Series Instructions manual for installation, operation and maintenance

Curtis Dyna-Fog

Curtis Dyna-Fog TWISTER XL 3 4 Series Instructions manual for installation, operation and maintenance

Titan IMPACT 410 owner's manual

Titan

Titan IMPACT 410 owner's manual

Graco Reactor 2 Operation

Graco

Graco Reactor 2 Operation

ANI S31/2 Operation and maintenance manual

ANI

ANI S31/2 Operation and maintenance manual

Graco Mark X 240 Volt instructions

Graco

Graco Mark X 240 Volt instructions

SAMES KREMLIN AIRMIX ATX manual

SAMES KREMLIN

SAMES KREMLIN AIRMIX ATX manual

Speeflo S-3 owner's manual

Speeflo

Speeflo S-3 owner's manual

Talboys 1000-3 instruction manual

Talboys

Talboys 1000-3 instruction manual

Apollo Sprayers PRECISION-6 instruction manual

Apollo Sprayers

Apollo Sprayers PRECISION-6 instruction manual

Nomix Enviro Stem Master instruction manual

Nomix Enviro

Nomix Enviro Stem Master instruction manual

Santint S5 user manual

Santint

Santint S5 user manual

Maruyama MS317 instruction manual

Maruyama

Maruyama MS317 instruction manual

netta 103648 User instruction

netta

netta 103648 User instruction

AIRLESSCO SL6500 Service & operation manual

AIRLESSCO

AIRLESSCO SL6500 Service & operation manual

Graco 330GS manual

Graco

Graco 330GS manual

Valemo VF-ES100 Specification & user manual

Valemo

Valemo VF-ES100 Specification & user manual

Titan PowrLiner 3500 operating manual

Titan

Titan PowrLiner 3500 operating manual

manuals.online logo
manuals.online logoBrands
  • About & Mission
  • Contact us
  • Privacy Policy
  • Terms and Conditions

Copyright 2025 Manuals.Online. All Rights Reserved.