PRINT LANDSCAPE
FOR OPTIMUM PERFORMANCE IT IS VERY IMPORTANT TO ENSURE THE GUN IS CORRECTLY CLEANED
AFTER EACH USE.
Disconnect from the air supply before attempting any cleaning or maintenance.
5.1. Cleaning the gun
5.1.1. Immerse the front end of the gun only in solvent. The solvent should just cover the fluid connection (fig.7).
5.1.2. Use a bristle brush and solvent to wash off accumulated paint.
5.1.3. Do not immerse the entire gun in solvent as this will cause lubricants on the rubber seals to dissolve.
Dirty solvent may also clog narrow passages in the gun.
5.1.4. Flush the gun through with clean solvent.
5.1.5. Wipe the outside of the gun with a dampened solvent rag.
5. CLEANING & MAINTENANCE
4. OPERATING INSTRUCTIONS
4.1. For best results, the gun should be held perpendicular to the surface being sprayed and moved parallel
to it. Start the stroke before
squeezing the trigger and release the trigger before finishing the stroke. This
will enable you to accurately control the gun and material (fig.
3).
4.2. Spray from a distance of about 150mm (6") to 250mm (10") depending on the material and the
atomizing pressure. The material deposited should always be even and wet. Each stroke must overlap
the preceding stroke to obtain a uniform finish.
To reduce over-spray and obtain maximum efficiency, spray with the lowest possible atomizing air
pressure.
4.3. Controlling the fan spray and the fluid.
a) Use the needle (paint) adjustment knob (fig.4.1) to increase or decrease the amount of paint flow.
b) The air flow is controlled by knob (2).
c)
A
s width of spray is increased more material must pass through the gun to obtain the same coverage
on the increased area.
d) Turn the air nozzle (3) to achieve a horizontal or vertical fan spray. Lock the nozzle with retaining
ring (4). The spray pattern of the gun is variable from round to flat with all patterns in between. In
normal operation, the wings on the nozzle are horizontal as (fig.5). This provides a vertical fan-
shaped pattern which gives maximum uniform and even coverage when moving the gun back and
forth, parallel to the work surface (fig.6).
fig.4
fig.5
fig.6
SG6VC.V3 - 1 - 230108
fig.7
Keep solvent level
below packing
fig.3
1
2
3
4
6
. TROUBLESHOOTING
Dried material in a dirty side port
restricts passage of air. Greater flow of
air from the cleaner side port forces a
fan pattern in the direction of the
clogged side.
Dried material around the outside of the
fluid nozzle tip restricts the passage of
atomizing air at one point through the
centre opening of the air nozzle and
results in the pattern shown.
Material to thin or atomization air
pressure too high.
Dirt between the fluid nozzle seat and
body or loosely installed fluid nozzle will
cause the gun to spit.
Material bubbles or
“boils”
in paint cup.
Atomised air flowing through the paint
channel to pot.
The paint nozzle is not tight enough.
Air nozzle is not completely screwed in.
Tighten, clean or replace parts accordingly.
Dissolve material in the side ports with
solvent, then blow the gun clean. Do not
poke into the opening with metal
instruments.
Remove the air nozzle and wipe off fluid tip
using a rag dampened with solvent. Tighten
the air nozzle.
Regulate material viscosity or reduce air
pressure.
Remove the fluid nozzle, clean the back of
the nozzle and the nozzle seat in the gun
body using a rag dampened with thinner.
Replace the nozzle and secure it tightly
against the body.
VIEW OF PROBLEM POSSIBLE REASON FOR PROBLEM SOLUTION
A faulty spray is usually caused by improper cleaning or dried material around the fluid nozzle tip or in the air
nozzle. Soak these parts in a solvent that will soften the dried material and remove with a brush or a cloth.
Never use metal instruments to clean the air or fluid nozzles. These parts are carefully machined and any
damage to them will cause a faulty spray. If either the air nozzle or fluid nozzle is damaged, the part must be
replaced before a perfect spay can be obtained.
SG6VC.V3 - 1 - 230108
5.2. Air nozzle, fluid nozzle and needle assembly
5.2.1. To clean the nozzles, soak them in solvent to dissolve any dried material then blow them clean with
air. Handle all nozzles carefully and do not make any alterations to the gun.
5.2.2.
If you need to probe the holes in the nozzles, use a tool that is softer than brass; do not use metal instruments.
5.2.3. Adjust the fluid needle valve so that when the gun is triggered, air flow occurs before fluid flow.
5.3. Maintenance
Take care when re-assembling. Screw parts hand tight to avoid cross-threading. If a part cannot easily
be turned by hand, check that you have the correct part, or unscrew, realign and try again.
DO NOT use force when re-assembling.
5.3.1. Lubricate the gun daily with a light machine oil.
5.3.2. If you change the nozzle size, ensure the complete nozzle set is exchanged. Insert paint nozzle before
putting the paint needle in.
NOTE: It is our policy to continually improve products and as such we reserve the right to alter data, specifications and component parts
without prior notice.
IMPORTANT: No responsibility is accepted for incorrect use of this product.
WARRANTY: Guarantee is 12 months from purchase date, proof of which will be required for any claim.
INFORMATION: For a copy of our latest catalogue and promotions call 01284 757525 and leave your name and address, including postcode.
Declaration of Conformity We, the sole importer into the UK, declare that the product listed here is in conformity with the
following standards and directives
The construction files for this product is held by the
manufacturer and may be inspected, by a national authority,
upon request to Jack Sealey Ltd.
Signed by Mark Sweetman
For Jack Sealey Ltd.
Sole importer into the UK of SealeyPower Products.
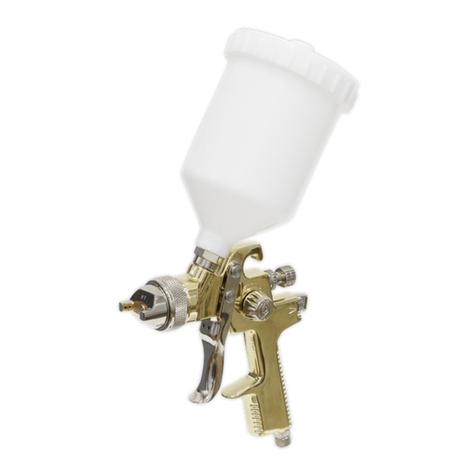
Gravity Feed Spray Gun
Model SG6VC.V3
93/68/EEC CE Marking Directive
22nd January 2008
01284 757500
01284 703534 sales@sealey.co.uk
Sole UK Distributor
Sealey Group,
Bury St. Edmunds, Suffolk.
www.sealey.co.uk
email
Web
