manuals.online logo
Brands
  1. Home
  2. •
  3. Brands
  4. •
  5. Sealey
  6. •
  7. Tools
  8. •
  9. Sealey Auto Service VSE4780.V2 User manual

Sealey Auto Service VSE4780.V2 User manual

1. SAFETY INSTRUCTIONS
2. INTRODUCTION & APPLICATIONS
Thank you for purchasing a Sealey product. Manufactured to a high standard this product will, if used according to these instructions and properly maintained, give
you years of trouble free performance.
IMPORTANT: READ THESE INSTRUCTIONS CAREFULLY. NOTE THE SAFE OPERATIONAL REQUIREMENTS, WARNINGS AND CAUTIONS.
USE THE TOOL CORRECTLY AND WITH CARE FOR THE PURPOSE FOR WHICH IT IS INTENDED. FAILURE TO DO SO MAY CAUSE DAMAGE
AND/OR PERSONAL INJURY AND WILL INVALIDATE THE WARRANTY. PLEASE KEEP INSTRUCTIONS SAFE FOR FUTURE USE.
 WARNING! Ensure Health and Safety, local authority and general
workshop practice regulations are adhered to when using tools.
 DO NOT use tools if damaged.
 Maintain tools in good and clean condition for best and safest
performance.
 Ensure that a vehicle which has been jacked up is adequately
supported with axle stands and that the wheels are chocked.
 Ensure that the rear axle is adequately supported, refer to the
vehicle manufacturer’s service instructions, or a proprietary
manual.
 Wear approved eye protection. A full range of personal safety
equipment is available from your Sealey dealer.
 Wear suitable clothing to avoid snagging. Do not wear jewellery
and tie back long hair.
DO NOT use air tools to operate the force screw.
IMPORTANT: The force screw must be kept well lubricated.
IMPORTANT: This manual is provided as a guide only, refer to
the vehicle manufacturer’s service instructions, or a proprietary
manual, to establish the current procedure and data.
 WARNING! Failure to heed safety and warning instructions may
result in damage and/or personal injury and will invalidate the
warranty.
 WARNING! The warnings, cautions & instructions referred
to in this manual cannot cover all possible conditions and
situations that may occur. It must be understood that
common sense and caution are factors which cannot be
built into this product, but must be applied by the operator.
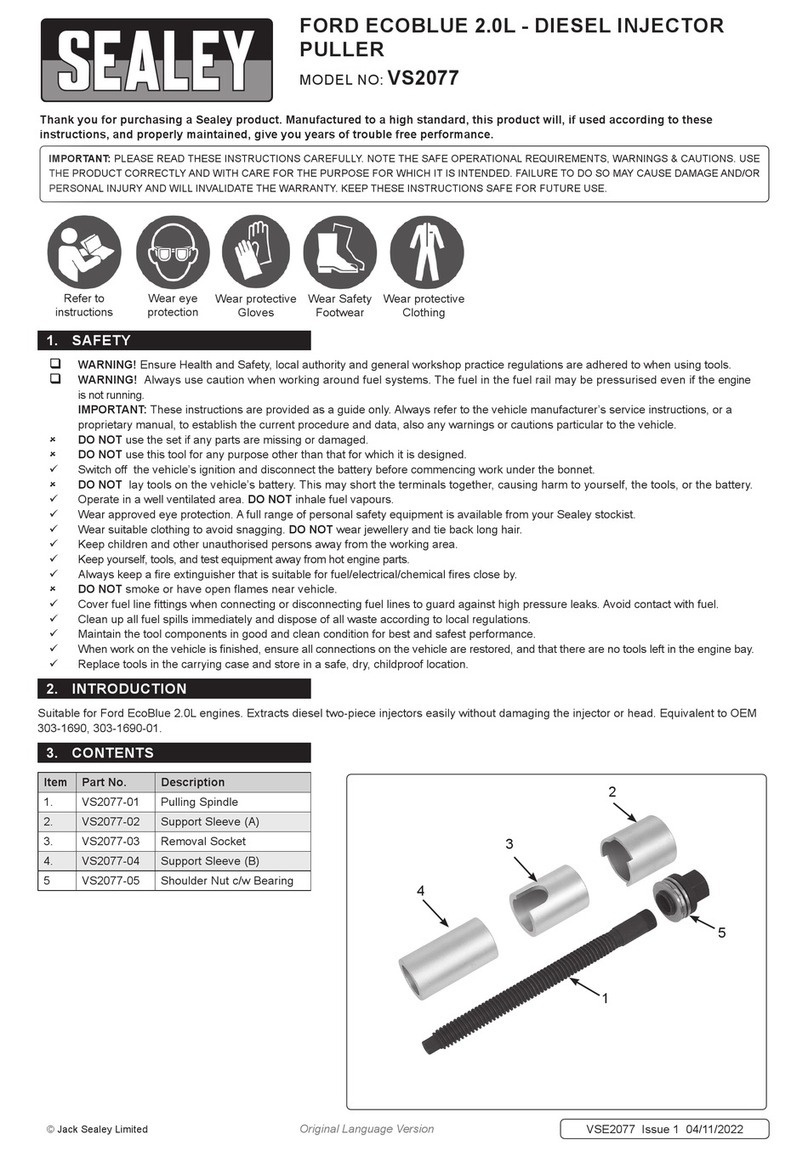
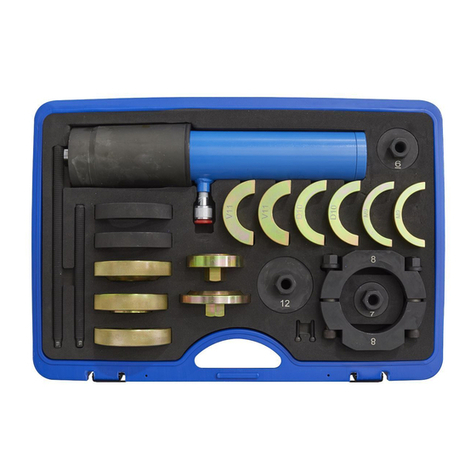
Remove/install rear sub-frame bushes on Ford Focus.
Can be used in situ - no need to remove sub-frame from vehicle.
Ford Focus MK1 1998 – 2004.
IMPORTANT: This tool is designed to aid removal of the suspension bush.
• Adequate consideration should be made to lubricate or otherwise
easethetofthebushpriortouseofthistool.
• We suggest that the bush is thoroughly lubricated and the area
around the bush cleaned.
• The threads of the tool should also be thoroughly lubricated in
use.
• An Impact Socket must NOT be used with this tool.
• Stripped threads and bent thrust cups are not accepted
warranty claims on this tool.
3. OPERATION
NOTE! Pictures taken with the trailing arm removed from vehicle
for clarity.
NOTE! The tool will insert the bush to the correct depth, but
before installing the new bush, refer to the vehicle
manufacturer’s service instructions, or a proprietary manual, to
establish the correct horizontal alignment/positioning of the bush
in the trailing arm.
Bush before removal from trailing arm.
VSE4780.V2 Issue No. 1 - 28/06/13

ALWAYS KEEP FORCE SCREW
WELL LUBRICATED.
DO NOT USE AIR TOOLS
Bush Removal Press
Force Screw
Bush Replacement Press
INSTRUCTIONS FOR:
REAR BUSH TOOL
FORD FOCUS MK1 1998 - 2004
Model No: VSE4780.V2
Force screw maximum load 150Nm. Exceeding this load will shorten the life of the force screw. The
force screw is considered to be a consumable item and is NOT covered under warranty.
Original Language Version
© Jack Sealey Limited
Fig.4
3.1. Attach the silver removal press as in Fig.1. Note the inner
 shoulderofthepresstsinsidetheouterbodyofthebush.
3.6. Remove the tool, clean and lubricate before returning to storage
case.
3.2. Assemble as in Fig.2.
a) Wind the force screw clockwise. The press will start to push the
bush through the trailing arm.
b) Keep winding until the bush has been pushed all the way out of
the trailing arm.
NOTE! If any undue resistance is felt, remove the press and check
everything is correctly aligned. The bush will only push out in one
direction (Fig.2).
3.3. Fitting new bush.
a) Beforettingthenewbush,thoroughlycleanandlubricatethe 
trailing arm.
b) Thoroughlylubricatethebushsleevingtohelpeaseretting.
NOTE! The bush must be pressed through from the domed (inside)
edge of the trailing arm (Fig.3).
3.4. Assemble the press on the trailing arm as below (Fig.4).
a) Thebushshouldtintotherecessontheblackreplacement
press (Fig.3).
b) To facilitate correct positioning of the bush, the replacement press
has a raised shoulder on the opposite edge to the cutaway.
Align the replacement press so the cut-away faces towards
the rear of the trailing arm (cut-away facing the rear of the car)
(Fig.5).
3.5. Wind the force screw clockwise.
NOTE! If any undue resistance is felt, remove the press and check
everything is correctly aligned.
a) When the press makes contact with the trailing arm, the bush is
fully installed.
Fig.1
Fully installed bush
Front of car
Rear of car
VSE4780.V2 Issue No. 1 - 28/06/13
Bush
Rear of trailing arm (car)
Cutaway facing rear of car
Fig.5
Fig.2
Outside edge of trailing arm
Fig.3 Black removal pressLubricate sleeve
Front of car Domed edge
Rear of car
NOTE: It is our policy to continually improve products and as such we reserve the right to alter data, specifications and component parts without prior notice.
IMPORTANT: No liability is accepted for incorrect use of this product.
WARRANTY: Guarantee is 12 months from purchase date, proof of which will be required for any claim.
INFORMATION: For a copy of our latest catalogue and promotions call us on 01284 757525 and leave your full name and address, including postcode.
01284 757500
01284 703534
sales@sealey.co.uk
Sole UK Distributor, Sealey Group,
Kempson Way, Suffolk Business Park,
Bury St. Edmunds, Suffolk,
IP32 7AR
www.sealey.co.uk
Web
email
Original Language Version
© Jack Sealey Limited
Environmental Protection.
Recycle unwanted materials instead of disposing of them as waste. All tools, accessories and packaging should be sorted, taken to a recycle centre and disposed of in a manner
which is compatible with the environment.

Other Sealey Tools manuals

Sealey CPG18V User manual

Sealey

Sealey CPG18V User manual

Sealey VS0216 User manual

Sealey

Sealey VS0216 User manual

Sealey 1020LE User manual

Sealey

Sealey 1020LE User manual

Sealey LAD001 User manual

Sealey

Sealey LAD001 User manual

Sealey AK962EV.V2 User manual

Sealey

Sealey AK962EV.V2 User manual

Sealey Professional TOOLS Auto Service VS7023 User manual

Sealey

Sealey Professional TOOLS Auto Service VS7023 User manual

Sealey HRK01.V2 User manual

Sealey

Sealey HRK01.V2 User manual

Sealey VS1542 User manual

Sealey

Sealey VS1542 User manual

Sealey VS313 User manual

Sealey

Sealey VS313 User manual

Sealey SR2000TS User manual

Sealey

Sealey SR2000TS User manual

Sealey GA50.V3 User manual

Sealey

Sealey GA50.V3 User manual

Sealey RE232.V3 User manual

Sealey

Sealey RE232.V3 User manual

Sealey VS1815 User manual

Sealey

Sealey VS1815 User manual

Sealey VS0204T User manual

Sealey

Sealey VS0204T User manual

Sealey VSE5009 User manual

Sealey

Sealey VSE5009 User manual

Sealey CX410SS User manual

Sealey

Sealey CX410SS User manual

Sealey MS0381 User manual

Sealey

Sealey MS0381 User manual

Sealey GH60A User manual

Sealey

Sealey GH60A User manual

Sealey VS004 User manual

Sealey

Sealey VS004 User manual

Sealey GH60 User manual

Sealey

Sealey GH60 User manual

Sealey SA11/S User manual

Sealey

Sealey SA11/S User manual

Sealey SA811 User manual

Sealey

Sealey SA811 User manual

Sealey TS01 User manual

Sealey

Sealey TS01 User manual

Sealey VS779.V4 User manual

Sealey

Sealey VS779.V4 User manual

Popular Tools manuals by other brands

Wurth Elektronik 600 002 Operation manual

Wurth Elektronik

Wurth Elektronik 600 002 Operation manual

Forza 25/130 Series user manual

Forza

Forza 25/130 Series user manual

probst KKV-200 operating instructions

probst

probst KKV-200 operating instructions

Axley 010931 operating instructions

Axley

Axley 010931 operating instructions

Mityvac MV8020 user manual

Mityvac

Mityvac MV8020 user manual

MyTana M888 owner's manual

MyTana

MyTana M888 owner's manual

YATO YT-82320 instruction manual

YATO

YATO YT-82320 instruction manual

Nederman 865 series instruction manual

Nederman

Nederman 865 series instruction manual

JessEm Tool 02101A Operating instructions and parts manual

JessEm Tool

JessEm Tool 02101A Operating instructions and parts manual

Telesis TMP1700 user manual

Telesis

Telesis TMP1700 user manual

MBCI EM BattenLok HS manual

MBCI

MBCI EM BattenLok HS manual

Harbor Freight Tools Central Pneumatic 97728 Set up and operating instructions

Harbor Freight Tools

Harbor Freight Tools Central Pneumatic 97728 Set up and operating instructions

Rodia WGK 125 operating manual

Rodia

Rodia WGK 125 operating manual

Omer HR20 M5 Use, maintenance and spare parts manual

Omer

Omer HR20 M5 Use, maintenance and spare parts manual

Amkus iC550 INSTRUCTIONS FOR SAFE OPERATION AND MAINTENANCE

Amkus

Amkus iC550 INSTRUCTIONS FOR SAFE OPERATION AND MAINTENANCE

Laguna Tools MCNC Swift 60 X 120-0233 manual

Laguna Tools

Laguna Tools MCNC Swift 60 X 120-0233 manual

Pittsburgh Automotive 95987 quick start guide

Pittsburgh Automotive

Pittsburgh Automotive 95987 quick start guide

Parkside PDSS 13 D4 Operation and safety notes

Parkside

Parkside PDSS 13 D4 Operation and safety notes

manuals.online logo
manuals.online logoBrands
  • About & Mission
  • Contact us
  • Privacy Policy
  • Terms and Conditions

Copyright 2025 Manuals.Online. All Rights Reserved.