manuals.online logo
Brands
  1. Home
  2. •
  3. Brands
  4. •
  5. SECO-LARM
  6. •
  7. Door Opening System
  8. •
  9. SECO-LARM Enforcer SD-927PKC-NEQ User manual

SECO-LARM Enforcer SD-927PKC-NEQ User manual

ENFORCER
®
No Touch Request-To-Exit Sensor
4 SECO-LARM
U.S.A., Inc
Care and Cleaning for the SD- 27P Series No-Touch:
The SD-927P Series is designed for inside use to match most interiors. The sensor and included
decals (SD-927PWC only) require special care to ensure reliability and a long operating life.
1. Use a soft, clean cloth for cleaning. Rough materials may scratch the decals of the SD-
927PWC .
2. Be careful not to spray liquids directly on the unit.
3. When cleaning, spray the cleaning solution onto the cleaning cloth instead of the unit.
4. Be sure to wipe off any excess liquid from the sensor. Wet spots or areas may affect the
sensor’s performance.
5. Repeated exposure to strong cleaning chemicals may damage the decals included with the
SD-927PWC . Use the mildest type of cleaner available.
WARNING: Incorrect mounting which leads to exposure to rain or moisture inside the enclosure
could cause a dangerous electric shock, damage the device, and void the warranty.
WARRANTY This SECO-LARM product is warranted against defects in material and
workmanship while used in normal service for a period of one (1) year from the date of sale to
the original consumer customer.
SECO-LARM’s obligation is limited to the repair or replacement of any defective part if the unit is
returned, transportation prepaid, to SECO-LARM.
This Warranty is void if damage is caused by or attributed to acts of God, physical or electrical
misuse or abuse, neglect, repair, or alteration, improper or abnormal usage, or faulty installation,
or if for any other reason SECO-LARM determines that such equipment is not operating properly
as a result of causes other than defects in material and workmanship.
The sole obligation of SECO-LARM, and the purchaser’s exclusive remedy, shall be limited to
replacement or repair only, at SECO-LARM’s option. In no event shall SECO-LARM be liable for
any special, collateral, incidental, or consequential personal or property damages of any kind to
the purchaser or anyone else.
NOTICE: The information and specifications printed in this manual are current at the time of
publication. However, the SECO-LARM policy is one of continual development and improvement.
For this reason, SECO-LARM reserves the right to change specifications without notice.
SECO-LARM is not responsible for misprints or typographical errors.
Copyright © 2013 SECO-LARM U.S.A., Inc. All rights reserved. This material may not be
reproduced or copied, in whole or in part, without the written permission of SECO-LARM.
SECO-LARM
®
U.S.A., Inc.
16842 Millikan Avenue, Irvine, CA 92606 Website: www.seco-larm.com
Tél: 800-662-0800 / 949-261-2999 Fax: 949-261-7326 Email: sales@seco-larm.com
M iSD
-
927PKC
-
NE
_1
303
.docx
PI
T
S
W
3
No Touch
Request-To-Exit Sensor
Manual
SD- 27PKC-NEQ (English) SD- 27PWCQ
SD- 27PKC-NSQ (Español) (English / Español / Français)
SD- 27PKC-NFQ (Français)
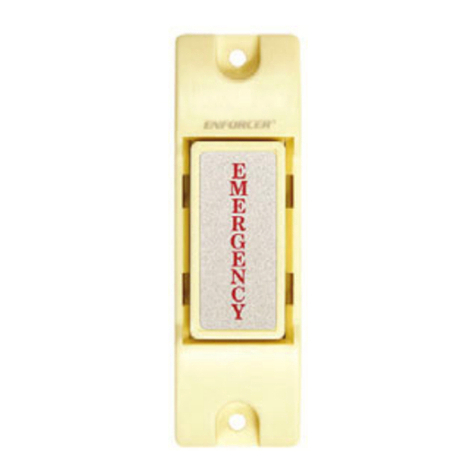
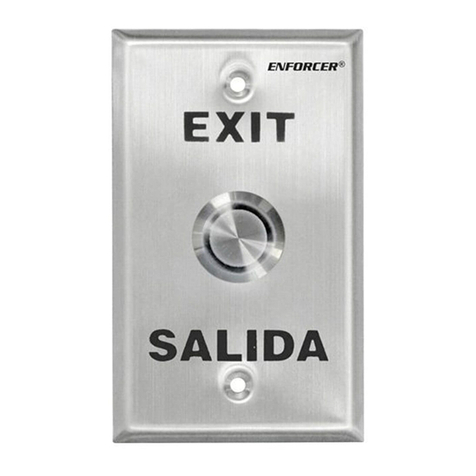
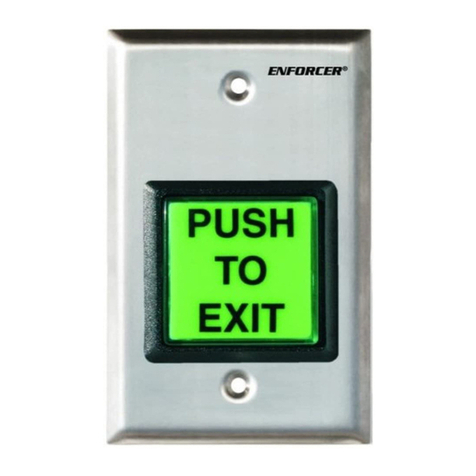
The ENFORCER No Touch Request-To-Exit Sensor uses IR technology to request egress from
a protected area or activate a device with the simple wave of a hand. Since it is No Touch, this
sensor is ideal for use in hospitals, clinics, labs, cleanrooms (to reduce the risk of contamination),
schools, factories, or offices.
Features:
•
Range up to 4" (10cm). Range for
SD-927PWC is up to 2" (5cm).
•Stainless steel or white plastic single-gang
plate.
•3A relay, triggers minimum 0.5 sec or as
long as hand is near the sensor.
•
LED illuminated sensor area for easy
identification.
•uick connect screwless terminal block.
•Selectable LED colors (turns from red to
green or green to red) to show sensor
activated.
Note: Products with model numbers that end with “ ” or that hav
e a round green “ ” sticker are RoHS compliant.








®
No Touch Request-To-Exit Sensor
2 SECO-LARM
U.S.A., Inc
Fig. 1
–
Connections (under
back cover)
NC COM NO
(
–
)
(
+
)
Power Input
Relay
output
(3A max.)
Jumper
(for LED color adjustment)
Installation:
1. Run four wires through the wall to a single-gang back-box.
2. Connect the four wires from the back-box to the quick connect screwless terminal according to
Fig. 1.
3. Screw the plate into the back-box, taking care not to crimp the wires.
4. Remove clear protective film from the sensor before use.
Adjusting the LED Color:
1. The LED color factory default setting is red (standby) and
green (triggered).
2. To reverse the LED color visual indicator to green (standby)
and red triggered), remove the jumper located at the right
side of the terminal block as shown in Fig. 1.
Pasting the Decals
(For SD-927PWC model only)
1. The SD-927PWC model includes "NO TOUCH" and
"EXIT" decals in English, French and Spanish.
2. Select the appropriate decals according to your
requirements.
3. Remove the back sheet of the decal and then set it on the
desired location. Use the thin lines on the left and right
sides of the text on the decals for alignment, see Fig. 2.
4. After the decal has been placed and set in the desired
location, scratch the front of the decal to transfer the text
onto the faceplate.
Note: The decal needs at least 24 hrs. to fully dry & bond
with the surface. Do not touch or scratch until the decal is
fully dry.
Specifications:
SD-927PKC-Nx
Series SD-927PWC
Power
12VDC
Current drain (max)
50mA@12VDC
Relay type
Form C dry contact, 3A@24VDC
Response time
10mS
LEDs
Standby
Red*
Triggered
Green*
Output time
0.5 sec. or as long as sensor is
triggered
Range
4" (10cm) 2" (5cm)
Temperature range
-4°~131° F (-20°~55° C)
Weight
3-oz (85g) 2.5-oz (70g)
* Reversible by jumper
1
1
/
8
”
(29mm)
2
1
/
8
”
(55mm)
Fig. 2 – Alignement de les autocollants
ENFORCER
®
No Touch Request-To-Exit Sensor
SECO-LARM
U.S.A., Inc 3
(–)
(+)
12VDC
Power input
Re lay ou tpu t
N
C
COM
NO
(–)
(+)
12VDC
Power input
Re lay ou tpu t
N
C
COM
NO
Example Installations:
1. Installation with Electromagnetic Lock (Fail-Safe)
2. Installation with ElectricDoorstrike (Fail-Secure)
3. Installation with Electromagnetic Lock and Keypad
EAP
-
5D1Q
Access Control
Power Supply
(
+
)
(–)
ENFORCER
Series
Electromagnetic Lock
EAP
-
5D1Q
Access Control
Power Supply
ENFORCER
Series
Electric Strike
(
+
)
(–)
(
+
)
(–)
EAP
-
5D1Q
Access Control Power Supply
SK
-
1011SQ
Digital Keypad
Tamper
Ou tpu t ( N .C .)
EGRESS
NO
COM
NC
ENFORCER Series
Electromagnetic Lock
(–)
(+)
12VDC
Power input
Re lay ou tpu t
N
C
COM
NO

Other manuals for Enforcer SD-927PKC-NEQ

1

This manual suits for next models

4

Other SECO-LARM Door Opening System manuals

SECO-LARM SD-7202GC-PEQ User manual

SECO-LARM

SECO-LARM SD-7202GC-PEQ User manual

SECO-LARM SD-7175SGEX1Q User manual

SECO-LARM

SECO-LARM SD-7175SGEX1Q User manual

SECO-LARM Enforcer SD-C141S Installer manual

SECO-LARM

SECO-LARM Enforcer SD-C141S Installer manual

SECO-LARM ENFORCER SD-962AR-36G User manual

SECO-LARM

SECO-LARM ENFORCER SD-962AR-36G User manual

SECO-LARM Enforcer Access SD-962AR-36A User manual

SECO-LARM

SECO-LARM Enforcer Access SD-962AR-36A User manual

SECO-LARM ENFORCER SD-C101-SBBQ User manual

SECO-LARM

SECO-LARM ENFORCER SD-C101-SBBQ User manual

SECO-LARM Enforcer Access SD-962AR-36A User manual

SECO-LARM

SECO-LARM Enforcer Access SD-962AR-36A User manual

SECO-LARM SD-998C-D3Q User manual

SECO-LARM

SECO-LARM SD-998C-D3Q User manual

SECO-LARM ENFORCER SD-962AR-36M User manual

SECO-LARM

SECO-LARM ENFORCER SD-962AR-36M User manual

SECO-LARM SD-7104SGEX1Q User manual

SECO-LARM

SECO-LARM SD-7104SGEX1Q User manual

SECO-LARM Enforcer SD-C141S User manual

SECO-LARM

SECO-LARM Enforcer SD-C141S User manual

SECO-LARM Enforcer SD-C141S User manual

SECO-LARM

SECO-LARM Enforcer SD-C141S User manual

SECO-LARM SD-C101-SGQ User manual

SECO-LARM

SECO-LARM SD-C101-SGQ User manual

SECO-LARM SD-969-A18Q User manual

SECO-LARM

SECO-LARM SD-969-A18Q User manual

SECO-LARM ENFORCER SS-075CQ User manual

SECO-LARM

SECO-LARM ENFORCER SS-075CQ User manual

Popular Door Opening System manuals by other brands

Allegion FALCON SC93 Series Installation instruction

Allegion

Allegion FALCON SC93 Series Installation instruction

B&D Controll-A-Door Smart SDO-7 installation instructions

B&D

B&D Controll-A-Door Smart SDO-7 installation instructions

Hewi PS160XA Series Mounting instructions

Hewi

Hewi PS160XA Series Mounting instructions

DORIC DS5010 installation guide

DORIC

DORIC DS5010 installation guide

Lock Control DH-66 Series Installation and operation manual

Lock Control

Lock Control DH-66 Series Installation and operation manual

samet Multi-Mech Assembly manual

samet

samet Multi-Mech Assembly manual

Stanley MA900ñ Installation and owner's manual

Stanley

Stanley MA900ñ Installation and owner's manual

GEZE Guide rail Boxer P installation instructions

GEZE

GEZE Guide rail Boxer P installation instructions

argenta INVISIDOOR SDX-125 manual

argenta

argenta INVISIDOOR SDX-125 manual

G-U OTS 736 SV BG Assembly instructions

G-U

G-U OTS 736 SV BG Assembly instructions

Dormakaba PORTEO Mounting instructions

Dormakaba

Dormakaba PORTEO Mounting instructions

Erreka PREMIS 200 installation guide

Erreka

Erreka PREMIS 200 installation guide

Dorma BEYOND Mounting instruction

Dorma

Dorma BEYOND Mounting instruction

Najm Alfarqadain M-238 operation instruction

Najm Alfarqadain

Najm Alfarqadain M-238 operation instruction

Assa Abloy Norton PR1601BF installation instructions

Assa Abloy

Assa Abloy Norton PR1601BF installation instructions

Excel XL8800 Series quick start guide

Excel

Excel XL8800 Series quick start guide

D+H KA 66-TW1-K-BSY+ Original instructions

D+H

D+H KA 66-TW1-K-BSY+ Original instructions

GAL MOVFE 2500 MECHANICAL MANUAL

GAL

GAL MOVFE 2500 MECHANICAL MANUAL

manuals.online logo
manuals.online logoBrands
  • About & Mission
  • Contact us
  • Privacy Policy
  • Terms and Conditions

Copyright 2025 Manuals.Online. All Rights Reserved.