Seg MRF3 User manual

MRF3 - Frequency Relay

2 TB MRF3 04.01 E
Contents
1 Introduction and application
2 Features and characteristics
3Design
3.1 Connections
3.1.1 Analog input circuits
3.1.2 Output relays
3.1.3 Blocking input
3.1.4 External reset input
3.1.5 Fault recorder
3.1.6 Parameter settings
3.2 LEDs
4 Working principle
4.1 Analog circuits
4.2 Digital part
4.3 Principle of frequency supervision
4.4 Measurement of the frequency gradient
(rate of change of frequency)
4.4.1 Load shedding
5 Operation and settings
5.1 Display
5.2 Setting procedure
5.3 System parameter
5.3.1 Display of voltage U as primary quantity
(Uprim/Usek)
5.3.2 Setting of nominal frequency
5.3.3 Display of the activation storage
(FLSH/NOFL)
5.4 Protection parameters
5.4.1 Parameter switch
5.4.2 Number of measuring repetitions(T)
5.4.3 Threshold of frequency supervision
5.4.4 Tripping delays for the frequency elements
5.4.5 Disengaging value for the frequency stages
with mains stabilisation
5.4.6 Reclaim time upon mains stabilisation
5.4.7 Parameter for frequency gradient
supervision df/dt at load shedding
5.4.8 Parameters for frequency gradient
supervision df/dt for mains decoupling
5.4.9 Blocking for frequency measuring
5.4.10 Voltage threshold for frequency
measurement
5.4.11 Adjustment of the slave address
5.4.12 Setting of Baud-rate (applies for Modbus
Protocol only)
5.4.13 Setting of parity (applies for Modbus
Protocol only)
5.5 Parameter for the fault recorder
5.5.1 Adjustment of the fault recorder
5.5.2 Type of fault recorder
5.5.3 Number of the fault recordings
5.5.4 Adjustment of trigger occurences
5.5.5 Pre-trigger time (Tpre)
5.6 Date and time
5.6.1 Adjustment of the clock
5.7 Additional functions
5.7.1 Setting procedure for blocking the
protection functions
5.8 Measuring values
5.8.1 Instantaneous values
5.8.2 Tripping memory
5.8.3 Display of measuring values
5.8.4 Unit of the measuring values displayed
5.8.5 Minimum and maximum values
5.9 Fault memory
5.9.1 Reset
5.10 Dynamic behaviour of the relay functions
6 Relay testing and commissioning
6.1 Power-on
6.2 Testing the output relays
6.3 Checking the set values
6.4 Secondary injection test
6.4.1 Test equipment
6.4.2 Test circuit
6.4.3 Checking the input circuits and measuring
values
6.4.4 Checking of operating- and resetting
values of the over-/underfrequency func-
tions
6.4.5 Checking of operating- and resetting
values of the df/dt elements
6.4.6 Checking the tripping delays
6.4.7 Checking the reclaim time of the
frequency stages
6.4.8 Checking the external blocking- and reset
functions
6.5 Primary injection test
6.6 Maintenance
7 Technical Data
7.1 Measuring input circuits
7.2 Common data
7.3 Setting ranges and steps
7.4 Order form
For additional common data of all MR-relays please
refer to manual “MR-Digital Multifunctional Relays”.
This manual is valid for software version D01-6.00.

TB MRF3 04.01 E 3
1Introduction and application
The MRF3 is a universal frequency relay and contains
the protective functions required by most electrical utili-
ties for mains parallel operation of power stations:
•Four elements for over- or under frequency protection
•Two elements for frequency gradient supervision
df/dt
•Fast decoupling of the generator from the grid at
mains failure
•Suitable for load shedding systems
2Features and characteristics
•Microprocessor technology with watchdog
•effective active low pass filter for suppressing of
harmonics,
•four elements for frequency supervision, alternatively
for under- or overfrequency detection,
•adjustable reconnection values for the frequency
stages
•independent separate adjustable timers,
•adjustable voltage threshold for blocking and dis-
connection of the frequency measurement,
•reclaim time of output relays after the frequency has
been exceeded or fallen short of.,
•display of all measuring values and setting parame-
ters for normal operation and tripping via an alpha-
numerical display and LEDs,
•display of actual measuring values, storage and dis-
play of tripping values,
•minimum- and maximum measurement of the fre-
quency gradient,
•adjustable tripping window for the df/dt supervision
at mains decoupling application,
•the protective functions can be assigned individually
to the output relays (relay matrix),
•display of measuring values as primary quantities,
•storage and display of tripping values in a fault
memory (voltage-failure safe),
•recording of up to eight fault occurences with time
stamp,
•for blocking the individual functions by the external
blocking input, parameters can be set according to
requirement,
•safe and fast mains decoupling by df/dt supervi-
sion,
•suppression of indication after an activation
(LED flash),
•display of date and time,
•in complience with VDE 0435, part 303 and IEC
255,
•serial data exchange via RS485 interface possible;
alternatively with SEG RS485 Pro-Open Data Proto-
col or Modbus Protocol.

4 TB MRF3 04.01 E
3Design
3.1 Connections
Figure 3.1: Connection diagram MRF3
Note:
Phase voltages can also be connected to A3/A4

TB MRF3 04.01 E 5
3.1.1 Analog input circuits
The analog input voltage is galvanically insulated via
the input transformer of the relay and the signal is
passed through an active low pass filter. The fre-
quency is detected from the square wave voltages
which are formed via comporators. The external wiring
of the measuring circuits as well as the auxiliary volt-
age are shown in the connection diagram.
3.1.2 Output relays
The MRF3 has 5 output relays with change-over con-
tacts:
Output relay 1: C1, D1, E1 and C2, D2, E2
Output relay 2: C3, D3, E3 and C4, D4, E4
Output relay 3: C5, D5, E5
Output relay 4: C6, D6, E6
Output relay 5: Self-supervision (internal fault of
the relay) C7, D7, E7
All relays are normally off, only the self-supervision re-
lay is normally on.
3.1.3 Blocking input
The parameters for the blocking function are free ad-
justable. Application of the aux. voltage to D8/E8
blocks all protection functions of the device for which
the parameters were set previsouly, refer Table 5.2
3.1.4 External reset input
Refer chapter 5.9.1

6 TB MRF3 04.01 E
3.1.5 Fault recorder
Recording time
There are two possible ways of using the memory ca-
pability of the fault recorder:
•Normal recording time
The curve shape of the measured analogue voltage
value (U) as well as the frequency (f) and the measured
df/dt values are scanned and recorded 16 times per
period. The maximal memory capacity is 16s at 50
Hz and 13.3s at 60 Hz.
•Extended recording time
Measured as an effective value, the voltage (U), the
frequency (f) as well as the frequency gradient (df/dt)
are recorded in two times per period. By this the total
recording time is extended considerably.
The maximal memory capacity is 64s at 50 Hz and
53.3s at 60 Hz.
Sampler rate at rated frequency
Recording time 50 Hz 60 Hz
Normal 1.25 ms 1.041 ms
Extended 10 ms 8.33 ms
Segregation of the memory
Independently of the recording time, the entire memory
capacity can be subdivided so that several short fault
events can be recorded. The erasing behaviour of the
fault recorder can also be influenced.
•not writing over
When 2, 4 or 8 recordings are chosen, the store is
segregated into the corresponding number of
subranges. If the maximal number of fault events has
been recorded, further recordings are blocked by the
fault recorder in order to save the stored data. After
these have been read-out and erased, the fault re-
corder is ready for other fault events.
•overwrite
When 1, 3 or 7 recordings are chosen, the corre-
sponding number of subranges is reserved in the
store. If the store is full, the first-in recording will always
be written over by the latest one.
Structure of the fault recorder
The memory range of the fault recorder is designed as
circulating buffer. The example below explains the
storage of 7 fault recordings.
Memory locations 8 to 4 are engaged
Memory location 5 is being writed
This example shows that more than eight recordings
are stored because memory locations no. 6, 7 and 8
are engaged. From this follows that no. 6 is the first-in
fault recording and no. 4 the latest one. If there is an
uneven number of recordings selected, the first-in re-
cording is automatically written over. The fault recorder
has to be erased manually if an even number of re-
cordings is chosen because there is no storage loca-
tion for momentary recording.
1
2
3
4
5
6
7
8
Figure 3.2: Segregation of the memory in e.g. 8 events
trigger occurence
recording duration
T
pre
[s]
Figure 3.3: Standard structure of fault recording

TB MRF3 04.01 E 7
3.1.6 Parameter settings
System parameters
Uprim/Usek Primary/secondary measured value
display of the voltage transformers
fNRated frequency
LED-Flash Suppression of LED flashing after
pick up
Protection parameters
P2 Parameter set change-over switch
T Measuring repeated for frequency
measuring
f1Pickup value for frequency stage 1
f1+R Reclaim value for frequency stage 1
tf1 Trip delay for frequency stage 1
tf1+tRReclaim time for frequency stage 1
f2Pickup value for frequency stage 2
f2+R Reclaim value for frequency stage 2
tf2 Trip delay for frequency stage 2
tf2+tRReclaim time for frequency stage 2
f3Pickup value for frequency stage 3
f3+R Reclaim value for frequency stage 3
tf3 Trip delay for frequency stage 3
tf3+tRReclaim time for frequency stage 3
f4Pickup value for frequency stage 4
f4+R Reclaim value for frequency stage 4
tf4 Trip delay for frequency stage 4
tf4+tRReclaim time for frequency stage 4
fe(df1) Frequency threshold value for df/dt-stage 1
*With setting "vari“, two new parame-
ters appear which fix a trip window for
the df/dt.
*fe(df1+min) Bottom frequency threshold value for the
df/dt stage 1
*fe(df1+max) Top frequency threshold value for the
df/dt stage 1
df1Pickup value for the frequency
changing speed of the df/dt stage 1
dt1Time difference cum value of the trip
counter of the df/dt stage 1
fe(df2) Frequency threshold value for the
df/dt stage 1
*With setting „vari“, two new parame-
ters appear which fix a trip window for
the df/dt.
*fe(df2+min) Bottom frequency threshold value for the
df/dt stage 2
*fe(df2+max) Top frequency threshold value for the
df/dt stage 2
df2Pickup value for the frequency
changing speed of the df/dt stage 2
dt2Time difference cum value of the trip
counter of the df/dt stage 2
UBmin Blocking of frequency measuring
UBmax Release of frequency measuring
*min/max setting only if fe(df1); fe(df2) are set to "vari".
Parameters for the fault recorder
FR Number of disturbance events
FR Trigger events
FR Pre-Trigger time Tpre
Date and time
Year Y = 00
Month M = 04
Day D = 18
Hour h = 07
Minute m = 59
Second s = 23
Additional functions
Blocking function
Relay configuration (relay matrix)
Fault memory

8 TB MRF3 04.01 E
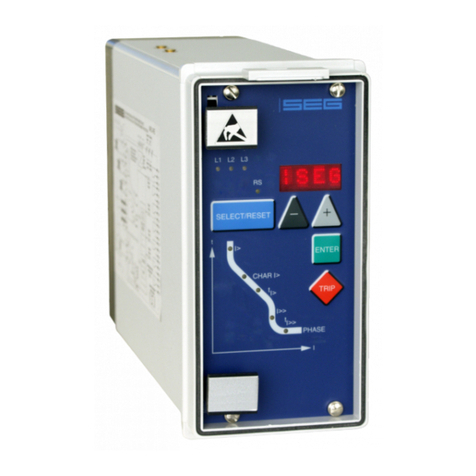
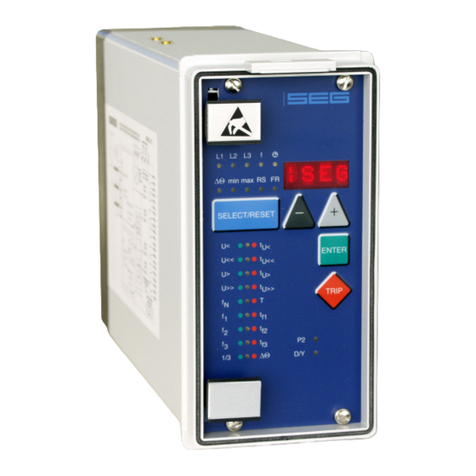
3.2 LEDs
All LEDs (except LEDs FR, RS and min., max. P2) are
two-colored. The LEDs left next to the alphanumerical
display light up green during measurement and red at
fault signals.
The LEDs below the <SELECT/RESET> push button
light up green during setting and reading out the set-
ting values printed on the left side next to the LEDs. The
LEDs light up red when the setting values printed on
the right side next to them are activated.
The LED marked with the letters RS lights up green dur-
ing setting of the slave address for the serial interface
(RS485) of the unit.
Figure 3.4: Front plate MRF3

TB MRF3 04.01 E 9
4Working principle
4.1 Analog circuits
The input voltage is galvanically insulated via the input
voltage transformer. The noise signals caused by the
influence of inductive and capacitive couplings are
then suppressed by RC-analog filter circuits. The ana-
log voltage signals are fed to the A/D-converter of the
microprocessor and then transformed into digital sig-
nals via sample- and hold-circuits. These digital values
are then used for further processing. The analog sig-
nals are sampled with a sampling frequency of 16 x
fN, namely, a sampling rate of 1.25 ms for every
measuring quantity (at 50 Hz). The input voltage is
also passed through an analog filter for frequency
measurement and is then converted into square wave
signals via comparators. The frequency is determined
by measuring complete cycles.
4.2 Digital part
The essential element of the protection relay is a pow-
erful microcontroller. All functions - from the analog
digital conversion to the relay tripping decision are
carried out by the microcontroller digitally.
The relay program is located in an EPROM (Electri-
cally-Programmable-Read-Only-Memory). With this
program the microcontroller's CPU calculates the value
of the measured voltage of the fundamental frequency.
Harmonics are suppressed by an efficient digital filter
based on the Fourier transformation (DFFT = Discrete
Fast Fourier Transformation) When the measured volt-
age falls below the voltage threshold UB, all frequency
functions are blocked.
The frequency is established from the time difference of
two similar voltage zero passages. The microprocessor
compares continuously the frequency measured values
and df/dt measuring values with the preset pickup
values (setting value) stored in the parameter memory
(EPROM). If a fault occurs an alarm is given and after
the set tripping delay has elapsed, the corresponding
tripping relay is activated.
The relay setting values for all parameters are stored in
a parameter memory (EPROM - Electrically Erasable
Programmable Read Only Memory), so that the actual
relay settings cannot be lost, even if the power supply
is interrupted. The microprocessor is supervised by a
built-in "watchdog" timer. In case of failure the watch-
dog timer resets the microprocessor and gives an
alarm signal via output relay "self supervision".
4.3 Principle of frequency supervision
Frequency relay MRF3 protects electrical generators,
consumers or electrical operating equipment in general
against over- or underfrequency.
The relay has, independent from each other, four fre-
quency elements f1- f4with a free choice of parame-
ters, with separate adjustable pickup values and delay
times as well as two elements for supervision of fre-
quency gradient df/dt. With the aid of the frequency
gradient sign both frequency increase and frequency
decrease can be supervised.
The measuring principle of the frequency supervision is
based in general on the time measurement of complete
cycles, whereby a new measurement is started at each
voltage zero passage. The influence of harmonics on
the measuring result is thus minimized.
J
KJ 6
6
Figure 4.1: Determination of cycle duration by means of
zero passages.
In order to avoid false tripping during occurence of in-
terference voltages and phase shifts the relay works
with an adjustable measuring repetition (see chapter
5.2.2)
Frequency tripping is sometimes not desired by low
measured voltages which for instance occur during al-
ternator start-up.
All frequency supervision functions can be blocked
with the aid of an adjustable voltage threshold UBin
case the measured voltage value is below this value.

10 TB MRF3 04.01 E
4.4 Measurement of the frequency gra-
dient (rate of change of frequency)
Supervision of the frequency gradient df/dt is applied
to the following applications:
•As additional criteria for underfrequency supervi-
sion at load shedding systems
•For fast decoupling of mains parallel electrical
generators at mains failure (mains decoupling)
•With frequency limiting function top and/or bottom
(setting-up of a trip window)
The df/dt elements can be set accordingly depending
on the type of application .
4.4.1 Load shedding
In the event of large interferences in the power genera-
tion grid, the failure of several power generators may
endanger the stability of the entire grid. The created
power deficit causes the mains frequency to drop rap-
idly.
The MRF3 can be used for defined load shedding in
order to re-stabilise the grid.
For this purpose, the parameters of the four frequency
stages are set for immediate load shedding.
After grid stabilisation the shed load can be connected
again after a reclaim time.
fx
tfx>
fx+R
Rückfallwert
Reclaim value
Anregung
pickup
Rückschaltzeit
Reclaim Time
Auslösezeit
Tripping Time
Relais
Relay
tR
tfx>+tR
Figure 4.2: Reclaim time after mains recovery
In addition, the MRF3 offers two measuring stages for
the frequency gradient df/dt. The amount of power
deficit can be determined by way of the frequency
change speed and this way appropriate load shed-
ding can be initiated.
The conventional method of supervising the frequency
gradient by using "load shedding" shows the following
disadvantages in practical application:
•At the beginning of a mains failure the frequency
gradient may differ greatly from one substation to
the next and is, from a time point of view, not con-
stant in most cases. This depends on the power re-
quired by the individual substations. This makes se-
lective shut-down of consumers more difficult.
•During a frequency decrease in the grid the power
between the individual power stations may fluctu-
ate. In this situation the frequency gradient is not
constant which makes a safe decision for tripping
on the basis of the momentary value of the fre-
quency gradient impossible.
On account of the above-mentioned disadvantages
only the consideration of the average value of the fre-
quency gradient makes sense for a df/dt supervision
with load shedding systems.
Since the frequency gradient supervision of the MRF3
can work on this principle, the above-mentioned prob-
lems can be excluded.
Remark:
The jumper J3, which is located behind the display
panel, must not be plugged in (automatic reset of the
relays).
The function of the jumper J3 is that all energised re-
lays go into self-holding position and are only de-
energised by manual resetting. This would prevent re-
setting of the trip relay.

TB MRF3 04.01 E 11
Application example: fmin:
The df/dt function of the MRF3 for load shedding is
only active as from an adjustable frequency threshold
value fe. If the measured system frequency drops be-
low fe , a time counter is started (adjustment value dt in
periods). If the measured system frequency drops be-
low the tripping value fT within the time dt, the MRF3
switches off immediately. The tripping value fTresults
from the settings df, feand dt:
df ff
dt
eT
=−⇒fT= fe -- df⋅dt
If the tripping value fTis not achieved within time dt, no
tripping will take place.
Only when the frequency rises above the threshold
value fewill the MRF3 be reset automatically.
Figure 4.3: Working principle of the df/measuring
This is to be considered as a simplified description.
The following functional description applies for an ex-
act trip mode at load shedding:
For thresholds fe and fT this frequency timer is con-
nected in series as measuring repetition timer as de-
scribed for frequency elements f1 - f4 (see chapter
5.4.2). Thus Figure 4.3 only applies when compared
to dt the setting value of T is smaller, otherwise an ad-
ditional trip delay has to be used (see Figure 4.4).
Figure 4.4: Working principle of the df measuring
t1 threshold fe is fallen short of
t2 measuring repetition delay T for fe has elapsed
t3 threshold fT is fallen short of
t4 measuring repetition delay for fT has elapsed
The frequency value fe is not reached at the instant t1a
or t1b and the measuring repetition timer T is started. At
the instant t2a or t2b the time has elapsed and time dt
starts.
The frequency value fe is not reached at the instant t3a
or t3b and the measuring repetition timer T is restarted
by a second timer. If its time has run down and time
dt has not elapsed yet (time 4b), tripping is initiated.
There is no tripping if time dt has elapsed before the
time of the second timer has run down (time 4a).

12 TB MRF3 04.01 E
5Operation and settings
5.1 Display
Function Display shows Pressed pushbutton Corresponding
LED
Colour
of LED
Normal operation: SEG
Measured operating values meas. value of voltage <SELECT/RESET> U green
meas. value of frequency <SELECT/RESET> f green
Min./Max. frequency
measuring values before
last reset
<SELECT/RESET>
one time for each value
f + (min or max) green
Measuring value df/dt <SELECT/RESET>
one time for each value
df/dt green
Min./Max. measuring
value of frequency gradi-
ent before last reset
<SELECT/RESET>
one time for each value
df/dt + (min or
max)
green
Setting values:
Rated frequency fNSetting value in Hz <SELECT/RESET><+><-> fNgreen
Measuring repetition Setting value in periods of
nominal frequency
<SELECT/RESET><+><-> T red
Frequency pickup value f1
Reclaim value for f1
Tripping delay time for f1
Reclaim time for f1
Setting value in Hz
setting value in seconds
<SELECT/RESET><+><->
one time for each value
f1
f1+R
tf1
tf1+ tR
green
green
red
red
Frequency pickup value f2
Reclaim value for f2
tripping delay time for f2
Reclaim time for f2
Setting value in Hz
setting value in seconds
<SELECT/RESET><+><->
one time for each value
f2
f2+R
tf2
tf2+ tR
green
green
red
red
Frequency pickup value f3
Reclaim value for f3
tripping delay time for f3
Reclaim time for f3
Setting value in Hz
Setting value in seconds
setting value in seconds
<SELECT/RESET><+><->
one time for each value
f3
f3+R
tf3
tf3+ tR
green
green
red
red
Frequency pickup value f4
Reclaim value for f4
tripping delay time for f4
Reclaim time for f4
Setting value in Hz
Setting value in seconds
setting value in seconds
<SELECT/RESET><+><->
one time for each value
f4
f4+R
tf4
tf4+ tR
green
green
red
red
1. Frequency threshold value fe for
df/dt measuring
Setting value in Hz or
„VARI1)“
<SELECT/RESET><+><-> fe + df1green
1) Lower frequency threshold value
fe for df/dt measuring
1) Higher frequency threshold value
fe for df/dt measuring
Setting value in Hz <SELECT/RESET><+><-> fe + df1
+ min
fe + df1
+ max
green
yellow
green
yellow
2. Frequency threshold value fe for
df/dt measuring
Setting value in Hz or
„VARI1)“
<SELECT/RESET><+><-> fe + df2green
1) Lower frequency threshold value
fe for df/dt measuring
1) Higher frequency threshold value
fe for df/dt measuring
Setting value in Hz <SELECT/RESET><+><-> fe + df2
+ min
fe + df2
+ max
green
yellow
green
yellow
Setting value df1/dt
Different time or value of the trip
counter for df1/dt
Setting value in Hz /s
Setting value in periods of
rated frequency
<SELECT/RESET><+><->
one time for each value
df1
dt1
green
red
Setting value df2/dt
Different time or value of the trip
counter for df2/dt
Setting value in Hz /s
Setting value in periods of
rated frequency
<SELECT/RESET><+><->
one time for each value
df2
dt2
green
red
Function blocking EXIT <SELECT/RESET><+><-> LED of blocked
parameters
green
Blocking for the frequency measuring Setting value in Volt <SELECT/RESET><+><-> UB
tmin
green
yellow
1) The MRF3 is operating with the df/dt function
2) Setting is only possible in case of dt/df trip

TB MRF3 04.01 E 13
Function Display shows Pressed pushbutton Corresponding
LED
Colour
of LED
Releasing threshold for frequency
measuring
Setting value in volt <SELECT/RESET><+><-> UB + max green
yellow
Assignment of blocking function BLOC; NO_B SELECT/RESET><+><-> f1- f4, df1, df2
Assignment of output relays 1 - 4 <ENTER> + <TRIP>
<SELECT/RESET><+><->
R
f1- f4,,
tf1- tf4,dt1, dt2
red
green
red
Recorded fault data:
voltage Tripping value in Volt <SELECT/RESET><+><-> U red
Slave address of serial interface 1 - 32 <SELECT/RESET><+><-> RS yellow
Baud-Rate 2) 1200-9600 <SELECT/RESET><+><-> RS yellow
Parity-Check 2) even odd no <SELECT/RESET><+><-> RS yellow
Frequency Tripping value in Hz <SELECT/RESET><+><-> f, fmin, fmax red,
yellow
Frequency changing speed Tripping value in Hz/s <SELECT/RESET><+><-> df, dfmin, dfmax
Fault memory FLT1; FLT2..... <SELECT/RESET><+><-> U, f, fmin, fmax,
df, dfmin, dfmax
tf1- tf4,dt1, dt2, !
red,
yellow
red
red,
green
Delete failure memory wait <-> <SELECT/RESET>
Number of fault occurences S = 1N to S = 8N or
S = 1L to S = 8L
<SELECT/RESET> <+><-> FR yellow
Trigger signal for the fault recorder TEST, P_UP, A_PI, TRIP <SELECT/RESET> <+><-> FR yellow
Display of date and time Y = 99, M = 10,
D = 1, h = 12, m = 2,
s = 12
<SELECT/RESET> <+><-> !green
Save parameter? SAV? <ENTER>
Save parameter! SAV! <ENTER> for about 3 s
Software Version <TRIP> time for each part
Manual tripping TRI? <TRIP> three times
Inquire password PSW? <SELECT/RESET>/
<+>/<->/<ENTER>
Relay tripped TRIP <TRIP>
or fault tripping
Secret password XXXX <SELECT/RESET>/
<+>/<->/<ENTER>
System reset SEG <SELECT/RESET> for
about 3 s
2) only Modbus Protocol
Table 5.1: Possibilities for indications by the display

14 TB MRF3 04.01 E
5.2 Setting procedure
Before changing a parameter a password has to be
entered first (see chapter 4.4 of description "MR-digital
multifunctional relay)
The parameter setting procedure is guided by two-
colored illuminated LEDs. During setting of the fre-
quency setting values fN, f1- f4, fe, df1and df2the LEDs
light up green. During setting of the tripping delays,
differential periods or counters these LEDs light up red.
The desired pickup values, nominal values and trip-
ping delays can be adjusted by pressing push buttons
<+> and <-> and stored with <ENTER>.
5.3 System parameter
5.3.1 Display voltage U as primary quan-
tity (Uprim/Usek)
The voltage can be shown as primary measuring
value. For this parameter the transformation ratio of the
VT has to be set accordingly. If the parameter is set to
"sec", the measuring value is shown as rated secon-
dary voltage.
Example:
The voltage transformer used is of 10 kV/100 V. The
transformation ratio is 100 and this value has to be set
accordingly. If still the rated secondary voltage should
be shown, the parameter is to be set to 1.
5.3.2 Setting of nominal frequency
For proper functioning it is necessary to first adjust the
rated frequency (50 or 60 Hz).
First the nominal frequency (50 or 60 Hz) has to be
set before unit MRF3 is put into operation.
All frequency functions are determined by setting the
nominal frequency, i.e. whether the set frequency
thresholds are evaluated as over- or underfrequency
(see also chapter 5.2.3). Also the cycle duration
(20 ms at 50 Hz and 16.67 ms at 60 Hz) derives
from this setting which determines the minimum tripping
delay for frequency elements f1- f4with an adjustable
multiplier (see also chapter 5.4.4).
During setting of the nominal frequency a value in Hz
is shown on the display.
5.3.3 Display of the activation storage
(FLSH/NOFL)
If after an activation the existing current drops again
below the pickup value, e.g. f1, without a trip has
been initiated, LED f1 signals that an activation has
occured by flashing fast. The LED keeps flashing until it
is reset again (push button <RESET>). Flashing can be
suppressed when the parameter is set to NOFL.
5.4 Protection parameters
5.4.1 Parameter switch
By means of a change over facility, two different pa-
rameter sets can be activated. This change over pro-
cedure can be realized either over touch panel by
software or by using the external inputs RESET or
BLOCKING:
Software-
parameter
Blocking input
used as
RESET input
used as
SET1 Blocking input RESET input
SET2 Blocking input RESET input
B_S2 Parameter switch RESET input
R_S2 Blocking input Parameter switch
B_FR Trigger off the fault
recorder from ex-
ternal
Reset input
R_FR Blocking input Trigger off the fault
recorder from ex-
ternal
S2_FR Parameter switch Trigger off the fault
recorder from ex-
ternal
For settings SET1 or SET 2 the parameter set is acti-
vated by software. Terminals C8/D8 and D8/E8 can
then be used as external RESET or BLOCKING inputs.
At setting B_S2 the BLOCKING input (D8/E8) can be
used as parameter set change-over switch. At setting
R_S2 the RESET input (D8/E8) can be used as pa-
rameter set change-over switch. At setting B_FR imme-
diate activation of the fault recorder by using the
BLOCKING input. During the recording time the LED
"FR" lights up at the front plate.
Setting R_FR is used for activating the fault recorder via
the RESET input. At setting S2_FR the parameter set 2
can be activated via the BLOCKING input and/or via
the RESET input recording of a fault event can be acti-
vated.

TB MRF3 04.01 E 15
By applying the aux. voltage to one of the external in-
puts the respective function will be activated.
Important information:
The respective external inputs RESET or BLOCKING
used as parameter set change-over switch or to trigger
off the fault recorder are then not available. If, for in-
stance, the external BLOCKING input is used as pa-
rameter set change-over switch, the protective functions
have to be blocked separately by software (see chap-
ter 5.7.1).
5.4.2 Number of measuring repetitions (T)
In order to avoid false tripping of the unit at short volt-
age drops of the system voltage or interference volt-
ages, MRF3 works with an adjustable measuring repe-
tition. When the instantaneous frequency measuring
value exceeds (at overfrequency) or falls below (at un-
derfrequency) the set reference value, the counter is in-
cremented, otherwise the counter is decremented
down to the minimum value of 0. Only when the coun-
ter exceeds the value adjusted at T, alarm is given and
after the tripping delay of the frequency element has
elapsed the tripping command is given.
The setting range for T is between 2 - 99.
Recommendation for setting:
For short tripping times, e.g. for machine protection or
for mains decoupling T should be set in the range from
2 - 5.
At precision measurements, e.g. exact measurement of
the system frequency a setting of T in the range from
5 - 10 is recommended.
5.4.3 Threshold of frequency supervision
The frequency supervision of MRF3 has three fre-
quency elements independent from each other. Acc. to
setting the pickup value above or below the nominal
frequency, these elements can be used for over- or un-
der frequency supervision.
Dependent on the preset nominal frequency fNthe
pickup values from 30 Hz up to 70 Hz at fN= 50 Hz
and from 40 Hz to 80 Hz at fN= 60 Hz can be set.
During setting of the pickup values f1 – f4the display
shows the values in Hz. A value of for instance
49.8 Hz is indicated with "4980".
The function of the individual frequency elements can
be deactivated by setting the pickup values to "EXIT".
The setting value “EXIT“ corresponds to the rated fre-
quency. For this purpose the frequency adjustment
value must be set to the rated frequency fN.
5.4.4 Tripping delays for the frequency
elements
Tripping delays tf1 - tf4 of the four frequency elements
can be set independently from tf1min - 120 s. The mini-
mum tripping delay tf1min of the relay depends upon the
number of set measuring repetitions T (periods) and
amounts to:
Tt
f,min
2....49 (T+1)·20 ms
50....69 (T - 49)·50 ms + 1 s
70....99 (T - 69)·100 ms + 2 s
When setting the tripping delay to "EXIT" by pressing
push button <+> up to the maximum setting value, the
corresponding tripping relay is blocked. Pickup of the
frequency element is however displayed on the front
plate by the corresponding LED, an assigned alarm re-
lay is also activated.
5.4.5 Disengaging value for the frequency
stages with mains stabilisation
If the excitation points for frequency supervision are
exceeded or fallen short of, the disengaging value can
be separately adjusted for each frequency stage. The
disengaging values can never be set greater or smaller
than the appertaining tripping value.
Example: f
1< = 49 Hz →f1+ R = > 49.01 Hz
f2> = 51 Hz →f2+ R = < 50.99 Hz
see chapter 7.3
5.4.6 Reclaim time upon mains stabilisation
If the mains frequency is exceeded or fallen short of,
the trip relay is reset (refer to chapt. 4.4.1). The re-
claim time is separately adjustable for every tripping
stage. The adjustment can be changed if LED tR+tf1 – tf4
lights up and by means of the <+> , <-> keys.

16 TB MRF3 04.01 E
5.4.7 Parameter for frequency gradient
supervision df/dt at load shedding
Table 7.1 in chapter 7.3 shows the possible setting
parameters with their setting ranges.
For the frequency gradient supervision df/dt at load
shedding the following parameters are important:
fe+df1: Frequency threshold value as from which
excitation of the df/dt stages below fN
begins.
fe+df2: Frequency threshold value as from which
excitation of the df/dt stages above fN
begins.
df1+ df2: Tripping values of the df/dt stages are
set in Hz/s (refer also to 4.4.1
"Load shedding").
dt1+ dt2: Time interval in periods of the rated
frequency.
Setting example:
df/dt measurement is to be started when the frequency
falls below the pickup value of fe= 49.2 Hz. Tripping
of MRF3 is to follow when a mean frequency gradient
of df1/dt1=1Hz/s is exceeded before the critical fre-
quency dt1of 48.9 Hz is reached, this comes to a
time interval df1 to be set of:
dt 49.2Hz 48.9Hz
1.0Hz / s 0.02s 15(periods)
1=−⋅=
5.4.8 Parameters for frequency gradient
supervision df/dt for mains decou-
pling
With this application threshold fe+df1or. fe+df2must
be set to „VARI“. With this setting two additional pa-
rameters will appear by means of which a bottom
(fe+df+min) and/or a top (fe+df+max) limit value can
be adjusted. This way it is possible to set up a tripping
window each for both df/dt stages.
The parameters df1and df2are response values in
Hz/s. Normally df1and df2are adjusted in the same
way, but with different prefices (e.g. df1= -2 Hz/s
and df2= +2 Hz/s). This way it is possible to detect
an impermissible frequency increase as well as a drop
in frequency.
Measuring repetition counters dt1and dt2are for
checking the monotony of the frequency increase or -
decrease and can be set in the range from 1 - 64 cy-
cles.
For mains coupling a setting from 2 - 4 is recom-
mended. Setting of 2 cycles corresponds to an interal
evaluation of 4 measuring cycles and resulting from
this a tripping delay of 2 x 20 ms = 40 ms.
The df/dt stages can be blocked by setting the trip-
ping value of the frequency gradient to 0. The display
will show the word "EXIT".
5.4.9 Blocking for frequency measuring
If the system voltage is lowered, correct frequency
measuring may no longer be possible as from a cer-
tain value. In order to prevent faulty tripping of the
MRF3 in such cases, there is an adjustable voltage
threshold value UBmin. If the system voltage lies below
this threshold value, all frequency functions of the
MRF3 are blocked.
5.4.10 Voltage threshold for frequency
measurement
At very low system voltage, e.g. during alternator start-
up or voltage failure the frequency measurement can-
not be done correctly. An adjustable voltage threshold
UBmax prevents a false tripping of the MRF3 in such
cases. When the system voltage drops below this
threshold, all frequency functions of unit MRF3 are
blocked.
See chapter 5.10
5.4.11 Adjustment of the slave address
By pressing push buttons <+> and <-> the slave ad-
dress can be set in the range of 1 - 32. During this ad-
justment the LED RS lights up.
5.4.12 Setting of Baud-rate (applies for
Modbus Protocol only))
Different transmission rates (Baud rate) can be set for
data transmission via Modbus Protocol.
The rate can be changed by push buttons <+> and
<-> and saved by pressing <ENTER>.

TB MRF3 04.01 E 17
5.4.13 Setting of parity (applies for
Modbus Protocol only)
The following three parity settings are possible :
•"even" = even parity
•"odd" = odd parity
•"no" = no parity check
The setting can be changed by push buttons <+> and
<-> and saved by pressing <ENTER>.
5.5 Parameter for the fault recorder
5.5.1 Adjustment of the fault recorder
The MRF3 is equipped with a fault recorder (see chap-
ter 3.1.5). Three parameters can be determined.
5.5.2 Type of fault recorder
The normal or extended recording time can be se-
lected by parameter "Number of Recordings".
5.5.3 Number of the fault recordings
The max. storage time for the normal recording time is
16s at 50 Hz and 13.2 at 60 Hz. For the extended
recording time the storage time is 64s at 50 Hz and
53.2s at 60Hz.
Software
parame-
ter
Para-
meter
Time per recording
at the set rated fre-
quency of
Auto
writing
over
50 Hz 60Hz
Normal S=1N 1 x 8 s 1 x 6.65 s
S=3N 3 x 4 s 3 x 3.30 s yes
U; f ; df S=7N 7 x 2 s 7 x 1.65 s
S=2N 2 x 8 s 2 x 6.65 s
S=4N 4 x 4 s 4 x 3.30 s no
S=8N 8 x 2 s 8 x 1.65 s
Extended S=1L 1 x 64 s 1 x 53.2 s
S=3L 3 x 32 s 3 x 26.4 s yes
URMS S=7L 7 x 16 s 7 x 13.2 s
f; df S=2L 2 x 64 s 2 x 53.2 s
S=4L 4 x 32 s 4 x 26.4 s no
S=8L 8 x 16 s 8 x 13.2 s
5.5.4 Adjustment of trigger occurences
There is a choice between four different occurences:
P_UP (PickUP) Storage is initiated after recognition
of a general activation.
TRIP Storage is initiated after a trip has
occured.
A_PI (After Pickup) Storage is initiated after the last
activation threshold was fallen
short of.
TEST Storing is activated by simultaneous
actuation of the keys <+> and <->.
During the recording time the display shows
“Test”.
5.5.5 Pre-trigger time (Tpre)
By the time Tpre it is determined which period of time
prior to the trigger occurence should be stored as well.
It is possible to adjust a time between 0.05s and the
max. recording interval. With keys <+> and <-> the
values can be changed and with <ENTER> be saved.
5.6 Date and time
5.6.1 Adjustment of the clock
When adjusting the date and time, LED "lights up.
The adjustment method is as follows:
Date : Year Y=00
Month M=00
Day D=00
Time : Hour h=00
Minute m=00
Second s=00
The clock starts with the set date and time as soon as
the supply voltage is switched on. The time is safe-
guarded against short-term voltage failures (min. 6
minutes).
Note:
The window for parameter setting is located behind
the measured value display. The parameter window
can be accessed via the <SELECT/RESET> key.

18 TB MRF3 04.01 E
5.7 Additional functions
5.7.1 Setting procedure for blocking the
protection functions
The blocking function of the MRF3
can be set accord-
ing to requirement. By applying the aux. voltage to
D8/E8, the functions chosen by the user are blocked.
Setting of the parameter should be done as follows:
•When pressing push buttons <ENTER> and <TRIP>
at the same time, message "BLOC" is displayed (i.e.
the respective function is blocked) or "NO_B" (i.e.
the respective function is not blocked). The LED allo-
cated to the first protection function U< lights red.
•By pressing push buttons <+> <-> the value dis-
played can be changed.
•The changed value is stored by pressing <ENTER>
and entering the password.
•By pressing the <SELECT/RESET> push button, any
further protection function which can be blocked is
displayed.
•Thereafter the menu is left by pressing
<SELECT/RESET> again.
•If the <SELECT/RESET> key is actuated again, the
blocking menu is left and the assignment mode is
accessed^.
Function Description Display LED
f1 Frequency step 1 BLOC green
f2 Frequency step 2 BLOC green
f3 Frequency step 3 NO_B green
f4 Frequency step 4 NO_B green
df/dt1 Frequency gradient 1 BLOC green
df/dt2 Frequency gradient 2 BLOC green
Table 5.2: Blocking function for two parameter sets
Assignment of the output relays:
Unit MRF3 has five output relays. The fifth output relay
is provided as permanent alarm relay for self supervi-
sion is normally on. Output relays 1 - 4 are normally
off and can be assigned as alarm or tripping relays to
the voltage functions which can either be done by us-
ing the push buttons on the front plate or via serial in-
terface RS485. The assignment of the output relays is
similar to the setting of parameters, however, only in
the assignment mode. The assignment mode can be
reached only via the blocking mode.
By pressing push button <SELECT/RESET> in blocking
mode again, the assignment mode is selected.

TB MRF3 04.01 E 19
The relays are assigned as follows:
LEDs f1, f2, f3,f4, df1and df2are two-coloured and light
up green when the output relays are assigned as
alarm relays and LEDs tf1, tf2, tf3, tf4, dt1and dt2red as
tripping relays.
Definition:
Definition:
Alarm relays are activated at pickup.
Tripping relays are only activated after elapse of the
tripping delay.
After the assignment mode has been activated, first
LED U< lights up green. Now one or several of the
four output relays can be assigned to under voltage
element U< as alarm relays. At the same time the se-
lected alarm relays for under voltage element 1 are
indicated on the display. Indication "1_ _ _" means
that output relay 1 is assigned to this under voltage
element. When the display shows "_ _ _ _", no alarm
relay is assigned to this under voltage element. The as-
signment of output relays 1 - 4 to the current elements
can be changed by pressing <+> and <-> push but-
tons. The selected assignment can be stored by press-
ing push button <ENTER> and subsequent input of the
password. By pressing push button <SELECT/RESET>,
LED U< lights up red. The output relays can now be
assigned to this voltage element as tripping relays.
Relays 1 - 4 are selected in the same way as de-
scribed before. By repeatedly pressing of the
<SELECT/RESET> push button and assignment of the
relays all elements can be assigned separately to the
relays. The assignment mode can be terminated at any
time by pressing the <SELECT/RESET> push button for
some time (abt. 3 s).
Note:
•The function of jumper J2 described in general de-
scription "MR Digital Multifunctional Relays" does
not apply for MRF3. For relays without assignment
mode this jumper is used for parameter setting of
alarm relays (activation at pickup or tripping).
A form is attached to this description where the setting
requested by the customer can be filled-in. This form is
prepared for telefax transmission and can be used for
your own reference as well as for telephone queries.
Relay function Output relays Display- Corres-
ponding
1234IndicationLED
f1Alarm X 1 _ _ _ f1green
tf1Tripping X 1 _ _ _ tf1red
f2Alarm X 1 _ _ _ f2green
tf2Tripping X 1 _ _ _ tf2red
f3Alarm X _ 2 _ _ f3green
tf3Tripping X _ 2 _ _ tf3red
f4Alarm X _ _ 3 _ f3green
ff4Tripping X _ _ 3 _ tf3red
df/dt1Tripping X _ _ _ 4 dt1red
df/dt1Tripping X _ _ _ 4 dt2red
Table 5.3: Example of assignment matrix of the output relay (default settings)

20 TB MRF3 04.01 E
5.8 Measuring values
5.8.1 Instantaneous values
The indication of the instantaneous measuring values is
described in the general description "MR - Digital Mul-
tifunctional Relays", chapter 4.1.
5.8.2 Tripping memory
The indication of the measuring values in case of a trip
is described in the general description "MR - Digital
Multifunctional Relay“, chapter 4.5.2.
5.8.3 Display of measuring values
During normal operation the following measuring val-
ues can be displayed:
Displayed measuring values:
U: System voltage in Volt
f: System frequency in Hz
df: Frequency gradient in Hz/s
fmin/max: Min. and Max. value of systemfrequency in Hz
dfmin/max: Min. and Max. value of frequency gradient
in Hz/s
5.8.4 Unit of the measuring values
displayed
The measuring values can optionally be shown in the
display as a multiple of the "sec" rated value (x ln) or
as primary current (A). According to this the units of the
display change as follows:
Indication as Range Unit
sec. voltage 000V - 999V V
primary voltage .00V – 999V
1k00 – 9k99
10k0 – 99k0
100k – 999k
1M00 –- 3M00
V
kV
kV
kV
MV
Table 5.4: Units of the display
5.8.5 Minimum and maximum values
The MRF3 offers a minimum/maximum storage each
for the measuring values of the frequency gradient.
These min./max. values are mainly used to appraise
the system quality. Always the highest and lowest val-
ues of each cycle are measured and stored until the
next reset.
Min.-/max. measurement of the frequency:
Unit MRF3 calculates from each cycle of the mains
voltage the instantaneous frequency. These measuring
values are written into the min.-/max.-storage. Hereby
only a new minimum- or maximum value overwrites
older stored values. According to the setting of T and
the tripping delay it can happen that the stored min.-
/max.-values are far above the tripping thresholds, but
tripping does not occur. This is established by the stor-
age of instantaneous values.
Min.-/max.-measurement of the frequency gradient
The before described is valid in the same way for
storage of min.-/max. values of the df/dt measure-
ment. Because every instananeous df/dt value is
stored, high values can occur which however do not
lead to tripping. This can for instance occur due to
switching transients where high positive and negative
df/dt values occur. Because of the special measuring
procedure the relay does not trip.
Very helpful are the min.-/max.- measurements for long
time study of the mains quality.
Operation:
At each reset (see chapter 5.4) the stored min.-/max.-
values are deleted. From this time the min.-/max.-
storage runs without time limitation until the next reset.
The measuring values of the min.-/max.-storage can
be called by pressing push button <SELECT> several
times. Simultaneously the respective LEDs light up, for
instance LEDs "f"and "min" light up at the indication of
the minimum frequency.
5.9 Fault memory
When the relay is energized or is energized or trips,
all fault data and times are stored in a non-volatile
memory manner. The MRF3
is provided with a fault
value recorder for max. five fault occurrences. In the
event of additional trippings always the oldest data set
is written over.
For fault indication not only the trip values are re-
corded but also the status of LEDs. Fault values are in-
dicated when push buttons <-> or <+> are pressed
during normal measuring value indication.
Table of contents
Other Seg Relay manuals