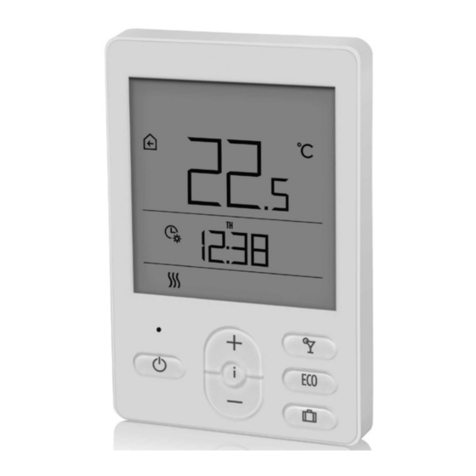
Seltron RT Series How to use

RT.., WT..
Short form manual
Gebrauchsanweisung
Manuel de forme courte
Manuale in forma corta
Verkorte handleiding
Manual de formato corto
ENEN
DEDE
DEDE
NLNL
FRFR
ESES
ENEN
ITIT
Aufladen des Akkus vor dem Gebrauch (gilt für die Modelle RT1B,
RT2B and WT1B)
Thermostat hat einen eingebauten Akku. Wir empfehlen Ihnen, den Akku vollständig
aufzuladen, bevor Sie mit der Nutzung des Thermostat beginnen. Zum Aufladen können
Sie jedes Haushaltsladegerät mit USB-C-Anschluss verwenden. Der Akku Ladeanschluss
befindet sich am unteren Teil des Thermostat. Das Aufladen des Akkus kann unter
normalen Bedingungen bis zu 10 Stunden dauern und muss einmal im Jahr erfolgen.
Beschreibung
Einschalten und Ausschalten
Steuerung des Thermostats mit einem intelligenten Gerät
Wahl der Betriebsart: Heizen oder Kühlen
Einstellung der gewünschten Tages- und Nachttemperatur
Mit einem 1-sekündigen Tastendruck wir wählen zwischen den Betriebsmodi des
Thermostat. Je nach Reglermodell können wir zwischen Raumheizung, Raumheizung &
Brauchwasser wählen. Heizung, Brauchwasser Heizung und Heizung aus.
Durch 10 Sekunden langes Drücken der Taste wählen Sie zwischen Heiz- oder
Kühlbetrieb. Die Betriebsart kann nur gewählt werden, wenn der Betrieb des Thermostat
ausgeschaltet ist .
Die gewünschte Tages- und Nachttemperatur kann bei eingeschaltetem Betrieb eingestellt
werden. Durch Drücken der Tasten und öffnen wir die Einstellung der gewünschten
Temperatur (Tag oder Nacht), die gerade aktiv ist. Stellen Sie die gewünschte
Temperatur mit den Tasten und ein. Durch Drücken der Taste wechseln wir zur
nächsten Temperatureinstellung. Durch erneutes Drücken der Taste verlassen wir die
Temperatureinstellung.
Taste zum Ausschalten der Funktion und
Beenden der Einstellungen.
Taste , um den Wert zu verringern und
zurück zu gehen.
Taste zur Eingabe und Bestätigung der
Einstellungen.
Taste , um den Wert zu erhöhen und
vorwärts zu gehen.
Der Anschluss zum Laden des
eingebauten Akkus ist Typ USB-C. Nur für
RT1B-, RT2B- und WT1B-Thermostate.
Taste für Benutzerfunktionen/Smart-
Geräteanschluss.
Gesperrte Tasten / der Zugang
zum Thermostat ist eingeschränkt. Fehlfunktion des Thermostats.
Die drahtlose Verbindung mit dem
Empfänger wird hergestellt. Das
Signal ist gut.
Die drahtlose Verbindung mit dem
Empfänger wird hergestellt. Das
Signal ist schwach.
Die drahtlose Verbindung mit dem
Empfänger wird hergestellt. Das
Signal ist ausgezeichnet.
Die Verbindung zum Smartgerät
wird hergestellt.
Der Akku ist 100% geladen.
Der Akku wird geladen.
Aufladen des Akkus erforderlich.
Raumheizung.
Raumkühlung.
Abschalten der Heizung oder
Kühlung der Räumlichkeiten.
Der Schutz vor Einfrieren oder
Überhitzung ist aktiv.
Gemessene Raumtemperatur.
Die Eco-Funktion ist aktiviert.
Die Party-Funktion ist aktiviert.
Die Urlaubsfunktion ist aktiviert.
Die Lüftungsfunktion ist aktiviert.
Betrieb entsprechend
der gewünschten
Tagestemperatur.
Betrieb entsprechend
der gewünschten
Nachttemperatur.
Die drahtlose Verbindung zum
Empfänger wird hergestellt oder
kann nicht hergestellt werden.
Die Verbindung zum Smartgerät
wird hergestellt.
Laden Sie die Clausius BT-App aus dem Google Play Store für Android-Geräte oder dem
Apple iStore für iOS-Geräte herunter. Önen Sie die App, klicken Sie auf das Symbol ,
um ein neues Gerät hinzuzufügen und folgen Sie den Anweisungen der App.
Um den Akku zu laden, muss der Thermostat nicht aus dem Sockel genommen
werden.
Wenn Sie die Thermostat-Modelle RT1B, RT2B, RT1M, RT2M vom Sockel abnehmen
wollen, müssen Sie zuerst den Betrieb ausschalten. Um den Betrieb auszuschalten,
siehe das »Einschalten und Ausschalten«.
Das drahtlose Raumthermostat WT1B wird im Akkusparmodus ausgeliefert.
Dieser Zustand wird durch die Anzeige 'St.by' signalisiert. Wenn Sie eine beliebige
Taste am Thermostat drücken, wird der Akkusparmodus aufgehoben, und der
Thermostat versucht, eine Verbindung zum Empfänger herzustellen. Wenn der
Thermostat zum ersten Mal an den Empfänger angeschlossen wird, wird der
Akkusparmodus dauerhaft deaktiviert. Wenn der Thermostat nicht innerhalb
einer Stunde eine Verbindung mit dem Empfänger herstellt, kehrt er in den
Akkusparmodus zurück.
Benutzerfunktionen
Durch Drücken der Taste wählen wir zwischen den Benutzerfunktionen aus.
Bestätigen Sie die ausgewählte Funktion mit der Taste . Anschließend mit den Tasten
und die gewünschte Funktionstemperatur auswählen und mit der Taste bestätigen.
Wählen Sie schließlich mit den Tasten und die Uhrzeit oder das Datum des
automatischen Ablaufs der Funktion aus. Durch Drücken der Taste verlassen wir die
Einstellung der Benutzerfunktion. Folgende Funktionen stehen zur Verfügung:
Für den Betrieb bei Spartemperatur
Für den Betrieb bei Komforttemperatur
Für Betrieb mit Urlaubstemperatur
Für den Betrieb unabhängig von der Raumtemperatur
Control of the thermostat with a smart device
Download the Clausius BT app from the Google Play Store for Android devices or the
Apple iStore for iOS devices. Open the app and click the icon to add a new device
and follow the app’s instructions.
Description
Choosing the mode of operation: heating or cooling
Setting the requested day and night temperature
Activation and deactivation of operation
With a 1 second press button we choose between the operating modes of the
thermostat. Depending on the controller model, we can choose between room heating,
room heating & d.h.w. heating, d.h.w. heating and heating off.
By pressing the button for 10 seconds choose between heating or cooling operation
mode. The operating mode can only be selected if the operation of the thermostat is
switched off .
The requested day and night temperature can be set when the operation is switched
on. By pressing the and button, we open the setting of the requested temperature
(day or night), which is active at that moment. Set the requested temperature with the
and buttons. By pressing the button, we move to the next temperature setting. By
pressing the button again, we leave the temperature setting.
Button to turn off the function and exit
the settings.
Button to reduce the value and move
back.
Button to enter and confirm the settings.
Button to increase value and move
forward.
Connection for charging the built-in
battery is type USB-C. Only for RT1B, RT2B and
WT1B thermostats.
Button for user functions / smart device
connection.
Locked kaypad / access to the
thermostat is limited. Thermostat malfunction.
Wireless connection with the
receiver is established. The signal
is good.
Wireless connection with the
receiver is established. The signal
is weak.
Wireless connection with the
receiver is is established. The signal
is excellent.
The connection to the smart
device is established.
The battery is 100% full.
The battery is charging.
Battery charging required.
Room heating.
Room cooling.
Switching o the heating or
cooling of the premises. Protection
against freezing or overheating
is active.
Measured room temperature.
The Eco function is activated.
Party function is activated.
The Holiday function is activated.
Operation according to the
required daily temperature.
Operation according to the
required night temperature.
The wireless connection to the
receiver is being established or
cannot be established.
The connection to the smart device
is being established.
The Ventilation function is
activated.
Charging the battery before use (applies to models RT1B, RT2B and
WT1B)
Thermostat has a built-in rechargeable battery. We recommend that you fully charge the
battery before you start using the thermostat. For charging, you can use any household
charger that has a USB-C connector. The battery charging port is located on the lower
part of the thermostat. Charging the battery can take up to 10 hours under normal
conditions and needs to be charged once a year.
To charge the battery, the thermostat does not need to be removed from its base.
Whenever you want to remove the thermostat models RT1B, RT2B, RT1M, RT2M
from the base, you must first switch o the operation. To switch o the operation,
see the chapter »Activation and deactivation of operation«.
The wireless room thermostat WT1B is delivered in battery saving mode. This state
is signaled by the display »St.by«. When pressing any button on the thermostat,
the battery saving mode is cancelled for 1 hour. When the thermostat is connected
to the receiver for the first time, the battery saving mode is permanently cancelled.
If the thermostat fails to connect to the receiver within one hour, it will return to
the battery saving mode.
User functions
By pressing button , we select between user functions. Confirm the selected function
with the button. Then select the requested function temperature with the and
button, and confirm it with the button. Lastly, with the and button, select the
time or date of the function automatic expiration. By pressing the button, we leave the
setting of the user function.
The following functions are available:
For operation at the economy temperature
For operation at a comfortable temperature
For operation with holiday temperature
For operation regardless of room temperature
An active user function can be switched off prematurely by selecting it again.
Eine aktive Benutzerfunktion kann durch erneutes Auswählen vorzeitig abgeschaltet
werden.
FRFR
Description
La touche permet de désactiver la fonction
et quitter les réglages.
La touche permet de diminuer la valeur et
revenir en arrière.
La touche permet de saisir les réglages et
les confirmer.
La touche permet d'augmenter la valeur
et continuer.
Le port pour charger la batterie intégrée
est de type USB-C. Uniquement pour les
thermostats RT1B, RT2B et WT1B.
La touche est conçue pour les fonctions
utilisateur ou la connexion à un appareil
intelligent.
La connexion sans fil avec le
récepteur est établie. Le signal
est bon.
Touches verrouillées/ accès limité
au thermostat.
La connexion sans fil avec le
récepteur est établie. Le signal
est faible.
La connexion sans fil avec le
récepteur est établie. Le signal est
excellent.
La connexion à l'appareil
intelligent est établie.
La batterie est 100% pleine.
La batterie se recharge.
La batterie doit être rechargée.
Chauage de la pièce.
Refroidissement de la pièce.
Éteindre le chauage ou le
refroidissement des installations.
Protection contre le gel ou la
surchaue activée.
La température ambiante est
relevée.
La fonction Éco est activée.
La fonction Party est activée.
La fonction Vacances est activée.
Fonctionne en accord
avec la température diurne
souhaitée.
Fonctionne en accord avec
la température nocturne
souhaitée.
La connexion sans fil au récepteur
est en cours d'établissement ou ne
peut pas être établie.
La connexion à l'appareil
intelligent est en cours
d'établissement.
Dysfonctionnement du
thermostat.
La fonction Ventilation est
activée.
The relay output is activated.
Der Relaisausgang ist aktiviert.
La sortie relais est activée.
Time program selection
Time program Day Interval of the requested daily
temperature
MON. - FRI. 06:00 - 22:00
SAT. - SUN. 07:00 - 23:00
MON. - FRI. 05:00 - 07:30
13:30 - 22:00
SAT. - SUN. 07:00 - 23:00
The thermostat has two time programs available. Timed programs can be accessed by
holding down the button for 2 seconds. CH1 appears on the display. By pressing the
button, we can move to another time program CH2. For the time program we want to
select, hold down the button for 2 seconds. When the time program is selected, the
symbol CH.1. is displayed.
CH1 is the default selected time program.
The time program CH1 and CH2 can be changed as requested. See other
thermostat settings for settings.
Auswahl des Zeitprogramms
Zeitprogramm Tag Intervall der gewünschten
Tagestemperatur
MO. - FR. 06:00 - 22:00
SA. - SO. 07:00 - 23:00
MO. - FR. 05:00 - 07:30
13:30 - 22:00
SA. - SO. 07:00 - 23:00
Der Raumthermostat verfügt über zwei Zeitprogramme. Um auf die Zeitprogramme
zuzugreifen, halten Sie die Taste für 2 Sekunden gedrückt. Auf dem Display wird CH1
angezeigt. Drücken Sie die Taste , um zum zweiten Zeitprogramm CH2 zu gelangen.
Halten Sie die Taste 2 Sekunden lang gedrückt, um das gewünschte Zeitprogramm
auszuwählen. Das CH1-Symbol wird für das gewählte Timerprogramm angezeigt.
CH1 ist das standardmäßig ausgewählte Zeitprogramm
Das Zeitprogramm CH1 und CH2 kann beliebig geändert werden. Siehe andere
Thermostateinstellungen für Einstellungen.
Charge de la batterie avant utilisation (s'applique aux modèles
RT1B, RT2B et WT1B)
Thermostat est équipée d'une batterie rechargeable intégrée. Nous vous recommandons
de charger complètement la batterie avant de commencer à utiliser l'unité le thermostat.
Pour la charger, vous pouvez utiliser n'importe quel chargeur domestique doté d'un
connecteur USB-C. Le port de charge de la batterie est situé sur la partie inférieure du
thermostat. Dans des conditions normales, la recharge de la batterie peut prendre jusqu'à
10 heures et doit être eectuée une fois par an.
Il n'est pas nécessaire de retirer le thermostat de sa base pour charger la batterie.
Chaque fois que vous souhaitez retirer les modèles de thermostat RT1B, RT2B,
RT1M, RT2M de la base, vous devez d'abord le désactiver. Pour le désactiver,
consultez le chapitre »Activation et désactivation du fonctionnement«.
Le thermostat de pièce sans fil WT1B est livré avec le mode d'économie de batterie
activé. Cela est signalé par l'achage du texte «St.by». En appuyant sur n'importe
quel bouton du thermostat, le mode d'économie de batterie est désactivé et le
thermostat tente de se connecter au récepteur. Lorsque le thermostat est connecté
au récepteur pour la première fois, le mode d'économie de batterie est désactivé en
permanence. Si le thermostat ne se connecte pas au récepteur dans l'heure qui suit,
il repasse en mode d'économie de batterie.
Choix du mode de fonctionnement: chauage ou
refroidissement
Activation et désactivation du fonctionnement
On peut choisir entre les modes de fonctionnement du thermostat en appuyant sur
le bouton pendant 1 seconde. Selon le modèle de contrôleur, on peut choisir entre
le chauffage de la pièce uniquement, le chauffage de la pièce et le chauffage ECS, le
chauffage ECS uniquement, ou la désactivation du chauffage.
Pour choisir entre le mode de fonctionnement de chauffage et celui de refroidissement,
appuyez sur le bouton pendant 10 secondes. Le mode de fonctionnement ne peut être
sélectionné que si l'unité de pièce est éteinte .
Réglage des températures diurnes et nocturnes souhaitées.
Les températures diurnes et nocturnes souhaitées peuvent être réglées pendant que
l’unité est en marche. En appuyant sur les touches ou , il est possible de modifier
le réglage de la température souhaitée (diurne ou nocturne) qui est actif à ce moment.
Sélectionnez la température souhaitée en utilisant les touches ou . En appuyant sur
la touche , vous pouvez accéder au deuxième réglage de température. En appuyant de
nouveau sur cette touche , vous quittez le réglage de température.
Fonctions d’utilisateur
On peut choisir entre les diverses fonctions d'utilisateur en appuyant sur le bouton .
Confirmez la fonction sélectionnée en appuyant sur le bouton . Sélectionnez ensuite la
température souhaitée avec les boutons et , et confirmez votre choix en appuyant
sur le bouton . Enfin, à l'aide des boutons et , sélectionnez l'heure ou la date de la
désactivation automatique de la fonction. Quittez les réglages des fonctions d'utilisateur
en appuyant sur le bouton .
Les fonctions suivantes sont disponibles:
Pour fonctionnement à une température économique
Pour fonctionnement à une température confortable
Pour fonctionnement à la température Vacances
Pour fonctionnement indépendamment de la température ambiante
Choix du programme horaire
Durée
programmée Jour Intervalle de la température diurne
souhaitée
LUN. - VEN. 06:00 - 22:00
SAM. - DIM. 07:00 - 23:00
LUN. - VEN. 05:00 - 07:30
13:30 - 22:00
SAM. - DIM. 07:00 - 23:00
Le thermostat de pièce dispose de deux programmes horaires. Vous pouvez accéder
aux programmes horaires en maintenant la touche enfoncée pendant 2secondes.
CH1 apparaîtra à l'écran. En appuyant sur la touche , vous pouvez passer à un autre
programme horaire CH2. Maintenez enfoncée la touche pendant 2secondes pour
choisir le programme horaire que vous souhaitez. Le symbole CH1 est aché pour le
programme horaire sélectionné.
CH1 est le programme horaire par défaut
Les programmes horaires CH1 et CH2 peuvent être modifiés à volonté. Consultez
Autres réglages du thermostat pour plus de détails.
Une fonction d'utilisateur active peut être désactivée prématurément en la sélectionnant
à nouveau.

Seltron d.o.o.
Tržaška cesta 85 A
SL-2000 Maribor
Slovenia
T: +386 (0)2 671 96 00
F: +386 (0)2 671 96 66
info@seltron.eu
www.seltron.eu
ITIT
Descrizione
Pulsante per disattivare la funzione e
uscire dalle impostazioni.
Pulsante per ridurre il valore e tornare
indietro.
Pulsante per entrare e confermare le
impostazioni.
Pulsante per aumentare il valore e andare
avanti.
La connessione per la ricarica della
batteria integrata è di tipo USB-C. Solo per
termostati RT1B, RT2B e WT1B.
Pulsante per funzioni utente/connessione
del dispositivo intelligente.
Malfunzionamento del termostato.
La connessione wireless con il
ricevitore è stabilita. Il segnale
è buono.
Tasti bloccati / l'accesso al
termostato è limitato.
La connessione wireless con il
ricevitore è stabilita. Il segnale è
debole.
La connessione wireless con il
ricevitore è stabilita. Il segnale è
eccellente.
La connessione al dispositivo
intelligente è stabilita.
La batteria è 100% carica.
La batteria si sta caricando.
È necessaria la ricarica della
batteria.
Riscaldamento della stanza.
Rareddamento della stanza.
Spegnimento del riscaldamento
o del rareddamento
dei locali. La protezione
contro il congelamento o il
surriscaldamento è attiva.
Temperatura della stanza
misurata.
La funzione Eco è attivata.
La funzione Party è attivata.
La funzione Vacanza è attivata.
Funzionamento in base alla
temperatura giornaliera
desiderata.
Funzionamento in base
alla temperatura notturna
desiderata.
La connessione wireless al
ricevitore è in corso o non può
essere stabilita.
La connessione al dispositivo
intelligente è in corso.
Comando del termostato con un dispositivo intelligente
Scaricare l'app Clausius BT da Google Play Store per dispositivi Android o dall'iStore
Apple per dispositivi iOS.
Impostazione della temperatura diurna e notturna desiderata
La temperatura diurna e notturna richiesta può essere impostata quando il funzionamento
è attivo. Premendo il tasto o , si apre l'impostazione della temperatura desiderata
(giorno o notte), che è attiva in quel momento. Impostare la temperatura desiderata con i
pulsanti o . Premendo il tasto , si passa alla seconda impostazione di temperatura.
Premendo nuovamente il tasto , usciamo dall'impostazione di temperatura.
Funzioni utente
Premendo il pulsante , selezioniamo tra le funzioni utente. Confermare la funzione
selezionata con il pulsante . Quindi selezionare la temperatura della funzione richiesta
con il pulsante e , e confermarla con il pulsante . Infine, con il pulsante e ,
selezionare l'ora o la data di scadenza automatica della funzione. Premendo il pulsante ,
si esce dall'impostazione della funzione utente.
Sono disponibili le seguenti funzioni:
Per il funzionamento a temperatura economica
Per il funzionamento con temperatura festiva
Per il funzionamento indipendentemente dalla temperatura ambiente
Una funzione utente attiva può essere disattivata anticipatamente selezionandola di nuovo.
NLNL
Beschrijving
Thermostaatregeling met smart device
De gewenste dag- en nachttemperatuur instellen
De gewenste dag- en nachttemperatuur kunnen worden ingesteld wanneer de bediening
is ingeschakeld. Door op de en toets te drukken, openen we de instelling van de
gewenste temperatuur (dag of nacht), die op dat moment actief is. Stel de gewenste
temperatuur in d.m.v. de en knoppen. Door op de te drukken, gaan we naar
de tweede temperatuurinstelling. Door nogmaals op de te drukken, verlaten we de
temperatuurinstelling.
Knop om de functie uit te schakelen en de
instellingen te verlaten.
Knop om de waarde te verlagen en terug
te gaan.
Knop om de instellingen in te voeren en
te bevestigen.
Knop om waarde te verhogen en vooruit
te gaan.
Verbinding voor het opladen van de
ingebouwde batterij is type USB-C. Alleen
voor RT1B, RT2B en WT1B thermostaten.
Knop voor gebruikersfuncties /
verbinding met smart-apparaten.
Storing in de kamer-unit.
De draadloze verbinding met de
ontvanger is tot stand gebracht.
Het signaal is goed.
Vergrendelde toetsen / toegang
tot de thermostaat is beperkt.
De draadloze verbinding met de
ontvanger is tot stand gebracht.
Het signaal is zwak.
De draadloze verbinding met de
ontvanger is tot stand gebracht.
Het signaal is uitstekend.
De verbinding met het smart-
apparaat is tot stand gebracht.
De batterij is 100% opgeladen.
De batterij wordt opgeladen.
Batterij opladen vereist.
Kamerverwarming.
Kamerkoeling.
Het uitschakelen van de
verwarming of koeling van het
gebied. Bescherming tegen
bevriezing of oververhitting is
actief.
Gemeten kamertemperatuur.
De Eco-functie is geactiveerd.
Partijfunctie is geactiveerd.
De Ontruimingsfunctie is
geactiveerd.
La funzione di Ventilazione è
attivata.
Bediening volgens de
gewenste dagelijkse
temperatuur.
Werking volgens de
gewenste nachttemperatuur.
De draadloze verbinding met
de ontvanger wordt tot stand
gebracht of kan niet tot stand
worden gebracht.
De verbinding met het smart-
apparaat wordt tot stand gebracht.
Download de Clausius BT-app van de Google Play Store voor Android-apparaten of de
Apple iStore voor iOS-apparaten.
Open de app en klik op het pictogram om een nieuw apparaat toe te voegen en volg
de instructies van de app.
Gebruikersfuncties
Door op de knop te drukken, kunnen we kiezen tussen de diverse gebruikersfuncties.
Bevestig de geselecteerde functie met de knop. Selecteer vervolgens de gewenste
functietemperatuur met de en knop en bevestig deze met de knop. Tenslotte
selecteert u met de en knop de tijd of datum waarop de functie automatisch vervalt.
Door op de knop te drukken, verlaten we de instellingen van de gebruikersfunctie.
Dit zijn de beschikbare functies:
Voor gebruik bij een economische temperatuur
Voor gebruik bij een comfortabele temperatuur
Voor gebruik bij een vakantietemperatuur
Voor gebruik bij een willekeurige kamertemperatuur
Een actieve gebruikersfunctie kan voortijdig worden uitgeschakeld door deze opnieuw te
selecteren.
ESES
Descripción
Controlar el termostato con un dispositivo inteligente
Ajustar las temperaturas diurna y nocturna deseadas
La temperatura diurna y nocturna deseada se puede ajustar cuando se enciende el
funcionamiento. Presione las teclas o para abrir la configuración de la temperatura
deseada (diurna o nocturna) que esté activa en ese momento. Ajuste la temperatura que
desee con los botones y . Presione la tecla de para pasar al segundo ajuste de
temperatura. Presione de nuevo la tecla de para salir del ajuste de temperatura.
Botón para apagar la función y salir de la
configuración.
Botón para reducir el valor y retroceder.
Botón para introducir y confirmar la
configuración.
Botón para aumentar el valor y avanzar.
La conexión para cargar la batería
incorporada es de tipo USB-C. Solo para
termostatos RT1B, RT2B y WT1B.
Botón para funciones de usuario y
conexión del dispositivo inteligente.
Descargue la aplicación Clausius BT desde la tienda Google Play Store para dispositivos
Android o desde la Apple iStore para dispositivos iOS.
Abra la aplicación, haga clic en el icono para añadir un nuevo dispositivo y siga las
instrucciones de la aplicación.
Elección del modo de funcionamiento: calefacción o
refrigeración
Activar y desactivar el funcionamiento
Con una pulsación de 1 segundo del botón , podemos elegir entre los modos de
funcionamiento del termostato. Dependiendo del modelo del mando, podemos elegir entre
calefacción de ambiente; calefacción de ambiente y de agua caliente sanitaria; calefacción
de agua caliente sanitaria, y calefacción apagada.
Al pulsar el botón durante 10 segundos, puede elegir entre el modo de funcionamiento
de calefacción o refrigeración. El modo de funcionamiento sólo se puede seleccionar si el
funcionamiento del termostato está apagado .
Carga de la batería antes de usar (se aplica a los modelos RT1B,
RT2B y WT1B)
El termostato tiene una batería recargable integrada. Le recomendamos que cargue
completamente la batería antes de comenzar a usar la unidad de ambiente. Para ello,
puede utilizar cualquier cargador doméstico con un conector USB-C. El puerto de carga de
la batería se encuentra en la parte inferior de la unidad de ambiente. La carga de la batería
puede tardar hasta 10 horas en condiciones normales y debe hacerse una vez al año.
Para cargar la batería, no es necesario retirar el termostato de su base.
Siempre que desee retirar los termostatos modelos RT1B, RT2B, RT1M, RT2M de
la base, debe apagar primero el funcionamiento. Para ello, consulte el capítulo
»Activar y desactivar el funcionamiento«.
El termostato de ambiente inalámbrico WT1B se entrega en modo de ahorro
de batería. Este estado está señalado en la pantalla con la indicación »St.by«.
Al pulsar cualquier botón del termostato, se cancelará el modo de ahorro de
batería y el termostato intentará conectarse al receptor. Cuando el termostato
se conecta al receptor por primera vez, el modo de ahorro de batería se cancela
permanentemente. Si el termostato no se conecta al receptor en el plazo de una
hora, volverá al modo de ahorro de batería.
Funciones de usuario
Al pulsar el botón , podemos seleccionar una de las funciones de usuario. Confirme
la función escogida con el botón . A continuación, seleccione la temperatura de
funcionamiento deseada con los botones y , y confírmela con el botón . Por
último, con los botones y , seleccione la hora o fecha de finalización automática de la
función. Al pulsar el botón , salimos de la configuración de la función de usuario.
Están disponibles las siguientes funciones:
Para funcionar a la temperatura de ahorro
Para funcionar a una temperatura confortable
Para funcionar a la temperatura de vacaciones
Para funcionar independientemente de la temperatura ambiente
Puede desactivar antes de tiempo una función de usuario activa seleccionándola de nuevo.
Falla del termostato.
Se ha establecido la conexión
inalámbrica con el receptor. La
señal es buena.
Teclas bloqueadas/el acceso al
termostato está limitado.
Se ha establecido la conexión
inalámbrica con el receptor. La
señal es débil.
Se ha establecido la conexión
inalámbrica con el receptor. La
señal es excelente.
Se ha establecido la conexión con
el dispositivo inteligente.
La batería está cargada al 100%.
La batería se está cargando.
La batería necesita carga.
Calefacción del ambiente.
Refrigeración del ambiente.
Apagado de la calefacción o
la refrigeración del lugar. La
protección contra congelación o
sobrecalentamiento está activa.
Temperatura ambiente medida.
La función «Eco» está activada.
La función «Fiesta» está activada.
La función «Vacaciones» está
activada.
La función «Ventilación» está
activada.
Funcionamiento según la
temperatura diurna deseada.
Funcionamiento según
la temperatura nocturna
deseada.
La conexión inalámbrica con el
receptor se está estableciendo o
no se puede establecer.
Se está estableciendo la conexión
con el dispositivo inteligente.
Contrôler votre thermostat avec appareil intelligent
Téléchargez l'application Clausius BT à partir du Google Play Store pour les appareils
Android ou de l'Apple iStore pour les appareils iOS.
Ouvrez l'application, cliquez sur l'icône pour ajouter un nouvel appareil et suivez les
instructions de l'application.
L'uscita a relè è attivata.
La funzione di Ventilazione è
attivata.
Caricare la batteria prima dell'uso (si applica ai modelli RT1B, RT2B
e WT1B)
Il termostato ha una batteria ricaricabile incorporata. Si consiglia di caricare
completamente la batteria prima di iniziare a utilizzare l'unità ambiente. Per la ricarica, è
possibile utilizzare qualsiasi caricabatterie domestico dotato di un connettore USB-C. La
porta di ricarica della batteria si trova nella parte inferiore dell'unità ambiente. La ricarica
della batteria può richiedere fino a 10 ore in condizioni normali. La batteria deve essere
caricata una volta all'anno.
Per caricare la batteria, non è necessario rimuovere il termostato dalla sua base.
Ogni volta che si desidera rimuovere dalla base i termostati modelli RT1B, RT2B,
RT1M, RT2M, è necessario prima spegnere il funzionamento. Per spegnere il
funzionamento, vedere il capitolo »Attivazione e disattivazione del funzionamento«.
Il termostato ambiente wireless WT1B viene fornito in modalità di risparmio batteria.
Questo stato viene segnalato sul display "St.by". Premendo un pulsante qualsiasi sul
termostato, la modalità di risparmio batteria viene annullata e il termostato tenta
di connettersi al ricevitore. Quando il termostato viene collegato per la prima volta
al ricevitore, la modalità di risparmio batteria viene annullata definitivamente. Se il
termostato non riesce a connettersi al ricevitore entro un'ora, tornerà alla modalità
di risparmio batteria.
Scelta della modalità di funzionamento: riscaldamento o
rareddamento
Attivazione e disattivazione del funzionamento
Con una pressione di 1 secondo sul pulsante scegliamo tra le modalità di funzionamento
del termostato. A seconda del modello di regolatore, possiamo scegliere tra riscaldamento
dell'ambiente, riscaldamento dell'ambiente e riscaldamento dell'ACS, riscaldamento
dell'ACS e riscaldamento spento.
Premendo il pulsante per 10 secondi scegliere tra la modalità di funzionamento di
riscaldamento o raffreddamento. La modalità di funzionamento può essere selezionata
solo se il funzionamento del termostato è spento .
Selezione del programma orario
Programma orario Giorno Intervallo della temperatura
giornaliera desiderata
LUN. - VEN. 06:00 - 22:00
SAB. - DOM. 07:00 - 23:00
LUN. - VEN. 05:00 - 07:30
13:30 - 22:00
SAB. - DOM. 07:00 - 23:00
Il termostato della stanza dispone di due programmi orari. È possibile accedere ai
programmi orari tenendo premuto per 2 secondi il tasto . Sul display appare CH1.
Premendo il tasto si passa ad un altro programma orario CH2. Per il programma
orario che vogliamo selezionare, tenere premuto il tasto per 2 secondi. Quando viene
selezionato il programma orario, viene visualizzato il simbolo CH1.
CH1 è il programma orario selezionato di default.
Il programma orario CH1 e CH2 può essere modificato a piacere. Vedere le altre
impostazioni del termostato per le impostazioni.
L'uscita a relè è attivata.
Batterij opladen voor gebruik (is van toepassing op de modellen
RT1B, RT2B en WT1B)
Thermostaat heeft een ingebouwde oplaadbare batterij. Het is aanbevolen om de batterij
volledig op te laden voordat u de kamer-unit in gebruik neemt. Voor het opladen kunt u
elke gewone oplader met een USB-C-aansluiting gebruiken. De laadpoort bevindt zich aan
de onderkant van de kamer-unit. Het opladen kan onder normale omstandigheden tot 10
uur in beslag nemen en moet minstens eenmaal per jaar gebeuren.
Om de batterij op te laden hoeft de thermostaat niet uit het basisstation te worden
genomen.
Wanneer u de thermostaat modellen RT1B, RT2B, RT1M, RT2M van het basisstation
wilt halen, moet u deze eerst uitschakelen. Om deze uit te schakelen, raadpleegt u
het hoofdstuk »In- en uitschakelen«.
De draadloze kamerthermostaat WT1B wordt geleverd in batterijspaarstand. Deze
status wordt aangeduid door de melding "St.by". Als u op een willekeurige toets
van de thermostaat drukt, wordt de batterijspaarstand uitgeschakeld en probeert
de thermostaat verbinding te maken met de ontvanger. Wanneer de thermostaat
voor het eerst op de ontvanger wordt aangesloten, wordt de batterijspaarstand
permanent geannuleerd. Als de thermostaat binnen één uur geen verbinding maakt
met de ontvanger, schakelt hij terug naar de batterijspaarstand.
De stand kiezen: verwarmen of koelen
In- en uitschakelen
We kiezen de stand van de thermostaat door 1 seconde op toets te drukken. Afhankelijk
van het type regelaar kunnen we kiezen tussen kamerverwarming, kamerverwarming en
warmwaterverwarming, warmwaterverwarming en verwarming uitgeschakeld.
Door de toets 10 seconden lang in te drukken kunt u kiezen tussen de verwarmings-
of de koelingsmodus. De stand kan alleen worden gekozen als de bediening van de
thermostaat is uitgeschakeld .
Selectie tijdsprogramma
Tijdsprogramma Dag Interval van de gewenste
dagtemperatuur
MAA. - VRIJ. 06:00 - 22:00
ZAT. - ZON. 07:00 - 23:00
MAA. - VRIJ. 05:00 - 07:30
13:30 - 22:00
ZAT. - ZON. 07:00 - 23:00
De kamerthermostaat heeft twee tijdsprogramma's beschikbaar. U kunt de
tijdsprogramma's openen door de toets 2 seconden in te drukken. CH1 verschijnt op
het scherm. Door op de toets te drukken, kunt u naar een ander CH2-tijdsprogramma
gaan. Houd de toets voor het tijdsprogramma dat u wilt selecteren gedurende 2
seconden ingedrukt. Het CH1-symbool wordt voor het geselecteerde tijdsprogramma
weergegeven.
CH1 is het standaard geselecteerde tijdsprogramma.
Het tijdprogramma CH1 en CH2 kan naar wens worden gewijzigd. Zie andere
thermostaatinstellingen voor instellingen.
La salida de relé está activada.
Selección de programa temporizador
Programa
temporizado Día Intervalo de temperaturas diarias
deseadas
LUN. a VIE. 06:00 - 22:00
SÁB. a DOM. 07:00 – 23:00
LUN. a VIE. 05:00 - 07:30
13:30 – 22:00
SÁB. a DOM. 07:00 – 23:00
El termostato de ambiente dispone de dos programas temporizados. Para acceder a los
programas temporizados, presione la tecla durante 2 segundos. El signo CH1 aparecerá
en la pantalla. Presione la tecla más para pasar a otro programa temporizado CH2.
Para seleccionar el programa temporizado que desee, presione la tecla más durante 2
segundos. Cuando seleccione el programa, verá el signo CH1.
CH1 es el programa temporizado seleccionado por defecto
Los programas temporizados CH1 y CH2 se pueden cambiar según se desee.
Consulte otros ajustes del termostato para ver configuraciones.
Per il funzionamento a temperatura confortevole
Aprire l'app e cliccare sull'icona per aggiungere un nuovo dispositivo e seguire le
istruzioni dell'app.
01MC060812
Other manuals for RT Series
1
This manual suits for next models
1
Other Seltron Thermostat manuals
Seltron
Seltron T1 User manual
Seltron
Seltron ST User manual
Seltron
Seltron RCD20 User manual
Seltron
Seltron RT Series User manual
Seltron
Seltron ST2 User manual
Seltron
Seltron RCD1 Premium User manual
Seltron
Seltron ST User manual
Seltron
Seltron RCD20 How to use
Seltron
Seltron DD2+ User manual
Seltron
Seltron RCD1 Premium User manual
