Sesamo PROSWING R Simple manual

P R O S W I N G
R
ENGLISH
OPERATOR FOR SWINGING DOORS
MANUAL INSTRUCTIONS


3
SESAMO PROSWING
Thank you for choosing this product. For best automatism performance, Sesamo recommends
you carefully read and follow the installation and use instructions found in this manual.
Installation of this automatism must only be performed by the professionally qualified
personnel for whom this manual is addressed. Any errors during installation may be harmful
to people or things. Packaging material (wood, plastic, cardboard, etc.) should not be
scattered in the environment or left within the reach of children as potential sources of
danger. Every installation phase must be performed in accordance with the regulations in
force and following Good Technique standards. Before beginning installation make sure that
the product is integral and has not been damaged during transportation or by poor storage
conditions. Before installing the product make sure that each architectural and structural
element of the entrance (girder fastening surfaces, casings, guide, etc.) is appropriate and
sufficiently robust to be automated. Conduct a careful risk analysis and make suitable
modifications to eliminate conveyance, crushing, cutting and hazardous areas in general. Do
not install the product in environments where gas, steam or inflammable fumes are present.
The manufacturer is not liable for any neglect of “good technique” or specific regulations in
the construction of the casing to be motorized and any collapse of the same. All automatic
entrance safety and protection devices (photocells, active sensors, etc.) must be installed in
accordance with the regulations and directives in force, with the completed risk analysis,
system type, use, traffic, forces and inertia in play. Pay careful attention to area where the
following may occur: crushing, cutting, conveyance and any other type of hazard in general
applying, if necessary suitable indications. Indicate the motorized door identification
information on every installation. Make sure that the upstream electrical system is correctly
dimensioned and has all the opportune protections (circuit breakers and fuses). Only use
original spare parts in maintenance and repairs. Do not tamper or alter devices in the
automatism and all the safety devices in the control panel for any reason. The manufacturer
is not liable if parts within the automatism are altered or tampered with or if safety devices
other than those indicated by the manufacturer are used in the system. The automatism
installer must provide the automatic entrance manager with the use manual and all the
information required for correct use in automatic and manual modes (even for electronic
locking) and in the event of emergency. Pay careful attention to the messages in this manual
that are marked with the hazard symbol. They can either be warnings aimed at avoided
potential equipment damage or specific signals of potential hazard to the installer and others.
This device was designed to automate pedestrian swinging doors. Any other use is considered
contrary to the use foreseen by the manufacturer who therefore shall not be held liable.

4
SESAMO PROSWING
DIRETTIVA MACCHINE
The installer who motorised a door becomes the automatic door machine manufacturer according
to directive 2006/42/CE and must:
–Arrange the Technical Booklet with the documents indicated in attachment VII of the
Machine Directive and keep them for at least 10 years.
–Draft the CE declaration of conformity according to attachment II-A of the machine
directive and provide the use with a copy.
–Apply the CE markings on the motorized door according to point 1.7.3 of attachment I
of the machine directive.
–In particular, but not exclusively, if for the purpose of the standard EN 16005 it is
necessary to install monitored sensors, the wiring has to carry out as described in
this manual (see pages 13/14/15/19) and the correct sensors operation has to be
checked following instruction manual of the sensors themselves.
For more information and for assist installers in applying the specifications of the directives and of
European standards concerning the safe use of motorized gates/doors consult the guidelines
available on internet at the address www.sesamo.eu
DECLARATION OF INCORPORATION
(Directive 2006/42/CE, Annex II, part B)
Manufacturer: SESAMO S.R.L.
Address: Str. Gabannone 8/10 - 15030 Terruggia –AL -ITALY
Declares that the product: PROSWING R
- is made to be incorporated in a machine to construct a machine considered by Directive 2006/42/CE
- conforms with the essential safety requirements indicated in appendix I of the directive with the
exception of the following points: 1.2.4.3, 1.2.4.4, 1.3.4, 1.3.5, 1.3.7, 1.3.8.2, 1.4, 1.5.3, 1.5.7, 1.5.14,
1.5.15, 1.5.16
- complies with the conditions of the following other CE Directives: 2014/30/UE Electromagnetic
Compatibility, 2014/35/UE Low Voltage
and that
- the following (parts/clauses of) agreed regulations have been applied:
EN 60335-1 EN 61000-6-2 EN 50366 EN 61000 -6–3EN16005
and also declares that:
- the relevant technical documentation has been completed in accordance with part B of appendix VII;
this documentation, or parts of it, will be delivered electronically or by traditional post upon justified
request from the competent national authorities
- the relative technical documentation will be compiled by: SESAMO SRL, Strada Gabannone, 8/10 - 15030
Terruggia (AL) - Italy
- it is not permitted to use the product until the machine in which it will be incorporated or will become a
component of has been identified and has received the declaration of conformity with the conditions of
Directive 2006/42/CE and the national legislation that transposes it, in other words, until the machinery
referred to in this declaration forms a single unit with the machine.
SESAMO S.R.L. Aldo Amerio
Maggio 2016 (Amministratore)

5
SESAMO PROSWING
CARATTERISTICHE TECNICHE
DIMENSIONS
see Fig.1
POWER SUPPLY
230V ±10% AC 50/60Hz
NOMINAL POWER
85W
NOMINAL MOTOR TORQUE
45Nm
EXTERNAL DEVICE POWER
15VDC - 12W MAX
POWER BATTERY KIT (1)
24V -1,3Ah
OPENING TIME
3s ÷ 6s (70°/s ÷ 20°/s)
CLOSING TIME
4s ÷ 15s (40°/s ÷ 10°/s)
CLOSING FORCE (ACCORDING EN 1154) (2)
EN4 ÷ EN6
MAX OPENING ANGLE
110°
WING DIMENSION
700 ÷ 1400 mm
MAX.WING PAYLOAD
see Fig.2
WORKING TEMPERATURE
from -10°C to +50°C
ANTI-CRUSHING
Automatic traction restriction in presence of
obstacles
WEIGHT
11 kg approx
SERVICE
Intensive
OPERATOR WITH SPRING OPENING, IN CASE OF POWER FAILURE OR SIGNAL
–PLEASE CHECK INSTRUCTIONS
LOW ENERGY
PROSWING can be set in the order to meet requirements of Low-Energy application according
EN16005.
- reduced dynamic force;
- low speed;
- reduced dynamic/static force.
It is installer's responsibility to verify the compliance of the installation Low-Energy compared
with current standards. The protection of the closing edge must be assessed individually.
WARNINGS FOR THE INSTALLER (AND GENERAL SAFETY)
1) It is important for the safety of the people installing the automatism according to the
regulations. A wrong installation or use of the product might lead to serious damages to
people.
2)Read carefully the operating instructions before installing the product.
3)Store the operating instructions for future reference.
4)This automatism has been designed and built exclusively for the use specified in this
documentation. Any different use not stated herein could affect the integrity of the product
and/or represent danger situation.
5)SESAMO declines any responsibility from misuse or different use from which it was
intended.

6
SESAMO PROSWING
6)Do not install the product in explosive environment: the presence of flammable gases or
fumes is a serious safety hazard.
7)SESAMO is not responsible for the failure to comply with the Good Technical construction
procedure of the door to be automated, as well as deformations that may occur to the door
when using the same.
8)Before making any service to the product, switch off power supply.
9)Install a bi-polar switch to cut off power supply.
10)Verify functionality of ground wiring.
11)Safety devices (norm EN 12978) protect possible dangerous areas from mechanical risks
during movement, as. anti-crashing, conveying, shearing.
12)For maintenance use only genuine SESAMO spare parts.
13)Do not modify components that belongs to the whole automatism.
14)The installer must supply end user all the information in case of manual operating in
emergency.
15)End user shall refrain from any attempt to repair or direct intervention and ask only to
qualified personnel.
16) Installation must be done only from a qualified personnel and in full compliance with
regulations.
17) Everything not including in this operating instruction manual is not allowed.
18) This operating instructions manual is only intended for qualified personnel.
19) It is mandatory to use a MAG-LOCK to keep the door in closed position.
RECYCLING AND DISPOSAL
This product is built with different materials. The major parts (aluminum, plastic, iron, wires)
are solid urban waste. They can be recycled through collection and disposal in authorized
centers. Other components (control boards, etc.) may contain pollutants. They need to be
removed and hand over to companies authorized to recover and dispose them. The packaging
(paperboard, plastics etc.) are solid urban waste and they can be disposed of without any
problem, simply performing waste collection for recycling. Before proceeding it is always
recommended to verify local specific norm for disposal.
PLEASE RECYCLE!
INTENDED USE
IMPORTANT: PROSWING R must be used to automate pedestrian swinging door only.
This device is an electro mechanical system that allows to open and close a swinging door
using a transmission arm.
The door is moved by a movement open/close thanks to a spring/motor system or in opening
only with spring in case of NO power supply.
Programmable electronic control board allows correct functioning depending on the type of
installation.
It is alwasy necessary to combine a MAG-LOCK in order to keep the door in closed position.

7
SESAMO PROSWING
LIMIT OF USE
ATTENTION: Do not exceed door weight and width as shown in the diagram in “technical
specification” paragraph. Fig.2. At each transmission arm also corresponds a different value
of the maximum depth of the jamb that must not be over taken in order to perform a proper
installation of the system. This device is intended only for swinging pedestrian door, dry and
inside use. SESAMO shall not be held liable for any other use contrary to the use foreseen.
TYPES OF ARMS
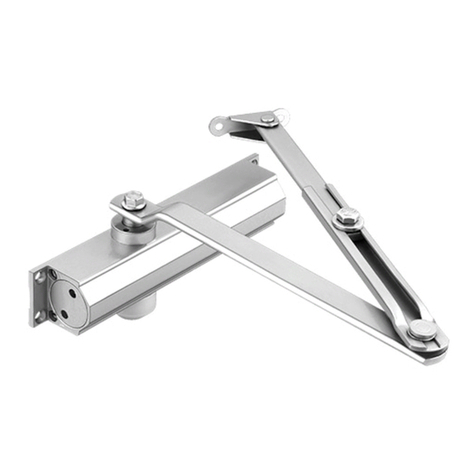
-RIGID ARM: the rigid arm can be used as PULLING arm (when the operator is
installed on the same side of the opening of the door).
-STANDARD PUSH ARM: the pushing arm can be fitted : PUSH (it is used when the
automatism is installed on the opposite side of the door opening).
-LONG PUSH ARM: the long push arm can be fitted: PUSH (it is used when the
automatism is installed in the opposite side of the door opening with extra
150mm depth of the jamb).
ATTENTION: For a proper positioning refers to paragraphs “Arms Installation”.
PRELIMINARY CHECKS
Before installing the automatism please check:
–verify the installation does not create dangerous situations;
–prearrange proper pipes and conduits for the wires, granting the protection of the
same against mechanical damages;
–the surface where fixing the automatism has to be resistant. Use screws, bolts, etc.
adequate to the type of surface;
–the structure of the door has to be strong to hold the weight of the automatism as
well the hinges, also check to not have friction between fixed and mobile parts;
–use proper equipment and tools to install in security and in accordance with the
regulations.
OPERATOT FIXING
Refer to Fig.4, to fix automatism proceed as follows:
-remove cover (B);
-disconnect all wiring (encoder, switches, transformer, motor) on control board (C);
-unscrew the 2 screws and remove control board with its support (C) (screws
remain between control board and support);
-unscrew the 2 screws (G) and remove transform;
-unscrew the 4 screws (D) and remove gear motor;
-unscrew the screws and remove end caps (E) and (F);
-fix aluminum base (A) to the structure following instructions of the following
paragraphs, depending on arm type;
-reassemble all components except end caps and aluminum cover.

8
SESAMO PROSWING
To make easier reassembling gear motor, partially screw the screws, then lean gear motor on
to them. Insert screws. Tight all screws paying attention that gear motor axis is perpendicular
to the door top edge.
ALUMINIUM BASE HOLES POSITIONING
Drill holes according to the type of screws chosen and fix the base only after verifying the
“Positioning dimensions” listed in the paragraph concerning the type of arm selected.
With double automatism prearrange the connection (wiring) between the two single
automatisms.
INSTALLAZIONE BRACCIO RIGIDO A TIRARE
Pull arm has to be used when automatism is installed on the same side of door opening.
ATTENTION: For a correct positioning always refer to the hinge axis and gear motor axis,,
as indicated in Fig.5 (Door opening LEFT) e Fig.6 (Door opening RIGHT).
ATTENTION: final tightening of the screws must be performed only after checking that
vertical positioning of the automatism allow a good parallelism between hinge axis and gear
motor axis. Therefore, after fixing the pulling arm and its guide, the coupling bolt of the arm
with the cylindrical skid have not to create force in opening/closing cycle. A positioning error
of the automatism might create bending between the bolt of the pulling arm and the
cylindrical skid more than the allowed tolerance, damaging parts of the automatism.
INSTALLATION PULL SLIDE ARM (PROSWING R)
-Remove the cover (Fig.9 Part.A) from the guide (Fig.9 part.B) to allocate the fixing
points.
-Fix the guide profile horizontally (Fig.9 part.B) following dimensions shown in Fig.5
e Fig.6.
-Unthread profile and drill 4 holes on the “V” mark on guide profile and fixed the
guide to the wing through adequate screws (Fig.9 part.B)
-Insert skid (Fig.9 part.C) into the guide rail (Fig.9 part.B)
-Tighten screw (Fig.12 part. A) to PRE-CHARGE the sping unitll the extremity of the
circle plate (Fig.12 part. B) will match with the line indicating the beginning of the
line EN4 (quote L=0).
-Position the door at desired point of opening as indicated in Fig.14.
-Find the correct position to insert the arm (Fig.11 part. A so that the extremity of
the arm (Fig.9 part.F) will be onlthe same line of the axis of the guide skid (Fig.9
part.C)
-Insert the washer (Fig.11 part.B) and tight the screw (Fig.11 part.C).
-Insert the arm (Fig.11part.D) in the arm extension slot, and tight two screws
(Fig.11 part.E).
ATTENTION THE MAX. TORQUE TO BE USED TO TIGHTEN SCREW “E” FIG.12 IS 10.5 N/m
-Screw the self-threated part (Fig.9 part.C) to pull arm (Fig.9 part.F).

9
SESAMO PROSWING
-Close the cover (Fig.9 Part.A) of the guide.
-Closed the right cap (Fig.9 part.E) and left cap (Fig.9 part.D) with the supplied
screws.
-Proceed with the adjustment of the spring [vedi paragrafo “[see paragraph “Spring
adjustment”].
Before tighten the arm extension, please check the distance between the guide and the upper
part of the arm, it should be around 17 mm
ATTENTION: After installing guide and slide arm, ALWAYS check the Switch on left
position in Fig.16 .
PUSH ARM INSTALLATION
Push arm is used when automatism is installed on the opposite side of door opening.
ATTENTION: For a correct positioning always refer to the hinge axis and gear motor axis,
as shown in Fig.7 (door opening LEFT) ed 8 (door opening RIGHT).
ATTENTION: final tightening of the screws must be performed only after checking arm
can easily rotate under door jamb.
FIX PUSH ARM TO THE DOOR
-Insert washer (Fig.11 part.B) and screw (Fig. 11part.C) on the arm extension (Fig.
11 part.A).
-Fix the first part of the articulated push arm (Fig. 11 part.D) in the slot of the arm
extension, as indicated in Fig. 11 and tight screws (Fig. 11 part.E).
ATTENTION THE MAX. TORQUE TO BE USED TO TIGHTEN SCREW “E” FIG.12 IS 10.5 N/m
-Unscrew 3 scews M8 x 16 (Fig.10 part.B) to leave independent the part of the arm
you will fix to the door leaf.
-Adjust the lenght of the arm following the calculation in Fig.13
-Screw, without tighten, 3 screws M8 x 16 (Fig. 10 part.B) to joint the two part of
the articulated arm.
-Drill the door leaf as indicated on Fig. 7 e 8.
-Position the door leaf on the desired opening point
-Fix the arm extension (Fig.10 part.A) of the pushing arm onto the above profile of
the wing through adequate screws.
ATTENTION: fix door bracket considering door material in case using a
reinforcement.
-Tighten screw (Fig. 12) to tension the spring up to the end of the plate (Fig.12 part.
B) matches the line indicating field EN4 (quote L=0).
-Fix the arm extension (Fig.11 part.A) into gear motor shaftto the door axis.
-Tight screw (Fig.11 part.C) until arm extension is well fixed to gear motor shaft
-Continue with spring adjustment (see paragraph “Spring adjustment”).

10
SESAMO PROSWING
ATTENTION: For articulated push arm, both right/left opening, set switch as shown
in Fig. 16.
SPRING ADJUSTMENT
The spring has to be charged according to the width of the door keeping in consideration the
norm EN 1154 in the range from EN 4 to EN 6.
Range of adjustment can be obtained from diagram in Fig.17 according to the width and
weight of the door, both for pull or push arm. During spring adjustment, wind force, over-
pressure and other environmental condition that might open the door, must be considered.
Adjust force of the spring tightening the screw (Fig. 12, Part.A) in order to tension the spring
up to the end of the plate (Fig. 12 part. B) on the range requested for the type of installation
(class EN identified).
ATTENTION: Keep in consideration the spring is a component that, when at maximum
compression, accumulates very high energy, it is necessary that both the spring both the
related components would be only replaced by using ORIGINAL parts. It is also recommended
to program service using qualified technicians. For maintenance please have a look on the
manual.
BREAKE ADJUSTEMENT WITHOUT POWER
Set breaking level on terminal board (Fig. 30) to suit closing speed without power supply to
door width/weight, ref. to Fig.16. Verify functionality opening door by hand and checking
closing cycle with spring, without power.
PRELIMINARY CHECKING
Before electrical wiring, check as follows:
-Remove carefully dust or any other residual of the installation
-Verify automatism being well fixed
-Verify all screws well tighten
-Verify all wiring well fixed and not near moving parts
-Verify arm well fixed to door.
-Verify arm well fixation of the plastic end side caps to the aluminium base
ATTE ATTENTION: ensure that the spring protection bracket is fixed (Fig.12, part. C) and
that the label with the seal hasn’t been removed (Fig.12, part. D).
WIRING POWER SUPPLY
ATTENTION: Wiring the connectors of the control panel or external peripheral
connections must be in absence of power supply in order to avoid irreversible damages of the
electronic device.
ATTENTION: before performing the following operation make sure the power supply is
OFF. Before starting the automatism, check and perform as paragraph “Start up”.

11
SESAMO PROSWING
-Bring the cable inside the automatism paying attention not to damage it against
metallic edges.
-Open the cover (Fig.18 Part.A)
-Connect the power supply and the ground cable on the terminal (Fig.18 Part.B)
-Close the cover (Fig.18 Part.A)
ATTENTION: Never invert power supply cable and ground cable. Power supply must be
isolatable from the general panel with a bi-polar switch with minimum contact opening equal
to 3 mm (not supplied) (Fig.32 E)
CONTROL BOARD PROSWING
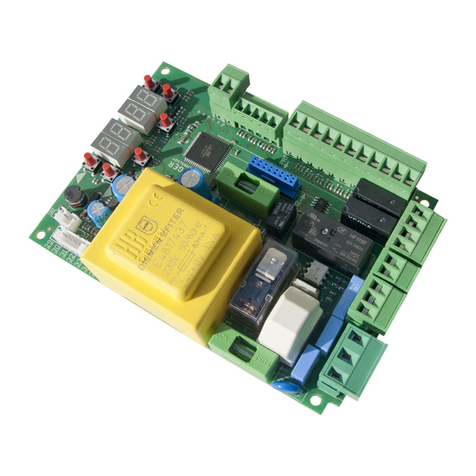
In Fig.19 show the important components of electronic control board:
A. Expansion connector for additional board (Optional)
B. Display and buttons
C. Dip switches
D. PC connector
E. Transformer connector
F. Batteries connector
G. Switch ON-OFF connector
H. Logics switch connector
I. Auxiliary exit connexion
J. Logics connectors
K. Sensors / accssories power supply
L. Selector connector
M. Electronic lock connector
N. Encoder connector
O. Gear motor connector
P. Brake level selection connector
Q. Arm type selection
WIRING
Connect the following terminal boards (Rif.Fig.19):
- logic switch [H];
- ON-OFF switch [G];
- transformer [E];
- motor [O];
- encoder [N
ARM TYPE SELECTION
Rigid pull arm (both right/left opening) → Set switch on LEFT as shown in Fig.16.
Articulated push arm (both right/left opening) → Set switch to RIGHT as shown in Fig.16.

12
SESAMO PROSWING
EXTERNAL PERIPHERALS CONNECTORS/INPUT
SEGNALE
DEFAULT*
DESCRIZIONE
FUNZIONAMENTO
KEY
NC
Lock contact. Lock devices
can be connected such as
electronic key, key
selector, proximity reader,
etc.
If the contact opens the unit sends a
complete closing cycle command (from
any position) From this moment until the
signal is closed the door stays closed and
no external peripheral is detected
(including the multi-logics selector). As
soon the signal closes the door opens and
allows again the standard operating.
The signal must be short circuited with
COM if no device is connected
START 1
NO
Opening contact door
opening devices can be
connected.
Closing this signal gives the command to
open the door. This signal is only
monitored in 2 Radars logic, selectable
through base or advanced selectors
(optionals).
START 2
NO
Opening contact door
opening devices can be
connected.
Closing this signal gives the command to
open the door. This signal is monitored
both in 2 Radars logic both in 1 Radar logic
selectable through base or advanced
selectors (optionals).
SAFE
OPEN
NC
Opening safety contact for
safety sensors monitoring
opening cycle.
If the door is opening and the contact
opens, the control board gives a stop
command immediately. Opening will only
continue after this signal is deactivated.
The signal must be connected with COM if
no device is connected.
SAFE
CLOSE
NC
Closing safety contact for
safety sensors monitoring
closing cycle
If the door is closing and the contact
opens, the control board commands the
door to reverse immediately. Closing will
continue only after the contact returns
closed again. The signal must be connected
with COM if no device is connected.
COM
Common electrical contacts.
AUX IN 1
AUX IN 2
NO
Auxiliary input signal that can be set as follows:
0 - DDA opening
Command DDA opening (disabled people).
Opens with motor and closes with spring
(LOW ENERGY mode) with minimal idle
time of 5 seconds
1 - Emergency open
It opens not depending on the existing
logic, over taking as priority also input KEY.
It opens door with priority on all other
contacts.
2 - Inter lock with priority
Opens with priority in case of simultaneous
command
3- Inter lock without
priority
It doesn’t open in case of simultaneous
command
4- Feedback Lock released
Micro switch or contact detecting the
status of lock released

13
SESAMO PROSWING
5- Command lock release
This contact allows to unlock manually the
lock without opening door through motor.
6- Single command in
double system
In case of Double system, opens only
MASTER door.
7- Stand-by
When the contact is closed the door goes
in stand by status (unlocked and
deactivated) - this logics works with door
in closing.
8-Reactivation after stand-
by
When the contact is closed the door start
working again after a stand by status.
9-Step/step function
An opening impulse will open the door.
Subsequent closing is possible with
another impulse.
* NO =Normaly open NC =normaly close
All INPUT mist refer to (COM)
Deafault setting. Can me modified (see par.”Setting parameters-display”)
EXTERNAL PERIPHERICALS CONNECTORS/OUTPUT
SEGNALE
DEFAULT*
DESCRIZIONE
AUX OUT 1
AUX OUT 2
NO
Auxiliary output contact that can be set as follows:
0 - Monitoring sensors
It monitors safety sensors.
1 - Inter lock
To be connected to the input interlock of
the other automatism, to obtain interlock
logic.
2 - Door opened
It signals door in opened position.
3 - Door closed
It signals door in closed position.
4 - Fault
It signals door in fault.
5- Repeat lock command
it repeats the command of the electric
lock.
* NO =Normaly open NC =normaly close
All INPUT mist refer to (COM)
Deafault setting. Can me modified (see par.”Setting parameters-display”)
ATTENTION: to connect aux out contacts see electrical wiring as shown in Fig.22, Fig.23
e Fig. 26. Carico di max contact rating: 24V - 100mA
ATTENTION: Absorbing more than the max rating can damage control board.
INSTALLATION OF THE SENSORS
The automatism can work with:
-Safety sensors (vedi Fig.32 A e B): they are fixed on the door and detect the area in
front of them in order to avoid contact with persons/obstacles;
-Detection sensors (vedi Fig.32 C e D): generally fixed on the wall or wall frame,
detect the approach of peoples and give the input to open the door.

14
SESAMO PROSWING
Sensors wiring and control board setting:
ID
SENSORE
SCHEMA
17=0
30=1
Safety monitoring sensor in closing (ref. Fig.39 A)
ref. Fig.22
17=0
30=1
Safety monitoring sensor in opening (ref. 39 B)
ref. Fig.23
Detection sensor (radar) entry (ref. Fig.39 D)
ref. Fig.24
Detection sensor (radar) exit (ref. Fig.39 C)
ref. Fig.25
If monitored sensors configuration has not been memorized, on display appears E6 error. Exit
from this status through procedure LS, see paragraph “parameters adjustment – display”.
During this procedure control board checks which sensors are connected and checks if they
are correctly working.
ATTENTION during LS procedure stay away from sensors and be sure they are not
detecting obstacles. In case they are not correctly wired or working, LS blinks. Abort procedure
pushing ESC. Checks sensors and launch LS again.
At the end of LS procedure display shows one of the following configurations:
ID
CONFIGURATION
DESCRIPTION
S0
No monitored sensor
detected
There are no monitored sensors wired or the sensors
connected will be managed as a normal sensors without
monitoring.
S1
monitored sensor only in
opening.
There is only monitored sensor in opening. In closing there
is no sensor connected or the sensor connected will be
managed as a normal sensor without monitoring.
S2
monitored sensor only in
closing.
There is only monitored sensor in closing. In opening , there
is no sensor connected or the sensor connected will be
managed as a normal sensors without monitoring.
S3
monitored sensor in
opening and closing.
There are monitored sensors wired both in closing and
opening.
The indication remains on the display until it is pressed one of the following push buttons:
-ENT: to confirm the configuration indicated, making sure that it correspond to the
real configuration of the connected sensors;
-ESC: to abort the detected configuration and go back to the error status E6.
ATTENTION: never confirm the detected configuration if does not correspond to the
real configuration of the connected sensors. This might create danger situations or
malfunction of the automatism.
LS procedure can be repeated in any occasion through the parameter LS (look at
paragraph “parameters adjustment – display”).

15
SESAMO PROSWING
ATTENTION: LS must be repeated whenever the configurations of the sensors
connected or the automatism are modified.
ATTENTION: in case of double Proswing (2 wings) it is necessary to carry out LS
procedure on both control boards (master and slave).
Every time after power ON: initially is showed control board firmware version and later, for
two seconds, sensors configuration: S0 or S1 or S2 or S3.
In case sensor monitoring fails, the value of the relevant sensor blinks on the display (S1: safety
in opening; S2: safety in closing; S3: both). Blinking ends when monitoring is working again.
.
DIP –SWITCHES SETTING
On the control board there is a dip-switch 8 positions to adjust functionality and basic options
ON-OFF. These settings are set and memorized, duringt reset of the dip-switch during
operation they cannot be considered:
Changing of setting is considered only after automatism RESET
DIP
PARAMETER
OPTION
DEFAULT
1
Arm selection
OFF
Push arm
OFF
ON
Pull arm
2
Mode
LOW ENERGY
OFF
Normal
OFF
ON
Low Energy
3
PUSH & GO
OFF
Disabled
OFF
ON
Enable
4
Key mode
OFF
Bistable
OFF
ON
Monostable
5
Tipologia Attuatore
ON
Proswing S ed R (Molla)
ON
6
Inutilizzato
OFF
7
Inutilizzato
OFF
8
Inutilizzato
OFF
PARAMETERS ADJUSTMENT-DISPLAY
It is possible to adjust several function parameters through two displays and relevant four
push buttons (Fig. 27).

16
SESAMO PROSWING
To properly see the display set the jumper according the opening direction of the wing as
shown in Fig.27.
La modalità di programmazione è la seguente:
1. Select parameter thorough push button [+] and [-]; press [ENT] to enter in the
adjustment procedure.
2. In adjustment procedure, parameter value is indicated in flashing mode. Press [+]
and [-] to change value, press [ENT] to memorize value and press [ESC] to come back to
parameter selection.
3. During procedure is active a timeout; if no push buttons are pressed for 10 seconds,
system exit from adjustment mode.
4. To validate teh commandit is necessary to press continuosly [ENT] for 5 seconds,
after validation the display will return to previous position.
ID
DESCRIPTION
SETTING
DEFAULT
01
Opening speed
RANGE: 20°/s ÷ 70°/s
(step of 5°/s)
60
02
Closing speed
RANGE: 10°/s ÷ 40°/s
(step of 5°/s)
20
03
Idle time
RANGE:
0 ÷ 60 seconds
62 = 2 min
63 = 3 min
64 = 4 min
0
04
Idle time in Low
Energy
RANGE: 5 ÷ 60 seconds (adjustment step of 1 second)
5
05
Closing speed with
spring (PROSWING S)
RANGE: 1 ÷ 9
(1 minimum speed, 9 maximum speed)
5
Force in closing
position
(PROSWING M)
RANGE: 0 –9
(0=no force, 9= max force)
0
06
Anti-crushing
RANGE: 1 ÷ 9 It is applied both for opening and
closing (1=more sensitive; 9=less sensitive)
5
07
Acceleration and
deceleration
RANGE: 5 ÷ 30
It is applied both for opening and closing
30
08
Approaching angle
RANGE: 10 ÷ 40
[it modifies both parameters (closing 1/2 of the
opening)]
20
09
Electric lock power
0=12 VDC
1=24 VDC
0
10
Lock type
0 = Lock not installed
For different type of electric locks please refer to
paragraph “electric locks setting”
0
11
Opening delay
RANGE: 0 ÷ 9
Timing depends on the type of electric lock:
please refer to paragraph “electric locks setting”
2
12
Lock closing force
RANGE: 0(min) ÷ 9(max)
5
13
Single/Master/Slave
0 = Single
1 = Double Master
2 = Double Slave
0

17
SESAMO PROSWING
14
Activation of the
electric lock or motor
closing according to
the logic selected
3 = Proswing R mag lock always active on logic ONE
radar and TWO radards (automatic)
3
15
Auxiliary input
configuration 1
0 = DDA opening
1 = Emergency opening
2 = Interlock door with priority
3 = Interlock door without priority
4 = Feedback lock release
5 = Command lock release
6 = Command Single on Double door
7 = Stand-by
8 = Reactivate the door after stand-by
9 = step/step function (1 impulse open, 1 impulse
close)
0
16
Auxiliary input
configuration 2
0 = DDA opening
1 = Emergency opening
2 = Interlock door with priority
3 = Interlock door without priority
4 = Feedback lock release
5 = Command lock release
6 = Command Single on Double door
7 = Stand-by
8 = Reactivate the door after stand-by
9 = step/step function (1 impulse open, 1 impulse
close)
1
17
Auxiliary output
configuration 1
0 = Sensors monitoring
1 = Interlock
2 = Stop open condition
3 = Stop closed condition
4 = Failure
5 = Repetition of lock command
0
18
Auxiliary output
configuration 2
0 = Sensors monitoring
1 = Interlock
2 = Stop open condition
3 = Stop closed condition
4 = Failure
5 = Repetition of lock command
1
19
MultiMaster
0 = No managing Multimaster,
1 ÷ 15 Keynote for MultiMaster connections
0
20
Opening safety
sensor exclusion
Opening safety sensor angle exclusion.
RANGE: 0 ÷ 40% of total angle opening
0
21
Phase displacement
in opening for double
door
RANGE: 0 –100
displacement in opening unit of 100 ms
(0=syncronized)
0
22
Phase displacement
in closing for double
door
RANGE: 0 - 100 displacement in closing unit of 100
ms (0=syncronized)
0
23
Polarity safe open
input
0 = NA (Normally Open)
1 = NC (Normaly Close)
1

18
SESAMO PROSWING
24
Polarity safe close
input
0 = NA (Normally Open)
1 = NC (Normaly Close)
1
25
Polarity key input
0 = NA (Normally Open)
1 = NC (Normaly Close)
1
26
Polarity Start1 input
0 = NA (Normally Open)
1 = NC (Normaly Close)
0
27
Polarity Start2 input
0 = NA (Normally Open)
1 = NC (Normaly Close)
0
28
Polarity Aux In 1
input
0 = NA (Normally Open)
1 = NC (Normaly Close)
0
29
Polarity Aux In 2
input
0 = NA (Normally Open)
1 = NC (Normaly Close)
0
30
Polarity Aux Out 1
input
0 = NA (Normally Open)
1 = NC (Normaly Close)
0
31
Polarity Aux Out 2
input
0 = NA (Normally Open)
1 = NC (Normaly Close)
0
32
Force level during LP
procedure
RANGE: 5 ÷ 60 (0 = force min 9= force max)
5
33
Opening angle
reduction
RANGE: 0÷50%
0
34
Installation on lintel
or door
2=Proswing R only lintel
2
35
DDA speed
0=Low Energy
1= speed according to parameters 1 e 2
0
36
Batteries mode
0=std (only spring)
1=continuos operation
2=antipanic
0
ST
Stop movement
TS
Test
0= no cyclical
1= cyclical
2= intensive cyclical
0
LS
Learning Sensor
(procedure for
monitored sensors
1-Select LS with push button [+] e [-]
2-Press [ENT] to start procedure
3-Display show value (SO; S1; S2; S3) correspondant
to detected situation (look at paragraph
“INSTALLATION OD SENSORS).
4- push ENT to confirm the detected configuration,
making sure that it correspond to the real
configuration of the connected sensors, or ESC to
reject the detected configuration.
Sd
Set to default
1-Select Sd pushing buttons [+] e [-]
2-Push [ENT]
3-when displays [--] push again[ENT] for 5 seconds to
confirm
4-when disappears [--] leave the push button [ENT].
Lp
Learning cycle
1- Select Lp pushing buttons [+] e [-]
2-Push [ENT]
3- when displays [--] push again[ENT] for 5 seconds to
confirm
4- when disappears [--] leave the push button [ENT].
Lp starts , see Start Up.

19
SESAMO PROSWING
During parameters setting any movement of motor is allowed.
When parameters setting it is not used, push button [ENT] is an opening command (only with
One Radar or Two Radars logics).
START UP
1. Set main power switch (Fig.1 A) on OFF.
Make sure to have properly adjusted DIP-Switches, in particular 1 and 5. Make sure
contacts KEY, SAFE CLOSE e SAFE OPEN are properly connected or, if not used, connected
to COM.
2. Give power supply to the automatism switching on 230 V the general switchboard.
3. Set the switch (Fig.1 A) in ON.
4. Verify lighting of the display and if it shows E6 (if necessary set the jumper to light
properly the display (look at Fig.27);
5. Select LS with push buttons [+] e [-], push [ENT] when it shows [--] push again
[ENT] for 5 seconds to confirm, when disappears [--] release push button [ENT], the
procedure of the acquisition of the monitoring sensors will start (refers to
paragraph “sensors installation” page 13/14 to finalize the procedure)
6. If present an electric lock, set parameters 10/11/12/14 (look paragraphs
“parameters adjustment-display” and/or “electric locks setting”).
7. Pushing buttons [+] e [-], select LP and push [ENT], when it shows [--] push again
[ENT] for 5 seconds to confirm the commend; when disappears [--] release push
button [ENT]. Door opens and it will start a cycle of parameters acquisition.
ATTENTION: While opening of the door, stop the wing in the position fixed as limit
in opening, to get the maximum opening angle. Immediately after this operation, the
door will close fully and on display CL blinks. When the door reaches the completely
closed position, and CL do not blink any more, it will be possible to test the operation of
the automatism pushing the button [ENT]: the door opens and closes normally. The
opening angle, during normal operation, will be reduced compared to the limit detected
during the acquisition of the limits so to allow the operation even if the mechanic door
limit is missing. The percentage of reduction is defined by parameter n.33. At each start
(or RESET operation), automatism must reach the position of door fully closed. Later the
first cycle will be at reduced speed.
MESSAGE OR ERRORS CODE
Display are also used to show message or error code:
SEGNALAZIONE
DESCRIZIONE
OP Fixed
Door opened
OP Blinking
Door opening

20
SESAMO PROSWING
CL Fixed
Door closed
CL Blinking
Door closing
E1
Door needs self learning procedure (see Paragraph “Start up”)
E2
Wrong arm selection [DIP 1 or switch on break board - see Paragraph
“type arm selection”), or wrong selection automatism- DIP 5.
E3/E4
Over Current
E6
Error monitored sensors
E8
NO encoder
OPERATING LOGICS
LOGICA
DESCRIZIONE
LOW-ENERGY
In all operative procedures (except Stop Close) it is possible a motor
opening with a reduced speed (Low Energy speed) and higher idle
time (idle time for disabled people) using the opening command for
disabled [AUX IN 1set through parameters 15=0 paragraph
“Parameter adjustment display”. The following closing is by spring.
PUSH & GO
An opening/closing automatic movement is possible slightly pushing
door in opening by hand while it is in a closed position. Set DIP 3 =
ON.
SAFE CLOSE
If closing safety sensor detects an obstacle whilst the door is closing,
it immediately stops and opens door completely .
If sensor detects while door is opening door continues opening.
SAFE OPEN
If opening safety sensor detects an obstacle whilst door is opening, it
immediately stops door movement. When detection stops, door
continues to open and then close.
If sensor detects while door is closing door continues closing.
If door opens toward a wall (in a corridor, for example) it is possible
to cancel the final part sensor detection to avoid wall detection. This
parameter is modifiable through parameter 20 (see paragraph
“Parameter adjustment display”).
Logic switch,
basic selector,
advanced
selector
operating logic
Manual
START 1 and START 2 are not working. Open and close only through
push button on selector or low energy or manually pushing the door.
1 radar
RADAR ONLY EXIT: Only START 2 input is working. A signal coming
from a sensor connected to START2 makes opening and closing of
the door. If the door is blocked by a lock or by motor (when no lock is
selected), the closing position depends on the type of lock or the
setting of parameter 14.
2 radar
RADAR ENTRY AND EXIT (Automatic): Both input START1 e START2
are working. A signal coming from a sensor connected to one of
these two inputs makes the opening and closing of the door. The
door blocked by lock or motor (when no lock is selected), the closing
position depends on the type of lock or the setting of parameter 14.
Stop
close
Automatism sends door in fully closed position. In this logic the
inputs START1 and START2 of the electronic control card are not
working; if installed, electric locking system locks door. When there
Table of contents
Other Sesamo Door Opening System manuals
Sesamo
Sesamo LIGHT MILLENIUM User manual
Sesamo
Sesamo Puma Millenium User manual
Sesamo
Sesamo SwinGo User manual

Sesamo
Sesamo MILLENNIUM SERIES Operating instructions

Sesamo
Sesamo Digidor User manual

Sesamo
Sesamo PROSWING User manual
Sesamo
Sesamo smart PRO User manual
Sesamo
Sesamo Digidor User manual
Sesamo
Sesamo PROSWING User manual
Sesamo
Sesamo PIUMA User manual
Popular Door Opening System manuals by other brands

Dormakaba
Dormakaba 8900 FT installation instructions
MS Sedco
MS Sedco CleraPath Spectrum S-COR installation instructions

Remote Solutions
Remote Solutions SAFE-T-RACK SR-U Operation manual

SECO-LARM
SECO-LARM ENFORCER SD-962AR-36G manual

Ellard
Ellard PROMAX 3 Product Instruction

Aprimatic
Aprimatic RAIDER installation instructions
