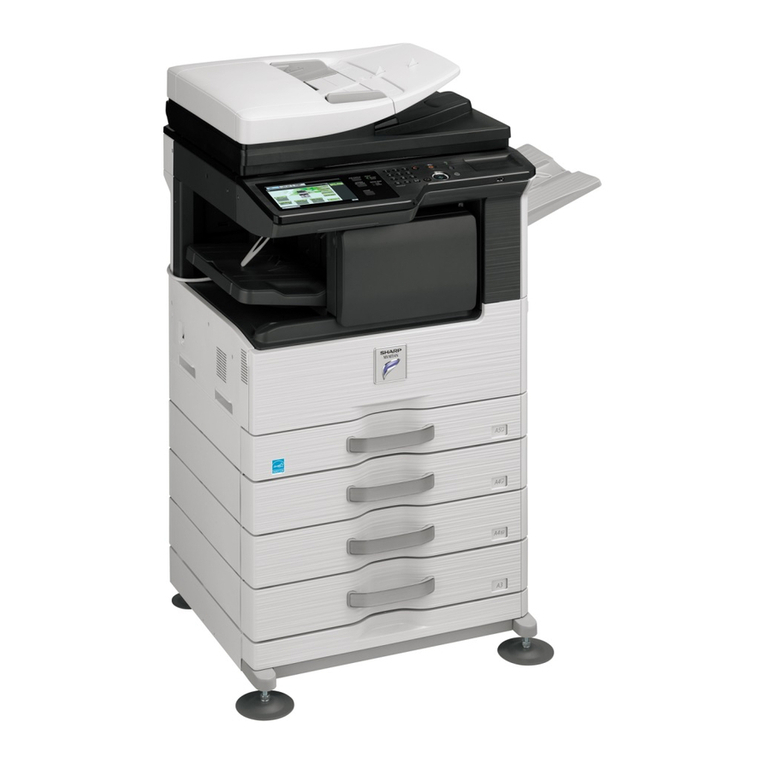
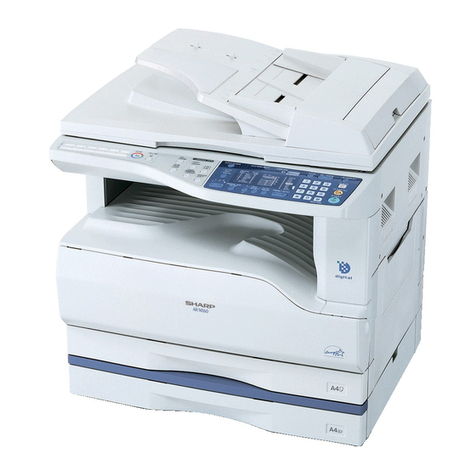
Sharp 00ZSF1116/A1E User manual

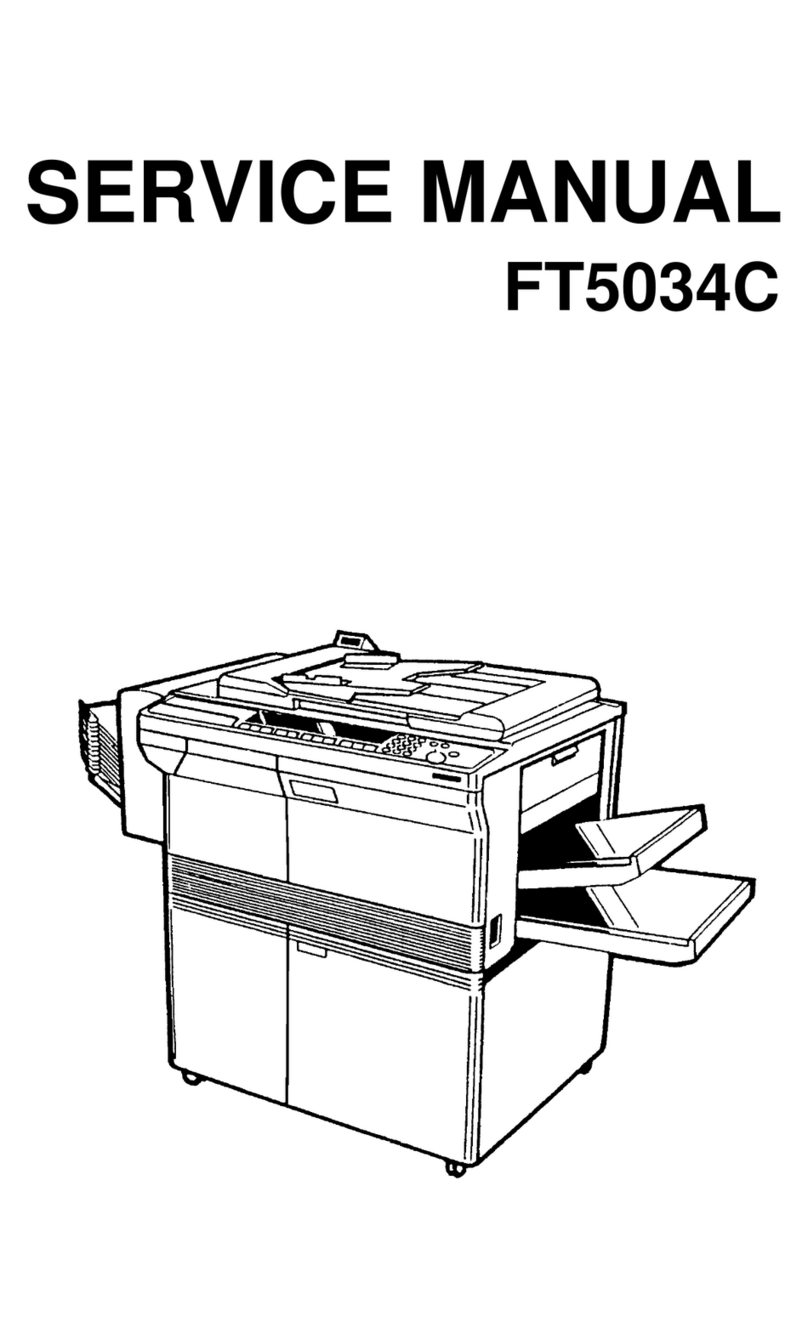
SERVICE MANUAL
CODE: 00ZSF1116/A1E
MODEL SF-1116
[ 1 ] PRODUCT OUTLINE . . . . . . . . . . . . . . . . . . . . . . . . . . . . . . . . . . . . . . . . . . . . 1 – 1
[ 2 ] PRODUCT SPECIFICATIONS . . . . . . . . . . . . . . . . . . . . . . . . . . . . . . . . . . . . . 2 – 1
[ 3 ] PRODUCT VIEWS . . . . . . . . . . . . . . . . . . . . . . . . . . . . . . . . . . . . . . . . . . . . . . 3 – 1
[ 4 ] UNPACKING AND INSTALLATION . . . . . . . . . . . . . . . . . . . . . . . . . . . . . . . . . 4 – 1
[ 5 ] DESCRIPTION ON EACH SECTION . . . . . . . . . . . . . . . . . . . . . . . . . . . . . . . . 5 – 1
[ 6 ] DISASSEMBLY AND ASSEMBLY . . . . . . . . . . . . . . . . . . . . . . . . . . . . . . . . . . 6 – 1
[ 7 ] ADJUSTMENT . . . . . . . . . . . . . . . . . . . . . . . . . . . . . . . . . . . . . . . . . . . . . . . . . 7 – 1
[ 8 ] SIMULATIONS . . . . . . . . . . . . . . . . . . . . . . . . . . . . . . . . . . . . . . . . . . . . . . . . . 8 – 1
[ 9 ] SELF DIAGNOSTICS . . . . . . . . . . . . . . . . . . . . . . . . . . . . . . . . . . . . . . . . . . . . 9 – 1
[10] MEMORY TROUBLES, FLOWCHART FOR REPLACEMENT OF
MAIN CONTROL PWB . . . . . . . . . . . . . . . . . . . . . . . . . . . . . . . . . . . . . . . . . . 10 – 1
[11] MAINTENANCE . . . . . . . . . . . . . . . . . . . . . . . . . . . . . . . . . . . . . . . . . . . . . . . 11 – 1
[12] ELECTRICAL SECTION . . . . . . . . . . . . . . . . . . . . . . . . . . . . . . . . . . . . . . . . . 12 – 1
CONTENTS
SHARP CORPORATION This document has been published to be used
for after sales service only.
The contents are subject to change without notice.
Parts marked with "!" is important for maintaining the safety of the set. Be sure to replace these parts with specified
ones for maintaining the safety and performance of the set.

Contents
[1] PRODUCT OUTLINE . . . . . . . . . . . . . . . . . . . 1-1
1. Product features . . . . . . . . . . . . . . . . . . . . . . . . 1-1
2. System configuration (options) . . . . . . . . . . . . . 1-1
[2] PRODUCT SPECIFICATIONS . . . . . . . . . . 2-1
1. Basic specifications . . . . . . . . . . . . . . . . . . . . . . 2-1
2. Description of each section . . . . . . . . . . . . . . . . 2-2
3. Supply parts . . . . . . . . . . . . . . . . . . . . . . . . . . . . 2-3
4. Optional specifications . . . . . . . . . . . . . . . . . . . 2-5
(1) Automatic document feeder (ADF) . . . . . . 2-5
(2) 10-bin sorter . . . . . . . . . . . . . . . . . . . . . . . 2-5
(3) 10-bin staple sorter (10-bin SS) . . . . . . . . 2-6
(4) Exclusive-use desk . . . . . . . . . . . . . . . . . . 2-6
[3] PRODUCT VIEWS . . . . . . . . . . . . . . . . . . . . . . 3-1
1. External view and internal structure . . . . . . . . . 3-1
2. Operation panel . . . . . . . . . . . . . . . . . . . . . . . . . 3-2
3. Clutches, solenoids, and motors . . . . . . . . . . . . 3-3
4. PWB . . . . . . . . . . . . . . . . . . . . . . . . . . . . . . . . . 3-4
5. Sensors and switches . . . . . . . . . . . . . . . . . . . . 3-5
6. Rollers, mirrors, etc. . . . . . . . . . . . . . . . . . . . . . 3-6
[4] UNPACKING AND INSTALLATION . . . . . 4-1
1. Unpacking . . . . . . . . . . . . . . . . . . . . . . . . . . . . . 4-1
2. Installation . . . . . . . . . . . . . . . . . . . . . . . . . . . . 4-1
(1) Environment . . . . . . . . . . . . . . . . . . . . . . . 4-1
(2) Space around the machine . . . . . . . . . . . . 4-2
(3) Installation base . . . . . . . . . . . . . . . . . . . . 4-2
(4) Power source . . . . . . . . . . . . . . . . . . . . . . 4-2
(5) Grounding wire connection . . . . . . . . . . . . 4-2
3. Optical system lock release . . . . . . . . . . . . . . . . 4-3
A. No. 2/3 mirror unit lock release . . . . . . . . . 4-3
B. Lens and No. 4/5 mirror unit lock release . 4-3
4. Charger cleaning . . . . . . . . . . . . . . . . . . . . . . . . 4-3
A. Main charger unit electrode cleaning . . . . 4-3
5. Developing unit setting . . . . . . . . . . . . . . . . . . . 4-4
A. Developing unit setting . . . . . . . . . . . . . . . 4-4
6. Toner density sensor level adjustment . . . . . . . 4-5
A. Developing unit level adjustment . . . . . . . 4-5
7. Accessory installation . . . . . . . . . . . . . . . . . . . . 4-5
A. Copier tray installation . . . . . . . . . . . . . . . 4-5
8. Toner supply . . . . . . . . . . . . . . . . . . . . . . . . . . . 4-5
9. Center shift adjustment . . . . . . . . . . . . . . . . . . . 4-7
10. Label attachment . . . . . . . . . . . . . . . . . . . . . . . . 4-7
A. Label attachment . . . . . . . . . . . . . . . . . . . 4-7
[5] DESCRIPTIONS OF EACH SECTION . . 5-1
1. Paper feed section . . . . . . . . . . . . . . . . . . . . . . 5-1
1) General descriptions . . . . . . . . . . . . . . . . . 5-1
2) Basic operations . . . . . . . . . . . . . . . . . . . . 5-1
2. Developing section . . . . . . . . . . . . . . . . . . . . . . 5-2
1) General descriptions . . . . . . . . . . . . . . . . . 5-2
2) Basic composition . . . . . . . . . . . . . . . . . . . 5-2
3) Basic operations . . . . . . . . . . . . . . . . . . . . 5-3
3. Optical section . . . . . . . . . . . . . . . . . . . . . . . . . . 5-3
1) General description . . . . . . . . . . . . . . . . . 5-3
2) Basic operations . . . . . . . . . . . . . . . . . . . . 5-6
4. Copy process . . . . . . . . . . . . . . . . . . . . . . . . . . 5-8
1) Photoconductor . . . . . . . . . . . . . . . . . . . . 5-8
2) Process diagram . . . . . . . . . . . . . . . . . . . . 5-9
3) Details of image forming process . . . . . . 5-10
4) Transition of photoconductor surface
potential . . . . . . . . . . . . . . . . . . . . . . . . . 5-14
5) Photoconductor drum sensitivity
correction . . . . . . . . . . . . . . . . . . . . . . . . 5-14
6) Process control function . . . . . . . . . . . . . 5-14
5. TRANSPORT/FUSINGSECTION . . . . . . . . . 5-16
1) General . . . . . . . . . . . . . . . . . . . . . . . . . . 5-16
2) Basic composition and functions . . . . . . 5-16
6. Fusing paper exit section . . . . . . . . . . . . . . . . 5-16
7. High voltage section . . . . . . . . . . . . . . . . . . . . 5-17
1) General . . . . . . . . . . . . . . . . . . . . . . . . . . 5-17
2) Basic composition . . . . . . . . . . . . . . . . . . 5-17
[6] DISASSEMBLY AND ASSEMBLY . . . . . . 6-1
1. Paper feed unit . . . . . . . . . . . . . . . . . . . . . . . . . 6-1
1-1. Paper feed unit . . . . . . . . . . . . . . . . . . . . . 6-1
1-2. Paper feed roller ass’y removal . . . . . . . . 6-1
1-3. PS front roller ass’y . . . . . . . . . . . . . . . . . 6-2
1-4. Separation roller . . . . . . . . . . . . . . . . . . . . 6-2
1-5. Paper feed roller, take-up roller . . . . . . . . 6-2
2. Transport unit . . . . . . . . . . . . . . . . . . . . . . . . . . 6-3
2-1. Resist roller, transfer roller . . . . . . . . . . . . 6-3
2-2. Transport belt . . . . . . . . . . . . . . . . . . . . . . 6-4
3. Fusing section . . . . . . . . . . . . . . . . . . . . . . . . . 6-4
3-1. Fusing unit removal . . . . . . . . . . . . . . . . . 6-4
3-2. Heater lamp replacement . . . . . . . . . . . . . 6-5
3-3. Upper heat roller ass’y removal . . . . . . . . 6-5
3-4. Upper separation pawl replacement . . . . . 6-5
3-5. Lower heat roller replacement . . . . . . . . . 6-5
3-6. Lower separation pawl replacement . . . . . 6-6
3-7. Thermistor/thermostatremoval . . . . . . . . . 6-6
4. Optical system . . . . . . . . . . . . . . . . . . . . . . . . . . 6-6

1) Copy lamp replacement . . . . . . . . . . . . . . 6-6
2) Mirror base wire replacement and
adjustment . . . . . . . . . . . . . . . . . . . . . . . . 6-7
3) No. 2/3 mirror unit (mirror base B)
installation (Mirror base B positioning) . . . 6-9
4) Copy lamp unit installation
(Mirror base A positioning) . . . . . . . . . . . 6-10
5) No. 4/5 mirror unit (mirror base C)
replacement . . . . . . . . . . . . . . . . . . . . . . 6-10
6) Lens wire replacement . . . . . . . . . . . . . . 6-12
7) Lens unit replacement . . . . . . . . . . . . . . 6-15
5. High voltage section . . . . . . . . . . . . . . . . . . . . 6-15
5-1. Main charger (MC) unit . . . . . . . . . . . . . . 6-15
5-2. Transfer/separation charger (TC/SC)
unit . . . . . . . . . . . . . . . . . . . . . . . . . . . . . 6-16
6. Process section . . . . . . . . . . . . . . . . . . . . . . . 6-17
6-1. Process unit . . . . . . . . . . . . . . . . . . . . . . 6-17
6-2. Waste toner bottle replacement
(required when waste toner full detection/
maintenance) . . . . . . . . . . . . . . . . . . . . . 6-17
6-3. Drum (Replace every 60K copies) . . . . . 6-18
6-4. Blank lamp unit
(Clean every 60K copies.) . . . . . . . . . . . 6-18
6-5. Discharge lamp unit
(Clean every 60K copies.) . . . . . . . . . . . 6-19
6-6. Cleaner blade
(Replace every 60K copies.) . . . . . . . . . . 6-19
6-7. Drum separation pawl
(Replace every 60K copies.) . . . . . . . . . . 6-19
6-8. Process control PWB (Clean the sensor
section every 60K copies.) . . . . . . . . . . . 6-19
6-9. Drum mark sensor PWB (Clean the sensor
section every 60K copies.) . . . . . . . . . . . 6-19
6-10. Toner reception seal (Replace every 60K
copies.) . . . . . . . . . . . . . . . . . . . . . . . . . . 6-19
7. Developing section . . . . . . . . . . . . . . . . . . . . . 6-20
A. DV side seals F/R replacement
(Replace every 120K copies.) . . . . . . . . . 6-20
B. DB blade replacement
(Replace every 120K copies.) . . . . . . . . . 6-20
C. V ring attachment . . . . . . . . . . . . . . . . . . 6-20
D. Note for toner hopper drive gear (31T)
and stirring shaft attachment . . . . . . . . . 6-21
8. Operation panel/intermediate cabinet . . . . . . . 6-21
9. Frame major parts . . . . . . . . . . . . . . . . . . . . . . 6-21
9-1. Cooling fan motor replacement . . . . . . . . 6-21
9-2. Power unit . . . . . . . . . . . . . . . . . . . . . . . . 6-22
9-3. Tray size detecting PWB . . . . . . . . . . . . 6-22
9-4. Main PWB unit . . . . . . . . . . . . . . . . . . . . 6-23
9-5. AC power PWB . . . . . . . . . . . . . . . . . . . . 6-23
9-6. Ozone filter (Check every 60K copies,
and clean every 300K copies.) . . . . . . . . 6-23
10. Multi paper feed unit . . . . . . . . . . . . . . . . . . . . 6-24
10-1. Separation roller . . . . . . . . . . . . . . . . . . . 6-24
10-2. Take-up roller/paper feed roller . . . . . . . 6-24
[7] ADJUSTMENTS . . . . . . . . . . . . . . . . . . . . . . . . 7-1
1. Developing section . . . . . . . . . . . . . . . . . . . . . . 7-1
1-1. Developing doctor clearance
adjustment . . . . . . . . . . . . . . . . . . . . . . . . 7-1
1-2. Developing magnet roller main pole
position adjustment . . . . . . . . . . . . . . . . . . 7-1
2. Optical system . . . . . . . . . . . . . . . . . . . . . . . . . . 7-2
2-1. Adjustment items . . . . . . . . . . . . . . . . . . . 7-2
2-2. Note for adjustments . . . . . . . . . . . . . . . . 7-3
2-3. Adjustment of each section . . . . . . . . . . . 7-4
A. Lens reference position adjustment . . . . . 7-4
B. No.4/5 mirror reference position
adjustment . . . . . . . . . . . . . . . . . . . . . . . . 7-4
C. Vertical copy magnification ratio
adjustment . . . . . . . . . . . . . . . . . . . . . . . . 7-5
D. Resolution adjustment
(Focus adjustment) . . . . . . . . . . . . . . . . . . 7-6
E. Horizontal copy magnification ratio
adjustment . . . . . . . . . . . . . . . . . . . . . . . . 7-8
F. Comparison table of lens values and
simulation input values . . . . . . . . . . . . . . . 7-9
G. Vertical skew adjsutment . . . . . . . . . . . . 7-10
H. Horizontal skew adjustment . . . . . . . . . . 7-10
I. Center shift adjustment . . . . . . . . . . . . . . 7-12
J. Exposure balance adjustment . . . . . . . . 7-12
K. Copy lead edge adjustment . . . . . . . . . . 7-13
2-4. Copy density adjustment . . . . . . . . . . . . 7-16
2-5. Process section adjustment . . . . . . . . . . 7-20
[8] SIMULATION . . . . . . . . . . . . . . . . . . . . . . . . . . 8-1
1. Outline . . . . . . . . . . . . . . . . . . . . . . . . . . . . . . . . 8-1
2. Purpose . . . . . . . . . . . . . . . . . . . . . . . . . . . . . . . 8-1
3. Operating procedure . . . . . . . . . . . . . . . . . . . . . 8-1
4. List of simulations . . . . . . . . . . . . . . . . . . . . . . . 8-2
5. Details of simulations . . . . . . . . . . . . . . . . . . . . 8-3
6. User simulation . . . . . . . . . . . . . . . . . . . . . . . 8-16
(1) Functions which can be set and
canceled by the user simulation . . . . . . . 8-16
(2) User simulation . . . . . . . . . . . . . . . . . . . 8-16
(3) User simulation code table . . . . . . . . . . . 8-17
(4) Department counter setting content
(Set with user program P10 ∼P15) . . . . 8-17
[9] SELF DIAGNOSTICS . . . . . . . . . . . . . . . . . . . 9-1
1. Summary/purpose . . . . . . . . . . . . . . . . . . . . . . . 9-1
2. Operation . . . . . . . . . . . . . . . . . . . . . . . . . . . . . . 9-1
3. Clearing the self diag display . . . . . . . . . . . . . . 9-1
[10] SERVICING AT MEMORY TROUBLE
AND MAIN CONTROL PWB
REPLACEMENT . . . . . . . . . . . . . . . . . . . . . . . 10-1
1. General . . . . . . . . . . . . . . . . . . . . . . . . . . . . . . 10-1
2. Purpose . . . . . . . . . . . . . . . . . . . . . . . . . . . . . . 10-1
3. Remedies . . . . . . . . . . . . . . . . . . . . . . . . . . . . 10-1
4. Set value recording sheet . . . . . . . . . . . . . . . . 10-3
5. Memory simulation list . . . . . . . . . . . . . . . . . . . 10-4
[11] MAINTENANCE . . . . . . . . . . . . . . . . . . . . . . . 11-1
1. Maintenance cycle and maintenance items . . 11-1
[12] ELECTRICAL SECTION . . . . . . . . . . . . . . 12-1
1. System block diagram . . . . . . . . . . . . . . . . . . . 12-1
2. Main circuit . . . . . . . . . . . . . . . . . . . . . . . . . . . 12-3
(1) Block diagram . . . . . . . . . . . . . . . . . . . . . 12-3
(2) CPU (IC6) SC3041K12F . . . . . . . . . . . . . 12-4
(3) Detector circuit of sensor signal . . . . . . . 12-8
(4) Start/stop control circuit . . . . . . . . . . . . . 12-8
(5) Heater lamp control circuit . . . . . . . . . . . 12-9
(6) Driver circuit (Solenoid, electromagnetic
clutch) . . . . . . . . . . . . . . . . . . . . . . . . . . 12-10
(7) Stepping motor drive circuit . . . . . . . . . 12-10
(8) AE (Auto Exposure) sensor circuit . . . . 12-11
(9) Toner supply motor drive circuit . . . . . . 12-11
(10) Reset IC (IC13) . . . . . . . . . . . . . . . . . . . 12-11
(11) Operation panel . . . . . . . . . . . . . . . . . . 12-12
(12) EnergyStar circuit description . . . . . . . . 12-13

[1] PRODUCT OUTLINE
1. Product features
(1) Compact body
•Compact body size
The body width of 600mm is the smallest in the class.
•The employment of the front loading tray and the folding-type multi
manual paper feed cassette realizes the small occupying area.
(Option)
(2) Clean copy gentle to the environment
•Silent design,
•Low level of ozone, use of recyclable materials
•The energy-saving mode reduces the power consumption.
(3) High capacity of copying
•Warm-up time is less than 35 sec. The first copy of 5.3 sec.
(4) Fully expandable system. (Refer to "2. System configuration.")
2. System configuration (options)
10-bin sorter SF-S17 N
Automatic document feeder SF-A18
Tray (reserve) SF-UB15
10-bin staple sorter SF-S54
Exclusive-use desk
Note: When installing the SF-S54, the exclusive-use desk (SF-DS17) is reguired.
SF-DS17
SF-MF15
(Option some areas)
1 – 1

[2] PRODUCT SPECIFICATIONS
1. Basic specifications
(1) Type: Table top
(2) Copy speed:
Normal Enlargement
(Magnification) Reduction
(Magnification)
A3 9 sheets/min 9 sheets/min
(200%) 9 sheets/min
(50%)
B4 11 sheets/min 11 sheets/min 11 sheets/min
A4 (Portrait) 16 sheets/min 13 sheets/min 13 sheets/min
A4 (Landscape) 13 sheets/min 13 sheets/min 13 sheets/min
B5 (Portrait) 16 sheets/min 13 sheets/min 13 sheets/min
B5 (Landscape) 13 sheets/min 13 sheets/min 13 sheets/min
Ledger 9 sheets/min 9 sheets/min 9 sheets/min
Legal 11 sheets/min 11 sheets/min 11 sheets/min
Letter (Portrait) 16 sheets/min 13 sheets/min 13 sheets/min
Letter (Landscape) 13 sheets/min 13 sheets/min 13 sheets/min
(Note) The copy speeds for enlargement and reduction are minimum
speed values.
(3) Warm up time: 35 sec or less
(4) First copy time: 5.3 sec (Tray)
(5) Jam recovery time: 8 sec (Conditions: After leaving the door
open for 60 sec, the standard conditions)
(6) Multi copy Max. 99 sheets
(7) Original
Max. original size A3/Ledger
Reference original size Left side/Center
Original sensing No
(8) Copy magnification ratio
Fixed magnification: AB series: 200, 141, 122, 115, 100, 86, 81,
70, 50% (9 steps)
Inch series: 200, 141, 129, 121, 100, 95, 77,
64, 50% (9 steps)
Zoom range: 50% ∼200% (151 steps by the increment of 1%)
(9) Exposure
Exposure mode: Auto/Manual/Photo
No. of manual steps: 9 steps
(10) Void width
Void area: Lead edge/rear edge: 3mm or less
Image loss Normal: 4mm or less
(11) Paper exit/finishing
Paper exit tray capacity: 250 sheets
Finishing: option 10-bin sorter, 10-bin staple sorter
(12) Additional functions
Function Remark
Auto Paper Selection ×
Auto Magnification ratio
Selection ×
Shift F
1-set 2-copy FEnlargement is impossible.
Edge erase F
Built-in auditor
password mode F20 departments
Interruption F
Monochrom ×
AICS F
Pre-heat mode F
Auto shut off F
Auto power save F
Auto tray switching ×
Cover insertion ×
OHP insertion paper ×
Overlay ×
(13) External dimensions
W x D x H 600 ×595 ×365 mm
23-5/8″×23-7/16″×14-3/8″
Occupying area (W x D) 885 ×595 mm
34-27/32″×23-7/16″
Weight 41.0Kg (90.4 lbs)
(14) Power source
Voltage: 100V 50/60Hz
110V 50/60Hz
120V 60Hz
127V 60Hz
220 ∼230V 50/60Hz
240V 50Hz
Frequency: 50/60Hz common
(15) Power consumption
Max. power
consumption 1.5kw (Note) Max. when the
option is installed
Energy efficiency 64Wh/h or less
Auto power shut
off (for EPA) 5W or less
2 – 1

2. Description of each section
(1) Paper feed section
Copying size A3 ∼A6/Ledger ∼Invoice
Paper feed system 1 tray + multi manual feed
Paper feed capacity 250 sheets ×1
Cassette Paper size Paper weight Paper kind
Tray
AB series: A3 ∼
A5 56 ∼80g/m2Standard paper,
recycled paper
Inch series:
Ledger ∼Invoice 15 ∼21 lbs
Multi
manual
paper
feed
Multi
AB series: A3 ∼
A6R
Inch series:
Ledger ∼Invoice
56 ∼80g/m2Standard paper,
specified paper,
special paper,
OHP film, Second
original paper,
postcards
(without folding)
15 ∼21 lbs
Single
AB series: A3 ∼
A6R
Inch series:
Ledger ∼Invoice
52 ∼
128g/m2
14 ∼34 lbs
(2) Optical section
Light source Halogen lamp
Exposure system Slit exposure by moving the light source
Zooming system By changing the lens positions and the scan
speed.
Lens Fixed focus lens
(3) Process
Charging system (–) DC saw teeth electrode system
Transfer system (–) tungsten system
Separation system (AC) separation tungsten system
(4) Developing section
Developing system Dry, two-component magnetic brush
development (developer replacement)
Developing bias voltage DC–200V ±5V
(5) Fusing section
Fusing system Heat roller system
Upper heat roller surface temperature 190 degrees C
Heater lamp Halogen lamp 1000W ×1
3. Supply parts
Middle East/Africa
Name Content Life Product name
1 Photoconductor kit Photoconductor drum x 1
Cleaner blade x 1
Drum separation pawl x 2
60K SF-226DM
2 Black developer Black developer (530g) x 10 60K x 10 SF-226LD
3 Black toner Black toner bottle (280g) x 10 6K x 10 SF-126LT
4 Upper heat roller kit Upper heat roller x 1
Upper separation pawl x 4
Fusing bearing x 1
120K SF-216HU
5 Lower heat roller kit Lower heat roller x 1
Lower separation pawl x 4 120K SF-220LH
6 Staple cartridge Staple cartridge (For SF-S54) x 3 5K staples x 3 SF-LS12
7 Upper heat roller Upper heat roller x 1 120K SF-216HU
8 Upper separation pawl Upper separation pawl x 4 x 10 120K x 10 SF-216UP
9 Heat roller gear Heat roller gear x 10 120K x 10 SF-216HG
10 Lower heat roller Lower heat roller x 1 120K SF-216HR
11 Lower separation pawl Lower separation pawl x 4 x 10 120K x 10 SF-216LP
12 Screen grid Screen grid x 10 120K x 10 SF-216SU
13 Cleaner blade Cleaner blade x 10 6K x 10 SF-216CB
14 Charging plate Charging plate x 10 120K x 10 SF-216PU
15 Ozone filter Ozone filter x 10 300K x 10 SF-216FL
16 Copy lamp Copy lamp x 10 — SF-216CL
17 MC case unit MC case unit x 10 — SF-216MC
2 – 2

Middle & South America/Asia (excluding China)
Name Content Life Product name
1 Photoconductor kit Photoconductor drum x 1
Cleaner blade x 1
Drum separation pawl x 2
60K SF-226DR
2 Black developer Black developer (530g) x 10 60K x 10 SF-226CD
3 Black toner Black toner bottle (280g) x 10 6K x 10 SF-126CT
4 Upper heat roller kit Upper heat roller x 1
Upper separation pawl x 4
Fusing bearing x 1
120K SF-216HU
5 Lower heat roller kit Lower heat roller x 1
Lower separation pawl x 4 120K SF-220LH
6 Staple cartridge Staple cartridge (For SF-S54) x 3 5K staples x 3 SF-LS12
7 Upper heat roller Upper heat roller x 1 120K SF-216HU
8 Upper separation pawl Upper separation pawl x 4 x 10 120K x 10 SF-216UP
9 Heat roller gear Heat roller gear x 10 120K x 10 SF-216HG
10 Lower heat roller Lower heat roller x 1 120K SF-216HR
11 Lower separation pawl Lower separation pawl x 4 x 10 120K x 10 SF-216LP
12 Screen grid Screen grid x 10 120K x 10 SF-216SU
13 Cleaner blade Cleaner blade x 10 6K x 10 SF-216CB
14 Charging plate Charging plate x 10 120K x 10 SF-216PU
15 Ozone filter Ozone filter x 10 300K x 10 SF-216FL
16 Copy lamp Copy lamp x 10 — SF-216CL
17 MC case unit MC case unit x 10 — SF-216MC
2 – 3

4. Optional specifications
(1) Automatic document feeder (ADF)
<Model name: SF-A18>
Original set direction Face up
Original set position Center reference
Original transport system Belt (half size) system
Original feed sequence Bottom taking (Face up exit)
Original size A3 ∼A5/11" x 17" ∼8 1/2" x 5 1/2"
Original change speed
(S →S) 16 sheets/min
Original weight 50 ∼128g/m2(14 to 34 lbs)
Original set quantity 50 sheets, 50 ~ 80 g/cm2,
80 ~ 128 g/m2(21 to 34 lbs) thickness
max. 5 mm (3/16")
Original stop system Position control system
Dimensions 571 (W) x 521 (D) x 110 (H) (mm)
22-31/64" (W) x 20-33/64" (D) x
4-11/32" (H)
(Height: excluding the tray)
Weight About 11.5kg (25.4 lbs.)
Power source Supplied from the copier’s power section.
Power consumption 65W
Functions
Original sensing on
the tray YES (Scanning read for uncertain size
originals.)
Sensing size Inch series: 11" x 17", 8 1/2" x 14", 8 1/2" x
11", 8 1/2" x 11"R, 8 1/2" x 5 1/2"
AB series: A3, B4, A4, A4R, A5
Original mixture Allowed (However, no linkage with the AMS)
Original reverse NO
(2) 10-bin sorter
<Model name: SF-S17 N>
Type Copier installation type/Hanging type
Distribution system Bin shift by lead screw
No. of bins 10 bins (The top bin is used also for
non-sort.)
Capacity 30 sheets/bin (L4/letter size), 100
sheets for the top bin only.
Sorting 30 sheets (A4/letter)
15 sheets (B4/legal)
15 sheets (A3/Ledger)
Grouping 20 sheets (A4/letter)
15 sheets (B4/legal)
15 sheets (A3/Ledger)
Paper size (Non-sort) A3 ∼A6 (Postcard)R/11" x 17" ∼
8 1/2" x 5 1/2"
(Sort/group) A3 ∼A5/11" x 17" ∼8 1/2" x 5 1/2"
Paper transport Center reference
Paper reception Face up
Paper weight (Non-sort) 52 ∼128g/m2(14 ∼34lbs)
(Sort/group) 56 ∼80g/m2(15 ∼21lbs)
Dimensions 335 (W) x 493 (D) x 298 (H) (mm)
13-13/64" (W) x 19-27/64" (D) x
11-47/64" (H)
(Width: Including the tray.)
Weight 8.6kg [9.8kg (21.6 lbs.) Including
mounted fittings]
Power source Supplied from the copier. DC24V (1.2A)
Power consumption Max. 30W
2 – 4

(3) 10-bin staple sorter (10-bin SS)
<Model name: SF-S54>
Type Copier installation type/hanging type
Distribution system Bin shift system by lead screw
No. of bins 10 bins (The top bin is commonly used
for non-sort.
Capacity 30 sheets for each bin
(A4, 8 1/2" ×11", 80g/m2)
100 sheets for the top bin
Sort 30 sheets (A4, 8 1/2" ×11")
15 sheets (B4, 8 1/2" ×14", 8 1/2" ×13")
15 sheets (A3, 11" ×17")
80g/m2(21 lbs.)
Grouping 20 sheets (A4, 8 1/2" ×11")
15 sheets (B4, 8 1/2" ×14")
15 sheets (A3, 11" ×17"),
80g/m2(21 lbs.)
Staple sort 30 sheets (A4, 8 1/2" ×11")
15 SHEETS (B4, 8 1/2" ×14")
15 sheets (A3, 11" ×17")
80g/m2(21 lbs.)
Paper size Non-sort A3 ∼A6R
11" ×17" ∼8 1/2" ×5 1/2"
Sort/group A3 ∼A5
11" ×17" ∼8 1/2" ×5 1/2"
Staple sort A3, B4, A4, A4R, B5, 11 ×17",
8 1/2 ×14", 8 1/2 ×11", 8 1/2 ×11R
Alignment (Sorting) Max. shift 2mm (Alignment operation)
Paper transport Center reference
Paper loading Face up
Paper weight Non-sort 49 ∼128g/m2(13 ∼34 lbs.)
Sort/group/staple sort 56 ∼80g/m2(15 ∼21 lbs.)
Dimensions 390(W) ×542(D) ×400(H)mm
15-23/64" (W) ×21-11/32" (D) ×
15-3/4" (H)
Weight About 11.5kg, 15kg (33.1 lbs.) [including
the installation kit]
Power source DC24V (1.5A) supplied from the copier.
Power consumption Max. 36W
Staple section
Type Copier stapler
Stapling time 1.8 sec
No. of stapled sheets 30 sheets (80g/m2, 21 lbs.)
Binding reference Front reference
Staple supply Cartridge (5,000 pcs.)
Staple SF-LS12
No staple/no cartridge/
no stapler detection Available
Staple jam detection Available
Manual staple mode Available (excluding manual stapling)
Note: When installing the SF-S54, the exclusive-use desk (SF-DS17,
SF-DS17E) is required.
(4) Exclusive-use desk
SF-DS17
Dimensions 570(W) ×523(D) ×520(H)mm
Weight About 19.5kg
Functions Caster Provided
Adjuster None
Door None
2 – 5

[3] PRODUCT VIEWS
1. External view and internal structure
No. Name No. Name No. Name
1Original cover 2Original table 3Paper exit tray
4Grip 5Manual feed original guide 6Manual feed tray
7Operation panel 8Front cover 9Power switch
FPaper tray GDeveloping unit grip HToner hopper
IFusing unit JDeveloping unit lock lever KRelease lever
LDrum
2
1
3
4
10
7
8
9
4
5 6
11 12
13
14 15
16
3 – 1

2. Operation panel
No. Name No. Name No. Name
1SORTER key and indicators 2DUAL PAGE COPY key and indicator 3MARGIN SHIFT key and indicator
4AUTO/MANUAL/PHOTO key and
indicators 5PAPER SIZE indicators 6Misfeed indicator
7Paper feed location/misfeed location
indicators 8Preset ratio indicators 9Copy quantity display
FMaintenance required indicator GDeveloper replacement required
indicator HToner required indicator
I10-key pad JPOWER SAVE indicator KAUDIT CLEAR key
LEDGE ERASE key and indicator MLIGHT and DARK keys and indicators NTRAY SELECT key
OPaper required indicator PCopy ratio selector keys QZOOM indicator
RCopy ratio display key SZoom keys TINTERRUPT key and indicator
UZero/readout key VClear key WPrint button and READY indicator
XClear all key
123
45
6
789
0/ C
CA
%
200%
50%
121%
95%
141%
129%
77%
64%
100%
SORTER
STAPLE
SORT
SORT
GROUP
DUAL PAGE
COPY
MARGIN
SHIFT
EDGE ERASE
EXPOSURE
AUTO
MANUAL
PHOTO
12345
LIGHT DARK
PAPER SIZE
TRAY SELECT
ZOOM INTERRUPT
POWER SAVE AUDIT CLEAR
12
/
8
12
/
511
11
17
x
12
/
8
11
12
/
811
12
/
8
11
12
/
8
14
12
/
8
14
12
/
814
12
/
8
11
12
/
8
12
/
8
12
/
5
12
/
8
12
/
5
12
/
8
12
/
5
11 17
12
/
8
12
/
8
12
/
5
11
11
12
/
811
12
/
814
17
x
11 17
11 17
11 17
11 17
R
EXTRA
1 2 3 4 5 6 7 8 9 10 11 12 13 14 15
23 24 25 26 27 2822212019181716
x
x
x
x
x
x
xxx
xx
x
x
xxx
x
x
x
xx
3 – 2

3. Clutches, solenoids, and motors
Clutches and solenoids
No. Signal name Name Functions, operations
1PSPS Paper separation solenoid Paper separation solenoid drive
2RRC Resist roller clutch For resist roller rotation
3TRC Transport roller clutch For transport roller rotation
4CPFC1 Tray paper feed clutch For paper feed roller rotation
5MPFS Manual paper feed solenoid For pressing take-up roller
Motors
No. Signal name Name Functions, operations Type
6VFM Ventilation fan motor Used to ventilate around the fusing section, cools
down the machine, and remove ozone. DC brushless
7MM Main motor Used to drive the body. DC brush
8CFM Optical system cooling fan Used to cool and ventilate the optical system. DC brushless
9LM Lens motor Used to move the optical lens. DC stepping
FTM Toner motor Used to stir toner. DC synchronous
GMRM Mirror motor Used to move the mirror base. DC stepping
HSMF Suction fan motor Used to ventilate the suction section. DC brushless
3
4
5
6
7
8
12
1
2
9
10
11
3 – 3

4. PWB
No Name Description No Name Description
1Operation PWB A Operation input, display control 2Operation PWB B Operation input, display control
3Blank lamp PWB Used to control the blank lamp. 4DL PWB Used to drive the discharge lamp.
5Optical PWB AE sensor and lens motor interface 6Process control PWB Used to sense the toner density.
7Main PWB Used to control the body. 8AC circuit PWB AC power input
9CSD PWB Used to sense the body cassette
size. FDC circuit PWB DC power input
GPID PWB Manual paper entry detection HPPD PWB Body PR roller JAM detection
IHigh voltage PWB Process high voltage, developing
bias voltage supply JPOD PWB Body paper exit section JAM
detection, ventilation fan motor
interface
KMark sensor PWB Drum marking point detection LSub DC power PWB Supplies power in the energy
saving mode. (Supplies 5V to the
main PWB and the operation
PWB.)
14
15
7
8
9
3 4 51 2
6
10
11
13
12
16
3 – 4

5. Sensors and switches
No. Signal name Name Type Operation, function
1TCS Toner density control sensor Transmission sensor HIGH when toner density falls.
2ILSW Front cabinet open/close switch Interlock switch ON when closed.
3MSW Power switch Seesaw switch
4TH Fusing heater thermistor Thermistor Greater resistance at low
temperature
5TS Fusing heater thermostat Thermostat Contact open at abnormally high
temperature
6POD Paper exit paper sensor Transmission photo sensor LOW when paper is present.
7MHPS Mirror home position sensor Transmission photo sensor HIGH when paper is sensed.
8MMRE Main motor encoder Transmission photo sensor Rotation pulse output
9TFD Waste toner full switch Lead switch HIGH when sensed.
FLHPS Lens home position sensor Transmission photo sensor LOW when reduction.
GPPD Paper transport sensor Transmission photo sensor LOW when paper is present.
HPED1 Body upper tray paper presence detection Transmission photo sensor HIGH when paper is present.
IDPPD1 Body upper tray paper transport sensor Transmission photo sensor LOW when paper is present.
JPID Single manual feed paper entry sensor Transmission photo sensor HIGH when paper is present.
12
9
8
7
2 3 5 4 6
10
1
13
14
11
3 – 5

6. Rollers, mirrors, etc.
No. Name No. Name No. Name
1No. 3 mirror 2No. 2 mirror 3No. 1 mirror
4Copy lamp 5No. 4 mirror 6No. 5 mirror
7No. 6 mirror 8Developing unit toner box 9Manual tray
F—GTake-up roller HPaper feed roller
IReverse roller JPS front roller follower roll KPS front roller
LDeveloping unit MBlank lamp NMain charger unit
OPhotoconductor drum PCleaner unit QResist roller follower roll
RResist roller STransfer charger TSeparation charger
UDrum separation pawl VSuction unit WSuction belt
XFusing thermistor YHeater lamp ZUpper heat roller
[Lower heat roller \Transport roller (upper) follower roller ]Transport roller (upper)
^Developing magnet roller _Tray paper feed roller ‘Tray paper feed reverse roller
aTray paper feed take-up roller bPE actuator
21
222324252627
30
1
2
3 4 567 8
9
11
12
13
14
15
16171819202829
31
32
33
34
35
36
37
38
3 – 6

[4] UNPACKING AND INSTALLATION
1. Unpacking
Packing material/accessory list
Name Q’ty
1 Paper exit tray 1
2 Instruction manual 1
3 Maintenance card 1
4 Dust cover 1
5 Service contract 1
6 Installation manual 1
7 Magnification ratio select label 1
2. Installation
Installing conditions
The surrounding conditions of the machine affect the machine perfor-
mance greatly. Use great care for the following items.
(1) Environment
1Avoid direct sunlight, and avoid installation near the window. (Cur-
tains or blinds must be shut completely.)
If not, the plastic parts and the original cover may be deformed.
Even if the window is of frosted glass, there is no difference.
2Avoid high temperature and high humidity, and avoid sudden
temperature change. (Avoid installation near a cooler or a heater.)
If not, paper absorbs moisture and dew forms in the machine,
causing paper jam or degraded image quality.
(Standard condition): The best condition to use the machine.
20∼25°C: 65±5%RH
(Temperature and humidity): 15 ∼30°C
20% ∼85% RH
35°C for 65%
3Avoid dust and vibrations.
If dust enters the machine, malfunctions may occur.
4Avoid installation on an unstable surface.
Keep the machine in level state to maintain the performance.
85
65
20
15 30 35
Humidity
HR
%
˚C
4 – 1

5Avoid installation to a poorly ventilated place.
6Avoid installation to a place where there are flammable materials
or ammonia gas, etc. If the machine is installed near a diazo
copier, the picture quality may be degraded and malfunctions may
occur.
7Install near a power outlet.
(2) Space around the machine
Install the machine with its rear side about 10cm (6 inches) apart from
the wall in order to allow space to ventilation by the cooling fan.
Also allow enough space around the machine for proper operation.
(3) Installation base
Set the machine in horizontal position in the following procedure.
Be sure to use a leveling instrument (UKOGM0054CSZZ) to install
the machine on a flat, horizontal place.
(Note) If the machine is not in horizontal position, the toner density
control function may not work normally, resulting in degraded
picture quality.
(4) Power source
1Use the power source of the rated capacity.
2Avoid complicated wiring. If not, the breaker or the fuse may be
overloaded.
(5) Grounding wire connection
1Connect the grounding wire to prevent against a danger.
2When connecting the grounding wire, connect only to the ground-
ing object (the grounding terminal of the power outlet, etc.) and
never connect to a gas pipe.
4 – 2

3. Optical system lock release
A. No. 2/3 mirror unit lock release
Remove the one fixing screw of the No. 2/3 mirror unit on the left side
of the copier.
B. Lens and No. 4/5 mirror unit lock release
Remove two fixing screws of the No. 4/5 mirror unit on the right inside
of the copier.
Open the front cabinet and remove one fixing screw of the lens on the
lower side of the operation panel.
4. Charger cleaning
A. Main charger unit electrode cleaning
1Press the hook section of the main charger unit to release lock,
and pull out and remove the main charger unit from the copier.
2Remove one fixing screw of the main charger unit (on the back
side).
3Press the electrode cleaner onto the tips of the electrode so that
the tips are inserted into the cleaner a few times to clean.
(Note)
•Do not move the cleaner back and forth with the electrode tips
inserted into it.
•When cleaning, clean thoroughly at one time. Avoid partial
cleaning.
4Return the electrode section to the original position and fix it with a
screw.
Mirror unit
fixing screw
Lens fixing screw
Mirror unit
fixing screw
Paper feed tray
Hook
main charger unit
Fixing screw
Electrode section
Main charger unit
Electrode section
Electrode cleaner
4 – 3

5Insert the main charger unit along the guide groove in the copier
fully to the bottom.
5. Developing unit setting
A. Developing unit setting
1Open the front cabinet, remove the installation toner fixed to the
developing unit level with tape, and pull the developing unit lever
toward you.
2Hold the grip of the developing unit, and slowly pull out the
developing unit until it stops.
Then hold the hand carry strap and press the developing lever,
and remove the developing unit.
3Remove three fixing screws of the toner hopper of the developing
unit, and remove the toner hopper.
4While supplying developer from the developer supply port of the
developing unit, turn the MG gear clockwise with a screwdriver or
a scale to supply fully in the developing unit.
5Install the toner hopper to the developing unit and fix it with two
screws.
Main charger unit
Hand carry strap
DV lever Developing unit Grip
Fixing screw
Toner hopper
Developing unit
Fixing screw
Developer
supply port
Developer
Developing unit
MG gear
Screwdriver (+) or scale
Fixing screw
Toner hopper Fixing screw
Developing unit
4 – 4
This manual suits for next models
1
Table of contents
Other Sharp Copier manuals

Sharp
Sharp AR-201 User manual

Sharp
Sharp AR-122E User manual

Sharp
Sharp MX-M850 User manual

Sharp
Sharp AL-1043 User manual

Sharp
Sharp SF-2220 User manual

Sharp
Sharp DM-1505 - B/W Laser Printer User manual

Sharp
Sharp AR-150 SERIES User manual

Sharp
Sharp AL1215 - B/W Laser - Copier User manual

Sharp
Sharp SF-825 User manual

Sharp
Sharp AR-800 imager User manual

Sharp
Sharp SF-2214 User manual

Sharp
Sharp AL-1020 User manual

Sharp
Sharp AR-RP3 User manual

Sharp
Sharp AR-156 User manual

Sharp
Sharp AR-5600 series Online Setup guide

Sharp
Sharp SF-7400 User manual

Sharp
Sharp AR-650 User manual

Sharp
Sharp SF-2050 User manual

Sharp
Sharp AL-2020 Manual

Sharp
Sharp AR-C360P Firmware update