Sibata LD-5 User manual

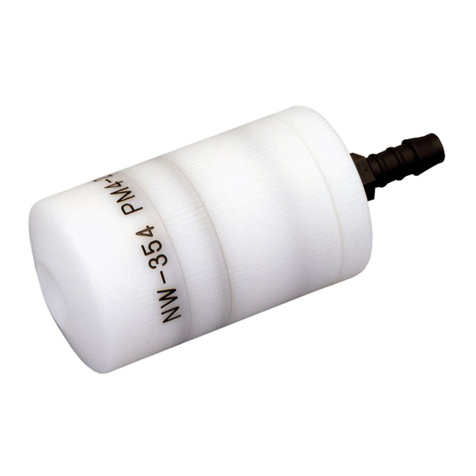
PM2.5 Cyclone Particle Size
Selector For LD-5
OPERATIONMANUAL
CODE080000-251
Thank you for purchasing this product.
z This operation manual describes precautions that are important for preventing accidents as well
as the procedures used to handle the product.
z Read this operation manual thoroughly before use, and use the product correctly.
z After reading this operation manual, keep it handy for future reference.


- 3 -
Table of Contents
Using the Product Correctly and Safely............................................4
Calibration of the LD-5/LD-5R Digital Dust Indicator .......................4
1Overview .........................................................................................5
2Operating procedure......................................................................6
2-1 LD-5 .........................................................................................7
(1) Attachment of PM2.5 cyclone ............................................................. 7
(2) Switch the LD-5 power ON .................................................................8
(3) Background (BG) Measurement .........................................................9
(4) Sensitivity Correction........................................................................10
(5) Dust measurement ...........................................................................10
(6) Switch the LD-5 power OFF ............................................................. 11
2-1 LD-5R.....................................................................................12
(1) Attachment of PM2.5 cyclone ........................................................... 12
(2) Switch the LD-5R power ON............................................................. 13
(3) Background (BG) Measurement ....................................................... 14
(4) Sensitivity Correction........................................................................15
(5) Dust measurement ...........................................................................16
(6) Switch the LD-5R power OFF...........................................................17
3Cleaning of PM2.5 cyclone..........................................................18
4Specifications...............................................................................19
5Warranty........................................................................................19

- 4 -
Using the Product Correctly and Safely
Read this operation manual and LD-5/LD-5R operation manual carefully to the end before
using the product and make sure it is used correctly. Also, keep this manual handy.
Calibration of the LD-5/LD-5R Digital Dust
Indicator
Before shipment, we have calibrated the digital dust indicator using standard particles, but
the measurement sensitivity may change due to contamination of the interior of the
detector that can occur during use, electrical or mechanical changes, or its maintenance
status.
Therefore, in addition to the daily maintenance of the dust indicator, we recommend that
calibration be performed annually to maintain its accuracy. To have the LD-5/LD-5R
digital dust indicator calibrated, be sure to send it with the PM2.5 cyclone particle size
selector for LD-5 removed and the LD-5/LD-5R accessory air sampling port attached. The
air sampling port is required for calibration, so store it and do not lose it.
To have the LD-5/LD-5R digital dust indicator calibrated, be
sure to send it with its accessory air sampling port attached.

- 5 -
1 Overview
The PM2.5 cyclone particle size selector for LD-5 is a cyclone-type particle sizer having
PM2.5 particle separation properties. It is used installed in our LD-5/LD-5R digital dust
indicator.
サイクロン分粒特性
0
10
20
30
40
50
60
70
80
90
100
0.00.51.01.52.02.53.03.54.04.55.05.5
粒径 (μm)
通過効率 (%)
ー WINS
● PM2.5サイクロンLD-5用
Aerodynamic Diameter (μm)
Comparison for the penetration curve
for the US EPA WINS and the c
y
clone for the model LD-5
Penetration (%)
-US EPA WINS IMPACTOR
●PM2.5 cyclone particle size
selector for LD-5

- 6 -
2 Operating procedure
The following describes the method for installing the PM2.5 cyclone particle size selector
for LD-5 (hereafter, PM2.5 cyclone) in the LD-5/LD-5R digital dust indicator and the
basic operating procedure for the LD-5/LD-5R.
Before operating the LD-5/LD-5R, please read the LD-5/LD-5R Operation Manual to
check the method of operation and the cautions regarding operation.
(1) Attachment of PM2.5 cyclone
(2) Switch the LD-5/LD-5R power ON
The following describes the procedure for using dry-cell batteries as the power
source.
(3) Background (BG) Measurement
Background (BG) refers to default count when the detector is filled with clean air.
Background levels result in excessive dust measurement values. Before
measuring the dust, perform a BG measurement.
(4) Sensitivity Correction
Dust indicator measurement sensitivity can vary due to contamination inside the
detector and the electric or mechanical change. To correct for such variations, a
standard scattering plate is measured before dust measurements and then a
correction factor is calculated from preset values. Such a correction factor is
applied to subsequent measurement values to ensure that the instrument
maintains the same sensitivity level as when shipped from the factory or last
calibrated. Sensitivity correction is performed after the operations described in (3)
Background (BG) Measurement.
(5) Dust measurement
The following describes the procedure for performing a countdown timer
measurement for one minute.
(6) Switch the LD-5/LD-5R power OFF

- 7 -
2-1 LD-5
(1) Attachment of PM2.5 cyclone
zMake sure the LD-5 power is OFF before disconnecting the air sampling port.
1) Remove the air sampling port by turning as shown in the lower left figure. It is
possible to remove only the top part of the air sampling port, separating it into two
parts, as shown in the lower right figure. To attach the PM2.5 cyclone, turn and
remove the bottom part.
2) Attach the PM2.5 cyclone onto the LD-5 unit by turning as shown in a figure.

- 8 -
(2) Switch the LD-5 power ON
1) Make sure the LD-5 power is OFF, then
remove the battery holder panel by lifting the
protruding tab at the bottom of the panel, as
shown.
zHold the unit securely. Due to a stiff latch,
the battery holder panel may release
suddenly and be thrown from the unit.
2) Remove the battery case and install eight
AA size alkaline batteries.
3) Return the battery case to its original
position.
zInsert the battery case oriented as shown.
Inserting it upside down could cause a
malfunction.
4) Reinstall the battery holder panel by inserting the two upper tabs into the main unit.
Then press on the battery holder panel to latch it in place.
zPress on the panel until it clicks to ensure it latches securely. If not latched
securely, it could come off during operation and cause an accident.
5) When the dry-cell batteries have been installed, press the POWER switch to turn
on the LD-5 power. When the power supply is turned on, the screen is displayed.
Battery holder
p
anel
Battery case Battery connector
Top side
Battery holder
p
anel
Battery holder
p
anel

- 9 -
(3) Background (BG) Measurement
1) Turn the scattering plate knob to the [MEASURE]
position.
2) Lift up the cap to close the PM2.5 cyclone cap (see
figure on right).
3) Leave the instrument in this state for at least one minute.
(Switch the LD-5 power ON.)
4) Press the TIMER SET▼switch to set the
measurement time/mode display to [BG]. ("BG" is
displayed in the lower left of the screen. )
5) Press the START/STOP switch.
6) After waiting, the dust is measured for about six
seconds.
This BG measurement value will be cancelled starting
with the next concentration measurement.
zThe BG value cannot be set properly if it is measured with the cap opened.
Doing so could affect measurement results, such as causing the instrument
to continue displaying a measurement value of zero. If the BG value has
been measured with the cap opened, close the PM2.5 cyclone cap and
measure the value again.
zPressing the START/STOP switch during the six-second BG measurement
cancels the measurement and stops the BG value from being subtracted
from the next dust measurement (resulting in a measurement value
increased by the amount of the BG value).
PM2.5 cyclone cap

- 10 -
(4) Sensitivity Correction
1) Turn the scattering plate knob to the [SENSI. ADJ] position.
2) Confirm that [SPAN XXXCPM] appears in the lower left area of the screen.
The value displayed below [SPAN] is the standard scattering plate value for
calibration.
3) Leave the instrument in this state for at least one minute.
4) Press the START/STOP switch.
5) Measurement is performed for one minute.
6) The sensitivity correction value is calculated from measured values.
Sensitivity is automatically corrected starting with the next concentration
measurement.
7) Turn the scattering plate knob to the [MEASURE] position.
(5) Dust measurement
1) Turn the scattering plate knob to the [MEASURE]
position.
2) Lower the cap to open the PM2.5 cyclone (see figure
on right).
zMake sure the PM2.5 cyclone cap is completely
open before starting measurements.
After starting measurements (after pump intake
starts), if the cap is suddenly or not completely
opened, the pump speed (rpm) can become
unstable, resulting in a "TRBL" error display.
PM2.5 cyclone cap

- 11 -
3) Press the TIMER SET▼switch to change (select) the measurement mode display.
The display changes in the following sequence. Switch to change (select) the
measurement mode [01 min.].
BG →01 min. (measurement time*) →MANUAL →LOG →MENU →BG →
*Measurement Time: [1 min], [5 min], [10 min], etc.
Select to display this item for countdown timer measurements. Set to one minute as
shown in the figure above. The measurement time used for countdown timer
measurements is prespecified on a separate screen. For details on specifying
settings, see 5. Functions of LD-5 operation manual.
4) Press the START/STOP switch, to start dust measurements.
When the measurement starts, the accumulated count value is displayed.
5) The dust measurement automatically stops in one minute, and the accumulated
count value is displayed.
6) After finishing measurements, close the PM2.5 cyclone by lifting the cap.
After finishing measurements, pressing the MASS CONCEN.▲switch displays the
mass concentration value converted based on the measurement time, count value,
and prespecified K-value. For details on specifying settings, see 5.2 Mass
Concentration Conversion of LD-5 operation manual.
7) After finishing measurements, be sure to clean inside the detector by following the
instructions in (3) Background Measurement.
(6) Switch the LD-5 power OFF
Press the POWER switch to turn off the LD-5 power. When the power is turned off, the
display goes out.
zIf leaving the product unused for an extended period, be sure to remove the
batteries from the battery case.
TRBL
SST
COUNT
min.0000:
LOG
:
0 200 400 600 800
CPM
Measurement mode
TRBL
SST
COUNT
min.0000:
LOG
:
Instantaneous value (cpm)
Accumulated count
Remaining measurement time (HH:MM:SS)

- 12 -
2-1 LD-5R
(1) Attachment of PM2.5 cyclone
zMake sure the LD-5R power is OFF before disconnecting the air sampling port.
1) Remove the air sampling port by turning as shown in the lower left figure. It is
possible to remove only the top part of the air sampling port, separating it into two
parts, as shown in the lower right figure. To attach the PM2.5 cyclone, turn and
remove the bottom part.
●The LD-5 is used in the illustration.
2) Attach the PM2.5 cyclone onto the LD-5R unit by turning as shown in a figure.

- 13 -
(2) Switch the LD-5R power ON
1) Remove the battery case cover.
Turn the battery case cover in the direction of
the arrow in the figure and then pull it forward.
2) Insert six AA batteries into the battery case.
(Alkaline batteries are recommended.)
3) Reverse the procedures to reattach the battery
case cover.
To complete the attachment, as shown in the
figure, align the mark on the cover with the
°mark on the main unit and turn the cover
clockwise until the mark aligns with the z
mark on the main unit.
4) Turn ON the power switch to display "LD-5R
During Startup Ver. x.xx" and then the startup
screen (either the BG or SPAN measurement
mode screen).

- 14 -
(3) Background (BG) Measurement
1) Turn the scattering plate knob to the [MEASURE]
position.
2) Lift up the cap to close the PM2.5 cyclone cap
(see figure on right).
3) Leave the instrument in this state for at least one
minute. (Switch the LD-5R power ON.)
4) Press the [START/STOP] switch.
5) The BG measurement will start after a cleanup
time of approximately eight seconds has elapsed.
6) Measurement will finish after six seconds. The
BG value will be recorded and the [BG] mark will
be displayed on-screen.
This BG measurement value will be cancelled
starting with the next concentration measurement.
zThe BG value cannot be set properly if it is measured with the cap opened.
Doing so could affect measurement results, such as causing the instrument
to continue displaying a measurement value of zero. If the BG value has been
measured with the cap opened, close the PM2.5 cyclone cap and measure the
value again.
zThe BG measurement can be aborted by pressing the [START/STOP] switch
twice during the six second measurement interval. If this is performed, the
BG subtraction function does not operate during the next dust measurement.
PM2.5 cyclone cap

- 15 -
(4) Sensitivity Correction
1) Turn the scattering plate knob to the [SENSI. ADJ]
position.
2) Check that the LCD screen changes to SPAN
measurement mode.
3) Leave it for approximately one minute (until the bar
graph's instantaneous value display stabilizes).
4) Press the [START/STOP] switch.
5) The SPAN measurement is performed for one minute.
One minute later, the measurement will finish
automatically. The sensitivity correction value will be
recorded and the [SP] mark will be displayed on-
screen. (In the figure at right, the [UP] or [DOWN]
switch was pressed and the instantaneous value
graph was displayed.)
6) Turn the scattering plate knob to the [MEASURE] position.
zThe SPAN measurement can be aborted by pressing the [START/STOP] switch
during the one minute measurement interval. If this is performed, the next
measurement is corrected with the sensitivity correction value obtained with
the previous measurement.

- 16 -
(5) Dust measurement
zIt is possible to convert the relative
concentration to the mass concentration via the
configured K factor, and then display it. (The
default setting is relative concentration CPM.)
Select the desired unit in the [01.Set Unit] field
in the basic setting mode screen.
For details on specifying settings,
see 9 Functions of LD-5R operation manual.
1) Turn the scattering plate knob to the [MEASURE]
position.
2) Lower the cap to open the PM2.5 cyclone (see
figure on right).
zMake sure the PM2.5 cyclone cap is completely
open before starting measurements.
After starting measurements (after pump intake
starts), if the cap is suddenly or not completely
opened, the pump speed (rpm) can become
unstable.
3) Press the [ESCAPE] switch to change the BG
measurement mode/stop ( orange) screen to the
BG measurement mode/standby ( green). Then
change the measurement mode. Press the [UP] or
[DOWN] switch to change to the mode screen with
the desired measurement time. Then press the
[ENTER] switch.
(The one minute measurement time is shown as an
example.)
4) Press the [START/STOP] switch to start the dust
measurement. When the measurement starts, a
cumulative count value will be displayed. The
displayed content can be toggled by pressing the
[UP] or [DOWN] switch during the measurement.
For details on specifying settings, see 3-1 Screens
During Measurement of LD-5R operation manual.
PM2.5 cyclone cap

- 17 -
5) After one minute has elapsed, the dust measurement stops automatically. The
relative concentration value or the mass concentration value (determined by the
item selected for the unit setting) and the accumulated count value are displayed.
After the measurement is finished, the displayed content can be toggled by pressing
the [UP] or [DOWN] switch. For details on specifying settings, see 3-1 Screens
During Measurement of LD-5R operation manual.
6) After finishing measurements, close the PM2.5 cyclone by lifting the cap.
7) After finishing measurements, be sure to clean inside the detector by following the
instructions in (3) Background Measurement.
(6) Switch the LD-5R power OFF
Turn off the power switch. When the power is turned off, the display goes out.
zIf leaving the product unused for an extended period, be sure to remove the
batteries from the battery case.
Relative concentration value
(or mass concentration value)
Accumulated count value

- 18 -
3 Cleaning of PM2.5 cyclone
zMake sure the LD-5R power is OFF before disconnecting the PM2.5 cyclone.
1) Remove the PM2.5 cyclone by turning
as shown in a figure.
2) Disassemble the PM2.5 cyclone as
shown in the figure, wipe the parts with
a soft cloth or something similar or
lightly blow air to remove dust that has
accumulated in the dust trap.
zDo not perform ultrasonic cleaning.
The dust trap is anodized. If ultrasonic cleaning is performed on the dust trap,
its surface color may change and other effects may occur if the ultrasonic
frequency is high or if the cleaning solution is alkaline. To clean the dust trap,
wipe it with a soft cloth or something similar or lightly blow air to remove dust
that has accumulated in the dust trap.
Dust trap

- 19 -
4 Specifications
Item Code 080000-251
Product Name PM2.5 Cyclone Particle Size Selector for LD-5
Particle Separation Classification Cut 50 % of 2.5 μm particles
Suction Flowrate 1.7L/min
Dimensions W60 ×D27 ×H77 mm
Weight approx.70g
Sold separately
Item Code 080000-72
Product Name Digital dust indicator LD-5R
5 Warranty
If a Sibata product fails within one year from date of purchase, it will be repaired free of
charge.
To request repairs, contact your Sibata representative or the store where you purchased
the product.
Be sure to provide the item code, product name, model number, serial number, a
description of the problem, and other relevant information.
Consumable parts included with Sibata products are not covered by the warranty.
The warranty excludes any problems resulting from any of the following causes. Such
repairs are subject to normal service fees.
(1) Faults due to improper usage
(2) Faults or damage resulting from repairs or modifications implemented by parties
other than Sibata
(3) Faults or damage resulting from fires, earthquakes, or other natural disasters.
(4) Faults or damage occurring after purchase due to relocation, movement, falling, or
vibration
(5) Faults or damage resulting from the use of consumable items not specified by Sibata
(6) [Modifications and Repairs Are Prohibited] Never disassemble or modify this product,
as doing so will void the warranty with Sibata. Doing so may also result in an
unforeseen fault or accident.
17.01.19H(03)

Note) Shape, dimensions, specifications, and other product information are subject
to change without notice in the interest of product improvement to the extent
that product functions and applications will not be impaired.
This manual suits for next models
1
Table of contents
Other Sibata Measuring Instrument manuals

Sibata
Sibata LB-6N2 User manual

Sibata
Sibata MT-05U User manual

Sibata
Sibata DM-100S User manual

Sibata
Sibata LV-20N User manual

Sibata
Sibata AQUAB AQ-201 User manual

Sibata
Sibata LD-5R User manual

Sibata
Sibata PMP-001 User manual

Sibata
Sibata 080150-066 User manual

Sibata
Sibata LD-5D User manual

Sibata
Sibata 080150-076 User manual