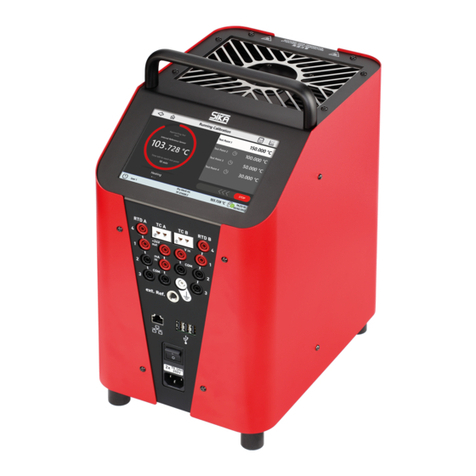
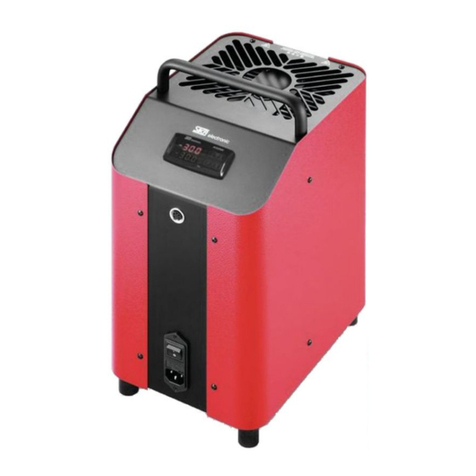
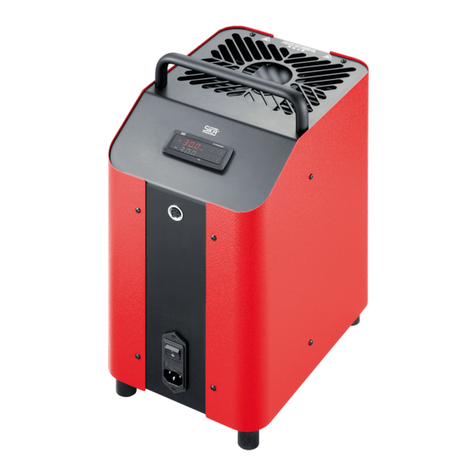
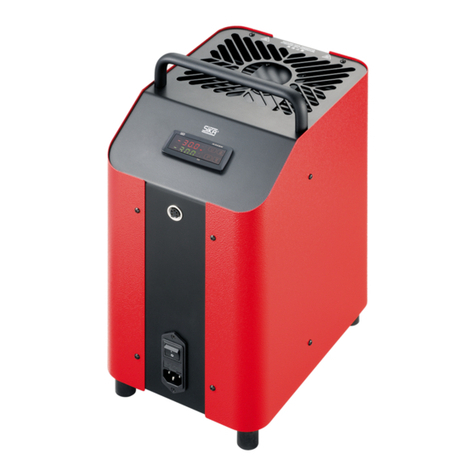
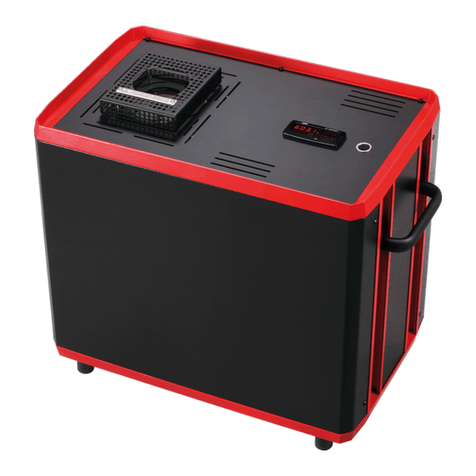
SIKA TP 37166E.2 User manual

Please keep this operating manual for future reference.
If the device is resold, please provide the operating manual along with it.
© SIKA • Ba_TP37-TP3M_en • 02/2018 .
Temperature calibrators
Series TP37 / TP3M
Types: TP 37200E.2 • TP 37165E.2 • TP 37166E.2
• TP 37700E • TP 3M165E.2 • TP 3M255E
Operating manual
(Translation)
Operating manual
.................................................. page 1 - 60

TP37 / TP3M
- 2 - © SIKA • Ba_TP37-TP3M_en • 02/2018
Table of contents page
0About this operating manual.........................................................................................4
1Device description .........................................................................................................5
1.1 Delivery, unpacking and accessories .........................................................................6
1.2 Intended use................................................................................................................7
1.3 Warranty......................................................................................................................7
1.4 Exclusion of liability ....................................................................................................8
2Safety Instructions ........................................................................................................8
2.1 Safety instructions for the application of calibration liquids ...................................10
3Construction, Function and Test Task ........................................................................11
3.1 Construction..............................................................................................................11
3.2 Function.....................................................................................................................12
3.3 Test tasks ..................................................................................................................13
4Commissioning and operation ....................................................................................14
4.1 Operating conditions .................................................................................................14
4.2 Electrical connection ................................................................................................15
4.3Preparing of the calibrator .......................................................................................16
4.3.1 Dry block calibrator ..............................................................................................17
4.3.2 Calibrator for infrared thermometer ...................................................................18
4.3.3 Calibrator for surface temperature sensors .......................................................19
4.3.4 Micro bath calibrator ............................................................................................20
4.4 Switching on, cool down and switching off ...............................................................24
5Operation .....................................................................................................................26
5.1 Main window..............................................................................................................27
5.2 Configuration range ..................................................................................................28
5.3 Window structure, operating elements and icons ...................................................28
5.3.1 Operating elements ..............................................................................................29
5.3.2 Toolbar and icons..................................................................................................30
5.4 Functionality of the calibrator...................................................................................31
5.4.1 Select Function .....................................................................................................31
5.4.2 Manage Function ..................................................................................................31
5.4.3 Configure Function ...............................................................................................32
5.5 Test specimen (DUT - Device under test) .................................................................33
5.5.1 Select DUT ............................................................................................................33
5.5.2 Manage DUT..........................................................................................................34
5.5.3 Configure DUT.......................................................................................................34


TP37 / TP3M
Technical changes reserved - 3 -
5.6 Test Task ...................................................................................................................35
5.6.1 Name ...............................................................................................................36
5.6.2 Data acquisition ...............................................................................................36
5.6.3Functionality ......................................................................................................36
5.6.4 Test specimen (DUT) .......................................................................................37
5.6.5 Test points..........................................................................................................37
5.6.6 Alarm settings ................................................................................................39
5.6.7 Scan / Barcode...............................................................................................39
5.7 Calibrator settings ....................................................................................................40
5.7.1 Calibrator Set Up ..................................................................................................40
5.7.2 Measurement reports...........................................................................................44
6Testing process / Calibration ......................................................................................45
7Problems .....................................................................................................................47
7.1 Return shipment to the manufacturer......................................................................47
8Maintenance and cleaning ..........................................................................................48
8.1 Maintenance ..............................................................................................................48
8.2 Cleaning.....................................................................................................................49
8.3 Recalibration .............................................................................................................51
8.4 Adjustment ................................................................................................................51
9Decommissioning and disposal ..................................................................................52
10 Technical data..............................................................................................................53
10.1 Characteristics TP37 / TP3M ....................................................................................53
10.2 Heating up and cooling times ...................................................................................55
10.2.1 TP 37200E.2 • TP 37165E.2 • TP 37166E.2 • TP 37700E (dry block) ..............55
10.2.2 TP 37166E.2 (Infrared and surface)......................................................................55
10.2.3 TP 3M165E.2..........................................................................................................56
10.2.4 TP 3M255E.............................................................................................................57
11 Guideline DAkkS-DKD-R 5-4 • Appendix B...............................................................58
Copyright notice:
The reproduction, distribution and utilization of this operating manual as well as the communication
of its contents to others without express authorization is prohibited. Offenders will be held liable for
the payment of damages. All rights reserved in the
event of the grant of a patent, utility model or
design.

About this operating manual TP37 / TP3M
- 4 - © SIKA • Ba_TP37-TP3M_en • 02/2018
0About this operating manual
•The operating manual is aimed at specialists and semi-skilled personnel.
•Before each step, read through the relevant advice carefully and keep to the specified
order.
•Thoroughly read and understand the information in the section "Safety Instructions".
•For calibrators with a cooling function, the term "Cooling" is also used for tempera-
tures below room temperature, in the meaning of "Heating".
If you have any problems or questions, please contact your supplier or contact us directly
at:
Dr. Siebert & Kühn GmbH & Co. KG
Struthweg 7-9 • D - 34260 Kaufungen
05605-803 0 • 05605-803 54
info@sika.net • www.sika.net
Hazard signs and other symbols used:
CAUTION! Electric current!
This sign indicates dangers which could arise from handling of electric current.
WARNING! / CAUTION! Risk of injury!
This sign indicates dangers that cause personal injuries that can lead to health defects or
cause considerable damage to property.
CAUTION! High temperature!
This sign indicates dangers resulting from high temperature that can lead to health defects or
considerable damage to property.
CAUTION! Material damage!
This sign indicates actions which could lead to possible damage to material or environmental
damage.
ADHERE TO OPERATING MANUAL!
NOTICE!
This symbol indicates important notices,
tips or information.
NO DOMESTIC WASTE!
The device must not be disposed of to-
gether with domestic waste.
Pay attention to and comply with infor-
mation that is marked with this symbol.
Follow the specified instructions and steps.
Adhere to the given order.
Check the specified points or notices.
Reference to another section, document or
source.
•Item.

TP37 / TP3M Device description
Technical changes reserved - 5 -
1Device description
The TP37 / TP3M series of calibrators test and calibrate different temperature measuring in-
struments and temperature sensors, and measure temperatures.
The calibrator can be very easily operated using the touch-sensitive screen or touch screen.
Pre-defined or self-defined testing tasks, by which the testing process is governed, are em-
ployed for this purpose.
The portable instruments are of compact and robust construction and thus allow use directly
on-site or in a laboratory. The calibrators meet the requirements of EN 61326-1, class A (in-
dustrial sector).
This TP37 / TP3M series is used for service purposes and for different industrial and labora-
tory tasks.
Thus, for example, thermometers, temperature switches/thermostats, resistance thermom-
eters and thermo-elements can be directly connected and checked.
Versions
∗
:
The TP37 / TP3M is available as a dry block, multi-function and micro bath calibrator.
It can be supplied both with a heating function as well
as a cooling and heating function.
The series and the various types are different in their
construction (tank or metal block, the temperature
range, the accuracy, the adapter sleeves and calibra-
tion inserts, the fittings and the available accessories.
Further information on the series, the models of the
individual types that can be supplied, and their fittings
can be found in our catalogues at
"catalogues.sika.net".
Type plate:
You find the type plate on the rear of the device.
It includes the type designation, the serial number and the key electric
specifications (example).
*Customised versions available on request.
Type plate example

Device description TP37 / TP3M
- 6- © SIKA • Ba_TP37-TP3M_en • 02/2018
1.1 Delivery, unpacking and accessories
All units have been carefully checked for their operational reliability before shipment.
Immediately after receipt, please check the outer packaging for damages or any signs of
improper handling.
Report any possible damages to the forwarder and your responsible sales representa-
tive. In such a case, state a description of the defect, the type and the serial number of
the device.
Report any in-transit damage immediately. Damage reported at a later date shall not be
recognized.
Unpacking:
Carefully unpack the unit to prevent any damage.
Check the completeness of the delivery based on the delivery note.
Save the packaging!
Temperature calibrators are delivered in special protective packaging.
Save the packaging for returning the instrument safely to the manufacturer for recal-
ibration or repair.
Scope of delivery and accessories:
Scope of delivery Accessories (optional)
TP37 / TP3M
according to the order data.
Test certificate.
Mains cable.
Sleeve exchange tool.
PC- and network cable.
Operating manual.
Protective packaging / transport protec-
tion.
Sensor cage*.
Drain syringe*.
Transport cover*.
Magnetic stirrer with magnet lifter*.
Work cover with 5 Silicone plugs*.
Transport case.
Adapter sleeve(s).
Infrared insert*.
Surface insert and exchange tool*.
Tub insert*.
External reference sensor TF 255-3-300.
PC software.
Network switch, barcode reader, WLAN
router.
DAkkS certificate.
Works certificate.
* only TP 37166E.2, TP 3M165E.2 and TP 3M255.E ** only TP 3M165E.2 and TP 3M255E
IMPORTANT!
Use the type plate to check if the delivered unit corresponds to your order.
In particular, for devices with electrical components, check to see if the correct power
supply voltage is specified.

TP37 / TP3M Device description
Technical changes reserved - 7 -
1.2 Intended use
The TP37 / TP3M series of calibrators may only be used for testing and calibration of suitable
temperature measuring instruments, temperature sensors and for measuring temperatures.
The calibrators may not be used for warming up or heating other parts or gases.
The calibrators have been designed for indoor use only.
The micro baths may only be used with suitable media. Permitted liquids are silicone oils,
mineral oils and water (§ 2.1 "Safety instructions for the application of calibration liq-
uids").
Hazardous media (flammable or explosive liquids or gases) may not be used.
The operational safety of the device supplied is only guaranteed by intended use. The speci-
fied limits (§ 10 "Technical data") may under no circumstances be exceeded.
CAUTION! Risk of burns!
The calibrator can become very hot when in operation. Touching hot parts can result in
serious injuries.
Never touch the metal block, the tank, the adapter sleeve or the test specimen at
temperatures above 35 °C or below 10 °C.
Allow the calibrator to cool before you remove the test specimen, clean the tank,
change the adapter sleeve or the calibration insert or switch off the calibrator.
CAUTION! Material damage!
The opening in the metal block of the calibrator is only intended to be used with adapt-
er sleeves or calibration inserts.
Using heat transfer media (oil, thermal paste or other media) can lead to incorrect
measurements and damage to the calibrator.
Never fill the metal block opening with a heat transfer medium.
Only micro baths are suitable for use with heat transfer medium.
It is your responsibility to select the instrument which is suitable for your specific application,
to connect it correctly, to carry out tests and to maintain all the components.
1.3 Warranty
The calibrator is under guarantee for 12 months as from the date of delivery for construction
errors or material defects. The guarantee is limited to repair or replacing the calibrator.
SIKA also provides an extra 5-year guarantee for calibrators which are calibrated and in-
spected annually by the SIKA DAkkS laboratory.
Opening the calibrator, unauthorised repairs or incorrect use or installation of the calibrator
automatically result in the warranty being rendered null and void.

Safety Instructions TP37 / TP3M
- 8 - © SIKA • Ba_TP37-TP3M_en • 02/2018
1.4 Exclusion of liability
We accept no liability for any damage or malfunctions resulting from incorrect installation,
in-appropriate use of the device or failure to follow the instructions in this operating manual.
2Safety Instructions
Before you install the TP37 / TP3M, read through this operating manual carefully. If the
instructions contained within are not followed, in particular the safety guidelines, this
could result in danger for people, the environment, and the device and the system it is
connected to.
The TP37 / TP3M corresponds to the state-of-the-art technology. This concerns the accuracy,
the operating mode and the safe operation of the device.
In order to guarantee that the device operates safely, the operator must act competently and
be conscious of safety issues.
SIKA provides support for the use of its products either personally or via relevant literature.
The customer verifies that our product is fit for purpose based on our technical information.
The customer performs customer-specific and application-specific tests to ensure that the
product is suitable for the intended use. With this verification all hazards and risks are trans-
ferred to our customers; our warranty is not valid.
Qualified personnel:
The personnel in charge of the installation, operation and maintenance of the TP37 /
TP3M must hold a relevant qualification. This can be based on training or relevant in-
structions.
Personnel must be aware of this operating manual and have access to it at all times.
The electrical connection should only be carried out by a fully qualified electrician.
General safety instructions:
In all work, the existing national regulations for accident prevention and safety in the
workplace must be complied with. Any internal regulations of the operator must also be
complied with, even if these are not mentioned in this manual.
Ensure that the complete operating instructions are always available in excellent condi-
tion at the calibrator installation site.
Degree of protection according to EN 60529:
Ensure that the ambient conditions at the site of use does not exceed the requirements
for the stated protection rating (§ 10.1 "Characteristics TP37 / TP3M").
Structural safety in accordance with EN 61010-1:
The calibrator must be installed in such a way that the requirements for structural safety
are met.
Only use the TP37 / TP3M if it is in perfect condition. Damaged or faulty devices must be
checked without delay and, if necessary, replaced.
If problems cannot be cleared, immediately shut down the calibrator and ensure that it
cannot be started up accidentally.
Never leave the calibrator unattended when it is in operation or in the cooling phase.
Do not remove or destroy type plates or other markings on the device, or the warranty is
rendered null and void.

TP37 / TP3M Safety Instructions
Technical changes reserved - 9 -
Special safety instructions:
Thermal fuse!
The calibrator is equipped with a temperature fuse that works independently. If there is
an over-temperature in the inside of the housing, the power supply to the heating system
is cut off. The calibrator cannot then be started any more.
After it has cooled, send the calibrator for inspection to SIKA.
Risk of injury from hazardous gases!
When liquids are heated, the evaporation can result in dangerous gases being formed.
The calibrator may not be used in an explosion-endangered atmosphere (ignitable or ex-
plosive atmosphere).
Remove all the easily flammable media from the vicinity of the calibrator.
Ensure that the calibrator cannot come in contact with easily flammable or explosive
media.
Operate the calibrator only in the temperature range permissible for the test sample.
Ensure that the test sample is securely fixed in the calibrator.
Use only suitable adapter sleeves or calibration inserts.
When doing so, also ensure that the structural safety of the calibrator is retained.
Expert mode!
When selecting the function, test sample and testing tasks, you can switch into the expert
mode for administration and configuration. The settings that are made in this mode re-
quire detailed knowledge of the calibration and method of working of calibrators.
If the settings are incorrect, the calibrator can get damaged!
IMPORTANT NOTICE!
The transport cover is equipped with a safety valve, which is activated once the pressure
reaches ~1.5 bar. This can result in hot steam being released.
Always unscrew the transport cover before putting the micro bath into service, in or-
der to avoid excessive pressure.
Wait until the micro calibration bath has cooled down before screwing on the
transport cover.
Further warnings that are specifically relevant to individual operating procedures or activities
can be found at the beginning of the relevant sections of this operating manual.

Safety Instructions TP37 / TP3M
- 10 - © SIKA • Ba_TP37-TP3M_en • 02/2018
2.1 Safety instructions for the application of calibration liquids
Before using calibration liquids, read the entire safety data sheet thoroughly. Pay particu-
lar attention to the information on the physical and chemical properties.
Only use calibration liquids that are suitable for the required temperature range and
which are not flammable.
Always wear safety goggles for the eyes when handling calibration liquids.
We recommend the following calibration liquids for the various temperature ranges:
Calibration liquid Calibration Range Flashpoint
Distilled water
2…95°C none
Silicone oil from XIAMETER®:
PMX-200 SILICONE FLUID 5 CS -40°C 123°C 133°C
PMX-200 SILICONE FLUID 10 CS
-35°C
155°C
165°C
PMX-200 SILICONE FLUID 20 CS
7°C
220°C
230°C
PMX-200 SILICONE FLUID 50 CS
50°C
270°C
280°C
Water:
Only use distilled water, otherwise excessive limescale and soiling will build up in the cal-
ibrator tank.
Silicone oil:
Use only the silicone oil recommended here.
Always read the safety data sheet supplied with the silicone oil before using it.
Always ensure adequate ventilation when working with silicone oil, since hazardous sub-
stances can be released.
Prevent silicone oil from coming into contact with your eyes.
Since silicone oil is hygroscopic, always use the transport cover to close the calibration
bath after use.
Mineral oil:
SIKA supplies the calibrators only with silicone oil.
Using mineral oil is possible, but must be done on your own responsibility. The danger
and the risk must be borne by the customer and our warranty will be rendered null and
void.
Please follow the safety data sheet of the mineral oil used.
The safety instructions for silicone oil apply analogously for mineral oils as well. The
same also applies to the corresponding sections for silicone oil in this operating manual.

TP37 / TP3M Construction, Function and Test Task
Technical changes reserved - 11 -
3Construction, Function and Test Task
3.1 Construction
The calibrator consists of a robust, black-and-red painted steel housing and has a carry-
ing handle at the top .
The front part of the housing holds the electronics of the TP37 / TP3M for controlling the ref-
erence temperature and for the touch screen .
On the front side are the main switch with fuse and mains plug connection , the connection
for the external reference , as well as the ports for the PC, the network and service .
The grille for the exhaust air is located, in the TP3M calibrators, in both the side walls of
the housing. In the TP37 calibrators, the grille is located in the upper plate of the housing
in the range of the opening of the metal block.
The rear part of the housing holds a heat-insulated calibration block with heating or cooling
elements and an integrated sensor for the reference temperature. In the case of the dry
block and multifunction calibrator, this is a metal block and in the micro bath calibrator, it
is a tank .
In the base, there are grilles for cooling the calibrator. The built-in fans control the inlet air
of the housing and of the calibration block .
An overview of the most important components of the TP37 / TP3M:
Carrying handle.
Steel housing.
Touch screen for operation and meas-
urement value display.
Main switch with fuse and mains plug
socket.
Tank (Micro bath).
Calibrator ventilation:
Exhaust through lateral and upper
housing grilles.
Metal block (Dry block).
Connection for external reference.
Ports for PC, network and service.
Calibrator, bottom view:
Calibrator ventilation
Inlet air for housing cooling.
Inlet air for tank / metal block cooling.

Construction, Function and Test Task TP37 / TP3M
- 12 - © SIKA • Ba_TP37-TP3M_en • 02/2018
3.2 Function
IMPORTANT NOTICE!
For your safety, manual operation of the calibrator, i.e. directly starting it up and its re-
maining at a certain temperature, is not possible.
The testing procedure is always started with a testing task (§ 3.3).
This ensures that the calibrator is always started with a defined "Behavior at test end"
(p. 24).
The calibrators can be used with dry block, infrared, surface or micro bath function.
The function is determined by the calibrator type and the used measuring insert.
Function
Type
Dry block Infrared Surface Micro bath
Measuring insert:
Adapter sleeve
Infrared insert
Surface insert
Calibration liquid
TP 37200E.2
-/-
-/-
-/-
TP 37165E.2
-/-
-/-
-/-
TP 37166E.2
-/-
TP 37700E
-/-
-/-
-/-
TP 3M165E.2
TP 3M255E
Method of working:
Adapter sleeves or calibration inserts that are suitable for the temperature sensors or tem-
perature measuring instruments to be tested are inserted in the calibrator (§ 4.3
"Preparing of the calibrator").
They give the test specimen a secure fit and ensure optimum heat transfer.
Once all the preparations have been carried out, the calibrator can be switched on (§ 4.4).
The calibrator heats or cools the metal block or tank to the set temperature. As soon as this
temperature has been reached and is stable, the calibrator signals accordingly.
The calibration of the test specimen can now be carried out. Then, the next test point is ap-
proached or the testing procedure is ended.
Functionality:
The measuring inserts (p. 16) of the calibrator have different characteristic values, which
were determined in our laboratory through calibration. These characteristic values are de-
fined at the factory and stored in the calibrator as a protected function.
To be able to use a measuring insert, the relevant "Functionality of the calibrator" (§ 5.4)
must be selected.
IMPORTANT! Protected list entries!
The functions, test specimens and test tasks marked with the symbol are factory-
defined. They can be neither deleted nor configured.
They serve as templates for your own functions, test specimens and test tasks, which are
marked with the symbol.

TP37 / TP3M Construction, Function and Test Task
Technical changes reserved - 13 -
3.3 Test tasks
Test tasks are containers for defined test conditions. They are helpful for recurring testing
processes, for standardising test sequences and for generating measurement logs.
All the required settings and configurations for the calibration of a test specimen are com-
piled in a test task. The parameters of the testing task are saved and linked to the selected
function and test specimen (§ 5.6).
The operation concept of the calibrator is based on pre-installed and self-defined test tasks.
They are a central component of the function and operation of the TP37 / TP3M.
The emphasis of the operating manual is on the use of test tasks during operation of the cali-
brator.
The calibrator is shipped with functions, test samples and testing tasks defined in the factory,
in which the basic settings of the calibrator are stored. If desired, customer-specific test
tasks can also be pre-set.
These protected test tasks can be neither deleted nor edited. They serve as templates for
your own self-defined test tasks. They can be copied and can then be configured.
You can define your own test tasks for different test specimens or test sequences. These test
tasks are directly saved in the calibrator and can then be easily activated. This makes quick
access to recurring test tasks possible.
Upon switching on the calibrator, the first test task of the selection list is loaded automatical-
ly, with the relevant parameters.
IMPORTANT! The function and test specimen are independent!
During the configuration of test tasks (§ 5.6) when selecting the function or the test
sample, you can switch to the respective expert mode for administration and configura-
tion.
Note here that changes to existing functions and test specimens always apply to all
the test tasks linked to them.

Commissioning and operation TP37 / TP3M
- 14 - © SIKA • Ba_TP37-TP3M_en • 02/2018
4Commissioning and operation
CAUTION! Risk of injury or material damage!
The calibrator can become very hot during operation. If the calibrator is operated without
supervision, third-party persons in the vicinity could get injured. Moreover, flammable
material could get into the calibrator and cause significant damage to property.
Never leave the calibrator unattended when it is in operation or in the cooling phase.
For safe operation of the calibrators of the TP37 / TP3M series, a proper commissioning pro-
cedure is necessary.
Commissioning includes the installation, the electrical connections, the preparation for the
test task as well as correct switching on and off of the calibrator.
Further, a visual inspection for damage is required before use.
The required steps are described in the following sections.
IMPORTANT!
Please also follow the instructions for intended use (§ 1.2), the safety instructions
(§ 2) and the information on the ambient conditions (p. 54).
4.1 Operating conditions
Select a safe installation site for commissioning the calibrator.
Installation site and operating position:
Only suitable for indoor use, do not use outdoors.
Operate only in the vertical position on an even surface. The surface must be stable,
clean, and dry.
If the operation positions do not conform to the above, the structural safety and the speci-
fied properties of the calibrator are not guaranteed.
At higher testing temperatures, please use a sufficiently big, fire-resistant supporting
surface.
Sufficient clearance around the calibrator
On the front side > 1 m, behind and to the sides > 0.5 m. Head clearance and sufficient
clear space above the calibrator.
Sufficient ventilation must be ensured.
Do not operate in the vicinity of flammable materials.
Do not install in a cupboard or other similar location.
The ventilation openings must not be blocked or covered.
The calibrator must be installed so that it can be switched off at any time.
IMPORTANT! "KILL" switch!
The plug of the mains connecting cable serves as a "KILL" switch.
Ensure that the plug is always easily accessible and easy to reach.
In an emergency, pull the plug, so that the calibrator is isolated from the mains.

TP37 / TP3M Commissioning and operation
Technical changes reserved - 15 -
4.2 Electrical connection
The electrical connections are made with the accompanying mains connecting cable.
DANGER! Risk of death due to electric current!
The TP37 / TP3M is operated at mains voltages up to 240 VAC. Contact with the mains voltage
can result in serious or fatal injuries.
Switch off the TP37 / TP3M and remove the mains connecting cable before you start
any work on live parts.
Check the following points before you connect the calibrator:
Operate the calibrator only with the approved supply voltage (§ 10.1). Ensure that the
mains voltage is the same as that specified on the type plate.
Please follow the local regulations of the energy supplier.
Connect the calibrator only to a properly installed and earthed 3-pole outlet.
Do not use any extension cables or adapter plugs.
IMPORTANT! Mains connecting cable!
The mains connecting cable may only be replaced by an equivalent cable.
Use only original cables from SIKA or approved cables of the same type with the cor-
rect design as replacements ("Electrical characteristics").
Connect TP37 / TP3M:
Connect the mains connecting cable with the connector plug of the TP37 / TP3M.
Insert the plug of the mains connecting cable in a suitable outlet.

Commissioning and operation TP37 / TP3M
- 16 - © SIKA • Ba_TP37-TP3M_en • 02/2018
4.3 Preparing of the calibrator
The preparations for the test task must be carried out with the calibrator switched off and
cooled to ambient temperature.
CAUTION! Risk of burns!
The calibrator can become very hot when in operation. Touching hot parts can result in
serious burn injuries.
Never touch the metal block, the tank, the adapter sleeve or the test specimen at
temperatures above 35 °C or below 10 °C.
Allow the calibrator to cool before you remove the test specimen, clean the tank,
change the adapter sleeve or the calibration insert or switch off the calibrator.
IMPORTANT! Empty the tank and clean it!
With micro bath calibrators (TP 3M165E.2), the tank must be emptied and cleaned to pre-
vent the adapter sleeve or the calibration insert from getting stuck.
Empty and clean the tank before you insert another adapter sleeve or calibration in-
sert.
Measuring insert:
The function of the calibrator is determined by the measuring insert. The required measuring
insert is inserted in the opening of the metal block or the tank.
It is thus easily possible to switch between the dry block, infrared, surface and micro bath
functions.
Each measuring insert has its own characteristic values, which are defined at the factory.
These characteristic values are influenced by different factors, such as: Diameter, type and
material of the measuring insert, number and diameter of the bore holes or the physical
properties of the calibration liquid.
These characteristic values are stored as protected functions for the accompanying measur-
ing inserts of the calibrator (§ 5.4).

TP37 / TP3M Commissioning and operation
Technical changes reserved - 17 -
4.3.1 Dry block calibrator
Type
TP 37200E.2
TP 37165E.2
TP 37166E.2
TP 37700E
TP 3M165E.2
TP 3M255E
Dry block
Adapter sleeves with single or multiple holes are used for the calibration of straight temper-
ature sensors.
To achieve the specified accuracy of the calibrators (§ 10.1) the temperature
sensor (test specimen) and the adapter sleeve must be matched to one another:
•The borehole of the adapter sleeve may be a maximum of 0.5 mm larger than
the diameter of the test specimen.
•The measurement element of the test specimen must be located in the ho-
mogeneous temperature zone of the adapter sleeve.
Please also follow the "Details of the DKD technical committee "Temperature
and Humidity" for the operation of temperature block calibrators" (§ 11).
Inserting:
The appropriate adapter sleeve is inserted
into the metal block with the aid of the
sleeve exchange tool.
Center the adapter sleeve so that there is
an even air gap between the adapter sleeve
and the block.
External reference sensor (optional):
Align the adapter sleeve so that the hole
for the external reference sensor is locat-
ed at 12 o’clock.
Removing and cleaning:
Let the calibrator cool before you remove the adapter sleeve.
Pull the adapter sleeve out of the metal block with the help of the sleeve exchange tool.
Clean the adapter sleeve and the metal block.
This prevents the adapter sleeve from getting stuck in the metal block.
Adapter sleeves and sleeve exchange tool

Commissioning and operation TP37 / TP3M
- 18 - © SIKA • Ba_TP37-TP3M_en • 02/2018
4.3.2 Calibrator for infrared thermometer
Type
TP 37200E.2
TP 37165E.2
TP 37166E2
TP 37700E
TP 3M165E.2
TP 3M255E
Infrared
-/-
-/-
-/-
A special infrared insert is used for the contact-less measurement infrared thermometers.
This makes calibration fast and easy.
The infrared insert has a special design and surface coating on the in-
side. As a result, an emissivity of 0.9994 (black body) is reached.
The additional holes in the border (2 x 3.5 mm • 1 x 4.5 mm) are for ex-
ternal reference sensors. In this manner, the exact temperature on the
inside of the infrared insert can be measured.
IMPORTANT! Size of the measuring spot!
The measuring spot of the infrared thermometer must project itself to the floor of the in-
frared insert during the calibration. The measuring spot must be smaller than the inner
diameter and must not touch the wall of the infrared insert.
Inserting:
The infrared insert is inserted into the metal block with
the aid of the sleeve exchange tool.
Center the infrared insert so that there is an even air
gap between the infrared insert and the block.
External reference sensor (optional):
Align the infrared insert so that the hole for the external
reference sensor is located at 12 o’clock.
Removing and cleaning:
Let the calibrator cool before you remove the infrared
insert.
Pull the infrared insert out of the metal block with the help of the sleeve exchange tool.
Clean the infrared insert and the metal block.
This prevents the infrared insert from getting stuck in the metal block.
FORMATION OF ICE AND DEW!
At temperatures < 0 °C and higher humidity levels ice or condensation can form in the in-
frared insert. This can result in the calibration of the infrared thermometer being dis-
torted.
The forming of ice or condensation can be significantly reduced by covering the measuring
opening of the infrared insert.
Keep the measuring opening closed for as long as possible.
Only open the measuring opening briefly for measuring.
Existing ice or condensation can be removed by heating the infrared insert.
Infrared insert

TP37 / TP3M Commissioning and operation
Technical changes reserved - 19 -
4.3.3 Calibrator for surface temperature sensors
Type
TP 37200E.2
TP 37165E2
TP 37166E.2
TP 37700E
TP 3M165E.2
TP 3M255E
Surface
-/-
-/-
-/-
A special surface insert is used for calibrating surface temperature sensors. This makes cal-
ibration fast and easy.
The surface insert is hollow from the bottom and longer
than the adapter sleeve. For reference sensors, three bore-
holes are located directly under the surface (1 x 3mm •
1x 3,1mm • 1x 4,5mm). Thus, the exact surface tempera-
ture of the insert can be measured.
The two threaded boreholes in the border are for the ac-
companying exchange tool.
Inserting:
The surface insert is inserted into the metal block with
the aid of the exchange tool.
Center the surface insert so that there is an even air
gap between the surface insert and the block.
External reference sensor (optional):
Align the surface insert so that the hole for the external
reference sensor is located at 12 o’clock.
Removing and cleaning:
Let the calibrator cool before you remove the surface insert.
Pull the surface insert out of the metal block with the help of the exchange tool.
Clean the surface insert and the metal block.
This prevents the surface insert from getting stuck in the metal block.
IMPORTANT NOTICE!
The calibration of surface temperature sensors is very difficult and not uncontroversial.
The temperature sensor, which are placed on the surface, conduct heat away from the
surface and thus produce a cold spot on the surface to be measured.
Using a multifunction calibrator, the calibration temperature is generated in a specially con-
structed surface insert and measured directly under the surface with an external reference
thermometer.
The reference thermometer also determines the temperature of the cold spots by integrating
the temperature over the sensitive length of the reference thermometer and can therefore
offer a true temperature calibration of surface temperature test specimens.
The surface insert is constructed in such a way that the included external reference delivers
the best possible results because the depth of the boreholes is adapted to the sensitive
length. If you need to make your own external reference for a comparison calibration, ensure
that the sensitive length is known and that it is situated in the middle of the calibration sur-
face
Surface insert and
exchange tool

Commissioning and operation TP37 / TP3M
- 20 - © SIKA • Ba_TP37-TP3M_en • 02/2018
4.3.4 Micro bath calibrator
Type
TP 37200E.2
TP 37165E.2
TP 37166E.2
TP 37700E
TP 3M165E.2
TP 3M255E
Micro bath
-/-
-/-
-/-
-/-
CAUTION! Risk of injury - Wear safety goggles!
Calibration liquid can be ejected when working with the micro bath calibrator.
Always wear safety goggles for the eyes when handling calibration liquids.
The micro bath is used for calibrating sensors with special shapes or dimensions. Direct con-
tact between the sensor and the calibration liquid ensures excellent heat transfer.
The calibration liquid is poured directly into the tank or into a tub insert (p. 21).
The micro bath includes the transport cover, the work cover, the sensor cage, the magnetic
stirrer, the drain syringe, the magnetic lifter and as an accessory, the tub insert. The individ-
ual components are described below.
Transport cover:
The transport cover serves for secure closing of the micro bath. It prevents spillage of the
calibration liquid during transport.
CAUTION! Safety valve!
The transport cover is equipped with a safety valve, which is activated once
the pressure reaches ~1.5 bar. This can result in hot steam being released.
Always unscrew the transport cover before putting the micro bath into
service, in order to avoid excessive pressure.
Work cover:
The work cover fulfils various tasks during the operation.
•It reduces the evaporation of the calibration liquid to a minimum.
•It reduces the cooling on the surface of the calibration liquid.
•It ensures stable positioning of the test specimens in the micro bath.
The work cover is screwed on to the micro bath and has five openings for
test specimens. The unused openings can be closed with suitable silicon
plugs.
Sensor cage and magnetic stirrer:
The sensor cage protects the magnetic stirrer. It prevents the sensors from
blocking the magnetic stirrer. The function of stirring is ensured by the sen-
sor cage.
The magnetic stirrer ensures a uniform temperature distribution in the cal-
ibration liquid. The speed of the magnetic stirrer is set in Configuration
range (§ 5.2) or in the window "Configure Function" (§ 5.4.3 "Stirring
speed").
IMPORTANT! Limited life part!
The magnetic stirrer is a limited life part.
Replace worn-out magnetic stirrers. (§ 8.1 "Maintenance").
This manual suits for next models
7
Table of contents
Other SIKA Measuring Instrument manuals

SIKA
SIKA TP 18 200 E User manual

SIKA
SIKA TP 28 1300 E Series User manual

SIKA
SIKA TP 17 *** M Series User manual

SIKA
SIKA TD 32500 User manual

SIKA
SIKA E2 User manual

SIKA
SIKA TP 17165M User manual

SIKA
SIKA TP 17 *** M Series User manual

SIKA
SIKA Type E User manual

SIKA
SIKA TP 18 600 E User manual

SIKA
SIKA MH3111 User manual