manuals.online logo
Brands
  1. Home
  2. •
  3. Brands
  4. •
  5. Simoco
  6. •
  7. Radio
  8. •
  9. Simoco SCP9150 User manual

Simoco SCP9150 User manual

Other Simoco Radio manuals

Simoco SDM600 Series User manual

Simoco

Simoco SDM600 Series User manual

Simoco SDM610 User manual

Simoco

Simoco SDM610 User manual

Simoco SRM9030 User manual

Simoco

Simoco SRM9030 User manual

Simoco SRM9020PLUS User manual

Simoco

Simoco SRM9020PLUS User manual

Simoco SDM600 Series User manual

Simoco

Simoco SDM600 Series User manual

Simoco P25 SRM9030 User manual

Simoco

Simoco P25 SRM9030 User manual

Simoco SDM730 User manual

Simoco

Simoco SDM730 User manual

Simoco P25 SRM9030 User manual

Simoco

Simoco P25 SRM9030 User manual

Simoco SRM9022 User manual

Simoco

Simoco SRM9022 User manual

Simoco SDP660 User manual

Simoco

Simoco SDP660 User manual

Simoco SRM9030 User manual

Simoco

Simoco SRM9030 User manual

Simoco P25 SRM9022 User manual

Simoco

Simoco P25 SRM9022 User manual

Simoco SRM9000 User manual

Simoco

Simoco SRM9000 User manual

Simoco SRM9030 plus User manual

Simoco

Simoco SRM9030 plus User manual

Simoco P25 SRM9022 User manual

Simoco

Simoco P25 SRM9022 User manual

Simoco SRM9030 User manual

Simoco

Simoco SRM9030 User manual

Simoco SDM630 User manual

Simoco

Simoco SDM630 User manual

Popular Radio manuals by other brands

Grundig G6 AVIATOR owner's manual

Grundig

Grundig G6 AVIATOR owner's manual

Makita DMR114 instruction manual

Makita

Makita DMR114 instruction manual

PURE Move R3 manual

PURE

PURE Move R3 manual

Motorola CP040 Detailed service manual

Motorola

Motorola CP040 Detailed service manual

Bosch GPB18V-5C Operating/safety instructions

Bosch

Bosch GPB18V-5C Operating/safety instructions

Ocean Digital WR-230 user manual

Ocean Digital

Ocean Digital WR-230 user manual

Realistic TRC-457 owner's manual

Realistic

Realistic TRC-457 owner's manual

Uniden AX 144 owner's manual

Uniden

Uniden AX 144 owner's manual

SIGNIFY EA2173 instruction manual

SIGNIFY

SIGNIFY EA2173 instruction manual

auna multimedia 10026443 user manual

auna multimedia

auna multimedia 10026443 user manual

GME TX680 instruction manual

GME

GME TX680 instruction manual

Motorola MTM5 00 Series Basic service manual

Motorola

Motorola MTM5 00 Series Basic service manual

Tivoli Audio ONE+ owner's manual

Tivoli Audio

Tivoli Audio ONE+ owner's manual

Sirius Satellite Radio SDVK1 installation guide

Sirius Satellite Radio

Sirius Satellite Radio SDVK1 installation guide

Sirius XM RAdio EDGE user guide

Sirius XM RAdio

Sirius XM RAdio EDGE user guide

Trevi XF 100 user guide

Trevi

Trevi XF 100 user guide

EisSound KBSound iSelect user manual

EisSound

EisSound KBSound iSelect user manual

Kirisun DM588-02 user manual

Kirisun

Kirisun DM588-02 user manual

manuals.online logo
manuals.online logoBrands
  • About & Mission
  • Contact us
  • Privacy Policy
  • Terms and Conditions

Copyright 2025 Manuals.Online. All Rights Reserved.

TNM-U-E-0106, Issue 1.1 © Simoco 2012
Simoco Group, Field House, Uttoxeter Old Road, Derby DE1 1NH
Tel: +44 (0) 1332 375500. Fax: +44 (0) 1332 375501. www.simocogroup.com
SCP9150 COVERT RADIO
B
EFORE
U
SE
Ensure that a fully charged battery is fitted to the radio.
Ensure that the antenna is firmly screwed in to the antenna
socket.
Check that voice messages have been programmed into the
radio. (Six transmit voice status messages, power on and alarm
messages).
Check that the wiring harness and accessories are connected;
refer to connection diagram over page.
T
URNING
T
HE
R
ADIO
O
N AND
O
FF
To turn the radio on, press the blue Power key on the radio briefly.
The LED next to the power key will flash green for a second to
confirm power is on and the power up voice message will be
announced.
When the radio is on, the LED will flash green briefly every 5
seconds (can be disabled in configuration).
To turn the radio off, press and hold the blue Power key until the
LED turns red. A brief press of the blue Power key also
announces the currently selected radio channel.
T
O
R
ECEIVE
C
ALLS
Select the required channel using the Channel Up/Down keys on
the controller, channels will be announced by voice (16 channels
available). If the channel is busy, the LED indicator flashes
yellow.
If the radio is receiving, the LED will be green.
On radios with selective mute, only the calls relevant to you are
heard.
Re-adjust the volume control as required for receiving.
T
O
M
AKE
A
C
ALL
Select the required channel using the Channel Up/Down keys on
the controller.
Press and hold the PTT key and speak into the microphone to
transmit (wait for the P25 Grant tone beep).
Release the PTT key to end the transmission. When transmitting,
the LED is illuminated red.
S
ENDING A
P
RE
-R
ECORDED
V
OICE
M
ESSAGE
To transmit a pre-recorded voice message, press the Message
Mode key (also volume knob). A voice message will announce
the current message.
Use the Channel Up/Down keys to select the required voice
message. Once the message has been selected, press the PTT
and the message will be transmitted to air. Message mode times
out after 4 seconds.
B
ATTERY
To remove battery: press down on the release (1) and lift battery
out (2).
If the battery is low, the LED flashes red and a voice message will
announce battery low or critical. The battery critical message
means the radio is about to shut off.
W
HISPER
M
ODE
Whisper Mode is for situations where the user needs to transmit
with a quietly spoken voice, possibly so others cannot overhear
the user. When Whisper Mode is on, the microphone input
sensitivity is increased.
Whisper Mode is set with a function key, generally F11. This
mode operates as a toggle, i.e. to turn on Whisper Mode, press
the key once, and to turn if off, press it again.
C
ARE
O
F
Y
OUR
R
ADIO
To keep your Radio clean use a slightly DAMP soft cloth for all
exterior surfaces - DO NOT use chemical, aerosol or abrasive
cleaners.
To ensure efficient operation, the battery contacts should be
periodically cleaned with a soft damp cloth.
Batteries must be disposed of in accordance with your local
Health & Safety Regulations. Do NOT incinerate or dispose of as
normal waste.
GENERAL WARNINGS:
Do NOT operate the radio if the antenna has become
disconnected or damaged.
Obey the 'Turn Off Two-way Radios' signs where these are
posted, e.g. on a petrol station forecourt.
Do NOT use or store the battery above +60 °C.
F
URTHER
I
NFORMATION
For more operational information, refer to the SCP9150 P25 User
Manual (TNM-U-E-0098).
Power On/Off
Function Key 7 Antenna Socket
Accessory
Connector
LED Indicator
TNM-U-E-0106, Issue 1.1 © Simoco 2012
Simoco Australasia, 1270 Ferntree Gully Road, Scoresby, Victoria, 3179, Australia.
Tel: +61 3 9730 3800. Fax: +61 3 9730 3968. www.simocogroup.com/australasia
PAR-9150-RL1 Accessory Harness Connections.
The above diagram shows the connections between the covert
radio, RCU, earphones and Phonak Cobra ® covert microphone
kit.
The earphones socket is compatible with 3.5 mm stereo jack
personal earphones as commonly used with MP3 music players.
The Phonak Cobra ® socket is compatible with Phonak induction
loop wireless covert earpiece and neck loop microphone.
I
F
E
XPERIENCING
P
ROBLEMS
The SCP9150 Radio is a high quality reliable product. In the
unlikely event of a problem, please check the following points
before contacting your supplier:
If the Radio fails to work, check that the battery is charged and
correctly fitted and that the radio is switched on.
If the radio does not receive or send calls, check that the antenna
is correctly fitted and the volume is turned up.
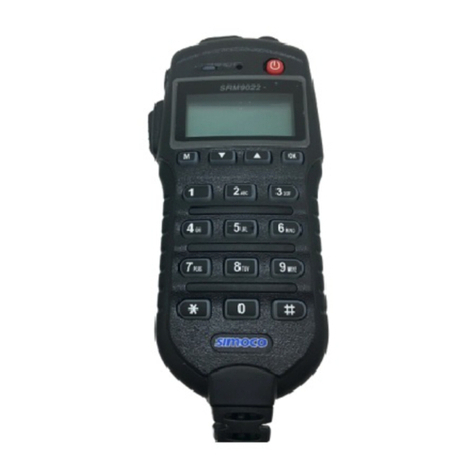
PAR-9150THS Test Handset
The Test Handset is used for recording and reviewing voice
messages on the SCP9150 Covert Radio.
•Connect the Test Handset unit to the SCP9150.
•Turn on the SCP9150. The Main Menu will display.
•Press the M key and use the Up/Down keys to navigate to the
Edit Message menu.
•Press OK to select Edit Message.
•The message number will be displayed (1-6 or
Alarm/Powerup). To select another message, use the scroll
keys. Note that new message will overwrite the old message.
•Press OK for the options of Play, Record and Delete.
•Use Up/Down keys to select Record and press OK.
•To start recording, press PTT and wait for the beep. After the
beep, speak to record the message, when finished, release
PTT. Message limit is 8 seconds.
•The menu will show the Play option. Press OK to review the
message.
•Once the message has finished replaying, either select
another message with the OK key or press Back to exit.
PAR-9180LMS4 Demonstration Controller
•The received audio volume is adjusted by the Up/Down keys
on the controller.
•To transmit, press the PTT on the controller.
•To preview a voice message, press the “C” key on the
controller. This will turn on the voice Message Mode.
•Use the Up/Down keys to select another message within 4
seconds of pressing the “C” key. After this time, Message
Mode will turn off.
•Channels are changed by holding down the SCP9150 blue
key and using the Up/Down keys on the controller.
•Whisper Mode is toggled on and off by the orange key on the
controller.
SCP9150
V
OICE
M
ESSAGES
Message Meaning
Channel 1 –16 Channel selected
Whisper mode on Whisper mode selected
Whisper mode off Whisper mode is off
Encryption on Encryption is on
Encryption off Encryption is off
Battery low Battery is low, change it
Battery critical Battery is almost dead
Alarm mode on Radio is in Alarm mode
Keys Deleted Encryption keys deleted
Message mode off Message mode time out
To Radio Accessory Connector
To Remote Controller Unit
(RCU), 4 Pin Hirose Connector
To Earphones, 3.5mm tereo
To Phonak "Cobra" Wireless
et, 6 pin Hirose Connector
Message
On/Off
PTT
Whisper
On/Off
Volume
Up/Down
Scroll
Up/Down