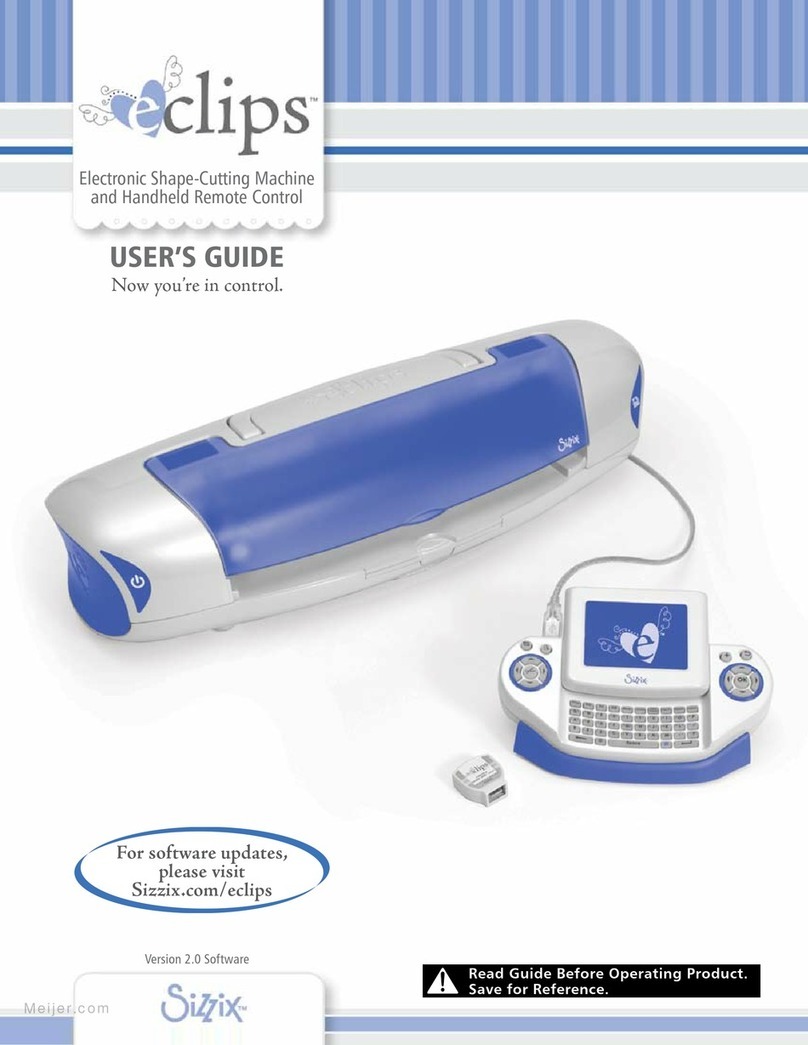
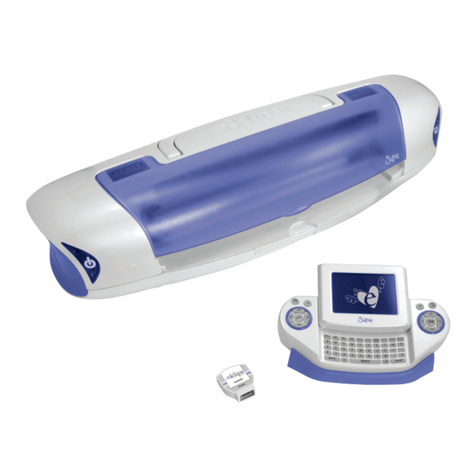
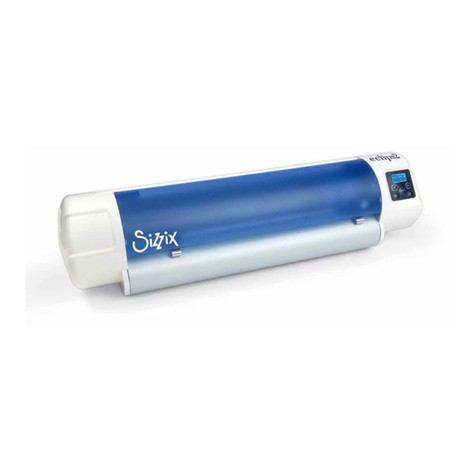
SIZZIX eclips2 User manual

SUBSECTION
Read Guide Before Operating Product.
Save Guide For Reference.
eCAL lite Software
Access Code included!
by Sizzix™
™
Pantone P 100-8C
(CMYK Coated)
™
by Sizzix™
DIY Electronic Cutter
Font: Humanist 777
by Sizzix™
™
Pantone P 100-8C
(CMYK Coated)
™
by Sizzix™
DIY Electronic Cutter
Font: Humanist 777
USER’S GUIDE

2IMPORTANT SAFETY INSTRUCTIONS
IMPORTANT SAFETY INSTRUCTIONS
READ THESE IMPORTANT SAFETY INSTRUCTIONS
THIS DEVICE IS INTENDED FOR HOUSEHOLD USE ONLY
WARNING
To reduce the risk of fire, electrical shock or personal injury, it is important that you read and
understand all the instructions and warnings that come with your eclips®2 DIY Electronic Cutter
(“Product”).
ELECTRICAL SHOCK HAZARD
Product is an electrical device. Use with caution. Observe the following precautions:
• Do not operate Product on wet surfaces or near any water sources (tub, shower, sink, etc.).
• Keep liquids and beverages away from Product.
• Unplug Product from outlet when not in use or before cleaning.
• Unplug Product when removing or installing Blades or Blade Holder.
PINCH HAZARD
Cutting Carriage can pinch fingers or hand. Feed Rollers can catch hair or clothing.
• Keep fingers away from moving parts.
• Keep hair and clothing away from moving parts.
CUTTING HAZARD
Cutting Blades are sharp. Handle with care.
• Keep fingers away from exposed blade.
Keep away from Children
• Choking hazard. Small parts.
This Product has a Class 1 laser and complies with International Standards EN 60825-1;
a Class 1 laser product is safe under reasonably foreseeable conditions of operation.
Use of controls or adjustments or performance of procedures other than those specified
herein may result in hazardous radiation exposure.
• DO NOT disassemble the device.
• DO NOT shine the laser on a reflective surface.
• DO dispose of the Product according to the local laws and regulations of your region.
• DO NOT look directly at laser at any time.
GENERAL SAFETY RULES:
• Read and understand all the instructions and warnings that come with the Product.
• Always operate Product on a dry, clean, level surface.
• Do not operate Product with wet hands.
• Keep area of operation well lit.
• Do not operate Product near flammable liquids or gases.
• Do not operate Product out of doors.
• Do not unplug Product by tugging or pulling the power cord.
SAVE THESE INSTRUCTIONS AND WARNINGS and keep them near your eclips®2 DIY Electronic Cutter.
Please visit sizzix.com for more information.
NOTICE The device complies with Part 15 of the FCC Rules. Operation is subject to the following two
conditions: (1) this device may not cause harmful interference, and (2) this device must accept
any interference received, including interference that may cause undesired operation.

3
2
5
4
6
7
8
1
3
CONTENTS
SUBSECTION
Read Guide Before Operating Product.
Save Guide For Reference.
eCAL lite Software
Access Code included!
by Sizzix™
DIY Electronic Cutter
USER’S GUIDE
CONTENTS
1. eclips®2 DIY Electronic Cutter (26" x 6 1/2" x 7")
(Model # EC-C1400)
2. Universal Power Supply
3. Power Cord
4. eclips®2 User's Guide
5. Blade Holder
6. Blades, Standard, 2 Pack
7. 12" x 12" Cutting Mat**
8. 6ft USB 2.0 Cable
To install eCAL lite Software for your new eclips®2 DIY Electronic Cutter:
1. Enter your eCAL lite Access Code, which can be found at the bottom of this page.
2. Go to http://www.sizzix.com/eCAL-lite
3. Enter your Name, Email Address and Access Code in the appropriate boxes. An Activation Link will be sent to the email
address you enter, so be sure to use a valid address.
4. Check your Inbox for an email from CraftEdge containing your eCAL lite software Activation Link. If you do not see the
email, check your Junk Folder.
5. Click the link in your email to download the eCAL lite software. If you experience problems with the provided link, copy
the link directly into your browser.
6. Open up the eCAL lite installer and follow the instructions to install the eCAL lite software application on your computer.
7. When the activation prompt appears, enter the eCAL lite Serial Number that was provided in your email.
8. After successfully activating* and registering your eCAL lite software, connect the eclips®2 DIY Electronic Cutter to your
computer with the USB cable provided.
CONTENTS
*If your software doesn’t activate or if you’re not connected to the Internet, you can manually activate eCAL lite from the Help menu or go
to www.craftedge.com.
**12" x 24" Cutting Mat also available (sold separately). Visit sizzix.com to see a complete selection of available accessories.
00000-00000-00000-00000
eCAL lite
00000-00000-00000-00000
eCAL lite
Helvetica Nue 35 Thin
Adobe Jenson Pro
eCAL lite
application window for booklet page 3
Helvetica Nue 65 Medium
eCAL lite
Access Code Sticker

4
Right Side of Machine
Computer USB Port
Depth Selection
Arrow
1. Plug Power Cord into Universal Power Supply.
2. Plug Universal Power Supply into back of eclips2 Machine.
3. Plug USB cable into back of eclips2 Machine.
4. Plug flat end of USB cable into USB port of computer.
CONNECTING
SET UP
DO NOT adjust blade depth while Machine is operating.
NOTICE
SET UP
SETTING THE BLADE DEPTH
Lower Number for Thinner Material
Higher Number for Thicker Material
Printed on a ring around the Blade Holder Top are Blade Depth Settings, ranging from 1 to
6. These numbers can be selected individually by setting the Depth Selection Arrow on the
number relative to the material you will be cutting.
As a general rule, thinner materials, such as paper and vinyl, require a lower number Blade
Depth Setting, while thicker materials, such as light chipboard and heavy cardstock, require
a higher number Blade Depth Setting. For optimal results, try a test cut and make the
necessary adjustments to the settings before performing the final cut.

5
CUTTING BLADE MAINTENANCE
Lift open Machine Cover to expose
Carriage and Blade Holder Clamp.
Loosen Clamp by turning
Clamp Screw counterclockwise,
approximately 1/4 of a
turn. IMPORTANT: Spring
on end of Clamp Screw
MUST be kept in place.
Place Blade Holder into Clamp,
making sure that Depth Selection
Arrow is facing out.
1 2 3
Rollers
Guides
Clamp Screw
Top Edge of Clamp
Depth Selection
Arrow
White Ring
Angled
Cutting Edge
Safety Cap
Insert this end
into Blade Holder
Non-Cutting Side
Tighten Blade Holder by turning
the Clamp Screw clockwise, until
Blade Holder is secure.
4
Clamp Screw
Clamp
SET UP
CAUTION: CUTTING HAZARD Blade is sharp, handle with care.
WARNING: MOVING PARTS Keep fingers, hair and clothing away.
CAUTION: CUTTING HAZARD Keep fingers away from exposed blade.
CAUTION: Always unplug Machine before removing or installing Blade Holder.
INSTALLING THE CUTTING BLADE HOLDER
Carefully remove Safety Cap from
Blade, exposing Angled Cutting
Edge.
Carefully insert Non-Cutting Side
of Blade into hole at bottom of
Blade Holder. Blade is held in place
magnetically.
Note that Blade is exposed, but
barely visible, when inserted
properly.
1 2 3
INSERTING THE BLADE INTO THE BLADE HOLDER

6
1 2
Pressing Power button
again will turn the
Machine OFF.
1 2
1 2
Replace plastic cover on
Cutting Mat when not in use.
SET UP
DO NOT unplug USB cable from computer while Machine is in use. This will
cause loss of data.
NOTICE
WARNING: MOVING PARTS Keep fingers, hair and clothing away.
3
Activate loading using
eCAL software on your
Computer.
STARTING THE MACHINE
CUTTING MAT
LOADING THE CUTTING MAT INTO THE MACHINE
Rollers
Guides
Rollers
Guides
Front
12" - 24"
12" – 24"
12"
WORKSPACE
PLACEMENT
Leave 12 to 24 inches of clear space behind your eclips2 Machine to allow full
Cutting Mat movement.
Place your eclips2 Machine at least 12 inches from the edge of your work surface to
prevent it from tipping over and causing possible injury.
ENVIRONMENT
Place eclips2 Machine on a clean, level, dry and sturdy surface.
PLACING MATERIAL ON THE CUTTING MAT
Peel back and remove plastic cover
from Cutting Mat.
Align material to be cut with top-left
edge of Cutting Mat. Press evenly into
place.
Open cover (Cutting Mat can also be
loaded with Machine cover closed.)
When removing more intricate
shapes from Cutting Mat, an eclips
Spatula* is recommended (sold
separately).
*Visit sizzix.com to see a complete selection of available accessories.
Plug Power Cord into wall outlet.
Plug the other end into your eclips2
Machine.
Press Power button (front of Machine shown).
Unplug Machine when not in use.
Place Cutting Mat between Alignment Guides
and insert into Machine until the leading edge
touches the Rollers.

7
CUTTING BLADE MAINTENANCE
CLEANING THE CUTTING BLADE
MAINTENANCE
MAINTENANCE
Loosen Blade Holder Clamp
by turning Clamp Screw
counterclockwise. Remove
Blade Holder.
Push down on Blade Ejection Pin to
reveal Blade. Carefully remove and
discard used Blade.
Carefully insert new Blade into hole
at bottom of Blade Holder; Blade is
held in place magnetically. Replace
Blade Holder in Machine, as shown
on page 5.
2 3
4
Blade Ejection Pin
Blade
CAUTION: CUTTING HAZARD Keep fingers away from exposed blade.
WARNING: CHOKING HAZARD Small parts. Keep away from children.
CAUTION: CUTTING HAZARD Blade is sharp, handle with care.
CAUTION: Always unplug Machine before removing or installing Blade Holder.
Non-Cutting Side
ADJUSTING THE CUTTING BLADE DEPTH
REPLACING THE CUTTING BLADE
Lift open Machine Cover to expose
Carriage and Blade Holder Clamp.
1
Rollers
Guides
Clamp Screw
After prolonged use, the Cutting Blade may not cut as precisely as it once did. To help prolong the life of the Cutting
Blade, remove it from the Blade Holder and clean it with Isopropyl Alcohol (rubbing alcohol) poured onto a clean paper
towel. Remove any material left inside the Cutting Blade Holder, using a Die Pick from the Tool Kit (sold separately).
Visit sizzix.com to see a complete selection of available accessories.
Printed on a ring around the Blade Holder Top are Blade Depth Settings, ranging from 1 to 6. These numbers can be
selected individually by turning the wheel to the number relative to the material you are using. Refer to page 4 for
more information about setting the Blade Depth.

TROUBLESHOOTING
Problem: eclips2 system will not turn on ����������������
• Unplug system from wall outlet before troubleshooting. Make sure all components and connectors are plugged in
properly (see pg. 4). When everything is connected, plug system into wall outlet and press power ON (see pg. 6).
Problem: eclips2 Machine freezes up �����������������
• Turn off Machine and restart (see pg. 6).
Problem: Machine is not cutting with its usual pristine quality �����
• Your Cutting Blade may be worn and need replacing (see pg. 7).
• Make sure material to be cut was correctly selected in the eCAL application's cut settings.
• If you are using a material not listed, you can manually change the Speed, Pressure and Blade Depth, using the eCAL application.
Please note that not all materials will be compatible with the Machine.
Problem: Cutting Blade does not cut all the way through my material ��
• Make sure Cutting Blade is installed properly (see pg. 5).
• Make sure material to be cut was correctly selected in the eCAL application's cut settings.
• Increase cutting pressure or decrease cutting speed manually, using the eCAL application. If Blade still does not cut through the
chosen material, the Blade needs to be adjusted (see pg. 4) or replaced (see pg. 7).
Problem: The corners of my cutouts are wrinkled ������������
Make sure you are using recommended materials with the correct eCAL settings. If you have confirmed this:
• Blade may need to be replaced for a sharper cut.
• Pressure setting may be too high (change to a lower number for lesser pressure).
• Cutting Mat may have lost its adhesion.
• Speed setting may be too fast (change speed to a slower, lower number).
• Blade Depth Setting may be too high (change Blade Depth to a lower number).
Problem: Machine is cutting outside of paper �������������
• Preview the image before you cut it, to see how it will fit on the material you are working with; make any necessary adjustments.
Problem: Material keeps shifting from its original position during cutting
• If your material is no longer adhering to the Cutting Mat, it is time to replace the Cutting Mat* or re-coat it with eclips Spray
Adhesive (sold separately)*.
• If you are using a material that has an adhesive side covered by a protective, slippery backing, turn the adhesive side face-up,
so that the material can better adhere to the Cutting Mat. Be sure to use the Mirror feature to reverse the artwork to its proper
orientation.
Problem: Material does not stick to Cutting Mat ������������
• Remove clear protective sheet from Cutting Mat (see pg. 6). Using the eclips Spatula included in the Tool Kit (sold separately)*,
make sure all debris has been removed from the Cutting Mat. Align material to top-left corner of Cutting Mat and press evenly
into place. If material will not stick to Cutting Mat, replace it or re-coat it with eclips Spray Adhesive (sold separately)*.
Problem: Cutout cannot be removed from Cutting Mat ���������
• Use the eclips Spatula (sold separately)* when removing cutouts from the Cutting Mat.
*For a complete selection of available accessories and replacement Cutting Mats, visit sizzix.com.
TROUBLESHOOTING
8
For latest updates to the User's Guide, please visit sizzix.com.

9
END USER LICENSE AGREEMENT
Revised: LGL/sw/121013/v2
ECLIPS®2 DIY ELECTRONIC CUTTER BY SIZZIX™
Ellison Educational Equipment, Inc., doing business as
Sizzix (“Sizzix”) is willing to grant to you a license to use
the eclips®2 DIY Electronic Cutter (the “Product”), subject
to your acceptance of the following terms and conditions.
Please read the terms of this Agreement carefully. Your use
of the Product or any components will constitute acceptance
of the terms of this Agreement. If you do not agree to
these terms, you may not use the Product and you should
contact Sizzix for instructions regarding the return of the
Product.
1. License. Subject to the terms of this Agreement, Sizzix
hereby grants you a non-exclusive, non-transferable, royalty-
free, limited license to use the Product and any associated
components, software, firmware and documentation for
personal, non-commercial purposes solely in connection
with the use of the Product for its intended purpose as
described in the applicable documentation. You may assign
this license only as part of a sale or transfer of the Product
and all components, and only if the recipient agrees to
comply with the terms of this Agreement. Your rights under
this Agreement will terminate upon such assignment.
2. Restrictions. Except to the extent expressly permitted
under applicable law, you may not reverse engineer,
decompile, or otherwise attempt to make a copy of,
or publish, the software, firmware or documentation
included with the Product. Sizzix retains ownership of
the Product design and associated software, firmware
and documentation, together with all related intellectual
property rights, subject only to the limited rights granted
to you in this Agreement. No right to use Sizzix, eclips2 or
any other brand of Ellison Educational Equipment is granted
under this Agreement. You agree to comply with all export
laws and regulations applicable to the Product and its
components.
3. Warranty. The product is subject to the Limited
Warranties included in the Product documentation, which is
hereby incorporated into this Agreement.
4. General. This agreement is governed by the laws of the
State of California. All disputes relating to the Product or
this Agreement shall be subject to the exclusive jurisdiction
of the state and federal courts in Orange County, California.
This Agreement is the entire agreement between you and
Sizzix relating to the Product, and it supersedes any prior
communications and any conflicting terms contained in any
purchase order, quote or acknowledgment. No amendment
to this Agreement shall be binding unless signed by Sizzix
and you.
5. Contacting Sizzix. For Product inquiries, please contact:
North America:
sizzix.com
877-355-4766 toll-free in USA
949-598-8821 outside USA

10
WARRANTY
Revised: LGL/sw/121013/v2
WARRANTY
ECLIPS®2 DIY ELECTRONIC CUTTER BY SIZZIX™
90-DAYS LABOR, ONE-YEAR PARTS LIMITED WARRANTY
What Does This Warranty Cover? This Limited Warranty
covers only manufacturing defects in material and
workmanship in the hardware components of your eclips®2
DIY Electronic Cutter (the “Product”).
How Long Does The Warranty Last?
Labor: For a period of 90 days from the original date of
purchase of the Product (“Labor Warranty”).
Parts: For a period of 1 year from the original date of
purchase of Product (“Parts Warranty”). You should retain
your receipt as proof of purchase, which may be required in
connection with obtaining warranty service.
What Will Sizzix Do?
Labor Warranty: Sizzix will, at our option, repair or
replace with new or refurbished product or parts, product
determined to be defective. If Sizzix elects to replace the
product after this Labor Warranty has expired but while the
Parts Warranty below is still in effect, it will do so for the
applicable labor charge.
Parts Warranty: Sizzix will supply new or refurbished
replacement parts in exchange for parts determined to be
defective.
“Refurbished” means a product or part that has been
returned to its original specifications. In the event of a
defect, these are your exclusive remedies. Any product or
parts replaced under this Limited Warranty will become the
property of Ellison Educational Equipment, Inc. (“Sizzix”).
What Does This Warranty Not Cover? It does not cover
technical assistance for hardware, firmware or software
usage and it does not cover any software products, whether
or not contained in the Product. Any such software is
provided “AS IS”. Please refer to the End User License
Agreement included with the Product for your rights
and obligations with respect to the software. Further,
this Limited Warranty does not cover damages or defects
caused by misuse or abuse of the Product; modification
of or to any part of the Product; use of any third-party
software, firmware and/or hardware with the Product; acts
of God; limitations of technology; or use of the Product for
commercial, rather than personal, applications. The cutting
blades, blade housing, cutting mat and any accessories are
also excluded from this Limited Warranty. Opening any of
the Product housing or tampering with the Notice label on
the underside of the housing will automatically void the
warranty.
Disclaimers. SIZZIX SHALL NOT BE LIABLE FOR
CONSEQUENTIAL AND INCIDENTAL DAMAGES, DAMAGES
FOR BODILY INJURY (INCLUDING DEATH) AND DAMAGE TO
PROPERTY. THE DURATION OF ANY IMPLIED WARRANTIES
SHALL BE LIMITED TO THE DURATION OF THE EXPRESS
WARRANTY SET FORTH ABOVE. SOME STATES DO NOT
ALLOW THE EXCLUSION OR LIMITATION OF INCIDENTAL
OR CONSEQUENTIAL DAMAGE, DAMAGES FOR PERSONAL
INJURY OR THE LENGTH OF IMPLIED WARRANTIES, SO
THESE LIMITATIONS MAY NOT APPLY TO YOU. THIS
WARRANTY GIVES YOU SPECIFIC LEGAL RIGHTS AND YOU
MAY ALSO HAVE OTHER RIGHTS, WHICH VARY FROM STATE
TO STATE.
How Do You Get Warranty Service? If you believe that there
is a manufacturing defect in material and workmanship
in the hardware components packaged with your Product
during the Limited Warranty Period, please contact Sizzix
Customer Relations at the following telephone number or
website:
North America:
sizzix.com
877-355-4766 toll-free in USA
949-598-8821 outside USA
A Return Authorization (RA), along with shipping
information, will be issued. Following a determination by
Sizzix that a fault covered by this Limited Warranty may have
occurred, Sizzix will: (a) ship you replacement parts or (b)
ship you a replacement Product. Product not covered by this
Limited Warranty will be returned at your expense.

25862 Commercentre Drive, Lake Forest, CA 92630 • 877-355-4766
©2013 Ellison Educational Equipment, Inc. All rights reserved.
by Sizzix™
™
Pantone P 100-8C
(CMYK Coated)
™
by Sizzix™
DIY Electronic Cutter
Font: Humanist 777
Other manuals for eclips2
3
Table of contents
Other SIZZIX Cutter manuals

SIZZIX
SIZZIX eclips2 User manual

SIZZIX
SIZZIX Big Shot Express User manual

SIZZIX
SIZZIX Eclips User manual

SIZZIX
SIZZIX 660855 User manual

SIZZIX
SIZZIX Big Shot User manual

SIZZIX
SIZZIX Sidekick User manual

SIZZIX
SIZZIX BigKick User manual

SIZZIX
SIZZIX eclips2 User manual

SIZZIX
SIZZIX Big Shot Machin User manual

SIZZIX
SIZZIX Eclips User manual
Popular Cutter manuals by other brands

Big Daishowa
Big Daishowa C-Cuter C0525C Operation manual

Florida Pneumatic
Florida Pneumatic Universal Tool UT8748E General Safety Information & Replacement Parts

Komatsu
Komatsu K3051 Operating instruction

Sealey
Sealey PP35PLUS instructions

flexo
flexo Novitool PUN M NDX Safety and operation manual

BGS technic
BGS technic 3205 manual