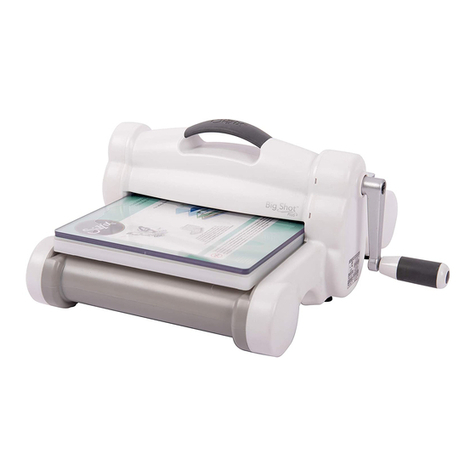
SIZZIX 660425 User manual

Instruction Booklet

2
Table of Contents
Safety Instructions
1. Introduction
2. Machine Placement
3. Setting Up the Big Shot Pro Machine
Inserting the Sliding Tray and Adapter Pad
Attaching the Crank Handle
4. Operating Instructions
Using Bigz Pro, Bigz XL, Bigz or Originals with Crease Rule
Using AllStar, Bigz, Originals or On The Edge Dies
without Crease Rule
Using Framelits or Wafer-Thin Dies
Using Sizzlits, Clearlits or DecoEtch Dies
Using Embossing Folders, Embosslits or
DecoEmboss Dies
Using Textured Impressions Pro Embossing Folders
Using Texturz Texture Plates
Using Ellison SureCut, ClearCrop or Ellison Custom Dies
5. Helps & Hints
6. Maintenance
Cleaning Your Machine
Keeping Dies Clean
Recognizing Worn Plastic Slides
Replacing Plastic Slides
7. Troubleshooting Solutions
8. Materials Guide
9. Die and Accessory Compatibility Table
10. Warranties
11. Instructions in Other Languages
French
German
Spanish
For additional help, call Sizzix within USA 866-742-4447 or
outside USA 949-598-5897 or within UK 0871 222 2277 or
outside UK +44 (0) 845 345 2277 or visit
Sizzix.com.
3
4
4
4
5
5
6
6
7
7
8
8
9
9
10
10
11
11
11
11
12
12
13
14
15
17
18
24
30

WARNING
3
When using this product, basic precautions should always be
followed, including, but not limited to, the following:
• Alwaysplaceandoperatethismachineonaclean,flat,sturdy,non-skid
surface (stout table or workbench). Do not allow any part of the machine to
overhang the edges of your work area.
• Toreducetheriskofpersonalinjury,closesupervisionisnecessarywhenthe
Big Shot Pro is used near children.
• Notrecommendedforusebychildrenunder14years.
• Useonlyattachmentsandaccessoriesrecommendedbythemanufacturerof
your Big Shot Pro die-cutting machine.
• Donotuseoutdoors.
• Pinchhazard.Keephands,fingersandclothingawayfromcontactwithrollers.
• Donotoverloadthemachine.SeeMaterialsGuide(page13)andneverusemore
than three pieces of thinner materials and one piece of thicker materials.
• Cuttinghazard.Donotcontactthebladeofthedies.
• UseonlySlidingTraysuppliedwithyourBigShotProdie-cuttingmachine.Using
another type or brand could cause damage to your machine and dies.
• CarryyourBigShotProdie-cuttingmachineusingthemoldedhandholdsat
both ends of the machine. Lifting or carrying the machine by any other part
of the machine is unsafe.
IMPORTANT SAFETY INSTRUCTIONS
SAVE THESE INSTRUCTIONS
Store in one of the well spaces under the Sliding Tray.
Read and understand all the instructions before
using your Big Shot Pro Machine.

4
The Sizzix®Big Shot™Pro Machine package includes all tools and parts necessary
for full assembly and operation. The Big Shot Pro Machine will cut and emboss a
wide variety of materials with the entire line of Ellison, AllStar and Sizzix dies and
embossing tools. See the Materials Guide (page 13) for specifics. When not in use,
place the dies in Sizzix and Ellison Storage Solutions (sold separately).
1. Introduction
Lift the Big Shot Pro Machine by its molded handholds at the ends of the Machine.
Place the machine on a clean, flat, sturdy, non-skid surface at a height and
positionthatarecomfortablefortheuser.Nopartofthemachineshouldhang
over the edge of the work surface.
2. Machine Placement
3. Setting Up the Big Shot Pro Machine
Parts included:
Item: Qty:
(1) Crank Handle 1
(2) Lock Washer 1
(3) Screw 1
(4) Screw Cap Cover 1
(5) Sliding Tray 1
(6) Cutting Pad 1
(7) Adapter Pad 1
(8) Premium Crease Pad 1
(9) Mylar Shims (0.1mm) 2
Tools required:
3mm Allen Wrench (Included)
Die Pick (Included)
(1 ) Crank Handle
Die Pick
(2) Lock Washer (3) Screw (4) Screw Cap Cover
(7) Adapter Pad
14 1/4" x 12 1/4" x 3/16"
(36.20cm x 31.12cm x 0.50cm)
(8) Premium Crease Pad
14 1/4" x 12 1/4" x 1/8"
(36.20cm x 31.12cm x 0.32cm)
(9) Mylar Shims
0.1mm x 2
3mm Allen Wrench
(6) Cutting Pad
14 1/4" x 12 1/4" x 1/8"
(36.20cm x 31.12cm x 0.32cm)
(5) Sliding Tray
15 5/8" x 12 7/8" x 5/8"
(39.69cm x 32.70cm x 1.59cm)

5
Inserting the Sliding Tray and Adapter Pad
1. Remove Big Shot Pro machine from the shipping carton and place it on a
clean, flat, sturdy, non-skid surface. Take care when lifting machine out of the
carton, as it weighs 30 lbs (13.6 kg).
2. Remove Sliding Tray from bottom of the carton. Place Sliding Tray onto Side
Rails. For cutting with Sizzix dies, place Adapter Pad in Sliding Tray.
3. The Sliding Tray can now move back and forth through the machine.
Attaching the Crank Handle
1. Slip the Lock Washer (Item 2) over the Screw (Item 3) and drop them into the
hole in the top of the Crank Handle (Item 1).
2. Push the Crank Handle assembly over the square roller shaft protruding
from the Big Shot Pro Machine. Insert Allen Wrench into Screw (Item 3) to
tighten. Turn clockwise (Figure A). Tighten Screw as far as possible to ensure
maximum pressure.
3. Press the Screw Cap Cover (Item 4) in place.
WARNING The Big Shot Pro Machine is very heavy.
Use extreme care and caution when handling.
Seek assistance whenever possible.
Figure A
(1) Crank Handle
(3) Screw
(2) Lock Washer
Square Roller Shaft
(4) Screw Cap Cover
Molded Handholds

6
Using all Sizzix Bigz™Pro, Bigz XL, Bigz or Originals™Dies with
Crease Rule*
1. Place a die on a Cutting Pad with foam side up. Place paper or desired material
to be cut on top of the die. Place the Premium Crease Pad on top of the paper
or material to create a “sandwich” (Figure B). (Extended Cutting Pad and
Extended Crease Pad [both sold separately] may also be used with XL-sized
dies.) A Mylar Shim may be necessary; see Troubleshooting Solutions on page 12.
2. Place sandwich on top of the Adapter Pad in the Sliding Tray.
3. Push Sliding Tray into the opening of the Big Shot Pro Machine. Keep hands
away from roller and dies while in use.
4. NotetherotationoftheCrankHandleandcontinuetorotateitinthesame
direction until the sandwich has passed through the opening of the rollers.
Dies can be passed through the rollers in either direction, from the right or
from the left.
5. Remove the sandwich from the Big Shot Pro. Your die-cut shapes are ready
to use!
*A Crease-Rule Die is similar to a regular Bigz (steel rule) Die; however, it contains
both cutting (sharp) rule and crease (blunt) rule.
4. Operating Instructions
WARNING Pinch and cutting hazard. Keep hands, fingers
and clothing away from contact with rollers
and dies while in use.
Figure B
See Die and Accessory Compatibilty Table on page 14
Paper
Die
"Sandwich"
Sliding Tray
Adapter Pad Cutting Pad
Premium Crease Pad
Mylar Shim

7
Using any size AllStar®Dies or Sizzix Bigz, On The Edge™or
Originals Dies without Crease Rule
1. Place a die onto an appropriately sized Cutting Pad or the Premium Crease Pad.
Place paper or desired material to be cut on top of the die. Place another
appropriately sized Cutting Pad on top of the paper or material to create a
“sandwich” (Figure C).
2. Place sandwich on top of the Adapter Pad in the Sliding Tray.
3. Follow Steps 3–5 in Operating Instructions, page 6.
Figure C
Paper
Die
Premium Crease Pad
or Cutting Pad
Cutting Pad
"Sandwich"
Sliding Tray
Adapter Pad
Using Framelits™ or Wafter-Thin Dies
1. Place material to be cut on top of a Cutting Pad. Align die on top of material as
desired. Place Cutting Pad on top of die to create a “sandwich” (Figure D).
2. Place sandwich on Big Shot™ Pro Solo Platform, Solo Shim and Solo Thin-Die
Adapter (sold separately) and place on top of the Adapter Pad in the Sliding
Tray.
3. Follow Steps 3–5 in Operating Instructions, page 6.
Figure D
Paper
Die
Cutting Pad
Cutting Pad
"Sandwich"
Sliding Tray
Adapter Pad
Solo Platform
Solo Shim
Solo Thin-
Die Adapter

8
Using Embossing Folders, Embosslits™or DecoEmboss™Dies
1. With Simple Impressions Embossing Folder, Textured Impressions Embossing
Folder or Embosslits or DecoEmboss Die open, insert paper, foil or other
embossable material, then close like a book. Place Standard Cutting Pads above
and below the closed Folder to create a “sandwich.”
2. Place sandwich on Big Shot Pro Solo Platform and Solo Shim (sold separately)
(Figure F) and place on top of the Adapter Pad in the Sliding Tray.
3. Follow Steps 3–5 in Operating Instructions, page 6.
Using Sizzix Sizzlits®, Clearlits™or DecoEtch™Dies
1. Place a Sizzlits Die onto a Standard Cutting Pad with foam side up. Place paper
over the die. Place another Standard Cutting Pad over the paper or material to
create a “sandwich.” For a Clearlits Die, place die over photo or other material so
that the area to be cut shows through the die. Then place photo or material
and die between Standard Cutting Pads to make sandwich.
2. Place sandwich on Big Shot Pro Solo Platform and Solo Shim (sold separately)
and place on top of the Adapter Pad in the Sliding Tray (Figure E).
3. Follow Steps 3–5 in Operating Instructions, page 6.
Figure E
Figure F
Textured Impressions
Embossing Folder
Standard Cutting Pad
Paper
Die
Cutting Pad
"Sandwich"
Sliding Tray
Adapter Pad
Solo Platform
Solo Shim
Cutting Pad
Paper
Textured Impressions
Embossing Folder Solo Platform
Solo Shim

9
Using Texturz™Texture Plates
1. Place a Texture Plate on the Big Shot Pro Solo Platform and Solo Shim
(sold separately) with the desired design facing up. Place paper or desired
material on top of the Texture Plate. Place Silicone Rubber on top of paper.
Place Impressions Pad on top of Silicone Rubber to create a “sandwich”
(Figure H).
2. Place sandwich on top of the Adapter Pad in the Sliding Tray.
3. Follow Steps 3–5 in Operating Instructions, page 6.
Figure H
Silicone Rubber
Paper
Impressions Pad
"Sandwich"
Sliding Tray
Adapter Pad
Solo Platform
Solo Shim
Texture Plate
Using Textured Impressions™Pro Embossing Folders
1. Open embossing folder and insert paper, cardstock or other embossable
material, making sure that the edge of the paper rests against the small
edge-blocks inside the die. Close the folder.
2. Place the closed Textured Impressions Pro Embossing Folder on top of the Big
Shot™ProSoloPlatform(soldseparately).DONOTUSECUTTINGPADS
(Figure G). Place on top of the Adapter Pad in the Sliding Tray.
3. Follow Steps 3–5 in Operating Instructions, page 6.
Figure G
Textured Impressions Pro
Embossing Folder
Paper
Solo Platform
Textured Impressions Pro
Embossing Folder

10
• DiesperformbetterwhentheyareplacedrubbersideupontheSlidingTray.
• Diesperformbetterwhentheyareusedwithappropriatelysizedcuttingpads.
See Die and Accessory Compatibility Table on page 14.
• Foreasiercutting,placediesonTraydiagonally.
• UsetheBigShotProMachinetocutavarietyofdifferentmaterials.
See Materials Guide on page 13 for suggestions.
• Fewer sheets of material should be used when cutting very complicated shapes.
• When cutting felt, poly foam or delicate materials, place a scrap of paper over
the material to be cut.
• Use of Premium Crease Pad is required with Crease-Rule dies.
• UseonlyonesheetofmaterialwithCrease-Ruledies.
• Ifcreaseruleiscuttingthroughthematerialratherthancreasingthematerial,
place the die and material to be cut on the Adapter Pad diagonally (as size
allows) and then cut.
• ItisimportanttousetheDiePick(includedwiththeBigShotPro)toclean
outthebitsofpaperandothermaterialthatbuildupinthejointsofthedies
(where the cutting rule meets). If dies are not kept clean, the scraps will
eventually push the rule slightly apart.
5. Helps & Hints
Figure I
Cutting Pad
(or Premium Crease Pad)
Paper
Die
Using Ellison®SureCut™or ClearCrop™Dies
Ellison SureCut and ClearCrop Dies can be used in the Sizzix Big Shot Pro Machine
without the Adapter Pad, as they are thicker than Sizzix Bigz Dies. Place SureCut
and ClearCrop dies directly on the metal Sliding Tray, rubber side facing up. Place
material to be cut against the rubber side of the die, then place one Cutting Pad on
top of the material (Figure I). For Ellison SureCut Crease-Rule Dies, place Premium
Crease Pad, instead of the Cutting Pad, on top of material to be cut. Follow Steps
3–5 in Operating Instructions, page 6.

11
6. Maintenance
Recognizing Worn Plastic Slides
After extended use, the Plastic Slides on the Side Rails may show signs of wear.
All four Plastic Slides should be replaced at the same time to ensure even wear in
the future.
Figure K Figure L
• Ifdiedoesnotcompletelycutthrough
material, add a Mylar Shim directly
below die (see Figure J) to increase
cutting pressure on material. Two Mylar
Shims are provided with the Machine.
Add one Shim to the sandwich first,
and if die still does not cut through
material, use another Shim.
Figure J
Paper
Die
Cutting Pad
Premium Crease Pad
Mylar Shim
Side Rail
Plastic Slide
Replacing Plastic Slides
• RemovethewornPlasticSlidewithathinputtyknifeorartist'sspatula.Gently
pry the Slide away from the Side Rail, popping the Slide out of the three holes
in the Side Rail.
• Use a damp cloth moistened with rubbing alcohol to wipe the rails where the
new Slides will be inserted (Figure K). The surface beneath the Slide must be
completely free of debris or residue that would prevent the Slide from lying flat
on the Side Rail.
• Remove adhesive paper backing from Slide. Line up the three pegs on the Slide
with the three holes in the Side Rail and gently press the pegs into the holes
(Figure L). Once the pegs are nearly all the way into position in the holes, press
down and in on the flat upper surface of the Plastic Slide. The Slide should snap
into its final position. Follow the same steps for each of the remaining Plastic Slides.

12
1. When cutting multiple sheets of material, the cutting is incomplete.
It may be necessary to use fewer sheets of material with intricate shapes. Add
a Mylar Shim directly below die (see Figure J) to increase cutting pressure on
material. Two Mylar Shims are provided with the Machine. Add one Shim to the
sandwich first, and if die still does not cut through material, use another Shim.
2. The Sliding Tray appears warped or does not slide smoothly.
Sliding Tray (part #656254) may need to be replaced. Contact Sizzix
Customer Relations for ordering information.
3. When rolling the “sandwich” through the machine, only the top Cutting or
Crease Pad moves.
Slide the sandwich toward the back of the tray with the first inch of the top
Cutting or Crease Pad overhanging the sandwich, on the side closest the rollers.
Turn the handle, allowing the Cutting or Crease Pad to pass through the rollers
first, acting as a wedge so the rest of the sandwich can pass through.
4. When using Crease-Rule dies, the crease rule cuts through the material
rather than creasing the material.
Use of Premium Crease Pad is required with Crease-Rule Dies. For easier cutting,
place the die and material to be cut on the Sliding Tray diagonally (as die size
allows) and then turn the Crank Handle to move the die through the rollers.
5. Rubber does not eject all parts of the cut material.
Use the Die Pick to remove excess material after each use.
7. Troubleshooting Solutions
Keeping Dies Clean
It is important to use the Die Pick (included with the Big Shot Pro) to clean out the
bitsofpaperandothermaterialsthatbuildupinthejointsofthedies(wherethe
cutting rule meets). If dies are not kept clean, the scraps will eventually push the
rule slightly apart.
Cleaning Your Machine
Over time and due to normal use, the machine will become dirty or dusty. This will
happen primarily in the Storage Well underneath the Sliding Tray. To clean, use only
isopropyl alcohol (rubbing alcohol) poured onto a clean paper towel and rub over
Storage Well until it evaporates. With another clean dry paper towel, wipe off any
residue.NEVERusebleachorabrasivecleanersonthemachine.ThemachineDOES
NOTneedtobeoiledorlubricated.

13
As a general rule, the Big Shot Pro Machine will cut anything that scissors will cut.
The number of pieces of material that it will cut depends on the thickness of the
material to be cut and the size and complexity of the die design.
• Whencuttingfelt,polyfoamordelicatematerials,placeascrapofpaperover
the material to be cut.
• Itmaybenecessarytousefewersheetsofmaterialwithintricateshapes.
• UseonlyonesheetofmaterialwhencuttingwithaCrease-Ruledie.
8. Materials Guide
Leather
Magnet, Flexible Sheets
Magnet, Self-Adhesive
Mat Board
PaperWood
Personalized Embossing Plastic (PEP)
Plastic, Shrink Film
Poly Foam
Poster Board
Quilt Batting
RuffleBoard
Rubber, Self-Adhesive
Sandpaper, Fine 00 (paper side up);
limit usage, can wear rule on die
Shelving Paper, Adhesive
Shiny Paper, Self-Adhesive
Shrink Film
Sponge, Pop-Up
Tag Board
Tin .008
Tissue, Laminated
VellumPaper
Vinyl,StaticCling
Wallpaper
Aluminum .016"
Balsa Wood 3/32"
Basswood
Brass .005"
Bubble Wrap
Butcher Paper
Cardstock/Cover Stock
Cardstock, Laminated
Chipboard
Construction Paper
Construction Paper, Laminated
Copier Paper
Cork, Self-Adhesive 1/8"
Decorator Foil
Embossing Rubber
Fabric (Cotton, Linen, etc., as many
pieces as will fit with a piece of paper)
Fabric, Iron-On
Felt (as many pieces as will fit with a
piece of paper)
Felt, Self-Adhesive
Fun Foam
Funky Film
Funky Fur
Gift Wrap

14
9. Die and Accessory Compatibility Table
Bigz Pro,
Movers & Shapers Pro
Bigz XL,
Movers & Shapers XL,
(Crease Rule)
Bigz XL,
Movers & Shapers XL
(no Crease Rule)
Bigz (Crease Rule)
Bigz (no Crease Rule),
Originals, AllStar
AllStar Long Dies
Sizzlits, Clearlits, Framelits
Textured Impressions Pro
Textured Impressions,
Simple Impressions,
Embosslits
Texturz
Ellison SureCut/Custom Dies
Ellison ClearCrop
Big Shot Pro
Adapter Pad
Big Shot Pro
Standard
Cutting Pad
Big Shot Pro
Standard
Premium
Crease Pad
Extended
Standard
Cutting Pads
Extended
Premium
Crease Pad
Big Shot/
BIGkick
Standard
Cutting Pads
Big Shot/
BIGkick
Standard
Crease Pad
Big Shot Pro
Solo Shim &
Platform
Impressions
Pad & Silicone
Rubber
•
•
•
•
•
•
•
•
•
•
•
(•)
(•)
(•)
•
•(XL,EW)
•
(•)
(•)
(•)
•
•
•
•(DC)
•
(•)
•
•
•
•
•(LG,SM,TY)
•
•
•
•
•
•

15
Sizzix Big Shot Pro Limited 3-Year Warranty
What Does This Warranty Cover?
This warranty covers any manufacturing defects in your Sizzix Big Shot Pro
Die-cutting Machine (the “Product”).
How Long Does The Warranty Last?
This warranty lasts for 3 years following your date of purchase of the Product.
You should retain your receipt as proof of purchase, which may be required in
connection with obtaining warranty service.
What Will Sizzix Do?
Sizzix will repair or replace any manufacturing defects for Products returned within
5 years following the original date of purchase.
What Does This Warranty Not Cover?
This warranty does not cover damages or defects caused by misuse or abuse of
the Product. Sliding tray, adapter pad, cutting pads and plastic slides are
excluded from this warranty.
Disclaimers.SIZZIXSHALLNOTBELIABLEFORCONSEQUENTIALANDINCIDENTAL
DAMAGES,DAMAGESFORBODILYINJURY(INCLUDINGDEATH)ANDDAMAGESTO
PROPERTY.THEDURATIONOFANYIMPLIEDWARRANTIESSHALLBELIMITEDTOTHE
DURATIONOFTHEEXPRESSWARRANTYSETFORTHABOVE.SOMESTATESDONOT
ALLOWTHEEXCLUSIONORLIMITATIONOFINCIDENTALORCONSEQUENTIALDAMAGE,
DAMAGESFORPERSONALINJURY,ORTHELENGTHOFIMPLIEDWARRANTIES,SO
THESELIMITATIONSMAYNOTAPPLYTOYOU.THISWARRANTYGIVESYOUSPECIFIC
LEGALRIGHTS,ANDYOUMAYALSOHAVEOTHERRIGHTSWHICHVARYFROMSTATE
TO STATE.
How Do You Get Warranty Service?
If you believe that there is a manufacturing defect in your Product during the
warranty period, contact Sizzix Customer Relations at the following telephone
number or website:
NorthAmerica:
sizzix.com
866-742-4447 toll-free in USA
949-598-5897 outside USA
10. Warranties

16
Europe:
www.sizzix.co.uk
0871 222 2277 within UK
+44 (0) 845 345 2277 outside UK
A Return Authorization (RA), along with shipping information, will be issued.
Following a determination by Sizzix that a fault covered by this warranty may have
occurred, Sizzix will: (a) ship you replacement parts or (b) ship you a replacement
Product. Product not covered by this warranty will be returned at your expense.
Sizzix and Ellison Die Limited Warranties
Thisproductcomeswithalimitedwarranty.VisitSizzix.com/warrantiesor
Ellisoneducation.com/warranties for details.

17
French
German
Spanish
18
24
30
11. Instructions in Other Languages
Instruction Booklet

CONSIGNES DE SÉCURITÉ IMPORTANTES
CONSERVEZ CES INSTRUCTIONS.
Les conserver dans un des casiers de rangement situés sous la plaque mobile.
AVERTISSEMENT : Lisez et assurez-vous de comprendre toutes les
instructions avant d’utiliser l’appareil Big Shot Pro.
Lors de l’utilisation de ce produit, il faut toujours respecter certaines précautions
élémentaires, notamment et de façon non exhaustive :
• Cetappareildoittoujoursêtreplacéetutilisésurunesurfacepropre,plane,robusteet
antidérapante (table épaisse ou établi). Aucune partie de l’appareil ne doit dépasser les bords
de la surface de travail.
• Pourréduirelerisquedeblessure,ilestnécessaired’effectuerunesurveillancestrictelorsquele
Big Shot Pro est utilisé à proximité d’un enfant.
• Déconseillépourlesenfantsdemoinsde14ans.
• Utiliseruniquementlespiècesetaccessoiresrecommandésparlefabricantdevotremachinede
découpage Big Shot Pro.
• Nepasl’utiliseràl’extérieur.
• Risquedepincement.Évitertoutcontactdesmains,doigtsetvêtementsaveclesrouleaux.
• Nepassurchargerl’appareil.VoirleGuidedesmatériaux(page13)etnejamaisutiliser
plus de trois éléments de matériaux fins et un élément de matériau plus épais.
• Risquedecoupure.Nepastoucherlalamedesmatrices.
• UtiliseruniquementleplateaumobilefourniavecvotreappareildedécoupeBigShotPro.
L’utilisation d’un autre type ou d’une autre marque risque d’endommager la machine et les
matrices.
• TransportezvotreappareildedécoupeBigShotProenutilisantlespoignéesmouléessituéesà
chaque extrémité de la machine. Il est dangereux de soulever la machine par toute autre partie.
1. Introduction
Lecolisdel’appareilBigShotPro™deSizzix®comprendtouslesoutilsetpièces
nécessaires à son montage complet et à son fonctionnement. L’appareil Big Shot Pro
Machinecouperaetgaufreradenombreuxmatériauxgrâceàlalignecomplètedematrices
etd’outilsdegaufrageEllison,AllStaretSizzix.VoirleGuidedesmatériaux(page13)pour
plus de précisions. Quand elles ne servent pas, placez les matrices dans les Solutions de
stockage Sizzix et Ellison (vendues séparément).
2. Positionnement de l’appareil
Placer le Big Shot Pro sur une surface lisse, horizontale et antidérapante à une hauteur
confortable pour l’utilisateur. Aucune partie de l’appareil ne doit dépasser des bords de
la surface de travail.
3. Installation du Big Shot Pro
Piècesincluses:
(1)Manivelle,1(2)Rondelledeblocage,1(3)Vis,1(4)Cachepourvis,1(5)Plateau
coulissant, 1 (6) Tapis de découpe, 1 (7) Plaque d’adaptation, 1 (8) Plaque à filet raineur
Premium Crease, 1 (9) Cale en mylar (0,1 mm), 2
Outils nécessaires :
Clé Allen hexagonale de 3 mm (incluse), Pique pour matrice (incluse)
Insertion du plateau mobile et de la plaque d’adaptation
AVERTISSEMENT : L’appareil Big Shot Pro est très lourd. Faire très attention
et preuve de prudence lors de sa manipulation. Il est conseillé de se faire aider
pour cette manipulation à chaque fois que possible.
French
Sizzix Big Shot Pro Livret d’instructions
18

19
1. Retirez l’appareil Big Shot Pro de son emballage et placez-le sur une surface propre,
plane, robuste et antidérapante. Faire attention en soulevant l’appareil hors de son
cartoncarilpèse13,6kg(30lb).
2. Sortir le plateau mobile du fond du carton. Placer le plateau mobile sur les rails
latéraux. Pour une découpe avec les plaques de découpe Sizzix, placer la plaque
d’adaptation dans le plateau coulissant.
3. Le plateau coulissant peut maintenant se déplacer dans les deux sens à travers
l’appareil.
Fixation de la manivelle
1. Faireglisserlarondelledeblocage(pièce2)surlavis(pièce3)etlesfaireentrer
dansletrousituéausommetdelamanivelle(pièce1).
2. Pousser l’ensemble de la manivelle par dessus l’axe carré du rouleau dépassant de
l’appareilBigShotPro.InsérerlacléAllendanslavis(pièce3)àserrer.Tournerdans
le sens (figure A). Serrer la vis autart que possible pour assurer une pression
maximale.
3. Enfonceràsaplacelecachedelavis(pièce4).
4. Mode d’emploi
Voir le tableau de compatibilité des matrices et accessoires, page 14
Utilisation de matrices Bigz™ Pro, Bigz XL, Bigz ou Originals™ Sizzix avec un filet raineur*
1. Mettre une matrice sur un tapis de découpe avec le côté en mousse vers
le haut. Mettre le papier ou le matériau à découper sur la matrice. Placer la plaque
à filet raineur Premium Crease sur le papier ou sur le matériau pour créer une sorte
de « sandwich » (figure B). (Un tapis de découpe étendu et une plaque de rainurage
étendue[tousdeuxvendusséparément]peuventaussiêtreutilisésavecles
matricesdetailleXL.)Unecaleunmylarpeutêtreenécessaire,voirledépannageà
la page 22.
2. Placer le « sandwich » sur le dessus de la plaque d’adaptation, dans le plateau
mobile.
3. Pousser le plateau mobile dans l’ouverture de l’appareil Big Shot Pro. Garder les
mains à distance du rouleau et des matrices quand la machine fonctionne.
AVERTISSEMENT : Risque de pincement et de coupure. Éviter tout contact des
mains, doigts et vêtements avec les rouleaux et les matrices pendant le fonc-
tionnement de la machine.
4. Noterlemouvementderotationdelamanivelleetcontinuerdetournercelle-cidans
lemêmesensjusqu’àcequele«sandwich»aitterminésacourseentrelesrouleaux.
Les matrices peuvent passer dans les rouleaux dans les deux sens, de la gauche ou
de la droite.
5. Retirerle«sandwich»duBigShotPro.Vosformesprédécoupéessontprêtesà
l’emploi !
*Une matrice à filet raineur est similaire à une matrice Bigz normale (filet en fer). Elle
diffèretoutefoisparlaprésenced’unebandecoupante(aiguisée)etd’unfiletraineur
(émoussé).
Utilisation de n’importe quelle taille de matrice AllStar au Sizzix Bigz, On The Edge
™
ou Originals sans filet raineur
1. Placer une matrice sur un tapis de découpe normal avec le côté en mousse vers le
haut. Mettre le papier ou le matériau à découper sur la matrice. Placer la plaque à
filet raineur Standard Premium sur le papier ou sur le matériau pour créer une sorte
de « sandwich » (figure C).
2. Placer le « sandwich » sur le dessus de la plaque d’adaptation, dans le plateau
mobile.
3. Suivez les étapes 3 à 5 du Mode d’emploi, page 19.

20
Utilisation de Matrices Framelits ou Minces
1. Mettre le matériau à découper sur un tapis de découpe standard. Aligner la matrice
sur le dessus de la matériau comme souhaiter. Mettre le tapis de découpe sur la
matrice pour créer une sorte de <<sandwich>> (figure D).
2. Placer le <<sandwich>> sur un plateforme Big Shot Pro Solo, une cale en Solo et une
àdaptacur pour poinçons minces Solo (vendue séparément) set les placer sur la
plaque d’adaptation, dans le plateau mobile.
3. Suivez les étapes 3 à 5 du Mode d’emploi, page 19.
Utilisation de matrices Sizzix Sizzlits®, Clearlits™ ou DecoEtch™
1. Mettre une matrice Sizzlits sur un tapis de découpe standard avec le côté en
mousse vers le haut. Mettre le papier sur la matrice. Mettre un autre tapis de
découpe standard sur le papier ou le matériau pour créer une sorte de « sandwich
». Dans le cas d’une matrice Clearlits, placer la matrice sur la photo ou le matériau
de sorte que la zone à découper soit visible à travers la matrice. Prendre ensuite en
« sandwich » la photo ou le matériau et la matrice entre les tapis de découpe
standard.
2. Mettre le sandwich sur une plateforme Big Shot Pro Solo et une cale en Solo (vendue
séparément) et les placer sur la plaque d’adaptation, dans le plateau mobile
(figure E).
3. Suivez les étapes 3 à 5 du Mode d’emploi, page 19.
Utilisation des pochettes de gaufrage, Embosslits™ ou DecoEmboss™
1. Une fois la pochette de gaufrage Simple Impressions, la pochette de gaufrage
Textured Impressions ou la matrice Embosslits our DecoEmboss ouverte, insérer le
papier, la feuille d’aluminium ou tout autre matériau gaufrable, puis refermer comme
un livre. Mettre des tapis de découpe standards sur et sous la pochette fermée
pour créer une sorte de « sandwich ».
2. Mettre le sandwich sur une plateforme Big Shot Pro Solo et une cale en Solo (vendue
séparément) (figure F) et les placer sur la plaque d’adaptation, dans le plateau
mobile.
3. Suivez les étapes 3 à 5 du Mode d’emploi, page 19.
Utilisation des pouchettes de gaufrage Textured Impressions Pro
1. Ouvrir le pochette de gaufrage et insérer le papier, papier cartonné ou tout autre
matériau gaufrable, faire en sorte que le bord de papier en appui contre le petit bord
intérieur de la matrice. Fermer la pochette.
2. Placer la pochette fermée sur une plateforme Big Shot Pro Solo (vendue
Séparément).NEPASUTILISERDETAPISDEDÉCOUPE(figureG).Placersurla
plaque d’adaptation, dans le plateau mobile.
3. Suivez les étapes 3 à 5 du Mode d’emploi, page 19.
Utilisation des plaques de texture Texturz™
1. Mettre une plaque de texture sur une plateforme Big Shot Pro Solo et une cale en
Solo (vendue séparément) avec la découpe désirée vers le haut. Mettre le papier ou
le matériau voulu sur la plaque de texture. Mettre le tampon de caoutchouc siliconé
sur le papier. Mettre le tapis Impressions sur le tampon de caoutchouc siliconé pour
créer un « sandwich » (figure H).
2. Placer le « sandwich » sur le dessus de la plaque d’adaptation, dans le plateau
mobile.
3. Suivez les étapes 3 à 5 du Mode d’emploi, page 19.
Utilisation des matrices Ellison® SureCut™ ou ClearCrop™
LesmatricesEllisonSureCutetClearCroppeuventêtreutiliséesavecl’appareilBigShot
Pro Sizzix sans plaque d’adaptation car elles sont plus épaisses que les matrices Bigz
Sizzix. Mettre les matrices SureCut et ClearCrop directement sur le plateau mobile en
métal, le côté caoutchouc vers le haut. Mettre le matériau à découper contre le côté en
caoutchouc de la matrice puis placer un tapis de découpe sur le matériau (figure I). Pour
les matrices Ellison SureCut à filet raineur, mettre la plaque à filet raineur Premium à
This manual suits for next models
1
Table of contents
Other SIZZIX Cutter manuals

SIZZIX
SIZZIX eclips2 User manual

SIZZIX
SIZZIX Eclips User manual

SIZZIX
SIZZIX Big Shot Express User manual

SIZZIX
SIZZIX eclips2 User manual

SIZZIX
SIZZIX Big Shot Pro 660550 User manual

SIZZIX
SIZZIX Big Shot Machin User manual

SIZZIX
SIZZIX Eclips User manual

SIZZIX
SIZZIX eclips2 User manual

SIZZIX
SIZZIX Big Shot User manual

SIZZIX
SIZZIX Sidekick User manual