SKF LINCOLN 1134 Product manual

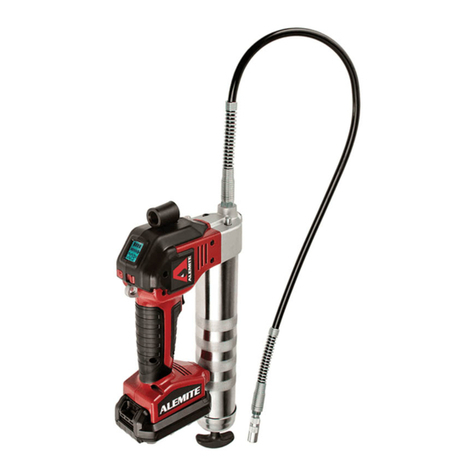
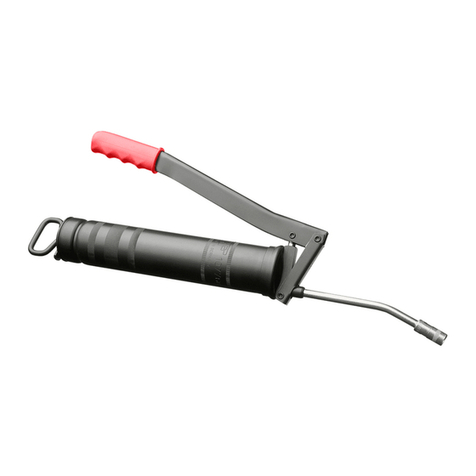
Pistol grip grease gun
Model 1134
Installation and maintenance guide
Read manual prior to installation or use
of this product. Keep manual nearby for
future reference. Failure to follow
instructions and safety precautions may
result in death or serious injury.
DANGER
Date of issue October 2014
Form number 403681D
Section D7
Page 60D

Bulk Capacity - 16 oz. (473 cm³)
Cartridge Capacity - 14 1/2 oz. (429 cm³)
Container
Lubricant
cartridge
Large
cap
Small
cap
Description
The Lincoln pistol grip type grease gun
complete with high pressure flexible grease
hose for easy access to those hard to reach
grease points
It is designed for use with cartridges or
bulk grease the filler/bleeder valve in the
head also allows clean filling from grease
pails using a Lincoln grease gun filler pump
The “variable stroke” feature of this
grease gun allows you to achieve higher
greasing pressures using short piston
strokes or high volume with a full stroke
Extreme pressure may cause nozzle
extension or whip hose to burst.
Use only Lincoln approved hoses and
follow whip hose instructions and
warnings.
WARNING
Grease gun can develop high pressure
up to 7,500 psi (517.2 Bar). Use safety
glasses and gloves for protection during
operation. Keep hands clear of the
extension during operation of the grease
gun.
WARNING
To install a lubricant
cartridge
1 Remove head and plunger assembly from
container tube.
2 To remove an empty cartridge pull back
on the T-handle until the plunger rod is
fully extended. Then carefully release the
T-handle to eject the empty cartridge
from the container tube. Pull back on the
T-handle. When the plunger rod is fully
extended pull it sideways to latch the rod
groove into the keyhole slot in the con-
tainer cap.
3 Remove the caps from both ends of the
cartridge and insert the large open end of
the cartridge into the container tube.
4 Loosely assemble the head and plunger
assembly to the container tube.
Extend the T-handle away from the con-
tainer tube and disengage the plunger rod
from the container cap. Engage the
plunger rod with the plunger by rotating
the T-handle. Exert force on the T-handle
until lubricant oozes from the tube and
head interface. Tighten container tube
into the head and plunger assembly.
5 Disengage the plunger rod from the
plunger by rotating the T-handle.
Push the plunger rod into the container.
To convert lever gun to
allow filling from bulk
container or filler
pump
1 Unscrew the container cap from the
container tube. Pull on the T-handle to
extract the plunger and spring from the
container tube.
2 Grasp plunger between thumb and fore-
finger and flip the plunger lip from the
rear to the front side.
!Notice
The plunger resembles a cup.
When the lever gun is assembled for use
with bulk lubricant the cup opens toward
the head assembly.
3 Reassemble plunger into container tube
and position with the T-handle so that the
container cap can be tightened onto the
container tube.
Front side Rear side
2

To fill lever gun with a
filler pump
Engage the plunger rod with the plunger by
rotating the T-handle. Insert the lever gun
filler nipple into the filler pump socket and
extend the T-handle away from the contain-
er tube. Operate the filler pump to fill the
lever gun container. When the plunger rod
groove is exposed the container is filled
(plunger rod will be extended approximately
8 inches). Disengage the plunger rod from
the plunger by rotating the T-handle.
Push the plunger rod into the container.
To fill lever gun from
bulk lubricant
container
1 Remove head and plunger assembly from
container tube.
2 Pack lubricant into cavity of the head and
plunger assembly.
3 Insert the open end of the container tube
into lubricant. Slowly pull the T-handle
back while pushing the container tube
deeper into the lubricant to prevent air
pockets from being pulled into the con-
tainer tube.
4 When the plunger rod is fully extended
pull it sideways to latch the rod groove
into the keyhole slot in the container cap.
5 Loosely assemble the head and plunger
assembly to the filled container tube.
Release the plunger rod from the con-
tainer cap and disengage the plunger rod
from the plunger by rotating the T-han-
dle. Push the plunger rod into the con-
tainer. Slowly unscrew the container tube
from the head and plunger assembly until
lubricant oozes from the interface. Tight-
en container tube into the head and
plunger assembly.
Air pockets in the cartridge lubricant will
cause the lever gun to lose its prime.
WARNING
!Notice
Plunger must be “locked” to rod.
1 Release plunger rod from slot in end cap.
2 Unscrew the filler/bleeder valve two full
turns.
To expel air pockets
Normally there is no need to bleed air
through the Filler/ Bleeder Valve. The gun
will self prime by pumping the handle 5 to
10 times.
After each reload of grease:
1 Release the plunger rod from the con-
tainer cap.
2 Gently push and turn the rod until it goes
fully into the container tube. Pump the
handle until grease appears at the coupler
(usually 5 to 10 times is sufficient)
If the grease is thick, cold or “tacky”, or
an air-lock is caused by the plunger stick-
ing in the cartridge;
Force air out through the Filler/Bleeder
valve:
3

Body
Handle
Piston sleeve
1
Circular clip
Cylinder
roller
Piston
Rivet
Retainer
screw
Piston
spring
O-ring Check valve
body
A
A
Steel ball Spring
Steel ball
Outlet ball spring
O-ring
Outlet valve
body
Spring keeper
screw
2
3
Rivet
Plunger washer
Support washer
Rubber plunger
Follower boss
Plunger spring
Container tube
Plunger rod
Container cap
Cap
T-handle
Filler/bleeder
valve
O-ring
5
6
4
7
Service parts
Item no. Description Part no.
1 Handle with piston kit 272392
2 Outlet kit 272388
3 Rubber washer 2724811)
4 Container assembly 272501
5 Bulk fill kit 272500
6 High pressure hose 71518
7 Coupler assembly 5852
8 6 in. (152,4 mm) rigid extension assembly 2725052)
1) Included with 272501 container assembly.
2) Not shown.
4

Troubleshooting
Problem Cause Remedy
Gun pumps little or no grease. Air lock -- plunger stuck in cartridge. 1) Check condition of cartridge Replace if
damaged.
2) ‘Lock” plunger to rod and push plunger into
cartridge.
Air lock -- Grease too thick or cold. 1) Consult grease supplier.
2) Store grease gun and grease away from
extreme cold.
Check valve ball seat damaged or dirty. 1) Remove check valve.
2) Clean and inspect all components Replace as
required.
3) Important - use Loctite (or similar) thread
sealant on check valve threads.
Body outlet ball seat dirty or damaged. 1) Remove ball and spring.
2) Disassemble, clean, and inspect all
components. Replace as required.
Worn or damaged Piston 0-ring. 1) Remove handle.
2) Pull out plunger.
3) Replace O-ring.
Grease leaks past plunger. Plunger damaged. Replace plunger.
0ver filling gun when using filler pump. Stop pumping filler pump when groove on piston
rod visible at the back of barrel Refer to filling
instructions.
5

Lincoln industrial
standard warranty
Standard limited warranty
Lincoln warrants the equipment manufac-
tured and supplied by Lincoln to be free
from defects in material and workmanship
for a period of one (1) year following the
date of purchase, excluding there from any
special, extended, or limited warranty pub-
lished by Lincoln. If equipment is deter-
mined to be defective during this warranty
period, it will be repaired or replaced, within
Lincoln’s sole discretion, without charge.
This warranty is conditioned upon the
determination of a Lincoln authorized rep-
resentative that the equipment is defective.
To obtain repair or replacement, you must
ship the equipment, transportation charges
prepaid, with proof of purchase to a Lincoln
Authorized Warranty and Service Center
within the warranty period.
This warranty is extended to the original
retail purchaser only. This warranty does not
apply to equipment damaged from accident,
overload, abuse, misuse, negligence, faulty
installation or abrasive or corrosive material,
equipment that has been altered, or equip-
ment repaired by anyone not authorized by
Lincoln. This warranty applies only to equip-
ment installed, operated and maintained in
strict accordance with the written specifica-
tions and recommendations provided by
Lincoln or its authorized field personnel.
This warranty is exclusive and is in lieu
of any other warranties, express or
implied, including, but not limited to, the
warranty of merchantability or warranty
of fitness for a particular purpose. War-
ranty on items sold by Lincoln, but not
manufactured by Lincoln are subject to
the warranty consideration, if any, of
their manufacturer (such as hoses,
hydraulic and electric motors, electrical
controllers, etc.) Assistance in making
such warranty claims can be offered as
required.
In no event shall Lincoln be liable for inci-
dental or consequential damages. Lincoln’s
liability for any claim for loss or damages
arising out of the sale, resale or use of any
Lincoln equipment shall in no event exceed
the purchase price. Some jurisdictions do
not allow the exclusion or limitation of inci-
dental or consequential damages, therefore
the above limitation or exclusion may not
apply to you.
This warranty gives you specific legal
rights. You may also have other rights that
vary by jurisdiction.
Customers not located in the Western
Hemisphere or East Asia: Please contact
Lincoln GmbH and Co. Kg, Walldorf,
Germany, for your warranty rights.
Special limited warranties
Special limited 2 year warranty
SL-V series, single injectors – 85772,
85782, and replacement injectors –
85771, 85781
Lincoln warrants the SL-V Injector series to
be free from defects in material and work-
manship for two (2) years following the date
of purchase. If an injector model (single or
replacement) is determined to be defective
by Lincoln, in its sole discretion, during this
warranty period, it will be repaired or
replaced, at Lincoln’s discretion, without
charge.
Special limited 5 year warranty
series 20, 25, 40 bare pumps, pmv bare
pumps, heavy duty and 94000 series bare
reels
Lincoln warrants series 20, 25, 40 bare
pumps, PMV bare pumps, heavy duty
(82206), mini bench (81133, 81323), and
all 94000 LFR series (single arm and dual
arm) bare reels to be free from defects in
material and workmanship for five (5) years
following the date of purchase. If equipment
is determined by Lincoln, in its sole discre-
tion, to be defective during the first year of
the warranty period, it will be repaired or
replaced at Lincoln’s discretion, without
charge. In years two (2) and three (3), the
warranty on this equipment is limited to re-
pair with Lincoln paying parts and labor
only. In years four (4) and five (5), the war-
ranty on this equipment is limited to repair
with Lincoln paying for parts only.
Special limited 5 year warranty
limited oil meters, limited fluid control
valves, aod (air-operated diaphragm
pumps)
Lincoln warrants the 712 series control
valves, 912 series lube meters, electronic
lube meters (980, 981, 982 series), our
universal inline digital meters (812/813
series), and our AOD pump offering to be
free from defects in material and workman-
ship for five (5) years following the date of
purchase. If either is determined to be
defective by Lincoln, in its sole discretion,
during the warranty period, they will be
repaired or replaced, at Lincoln’s discretion,
without charge.
Special DEF (diesel exhaust fluid) limited
warranty
DEF products are warranted to be free from
defects in material and workmanship for a
period of one (1) year following the date of
purchase. The following exceptions to the
standard warranty period are in effect:
• 85700-30/85700-50 DEF hose reels
(bare reel only),
277251/277252 AC DEF pumps, and
277256 and 277257 DEF meters are
warranted for two (2) years from date of
purchase.
• 85623 DEF AOD
(air operated diaphragm) pumps
are covered under the standard five (5)
year AOD pump warranty.
If either is determined to be defective by
Lincoln, in its sole discretion, during the
warranty period, they will be repaired or
replaced, at Lincoln’s discretion, without
charge.
Lincoln Industrial contact information
To find Lincoln Industrial’s nearest service
center call the following number;
customer service 314-679-4200
(international number 01-314-679-4200)
or you may also use our website
www.lincolnindustrial.com
6
This page left intentionally blank.
7

® SKF is a registered trademark of the SKF Group.
® Lincoln is a registered trademark of Lincoln Industrial Corp.
Loctite is a registered trademark of Henkel Corporation.
© SKF Group 2014
The contents of this publication are the copyright of the publisher and may not be reproduced (even extracts) unless prior written permis-
sion is granted. Every care has been taken to ensure the accuracy of the information contained in this publication but no liability can be
accepted for any loss or damage whether direct, indirect or consequential arising out of the use of the information contained herein.
SKF PUB LS/I4 00000 EN.R1 · October 2014 · Form 403681D
lincolnindustrial.com skf.com/lubrication
Table of contents
Other SKF Tools manuals

SKF
SKF LINCOLN 1440CLR User manual

SKF
SKF TLGB 20 User manual

SKF
SKF Lincoln PowerLuber B Series Product manual

SKF
SKF TMHP 10E User manual

SKF
SKF 729101 User manual

SKF
SKF LINKOLN 1262E Product manual

SKF
SKF TMBS 100E User manual

SKF
SKF TMHC 110E User manual

SKF
SKF TKSA 11 User manual

SKF
SKF TMBP 20E User manual

SKF
SKF TKBA 10 User manual

SKF
SKF Lincoln 91024 Product manual

SKF
SKF TMHP 10E User manual

SKF
SKF TLGU 10 User manual

SKF
SKF TMMA 75H User manual

SKF
SKF 83753 Instruction Manual

SKF
SKF TKSA 20 User manual

SKF
SKF TMHC 110E User manual

SKF
SKF Lincoln PowerLuber A Series Installation guide

SKF
SKF TMHP 15 Series User manual