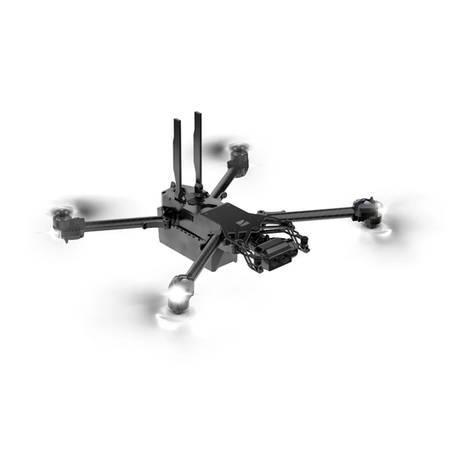
Skydio X2D QGC User manual

Operator Manual
Skydio X2D QGC
Eective date: Oct 18, 2021
WARNING: Please read all documentation provided with your Skydio X2D including but
not limited to the Safety & Operating Guide found here: www.skydio.com/getstartedX2
© 2022 Skydio, Inc. All rights reserved.

2Skydio X2D - QGC Operator Manual © 2022 Skydio, Inc. All rights reserved.
Overview
Skydio QGC is an alternative application available for the Skydio Enterprise Controller for full flight control and
access to X2 autonomy features.
Feature Description Main use cases Key benefits
Close Proximity
Obstacle Avoidance
Fly closer to obstacles.
Close (~11”)
Minimal (~4”)
Disabled
Standard (~34”)
• Situational awareness
• Inspection
Allows closer flight for indoor
navigation e.g. through large
doorways and up-close
inspection of detailed assets
Superzoom Blends the six 4K navigation
cameras to create an
omnidirectional view. Allows
the user to zoom digitally with
algorithmic image stabilization
• Situational awareness See farther, and in all
directions without moving the
drone - reduces pilot cognitive
load
Vertical View Gimbal can vertically look
straight up above the drone
• Inspection Allows for overhung
inspections such as ceilings,
bridges, and canopies
Rangefinding Provides rangefinding using the
augmented reality MGRS grid
on the controller UI
• Situational awareness
• Inspection
Increases operator situational
awareness and reduces time
to vectoring maneuvering
forces.
Skydio QGC supports a subset of the Skydio Autonomy Enterprise features:
Skydio Ground Control (QGC)
Skydio Autonomy Enterprise Software

3Skydio X2D - QGC Operator Manual © 2022 Skydio, Inc. All rights reserved.
Pre-flight
Launch QGC
To access Skydio QGC, power on the Enterprise Controller:
Step 1 - Select the INFO menu
Step 2 - Select Launch QGC

4Skydio X2D - QGC Operator Manual © 2022 Skydio, Inc. All rights reserved.
Oine maps
Step 5 - Launch QGC
• select the QGC icon in the top left corner
• select Application Settings
Step 6 - Select Oine Maps
Step 7 - Select Add New Set
• navigate to your desired map location. You will need to
zoom into a specific area.
• set the zoom levels for oine maps
• choose your preferred map provider
• name the location of your map
• select Download
• select the tile sets you want to export and select Export
Step 8 - copy the file with the extension .qgctiledb to a USB-C
flash drive
Pre-flight
Skydio QGC requires a specific map file that can only be generated using the QGC application on a device with
access to the Internet. To generate map files:
Step 1 - Using a computer or devices download the QGC
application to your desktop
• visit http://qgroundcontrol.com/downloads
Step 2 - Select the QGC icon in the top left corner
Step 3 - Select Application Settings
Step 4 - Select Oine Maps

5Skydio X2D - QGC Operator Manual © 2022 Skydio, Inc. All rights reserved.
Step 1 - Power on your Skydio Enterprise Controller
Step 2 - Select the INFO menu
Step 3 - Select Import Skydio QGC Maps
Step 4 - Insert the USB-C flash drive containing the
QGC map file
• select Maps
• navigate to My Files
• select the USB storage device
• select the map file
• select Done
Import map to Skydio Enterprise Controller:
Oine maps
Pre-flight

6Skydio X2D - QGC Operator Manual © 2022 Skydio, Inc. All rights reserved.
Your QGC map tiles will then import to the Skydio
Enterprise Controller map directory.
After completing the final step, you will only have 24
seconds to import the maps to QGC before your map
files are deleted.
NOTE: If an import fails, select and hold Import Skydio QGC Maps and clear the imported map directory when
prompted. Any maps not yet imported to Skydio QGC will need to be imported again.
Pre-flight
Oine maps

7Skydio X2D - QGC Operator Manual © 2022 Skydio, Inc. All rights reserved.
Step 1 - Select Open Skydio QGC
Import maps to QGC:
Step 2 - Select the QGC Icon in the top left corner of
the screen to bring up the menu
Step 3 - Select Settings
Step 4 - Select Oine maps
• select Import and then Import again
• tap on the tile set to import
Pre-flight
Oine maps

8Skydio X2D - QGC Operator Manual © 2022 Skydio, Inc. All rights reserved.
Step 1 - Select General
Step 2 - Select Miscellaneous
Step 3 - Choose the correct options from the Map
Provider and Map Type menus
Step 4 - Navigate back to the main screen
Pre-flight
Oine maps
Ensure your map provider and map types match

9Skydio X2D - QGC Operator Manual © 2022 Skydio, Inc. All rights reserved.
When your vehicle is provisioned for encryption, your media will be encrypted when flying with Skydio QGC. Skydio
QGC will indicate the state of your media encryption in the X2 status bar:
Media is not encrypted - your vehicle is not provisioned for encryption.
Encrypted media unlocked - displays when you insert the security key into X2 while it is
powered on. You will be able to view and access your decrypted media until you power o
the drone or fly again.
Media is encrypted - your media is currently encrypted. If you have provisioned your vehicle
for encryption, your media will always be encrypted when flying with Skydio QGC.
Media Encryption
QGC Flight

10 Skydio X2D - QGC Operator Manual © 2022 Skydio, Inc. All rights reserved.
Missions allow X2 to fly to designated waypoints without requiring you to manually fly. As X2 reaches each waypoint,
X2 can execute a number of operations before proceeding to the next waypoint. Missions can be planned pre-flight
and loaded onto the vehicle.
Waypoint Mission
QGC Flight
Step 1 - Select the Plan button to display the Map view
Step 2 - Select the parameters to set X2D behaviors while executing a mission
Step 3 - Select the Waypoint button to begin marking waypoints
• tap on the map to set the waypoints
• continue tapping on the map to set waypoints until your mission plan is complete
Step 4 - Adjust parameters and behaviors in the right sidebar, such as:
• altitude
• hold duration (in seconds)
• where X2 will loiter before proceeding
• changing the gimbal pitch angle
• planned photo
Selecting the hamburger icon allows you to set a dierent command for that point in the mission.
To delete a waypoint, select the point you want to delete, and
the trash icon.

11 Skydio X2D - QGC Operator Manual © 2022 Skydio, Inc. All rights reserved.
Select Upload Required to upload the mission. A Done notification will display if the
mission upload is successful
Return to the flight screen and begin the mission by
sliding from left to right on Slide to confirm.
Slide from left to right again to resume the mission.
While a mission is executing, tap the Pause button in
the left Toolbar and slide from left to right on Slide to
confirm to pause the mission.
QGC Flight
Waypoint Mission

12 Skydio X2D - QGC Operator Manual © 2022 Skydio, Inc. All rights reserved.
Select the Megaphone icon to display system notifications and status information for flight readiness.
Dismiss this screen by tapping the Xbutton in the top right corner.
Flight status is displayed in the top left corner of the flight screen:
Step 2 - Slide to Arm the drone and start the Skydio Autonomy Engine.
Step 3 - Swipe to take o. The propellers will begin to spin and the vehicle will launch.
Step 1 - Select the Takeo button to begin the takeo process.
Launch
QGC Flight

13 Skydio X2D - QGC Operator Manual © 2022 Skydio, Inc. All rights reserved.
Flight
4
7
2
5 86 9
12
11
10
1
3
14 16
1817
13 15
22
21
20
19
Flight Controls
1. Left joystick
2. Right joystick
3. Menu/back button
4. Directional pad (D-pad)
5. C1 Button - toggle Obstacle
Avoidance
6. C2 Button - toggle Lights
7. Return to Home button
8. Power button
9. Launch/Land button
10. Pause button
11. Controller clamshell
embedded antennas
12. User interface screen
13. R1 button - shutter/record
14. Right wheel - zoom
15. L1 button - boost
16. Left wheel - gimbal tilt
17. R2 button - toggle map
18. L2 button - color camera
19. Reset button
20 USB-C port
21. Cooling fan
22 Neck strap/tripod (¼-20 mount)
CAUTION: Skydio Enterprise Controller is not weatherproof. Do not operate in any precipitation, including
rain, fog, snow, or similar environments. Do not rest the controller in sand, dirt or on similar terrain where
particles can get trapped in the fan. Do not use batteries if the magnets or connector pins are damaged.

14 Skydio X2D - QGC Operator Manual © 2022 Skydio, Inc. All rights reserved.
You have the ability to modify the controller button mapping as needed. Button mapping in Skydio QGC will not
change the button mapping in the Skydio Enterprise Controller.
Pressing on each button on the controller will highlight the corresponding button number in the Skydio QGC app,
allowing you to verify your button assignments.
button action Behavior
NO ACTION Button will not be mapped to any behavior
ARM Starts autonomy engine and gets ready for takeo
DISARM Stops autonomy engine not ready for takeo
TOGGLE ARM Switch between the armed and disarmed states
CONTINUOUS ZOOM IN Holding down the button will continue to zoom in
CONTINUOUS ZOOM OUT Holding down the button will continue to zoom out
STEP ZOOM IN A single zoom step is taken each button press
Flight
Flight Controls
Step 1 - Select the QGC
Step 2 - Select Vehicle Setup
Step 3 - Select Joystick
Step 4 - Select Button Assignment

15 Skydio X2D - QGC Operator Manual © 2022 Skydio, Inc. All rights reserved.
button action Behavior
STEP ZOOM OUT A single zoom step is taken each button press
TRIGGER CAMERA Captures a photo
TRIGGER VIDEO Starts/stops recording
THERMAL ON/OFF Toggle the thermal overly.
THERMAL ON Turn the thermal overlay on
THERMAL OFF Turn the thermal overlay o
THERMAL NEXT PALETTE Cycle between the thermal color palettes
TOGGLE OBSTACLE AVOIDANCE Toggles obstacle avoidance settings
Standard > Close/Reduced > Minimal > Disabled
TOGGLE RGB LEDs Toggles RGB lights on/o
TOGGLE RTL Initiate a return to launch (or rally point)
TOGGLE SUBJECT
HIGHLIGHTING
Toggles subject detection on/o
SENSOR SLEW Reset the zoom level and center gimbal pitch
TOGGLE ILLUMINATION MODE Switch between modes (none, visible strobe, ir strobe)
DISMISS PROMPTS Dismiss any blocking prompts (required for night takeo). Also
cancel landing/takeo
GIMBAL DOWN (FINE) Pitch the gimbal up (scales with zoom)
GIMBAL UP (FINE) Pitch the gimbal down (scales with zoom)
YAW LEFT (FINE) Yaw the vehicle to the left (scales with zoom)
YAW RIGHT (FINE) Yaw the vehicle to the right (scales with zoom)
START TRIANGULATION Initiate the triangulation skill. The first button push enters the
skill and a subsequent push starts ranging
LAND Initiate a landing.
TAKEOFF Initiate a takeo.
QGC Flight
Flight Controls

16 Skydio X2D - QGC Operator Manual © 2022 Skydio, Inc. All rights reserved.
Media Controls
Media controls to capture video and photos:
• Photo/Video icon allows you to toggle between video and photo mode.
• Record/Shutter icon to start/stop recording or take still photos, depending on your
capture mode.
• Settings icon to access the video/photo settings for both color and thermal camera
By default, Skydio X2 will not automatically record video or photos. Switch to your desired
capture mode and tap the shutter button to record a video or take photos.
Flight
Flight Screen

17 Skydio X2D - QGC Operator Manual © 2022 Skydio, Inc. All rights reserved.
Choose between the three dierent views and the thermal camera palette options.
From left to right:
• Color Camera
• Picture in Picture
• Thermal Camera
• Thermal Camera Palette
The Flight Information menu displays live flight telemetry
from Skydio X2.
Double-tap the Flight Information to display a limited
menu for more space to view the map or live video.
NOTE: No GPS indicates the Skydio Enterprise Controller does not have a GPS position. This is normal.
Flight
Palette and View Menu
Flight Information Bar

18 Skydio X2D - QGC Operator Manual © 2022 Skydio, Inc. All rights reserved.
The Status Bar menu oers more information about the status and health of Skydio X2.
Subject Detection - subject detection is enabled/disabled
Satellite - view live GPS telemetry from Skydio X2
Encryption - indicates whether or not media on the SD card is encrypted. This
feature is optional and requires the use of a security key. See the Media encryption
section for more information.
Battery Status - displays current battery level. Tap the Battery Status icon to view
the controller battery level
Megaphone - displays system notifications and status. This screen is the best
location to find all information for flight readiness
Obstacle Avoidance - indicates which obstacle avoidance setting is active. Tap C1
to toggle between each obstacle avoidance setting
Signal Strength - displays the current strength of your radio link to the Skydio X2
while in flight
Flight
Status Bar

19 Skydio X2D - QGC Operator Manual © 2022 Skydio, Inc. All rights reserved.
The view in the bottom left of the screen displays the map.
Tap the Map picture-in-picture (PIP) to view the Map full screen and minimize the video stream. Tap the video stream
in the bottom left corner again to make the video stream full screen and minimize the Map. Tap and drag the corner
of the PIP to increase or decrease its size. Pinch with two fingers to zoom in on the map. Pinch out with two fingers to
zoom out of the map. With one finger, drag on the map to move the map around.
Select the Settings icon to adjust the video settings for both the color and thermal cameras.
Select Video Settings to adjust exposure, video resolution, and
thermal camera settings.
• restore Camera Defaults settings to default select Reset
Flight
Map View
Flight Settings

20 Skydio X2D - QGC Operator Manual © 2022 Skydio, Inc. All rights reserved.
Step 1 - Press and hold anywhere on the map
Step 2 - Select Orbit at location to begin orbiting around that point
• adjust the orbit range by adjusting the vehicle’s pitch while in flight
Step 3 - Slide from left to right to start the mission
Orbit a point of interest
Flight
Table of contents
Other Skydio Drone manuals
