manuals.online logo
Brands
  1. Home
  2. •
  3. Brands
  4. •
  5. SkyLink
  6. •
  7. Remote Control
  8. •
  9. SkyLink G6KR User manual

SkyLink G6KR User manual

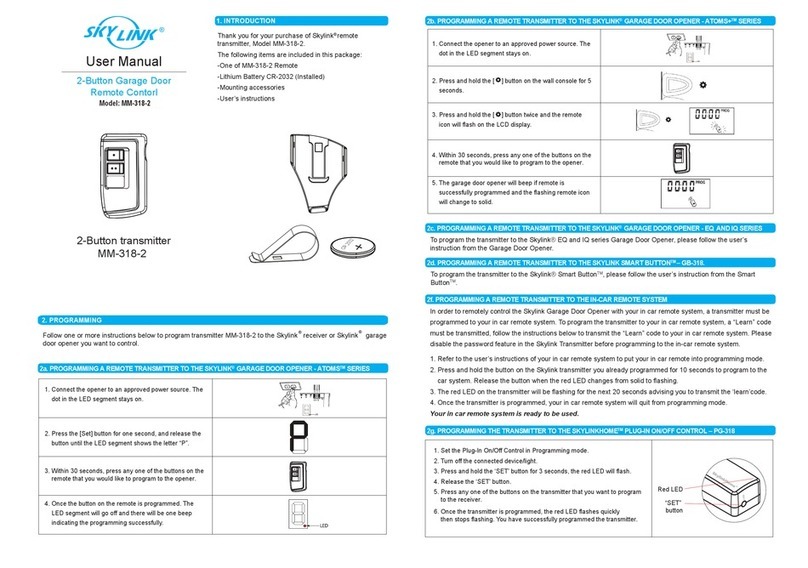
1. INTRODUCTION
ModelG6KR
Universal Garage Door
Remote Control
2. INSTALLATION
Unplug the power cord of your garage door opener
before installation to ensure power is not connected.
WARNING
GTRSmartButtonTM
The GTR Smart ButtonTM replaces most garage door “push buttons”
or “wall consoles”. There are 2 different kinds of “push buttons”.
1) Single button
2) Multi-Function Wall Console
1) Single button
If your garage door opener comes equipped with a single button “push
button”, you can replace the existing push button with Skylink®Smart
ButtonTM GTR. Please follow the procedures below.
1. Remove the existing push button by removing
the screws.
2. Disconnect the 2 wires that are connected to
the existing push button.
3. Connect the 2 wires from the existing wall
button to the GTR Smart ButtonTM. Twist the 2
wires together with the wire connector
provided. Polarity does not matter, so simply
pick one wire from the existing wall button, and
connect it to one of the wires on the Smart
ButtonTM. Do the same for the 2nd wire.
4. After connecting the wires, mount the Smart
ButtonTM on to the wall with 2 screws.
5. Plug in the AC cord of the garage door opener.
The red light on the Smart ButtonTM should flash
15 seconds after plugging in the power. The
red light will not flash immediately after
plugging in the power, which is normal. The
Smart ButtonTM is now ready to be operated.
Note: Straighten up the antenna to improve signal reception.
Remove
existing
wires
Mounting
Accessories
2. INSTALLATION (CONT)
Smart ButtonTM
2) Multi-Function Wall Console
Multi-Function Wall Console normally comes with 3 buttons that can be
used to:
1) operate the garage door opener lighting,
2) lock the receiver so it doesn’t accept
remote control operation, and
3) push button for door opening / closing
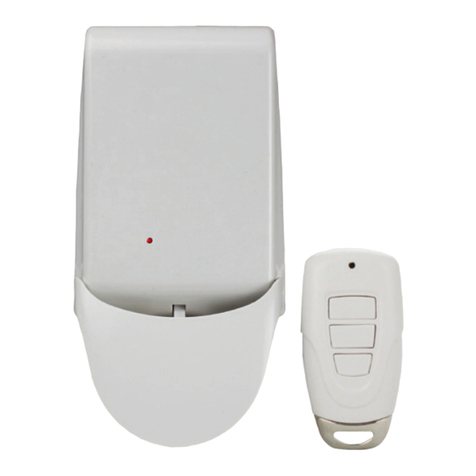
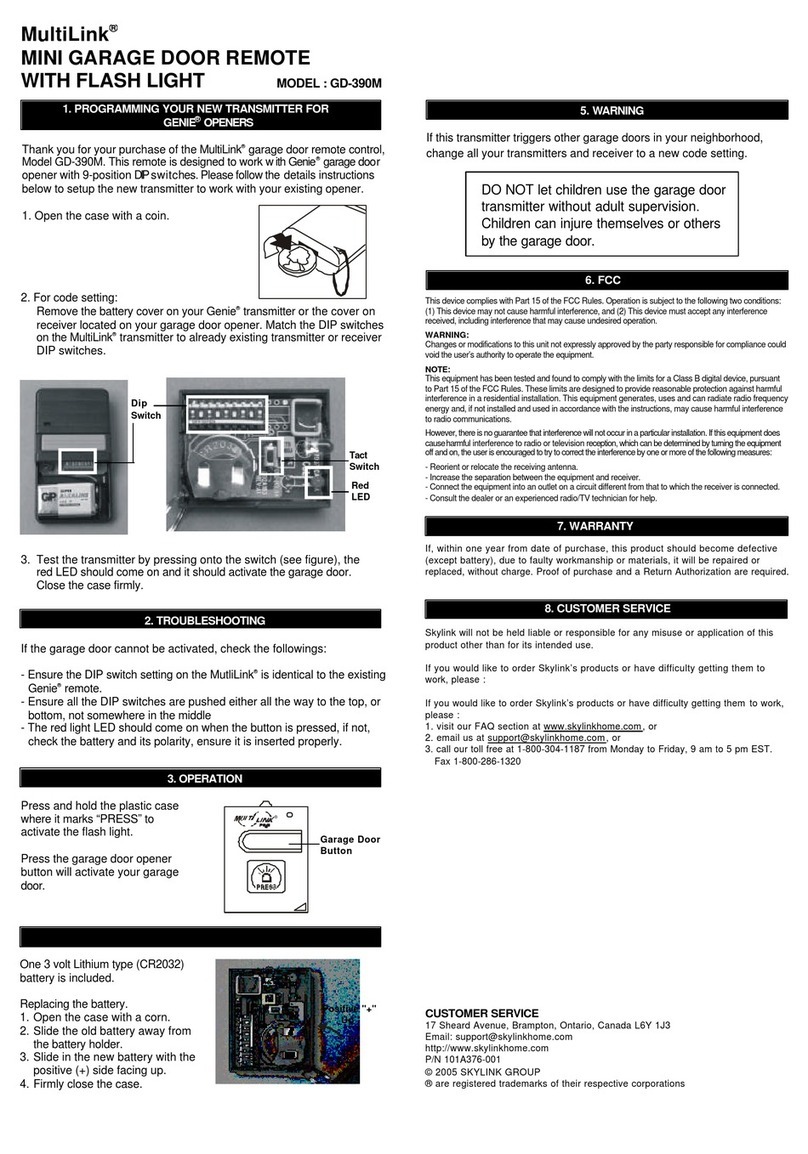
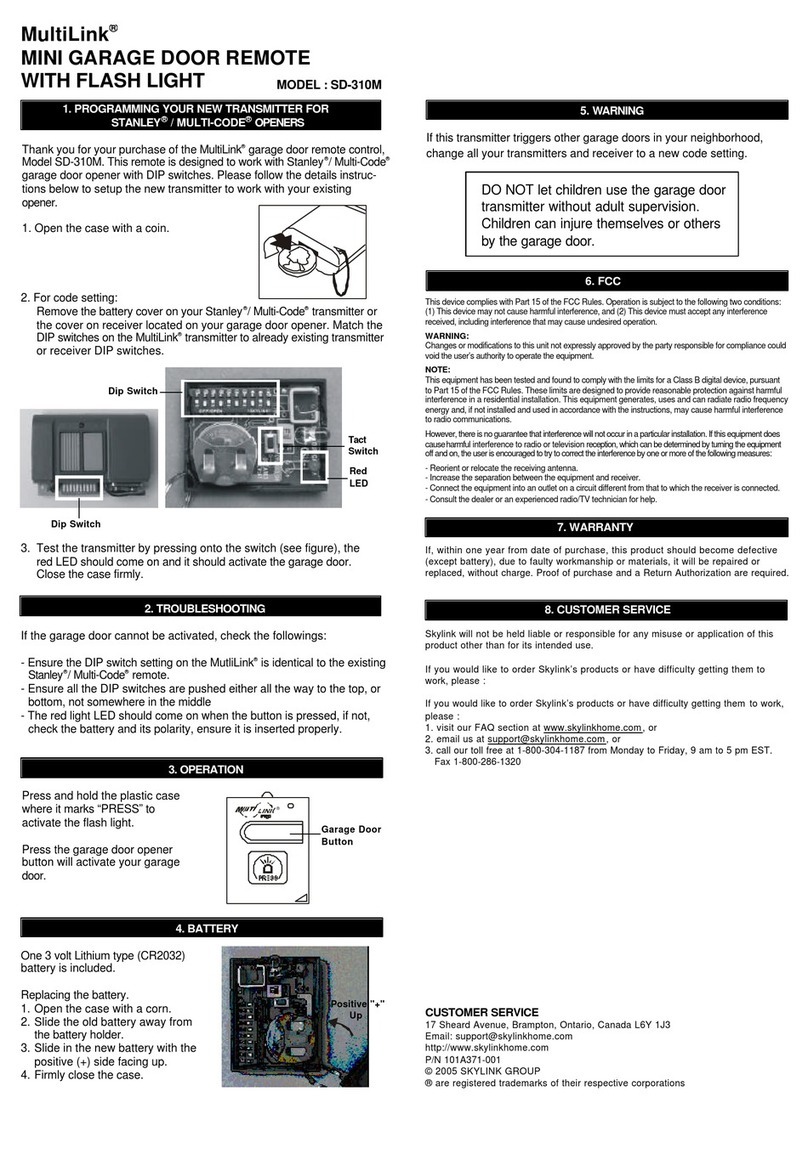
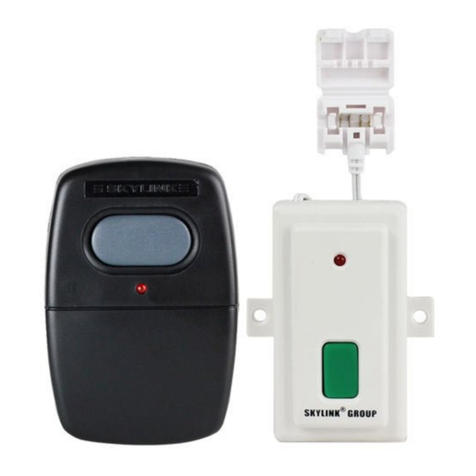
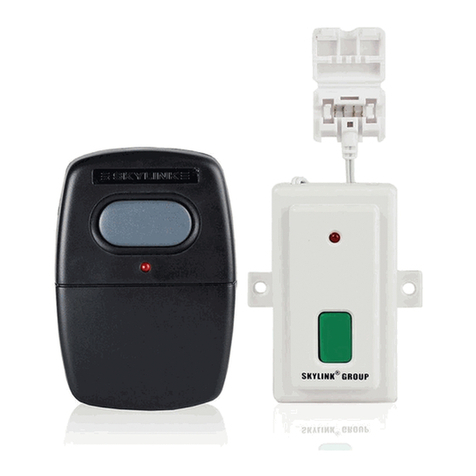
Congratulations on your purchase of the Skylink®G6KR Universal
Garage Door Remote Control. This is a kit with a universal keypad
transmitter and Smart ButtonTM. Simply replace the traditional wall button
by the Smart ButtonTM, that’s all for the installation. In this kit, you will
find the following:
Rating of the transformer: 12V DC, 100mA
Diameter of DC plug : 3.5mm
Note: Straighten up the antenna to improve signal
reception.
If you have the multi-function wall console, do not replace the wall
console by the Smart ButtonTM. You need to install the Smart ButtonTM in
parallel with your existing wall console.
1. Remove the existing wall console from the wall
by removing the screws.
2. Remove the 2 screws that secure the wires
on the wall console.
3. Connect the wires from the Smart ButtonTM to the
existing wall console. Polarity does not matter,
so simply pick one wire from the Smart ButtonTM,
and connect it to one of the terminals on the
existing wall console. Do the same for the 2nd
wire.
4. After connecting the wires, mount the Smart
ButtonTM on to the wall with 2 screws. Also
mount the original wall console on to the wall.
5. Plug in the AC cord of the garage door opener.
The red light on the Smart ButtonTM should flash
15 seconds after plugging in the power. The red
light will not flash immediately after plugging in
the power, which is normal. The Smart ButtonTM
is now ready to be operated.
6. If the Smart ButtonTM red light does not flash at
all 2 minutes after plugging in the AC cord, your
garage door opener is probably too old.
However, the Smart ButtonTM will still work by
plugging in an adapter (purchase separately).
Please contact Skylink®to purchase the
adapter.
If the red light on the Smart ButtonTM is flashing slowly,
that indicates it is in standby mode. When a valid
remote control signal is received, it will open / close the
garage door.
Simply press the button on the Smart ButtonTM, it
will open / close the garage door.
Note: After connecting this NEW Remote Control to
your wall button, your existing remote control will still
work with this connection.
OPEN /
CLOSE
3. OPERATION
Antenna
2 Wire
Connectors
Universal
Keypad Transmitter
(Battery included)
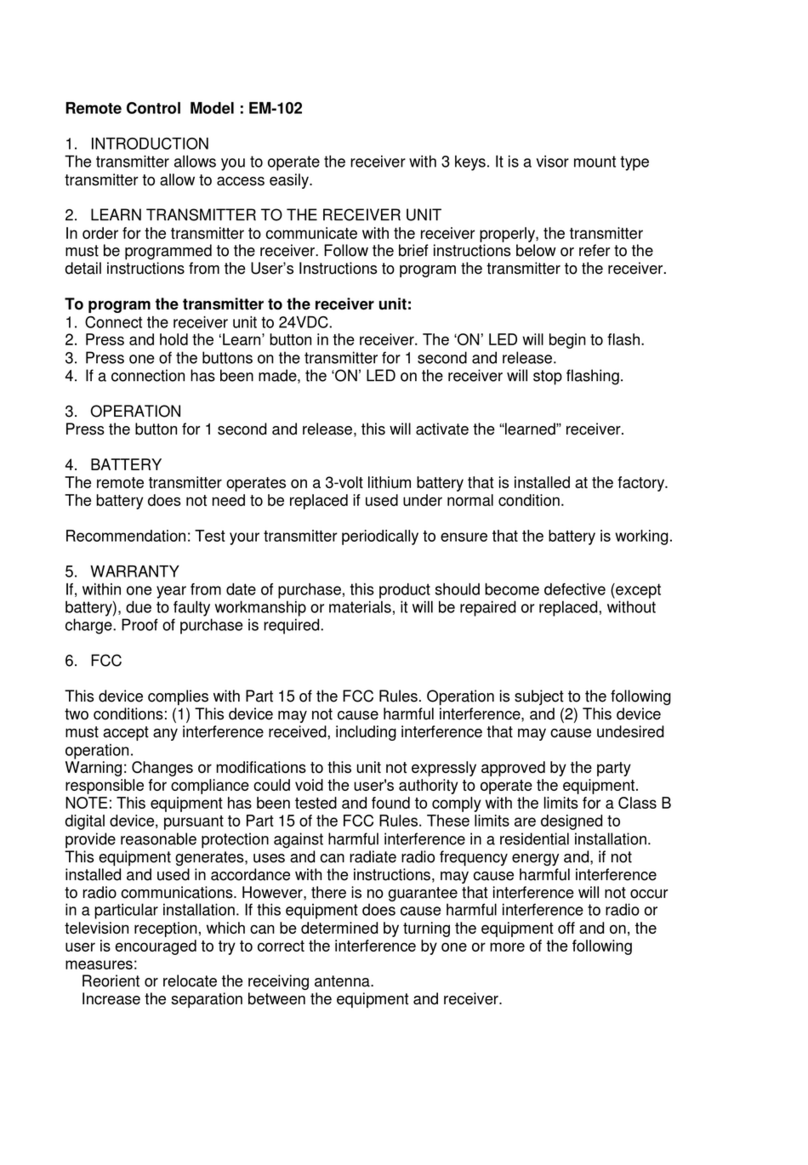
If you do not hear 3 beeps after entering the PIN, i.e. [0 0 0 0][#][1], that
means you have entered an incorrect PIN, and the keypad transmitter will
not operate your garage door.
The keypad transmitter can operate up to 4 Smart ButtonTM units, that also
means one keypad transmitter can operate up to 4 garage door openers.
Same PIN will be used for all doors. The factory default password is [0 0 0 0].
To operate door 1, you will enter [0 0 0 0][#][1]
To operate door 2, you will enter [0 0 0 0][#][2]
To operate door 3, you will enter [0 0 0 0][#][3]
To operate door 4, you will enter [0 0 0 0][#][4]
To program the keypad transmitter into the Smart ButtonTM, you must
decide which door you need to operate. If you only have one Smart
ButtonTM, we suggest you to use door 1. i.e. [0 0 0 0][#][1].
Erase remote controls
To erase unwanted remote control(s), first erase all remote controls,
then learn the ones you would like to keep.
To erase remote control(s)
1. Press and hold the learn button for approx 10 seconds.
2. The LED will flash rapidly after 10 seconds to indicate all the pro-
grammed remote controls have been erased. You may now release
the learn button.
3. You have erased all the remote controls in the Smart ButtonTM.
6. WARNING
DO NOT let children use the garage door transmitter without adult supervision.
Children can injure themselves or others by the garage door.
4. BATTERY
7. FCC
The Garage Door Remote Control is approved by the FCC and it complies with
Part 15 of the FCC Rules. Its operation is subject to the following two conditions :
1. This device may not cause harmful interference.
2. This device must accept any interference that may cause undesired operation.
WARNING:
Changes or modifications to this unit not expressly approved by the party
responsible of compliance could void the user’s authority to operate the equipment.
CUSTOMER SERVICE
17 Sheard Avenue, Brampton, Ontario, Canada L6Y 1J3
Email:[email protected]
http://www.skylinkhome.com
P/N.101Z476-002
®are registered trademarksof theirrespective corporations
©2007 SKYLINK GROUP
8. WARRANTY
If, within one year from date of purchase, this product should become defective
(except battery), due to faulty workmanship or materials, it will be repaired or
replaced, without charge. Proof of purchase and a Return Authorization are required.
9. CUSTOMER SERVICE
If you would like to order Skylink’s product or have difficulty getting your Skylink
remote control to work, please visit our website to ensure the manual you have is the
latest revision, or you can also contact us:
1. visit our FAQ section at www.skylinkhome.com, or
2. email us at [email protected], or
3. call our toll free at 1-800-304-1187 from Monday to Friday, 9 am to 5 pm EST.
Fax (800) 286-1320
You can add up to 15 additional transmitters to control the
same receiver. Skylink®offers Keychain Transmitters and
Visor Transmitters to work with your receiver. For more
information, please visit our website at
www.skylinkhome.com or contact us.
5. ADDITIONAL TRANSMITTER
Programming
Learn additional remote controls
Smart ButtonTM can learn up to 15 remote controls.
To learn additional remote controls, follow the
instructions below:
1. Press the learn button on the side of the GTR.
2. Once the learn button is pressed, the LED will
flash quickly. You may release the learn button.
3. Enter [PIN][#][assigned number of door] on the
keypad transmitter you would like to program.
The assigned door number can be either
1, 2, 3, or 4.
4. Once the keypad transmitter is programmed, the
LED will flash slowly, in the same way as it
flashes in standby mode.
5. You may now operate the garage door opener
with this new keypad transmitter.
Learn
Button
3. OPERATION (CONT)
Two 3 volt Lithium type (CR2032) batteries (included).
It is time to change the batteries when the backlight no longer appears.
+
-Battery
Compartment
Follow the instructions below to change the PIN.
To change your PIN:
1. Enter the current PIN, (factory default PIN 0 0 0 0), press * .
2. Enter new 4 to 6 digit PIN, press * .
3. Enter new PIN again, press * .
For example, if you are changing the PIN number from 0000 to 123456,
enter the following sequence, 0000, *, 123456, * , 123456, * .
If confirmed, the backlit LED flashes and the unit emits a long beep.

Other SkyLink Remote Control manuals

SkyLink LK-318-1 User manual

SkyLink

SkyLink LK-318-1 User manual

SkyLink MultiLink LM-318M Guide User manual

SkyLink

SkyLink MultiLink LM-318M Guide User manual

SkyLink Wave SoundTouch User manual

SkyLink

SkyLink Wave SoundTouch User manual

SkyLink SkylinkHome TC-318-1 User manual

SkyLink

SkyLink SkylinkHome TC-318-1 User manual

SkyLink MultiLink GE-390M User manual

SkyLink

SkyLink MultiLink GE-390M User manual

SkyLink GS1 User manual

SkyLink

SkyLink GS1 User manual

SkyLink HOUSELINK 318TR User manual

SkyLink

SkyLink HOUSELINK 318TR User manual

SkyLink MultiLink GD-390M Guide User manual

SkyLink

SkyLink MultiLink GD-390M Guide User manual

SkyLink MultiLink SD-310M Guide User manual

SkyLink

SkyLink MultiLink SD-310M Guide User manual

SkyLink MK-318-2 User manual

SkyLink

SkyLink MK-318-2 User manual

SkyLink MultiLink CG5 Guide User manual

SkyLink

SkyLink MultiLink CG5 Guide User manual

SkyLink SKYLINKHOME TC-318-10 User manual

SkyLink

SkyLink SKYLINKHOME TC-318-10 User manual

SkyLink G5M User manual

SkyLink

SkyLink G5M User manual

SkyLink EM-101 User manual

SkyLink

SkyLink EM-101 User manual

SkyLink MM-318-2 User manual

SkyLink

SkyLink MM-318-2 User manual

SkyLink 838A User manual

SkyLink

SkyLink 838A User manual

SkyLink 318TR User manual

SkyLink

SkyLink 318TR User manual

SkyLink MM-318-1 User manual

SkyLink

SkyLink MM-318-1 User manual

SkyLink EM-102 User manual

SkyLink

SkyLink EM-102 User manual

SkyLink G6T3 User manual

SkyLink

SkyLink G6T3 User manual

SkyLink MF-1 User manual

SkyLink

SkyLink MF-1 User manual

SkyLink MFV-300 Guide User manual

SkyLink

SkyLink MFV-300 Guide User manual

SkyLink MultiLink SD-300M User manual

SkyLink

SkyLink MultiLink SD-300M User manual

SkyLink WS-100 User manual

SkyLink

SkyLink WS-100 User manual

Popular Remote Control manuals by other brands

Hyundai Mobis FOB-4F33 manual

Hyundai Mobis

Hyundai Mobis FOB-4F33 manual

Palfinger RC 400 P2 Operator's manual

Palfinger

Palfinger RC 400 P2 Operator's manual

RCA RCU300 - RCU 300 Universal Remote Control product manual

RCA

RCA RCU300 - RCU 300 Universal Remote Control product manual

FUTABA 9ZAP - PART1 manual

FUTABA

FUTABA 9ZAP - PART1 manual

Qlife AIQIR01 user manual

Qlife

Qlife AIQIR01 user manual

WiSilica lumos controls Catron V Installation and Quick Start Instructions

WiSilica

WiSilica lumos controls Catron V Installation and Quick Start Instructions

Bose SoundTouch quick start guide

Bose

Bose SoundTouch quick start guide

Niles iREMOTE TS Quick install guide

Niles

Niles iREMOTE TS Quick install guide

Philips SBC RU 098 Instructions for use

Philips

Philips SBC RU 098 Instructions for use

Sony RM-V310A - Remote Commander Component code numbers

Sony

Sony RM-V310A - Remote Commander Component code numbers

JR ProPo XG11 Operation manual

JR ProPo

JR ProPo XG11 Operation manual

Firstech CompuSTAR 1WPLL4R user guide

Firstech

Firstech CompuSTAR 1WPLL4R user guide

Orbis XEOLUM MODULAR INSTRUCTIONS ON USE

Orbis

Orbis XEOLUM MODULAR INSTRUCTIONS ON USE

Topens TCS173 user manual

Topens

Topens TCS173 user manual

Goodmans GHD8015F2 Re-tuning guide

Goodmans

Goodmans GHD8015F2 Re-tuning guide

FUTABA SKYSPORT-6A instruction manual

FUTABA

FUTABA SKYSPORT-6A instruction manual

ZaapTV QWERTY quick start guide

ZaapTV

ZaapTV QWERTY quick start guide

LG Magic Remote Premium owner's manual

LG

LG Magic Remote Premium owner's manual

manuals.online logo
manuals.online logoBrands
  • About & Mission
  • Contact us
  • Privacy Policy
  • Terms and Conditions

Copyright 2025 Manuals.Online. All Rights Reserved.