manuals.online logo
Brands
  1. Home
  2. •
  3. Brands
  4. •
  5. Smartwares
  6. •
  7. Accessories
  8. •
  9. Smartwares SH4-99565AT User manual

Smartwares SH4-99565AT User manual

EN Remotecontrolledsocketset
NL Schakelset met afstandsbediening
DE Ferngesteuertes Steckdosen-Set
IT Set prese con telecomando
ES Kit de control para la iluminación interior
SH4-99565AT
EN Instruction manual
PREPARATION BEFORE USE
Insert battery
• Open the battery lid at the back of the remote (1) by turning it
counter clockwise.
• Insert the battery with the negative polarity downward.
To check if the battery is inserted correctly, briefly press a button on
the remote. If the LED flashes, then the battery is inserted successful.
• Insert the receiver into the wall outlet.
PAIRING THE REMOTE TO THE RECEIVER
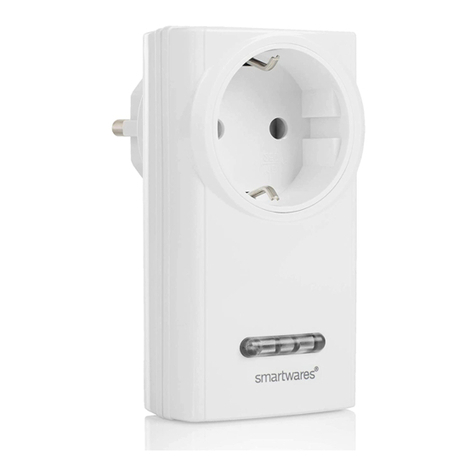
• Press the button on the receiver (2) for 3 seconds. When the LED
starts to blink, the receiver is in pairing mode.
• Press any of the ON buttons on the remote. If the LED stops
blinking and is constantly lit, the pairing was successful.
OPERATING RECEIVERS
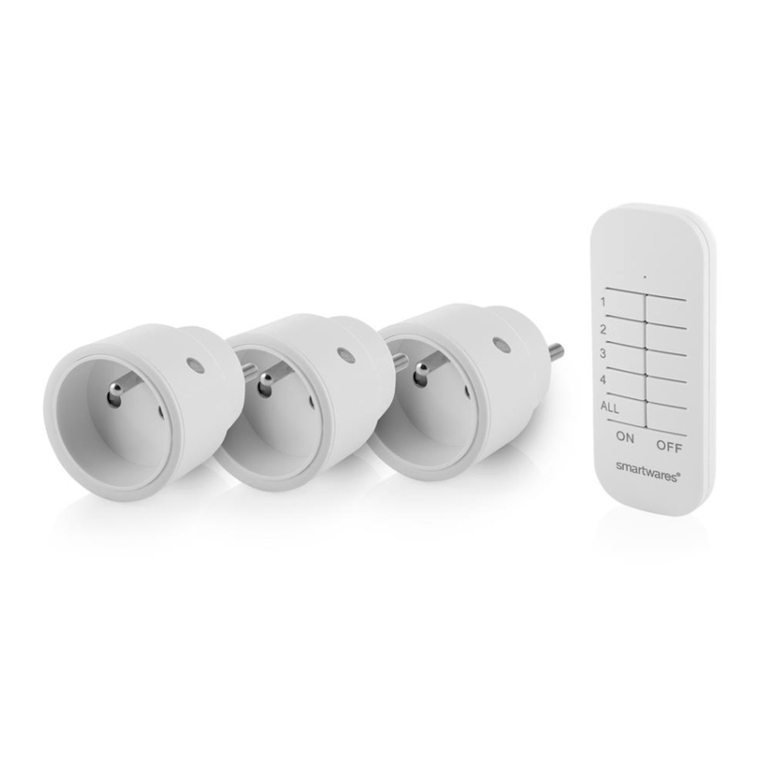
A. Press the ”ON” button on the remote control to turn on the
receiver.
B. Press the “OFF” button on the remote control to turn off the
receiver.
C. Press the ”ON” button beneath ALL (on the remote control) to turn
on all paired devices at the same time.
D. Press the ”OFF” button beneath ALL (on the remote control) to
turn off all paired devices at the same time.
Disconnecting a remote
A. Press and hold the button on the receiver for 3 seconds (3) and
then release it. During this operation the LED starts to blink. Your
receiver is now switched into the pairing mode. Attention: the LED
should blink only after releasing the button. If the LED starts to
blink while holding the button, there will be no pairing.
B. Perform one of the following steps:
– Press an ”OFF” button on the row on the remote you wish to
disconnect from a receiver. During this operation the LED on
the receiver blinks quickly and then turns off.
– Press the ”OFF” button next to ALL (on the remote) to
disconnect all links. During this operation the LED on the
receiver turns off.
To remove all pairing memories on the receiver:
• Press and hold the button for more than 6 seconds (3).
NL Gebruiksaanwijzing
VOORBEREIDING VOOR GEBRUIK
Batterij plaatsen
• Open het batterijdeksel aan de achterzijde van de
afstandsbediening (1) door het deksel tegen de klok in te draaien.
• Plaats de batterij met de negatieve pool naar beneden.
Als u wilt controleren of de batterij correct is geplaatst, drukt u kort op
een knop op de afstandsbediening. Als het ledlampje knippert, is de
batterij correct geplaatst.
• Doe de ontvanger in het stopcontact.
DE AFSTANDSBEDIENING KOPPELEN MET DE
ONTVANGER
• Houd de knop op de ontvanger (2) 3seconden ingedrukt. Als het
ledlampje begint te knipperen, staat de ontvanger in de
koppelingsmodus.
• Druk op een van de knoppen ON op de afstandsbediening. Als
het ledlampje stopt met knipperen en blijft branden, is het
koppelen gelukt.
DE ONTVANGERS BEDIENEN
A. Druk op de knop ON op de afstandsbediening om de ontvanger
in te schakelen.
B. Druk op de knop OFF op de afstandsbediening om de ontvanger
uit te schakelen.
C. Druk op de knop ON onder ALL (op de afstandsbediening) om
alle gekoppelde apparaten tegelijkertijd in te schakelen.
D. Druk op de knop OFF onder ALL (op de afstandsbediening) om
alle gekoppelde apparaten tegelijkertijd uit te schakelen.
De verbinding met een ontvanger verbreken
A. Houd de knop op de ontvanger 3seconden ingedrukt (3) en laat
deze los. Tijdens deze bewerking gaat het ledlampje knipperen.
De koppelingsmodus van de ontvanger is nu actief. Let op: Het
ledlampje mag pas gaan knipperen nadat u de knop hebt
losgelaten. Als het ledlampje al gaat knipperen terwijl u de knop
ingedrukt houdt, wordt de koppelingsmodus niet geactiveerd.
B. Voer een van de volgende stappen uit:
– Druk op een knop OFF op de rij van de afstandsbediening
waarvoor u de verbinding met een ontvanger wilt
verbreken. Tijdens deze bewerking knippert het ledlampje
op de ontvanger snel. Daarna wordt het uitgeschakeld.
– Druk op de knop OFF naast ALL (op de afstandsbediening)
om alle koppelingen te verbreken. Tijdens deze bewerking
wordt het ledlampje op de ontvanger uitgeschakeld.
Alle opgeslagen koppelingen verwijderen op de ontvanger:
• Houd de knop meer dan 6seconden ingedrukt (3).
DE Bedienungsanleitung
VORBEREITUNG
Batterie einsetzen
• Öffnen Sie den Batteriefachdeckel auf der Rückseite der
Fernbedienung (1), indem Sie ihn gegen den Uhrzeigersinn drehen.
• Setzen Sie die Batterie mit dem Minuspol nach unten ein.
Um zu prüfen, ob die Batterie korrekt eingesetzt ist, drücken Sie
kurz eine Taste auf der Fernbedienung. Wen die LED blinkt, ist die
Batterie korrekt eingesetzt.
• Schließen Sie den Empfänger an der Wandsteckdose an.
FERNBEDIENUNG UND EMPFÄNGER SYNCHRONISIEREN
• Halten Sie die Taste am Empfänger (2) 3Sekunden lang
gedrückt. Wenn die LED zu blinken, ist der Empfänger im
Synchronisierungsmodus.
• Drücken Sie eine der Tasten „ON“ auf der Fernbedienung.
Wenn die LED aufhört zu blinken und konstant leuchtet, war die
Kopplung erfolgreich.
EMPFÄNGERBETRIEB
A. Drücken Sie die Taste „ON“ auf der Fernbedienung, um den
Empfänger einzuschalten.
B. Drücken Sie die Taste „OFF“ auf der Fernbedienung, um den
Empfänger auszuschalten.
C. Drücken Sie die Taste „ON“ unter „ALL“ (auf der Fernbedienung),
um alle synchronisierten Geräte gleichzeitig einzuschalten.
D. Drücken Sie die Taste „OFF“ unter „ALL“ (auf der
Fernbedienung),um alle synchronisierten Geräte gleichzeitig
auszuschalten.
Empfänger trennen
A. Halten Sie die Taste am Empfänger 3Sekunden (3) lang
gedrückt und lassen Sie sie dann wieder los. Während dieses
Vorgangs beginnt die LED zu blinken. Ihr Empfänger wechselt nun
in den Synchronisierungsmodus. Achtung: Die LED sollte erst
blinken, nachdem Sie die Taste losgelassen haben. Falls die LED zu
blinken anfängt, während Sie die Taste gedrückt gehalten, findet
keine Synchronisierung statt.
Specifications:
Battery: 3VDC, type CR 2032 (incl.)
Radio Frequency: 433.92Mhz
Maximum output: 0dBm
Maximum range: 30m
Maximum power: 2300 W
AC input Voltage: 230V ~ 50Hz
Remote control (SH4-90152)
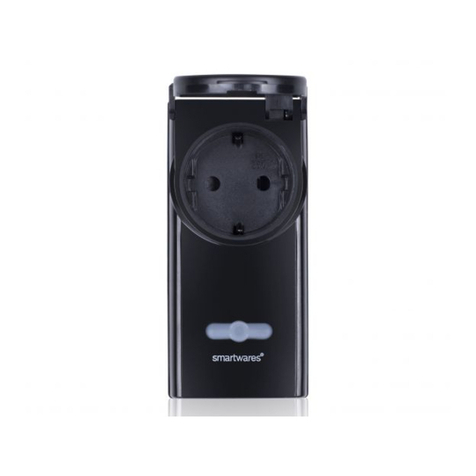
EU plug (SH4-90268)
B. Führen Sie einen der folgenden Schritte durch:
– Drücken Sie eine Taste „OFF“ in der Reihe der
Fernbedienung, die von einem Empfänger
getrennt werden soll. Während dieses
Vorgangs blinkt die LED am Empfänger schnell
und erlischt dann.
– Drücken Sie die Taste „OFF“ neben „ALL“ (auf
der Fernbedienung), um alle Empfänger zu
trennen. Während dieses Vorgangs erlischt die
LED am Empfänger.
Um alle Synchronisierungsspeicher am Empfänger zu
löschen:
• Drücken und halten Sie die Taste 6 Sekunden lang
(3).
IT Istruzioni per l'uso
PREPARAZIONE PER L’USO
Inserire la batteria
• Aprire il coperchio della batteria sul retro del
telecomando (1) ruotandolo in senso antiorario.
• Inserire la batteria con il polo negativo rivolto verso il
basso.
Per verificare se la batteria è inserita correttamente,
premere brevemente un pulsante del telecomando. Se il
LED lampeggia, la batteria è inserita correttamente.
• Inserire il ricevitore nella presa elettrica.
ASSOCIAZIONE DEL TELECOMANDO AL
RICEVITORE
• Tenere premuto il pulsante sul ricevitore (2) per 3
secondi e rilasciarlo. Quando il LED inizia a
lampeggiare, il ricevitore è in modalità di
associazione.
• Premere un pulsante qualsiasi del telecomando. Se
il LED smette di lampeggiare e rimane acceso fisso,
l'associazione è avvenuta correttamente.
UTILIZZO DEI RICEVITORI
A. Premere il tasto “ON” del telecomando per
accendere il ricevitore.
B. Premere il tasto “OFF” del telecomando per
spegnere il ricevitore.
C. Premere il tasto “ON” sotto ALL (del telecomando)
per accendere contemporaneamente tutti i dispositivi
associati.
D. Premere il tasto “OFF” sotto ALL (del telecomando)
per spegnere contemporaneamente tutti i dispositivi
associati.
Disconnessione di un telecomando
A. Tenere premuto il pulsante sul ricevitore per 3
secondi (3) e rilasciarlo. Durante questa operazione
il LED inizia a lampeggiare. Ora il ricevitore è in
modalità di associazione. Attenzione: il LED deve
lampeggiare solo dopo il rilascio del pulsante. Se il
LED inizia a lampeggiare mentre il pulsante è
premuto, l’associazione non verrà eseguita.
B. Eseguire uno dei passaggi seguenti:
– Premere un pulsante "OFF" sulla riga del
telecomando che si desidera scollegare da un
ricevitore. Durante questa operazione il LED sul
ricevitore lampeggia rapidamente e si spegne.
– Premere il pulsante "OFF" a lato di ALL (TUTTI)
del telecomando per scollegare tutte le
associazioni. Durante questa operazione il LED
sul ricevitore si spegne.
Per eliminare permanentemente tutte le associazioni dal
ricevitore:
• Tenere premuto il pulsante per 6 secondi (3).
ES Manual de instrucciones
PREPARACIÓN ANTES DEL USO
Introducción de la pila
• Para abrir la tapa de la pila, situada en la parte
posterior el mando (1), gírela hacia la izquierda.
• Introduzca la pila con el polo negativo orientado
hacia abajo.
Para comprobar si ha introducido la pila correctamente,
presione brevemente un botón del mando a distancia. Si
el LED parpadea, significa que ha introducido
correctamente la pila.
• Inserte el receptor en la toma de pared.
EMPAREJAMIENTO DEL MANDO A DISTANCIA
CON EL RECEPTOR
• Pulse el botón del receptor (2) durante 3 segundos.
Cuando el LED comience a parpadear, el receptor
estará en el modo de emparejamiento.
• Pulse cualquiera de los botones ON del mando a
distancia. Si el LED deja de parpadear y permanece
encendido de manera continua, el emparejamiento
es correcto.
FUNCIONAMIENTO DE LOS RECEPTORES
A. Pulse el botón “ON” del mando a distancia para
encender el receptor.
B. Pulse el botón “OFF” del mando a distancia para
apagar el receptor.
C. Pulse el botón “ON” situado debajo de ALL (en el
mando a distancia) para encender todos los
dispositivos emparejados al mismo tiempo.
D. Pulse el botón “OFF” situado debajo de ALL (en el
mando a distancia) para apagar todos los
dispositivos emparejados al mismo tiempo.
Desconexión de un mando a distancia
A. Mantenga pulsado el botón del receptor durante 3
segundos (3) y, a continuación, suéltelo. Durante
esta operación, el LED empieza a parpadear. Ahora
el receptor está en el modo de emparejamiento.
Atención: El LED solo debe parpadear después de
soltar el botón. Si el LED empieza a parpadear
mientras se mantiene pulsado el botón, no se
realizará el emparejamiento.
B. Realice uno de los siguientes pasos:
– Pulse un botón “OFF” en la fila del mando a
distancia que desee desconectar del receptor.
Durante esta operación, el LED del receptor
parpadea rápidamente y, a continuación, se
apaga.
– Pulse el botón “OFF” junto a ALL (en el mando
a distancia) para desconectar todos los
enlaces. Durante esta operación, el LED del
receptor se apaga.
Para eliminar todas memorizaciones de emparejamiento
en el mando a distancia:
• Mantenga pulsado el botón durante más de 6
segundos (3).
EN
COIN / BUTTON CELL BATTERIES
Do not ingest battery, risk of Chemical Burn Hazard. This
product contains a coin / button cell battery. If the coin /
button cell battery is swallowed, it can cause severe
internal burns in just 2 hours and can lead to death.
• Keep new and used batteries away from children.
• If the battery compartment does not close securely stop
using the product and keep it away from children.
• If you think batteries might have been swallowed or
placed inside any part of the body, seek immediate medical
attention.
NL
KNOOPCELBATTERIJEN
Slik de batterij niet in – risico op chemische brandwonden.
Dit product bevat een knoopcelbatterij.
Als de knoopcelbatterij wordt ingeslikt, kan dit in slechts 2
uur tijd leiden tot ernstige inwendige brandwonden en
overlijden.
•
•
Houd nieuwe en gebruikte batterijen buiten bereik van
kinderen. Als het batterijvak niet goed sluit, gebruik het
product dan niet meer en zorg dat u het buiten bereik van
kinderen houdt.
• Als u vermoedt dat iemand een batterij heeft ingeslikt of
een batterij op enige andere manier in iemands lichaam
terecht is gekomen, raadpleeg dan onmiddellijk een arts.
FR
PILES BOUTONS
Ne pas ingérer la pile, risque de brûlure chimique.
Ce produit contient une pile bouton. En cas d’ingestion, cette
pile peut provoquer de graves brûlures internes en deux
heures seulement et entraîner des lésions potentiellement
mortelles.
• Conservez vos piles neuves et usagées hors de la portée
des enfants.
• Si le compartiment de la pile ne ferme pas correctement,
cessez d’utiliser le produit et gardez-le hors de la portée des
enfants.
• Si vous pensez qu’une pile a été avalée ou insérée dans
une
quelconque autre partie du corps, contactez immédiatement
un médecin.
DE
KNOPFZELLENBATTERIEN
Batterie nicht verschlucken. Verätzungsgefahr Dieses
Produkt enthält eine Knopfzellenbatterie. Wird die Knopfzelle
verschluckt, kann sie in nur 2 Stunden schwere innere
Verätzungen verursachen und zum Tod führen.
• Halten Sie neue und gebrauchte Batterien von Kindern
fern.
• Falls sich das Batteriefach nicht sicher verschließen lässt,
verwenden Sie das Produkt nicht weiter und halten Sie es
von Kindern fern.
• Falls Sie glauben, dass Batterien möglicherweise
verschluckt oder in eine Körperöffnung eingeführt wurden,
suchen Sie unverzüglich einen Arzt auf.
This manual suits for next models

1

Other Smartwares Accessories manuals

Smartwares 10.043.79 User manual

Smartwares

Smartwares 10.043.79 User manual

Smartwares 10.037.10 User manual

Smartwares

Smartwares 10.037.10 User manual

Smartwares Byron DIC-23112 User manual

Smartwares

Smartwares Byron DIC-23112 User manual

Smartwares SH5-RPD-02A User manual

Smartwares

Smartwares SH5-RPD-02A User manual

Smartwares SC45 Operating instructions

Smartwares

Smartwares SC45 Operating instructions

Smartwares SH4-99565AT-FR User manual

Smartwares

Smartwares SH4-99565AT-FR User manual

Smartwares SH5-TSY-A User manual

Smartwares

Smartwares SH5-TSY-A User manual

Smartwares SH8-90901 User manual

Smartwares

Smartwares SH8-90901 User manual

Smartwares sa68p User manual

Smartwares

Smartwares sa68p User manual

Smartwares VD40W User manual

Smartwares

Smartwares VD40W User manual

Smartwares Byron User manual

Smartwares

Smartwares Byron User manual

Smartwares SH4-90155 User manual

Smartwares

Smartwares SH4-90155 User manual

Smartwares SH5-RPD-02A/FR User manual

Smartwares

Smartwares SH5-RPD-02A/FR User manual

Smartwares SH4-90158 User manual

Smartwares

Smartwares SH4-90158 User manual

Smartwares 10.037.28 User manual

Smartwares

Smartwares 10.037.28 User manual

Smartwares Byron 7900 User manual

Smartwares

Smartwares Byron 7900 User manual

Smartwares Byron 4260 User manual

Smartwares

Smartwares Byron 4260 User manual

Smartwares 10.037.08 User manual

Smartwares

Smartwares 10.037.08 User manual

Smartwares SC07/3 User manual

Smartwares

Smartwares SC07/3 User manual

Smartwares Byron DIC-23216 User manual

Smartwares

Smartwares Byron DIC-23216 User manual

Smartwares SHW-90130 User manual

Smartwares

Smartwares SHW-90130 User manual

Popular Accessories manuals by other brands

novotechnik LWH Series user manual

novotechnik

novotechnik LWH Series user manual

Sony CP-V10 operating instructions

Sony

Sony CP-V10 operating instructions

B-Link Video Doorbell Setup guide

B-Link

B-Link Video Doorbell Setup guide

Panasonic LA-511 instruction manual

Panasonic

Panasonic LA-511 instruction manual

VITROTECLABS BP25 manual

VITROTECLABS

VITROTECLABS BP25 manual

Mid Ocean Brands MO8642 user manual

Mid Ocean Brands

Mid Ocean Brands MO8642 user manual

Sun Power CryoTel Series operating instructions

Sun Power

Sun Power CryoTel Series operating instructions

Saivod VS1210B manual

Saivod

Saivod VS1210B manual

IDTECH SecureHead SPI user manual

IDTECH

IDTECH SecureHead SPI user manual

Vega VEGAFLEX 86 operating instructions

Vega

Vega VEGAFLEX 86 operating instructions

Multitech Reveal user guide

Multitech

Multitech Reveal user guide

S+S Regeltechnik KYMASGARD AFTF-HK-FSE Operating Instructions, Mounting & Installation

S+S Regeltechnik

S+S Regeltechnik KYMASGARD AFTF-HK-FSE Operating Instructions, Mounting & Installation

ROSE DISPLAYS QUICKGRIP WITH PEGS AND MULTICLIPS manual

ROSE DISPLAYS

ROSE DISPLAYS QUICKGRIP WITH PEGS AND MULTICLIPS manual

Yamaha FC9 owner's manual

Yamaha

Yamaha FC9 owner's manual

WiT BWT901CL user manual

WiT

WiT BWT901CL user manual

Balluff BIP AD0-B014-01-EP02 operating manual

Balluff

Balluff BIP AD0-B014-01-EP02 operating manual

PNI PlacePod user manual

PNI

PNI PlacePod user manual

MSA General Monitors S4000TH instruction manual

MSA

MSA General Monitors S4000TH instruction manual

manuals.online logo
manuals.online logoBrands
  • About & Mission
  • Contact us
  • Privacy Policy
  • Terms and Conditions

Copyright 2025 Manuals.Online. All Rights Reserved.