manuals.online logo
Brands
  1. Home
  2. •
  3. Brands
  4. •
  5. Smartwares
  6. •
  7. Accessories
  8. •
  9. Smartwares SHW-90130 User manual

Smartwares SHW-90130 User manual

EN | Instruction manual
NL |Gebruiksaanwijzing
DE | Bedienungsanleitung
ES | Manual de usuario
SV | Bruksanvisning
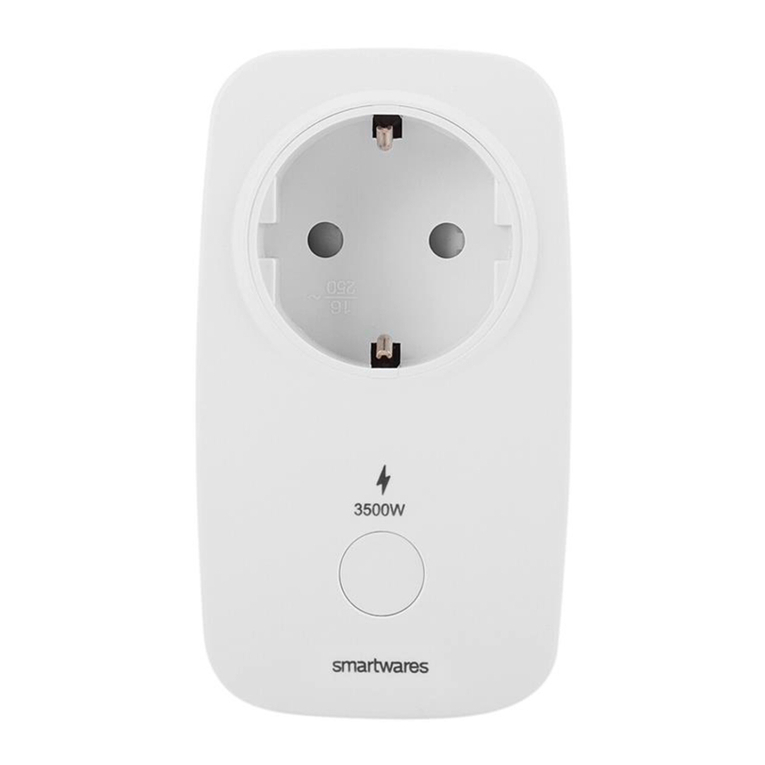
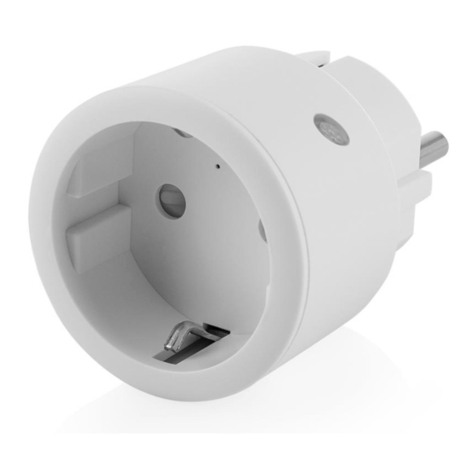
SHW-90130 | Wi-Fi Plug
EN Instruction manual
INSTALLING THE RECEIVER
• Insert the receiver into the wall outlet (A).
The receiver can be paired with and operated by any transmitter from
the Smartwares Plug & Connect series and/or with your smartphone.
Pairing the receiver with a sender
• Press the button on the receiver twice rapidly (B). The LED starts
to blink (C). Your receiver is now switched to pairing mode.
Attention: the LED should only blink after releasing the button. If
the LED starts to blink while holding the button, there will be no
pairing.
• Press the on button on the sender (see the instructions given in
the manual for the sender).
• The LED on the receiver will light up.
• Your receiver and sender are now paired.
• Connect the desired device to the receiver and make sure that
the desired device is switched on (D). Now, the receiver is ready
for use with the paired sender (for operating instructions please
see the manual for the sender).
Pairing the receiver with your smartphone
Note: Please enable Bluetooth and GPS location functions on your
smartphone before pairing.
• Download the Connected at Home app from Apple App Store or
Google Play Store. Alternatively, you can use the Smartlife app.
• Register or log in with existing account.
• Press [Add Device] or the + button to add the device.
• Long press (5 seconds) the pairing button (E) on the receiver
until the blue LED indicator flashes, then release it. The Wi-Fi
plug is now in pairing mode.
• The device will appear on the screen when the connection is
made.
• For Connected at home app: Choose Wi-Fi Plug by pressing the
+ button.
• For Smartlife app: Choose Plug (BLE+Wi-Fi) by pressing the +
button.
• Follow the instructions in the app for connecting with Wi-Fi.
• Connect the desired device to the receiver and make sure that
the desired device is switched on.
• The receiver can now be controlled using the app.
Note: The receiver can also be controlled via Alexa or Google
Assistant, follow the instructions for third party services under “Me” in
the app.
RESETTING
To reset Wi-Fi + remove paired senders:
• Go to the app settings and press: “Remove device”, then press
“Disconnect and wipe data”.
To unpair only 1 sender:
• Press the button on the device twice rapidly, so the LED will blink
blue rapidly. Then press the OFF button on the sender to unpair
the remote control from the plug.
NL Gebruiksaanwijzing
DE ONTVANGER INSTALLEREN
• Steek de ontvanger in het stopcontact (A).
De ontvanger kan worden gekoppeld aan en bediend met elke zender
uit de Smartwares Plug & Connect-serie en/of met uw smartphone.
De ontvanger koppelen met een zender
• Druk snel tweemaal op de toets op de ontvanger (B). De LED
begint te knipperen (C). Uw ontvanger is nu in de
koppelingsmodus geschakeld.
Let op: de LED moet alleen knipperen nadat u de toets hebt
losgelaten. Als de LED begint te knipperen terwijl u de toets
ingedrukt houdt, vindt er geen koppeling plaats.
• Druk op de Aan-knop van de zender (zie de instructies in de
handleiding van de zender).
• De LED op de ontvanger zal gaan branden.
• Uw ontvanger en zender zijn nu met elkaar gekoppeld.
• Sluit het gewenste apparaat aan op de ontvanger en zorg ervoor
dat het apparaat is ingeschakeld (D). Nu is de ontvanger klaar
voor gebruik met de gekoppelde zender (voor
bedieningsinstructies zie de handleiding van de zender).
De ontvanger koppelen met uw smartphone
Opmerking: Schakel Bluetooth en de GPS-locatiefunctie op uw
smartphone in alvorens te koppelen.
• Download de Connected at Home app in de Apple App Store of
Google Play Store. Als alternatief kunt u ook gebruik maken van
de Smartlife-app.
• Meld u aan of log in met een bestaand account.
• Druk [Apparaat toevoegen] of de + knop om het apparaat toe te
voegen.
• Houd de koppelingsknop (E) op de ontvanger lang ingedrukt (5
seconden) tot de blauwe LED-indicator knippert en laat hem dan
los. De wifi-stekker staat nu in de koppelstand.
• Het apparaat verschijnt op het scherm wanneer de verbinding tot
stand is gebracht.
• Voor de Connected at home-app: Kies Wifi-stekker door te
drukken op de + knop.
• Voor de Smartlife-app: Kies Stekker (BLE+Wifi) door te drukken
op de + knop.
• Volg de instructies in de app om verbinding te maken met wifi.
• Sluit het gewenste apparaat aan op de ontvanger en zorg ervoor
dat het apparaat is ingeschakeld.
• De ontvanger kan nu worden bediend met de app.
Opmerking: De ontvanger kan ook worden bediend via Alexa of
Google Assistant; volg de instructies voor diensten van derden onder
'Me' in de app.
RESETTEN
Om de wifi te resetten + gekoppelde zenders te verwijderen:
• Ga naar de app-instellingen en druk op: "Apparaat verwijderen",
en druk dan op "Verbinding verbreken en gegevens wissen".
Om slechts 1 zender te ontkoppelen:
• Druk twee keer snel achter elkaar op de knop op het apparaat,
zodat de led snel blauw gaat knipperen. Druk dan op de UIT-
toets van de zender om de afstandsbediening van de aansluiting
te ontkoppelen.
DE Bedienungsanleitung
INSTALLIEREN DES EMPFÄNGERS
• Stecken Sie den Empfänger in die Wandsteckdose (A).
Dieser Empfänger kann mit jedem Sender der Smartwares Plug &
Connect- Serie und/oder mit Ihrem Smartphone gekoppelt und
betrieben werden.
Koppeln (Pairing) des Empfängers mit einem Sender
• Drücken Sie die Taste am Empfänger zweimal schnell
hintereinander (B). Die LED beginnt zu blinken (C). Ihr
Empfänger befindet sich nun im Kopplungs-Modus.
A
2x
B
5 sec.
E
Flash
C
D
Specifications:
Maximum power: 2300W
Frequency: 2.4 GHz
Maximum RF output: 15.7dBm
AC input: 230V ~ 50Hz
Maximum range: 30m
Wireless technology: Wi-Fi
Smartlife app Connected at Home app
Achtung: Die LED sollte erst nach dem Loslassen
der Taste blinken. Wenn die LED zu blinken beginnt,
während Sie die Taste gedrückt halten, erfolgt keine
Kopplung.
• Drücken Sie die Einschalttaste des Senders (siehe
Anweisungen in der Bedienungsanleitung des
Senders).
• Die LED am Empfänger leuchtet auf.
• Ihr Empfänger und Ihr Sender sind nun miteinander
gekoppelt.
• Schließen Sie das gewünschte Gerät an den
Empfänger an und vergewissern Sie sich, dass das
gewünschte Gerät eingeschaltet ist (D). Nun ist der
Empfänger mit dem gekoppelten Sender
betriebsbereit (für die Bedienungsanleitung siehe
das Handbuch des Senders).
Koppeln des Empfängers mit Ihrem Smartphone
Hinweis: Bitte aktivieren Sie vor dem Koppeln die
Bluetooth- und GPS-Ortungsfunktionen auf Ihrem
Smartphone.
• Laden Sie die „Connected-at-Home-App“ aus dem
Apple-App-Store oder dem Google-Play-Store
herunter. Alternativ können Sie die Smartlife-App
verwenden.
• Registrieren Sie sich oder melden Sie sich bei
einem bestehenden Konto an.
• Drücken Sie [Gerät hinzufügen] oder die + -Taste,
um das Gerät hinzuzufügen.
• Halten Sie die Kopplungstaste (E) am Empfänger
lange gedrückt (5 Sekunden), bis die blaue LED-
Anzeige blinkt und lassen Sie sie dann los. Der
WLAN-Stecker befindet sich jetzt im
Kopplungsmodus.
• Das Gerät wird auf dem Display angezeigt, wenn die
Verbindung hergestellt ist.
• Für die Connected at Home App: Wählen Sie
WLAN-Stecker durch Drücken der + -Taste.
• Für die Smartlife-App: Wählen Sie Stecker
(BLE+WLAN) aus: durch Drücken der + -Taste.
• Befolgen Sie die Anweisungen in der App, um eine
WLAN-Verbindung herzustellen.
• Schließen Sie das gewünschte Gerät an den
Empfänger an und vergewissern Sie sich, dass das
gewünschte Gerät eingeschaltet ist.
• Der Empfänger kann nun über die App gesteuert
werden.
Hinweis: Der Empfänger kann auch über Alexa oder
Google Assistant gesteuert werden: Folgen Sie den
Anweisungen für Dienste von Drittanbietern unter „Me-
Ich“ in der App.
ZURÜCKSETZEN
So setzen Sie Wi-Fi zurück + entfernen gekoppelte
Empfänger:
• Gehen Sie zu den App-Einstellungen und drücken
Sie: „Gerät entfernen“ und dann auf „Trennen und
Daten löschen“.
Um nur einen Sender zu entkoppeln:
• Drücken Sie die Taste am Gerät zweimal
hintereinander, so dass die blaue LED schnell blinkt.
Drücken Sie dann die OFF-Taste am Sender, um
die Verbindung zwischen der Fernbedienung und
dem Stecker zu trennen.
ES Manual de instrucciones
INSTALACIÓN DEL RECEPTOR
• Inserta el receptor en el enchufe de pared (A).
El receptor lo puede emparejar y operar cualquier
transmisor de la serie Smartwares Plug & Connect o tu
smartphone.
Emparejar el receptor con el emisor
• Pulsa el botón en el receptor dos veces rápidamente
(B). El LED empezará a parpadear (C). El receptor
ahora estará conectado en modo de
emparejamiento.
Atención: el LED solo debe parpadear después de
haber soltado el botón. Si el LED empieza a
parpadear mientras se mantiene el botón, no habrá
emparejamiento.
• Pulsa el botón del emisor (ver las instrucciones
incluidas en el manual del emisor)
• El LED del receptor se encenderá.
• El receptor y el emisor estarán emparejados.
• Conecta el dispositivo que desees al receptor y
asegúrate de que el dispositivo elegido esté
encendido (D). Ahora el receptor está listo para usar
con el emisor emparejado (lee el manual del emisor
para ver las instrucciones de funcionamiento)
Emparejar el receptor con su smartphone
Nota: Activa el Bluetooth y la ubicación GPS en el
smartphne antes del emparejamiento.
• Descarga la aplicación Connected at Home en la
Apple App Store o Google Play Store. También
puedes utilizar la aplicación Smartlife.
• Regístrate o inicia sesión con una cuenta existente.
• Pulsa [Añadir dispositivo] o el + botón para añadir
el dispositivo.
• Pulsa prolongadamente (5 segundos) el botón de
emparejamiento (E) del receptor hasta que el
indicador LED azul parpadee y suéltalo. El conector
wifi estará en modo emparejamiento.
• El dispositivo aparecerá en la pantalla cuando se
establezca la conexión.
• Para la aplicación Connected at home: Elige
Conector wifi pulsando el + botón.
• Para la aplicación Smartlife: Elige Conector
(BLE+wifi) pulsando el + botón.
• Sigue las instrucciones de la aplicación para
conectar con el wifi.
• Conecta el dispositivo que desees al receptor y
asegúrate de que el dispositivo elegido esté
encendido.
• El receptor ya se puede controlar utilizando la
aplicación
Nota: El receptor también se puede controlar con Alexa
o Google Assistant, sigue las instrucciones para
servicios de terceros en «Me» en la aplicación.
REINICIAR
Para reinicial el Wi-Fi + eliminar remitentes vinculados:
• Ir a la configuración de la aplicación y pulsar:
"Eliminar dispositivo", luego pulsar "Desconectar y
borrar datos".
Para desemparejar solo 1 emisor:
• Presiona el botón en el dispositivo dos veces con
rapidez, para que el LED parpadee rápidamente en
azul. A continuación, presiona el botón de apagar en
el emisor para desemparejar el control remoto del
enchufe.
SV Instruktionshandbok
INSTALLERA SÄNDAREN
• Sätt in mottagaren i vägguttaget (A).
Mottagaren kan parkopplas med och drivas av valfri
sändare från Smartwares Plug & Connect-serie och/eller
med din smartphone.
Parkoppling av mottagaren med en sändare
• Tryck snabbt två gånger på knappen på mottagaren
(B). Lysdioden börjar blinka (C). Din mottagare går
nu över till parkopplingsläge.
Obs: lysdioden ska bara blinka när du släpper upp
knappen. Om lysdioden börjar blinka medan du
håller in knappen, sker ingen parkoppling.
• Tryck på knappen på sändaren (se instruktionerna
för sändaren i manualen).
• Lysdidoen på mottagaren tänds.
• Din mottagare och sändare är nu parkopplade.
• Anslut en önskad enhet till mottagaren och se till att
den önskade enheten är påslagen (D). Nu är
mottagaren klar för bruk med den parkopplade
sändaren (för bruksanvisningar, se manualen till
sändaren).
Parkoppling av mottagaren med din smartphone
Obs: Aktivera Bluetooth och GPS platsfunktioner på din
smartphone innan du parkopplar.
• Ladda ner appen Connected at Home från Apple
Appstore eller Google Playstore. Alternativt kan du
också använda appen Smart Life.
• Registrera dig eller logga in med ett befintligt konto.
• Tryck [Add Device][Lägg till enhet] eller +
knappen på enheten.
• Tryck länge (5 sekunder) på parkopplingsknappen
(E) på mottagaren tills den blå lysdioden blinkar och
släpp den sedan. Wi-Fi-kontakten är nu i
parkopplingsläge.
• Enheten kommer att synas på skärmen när
anslutningen är klar.
• För appen Connected at Home: välj Wi-Fi-kontakt
genom att trycka på + knappen.
• För Smartlife-appen: Välj Kontakt (BLE+Wi-Fi)
genom att trycka på + knappen.
• Följ instruktionerna i appen för anslutning till WiFi.
• Anslut den önskade enheten till mottagaren och se
till att den önskade enheten är påslagen.
• Mottagaren kan nu styras med appen.
Obs: Mottagaren kan också styras via Alexa eller Google
Assistant, följ instruktionerna för tredjepartstjänster under
“Me” i appen.
ÅTERSTÄLLNING
För att återställa Wi-Fi + ta bort parkopplade sändare:
• Gå till app-inställningarna och tryck på: “Ta bort
enhet”, tryck sedan på “Koppla bort och rensa data”.
Om bara en sändare ska avkopplas:
• Tryck snabbt två gånger på knappen på enheten så
blinkar LED snabbt blått. Tryck sedan på OFF(AV)-
knappen på sändaren för att koppla isär
fjärrkontrollen från kontakten.
Other Smartwares Accessories manuals

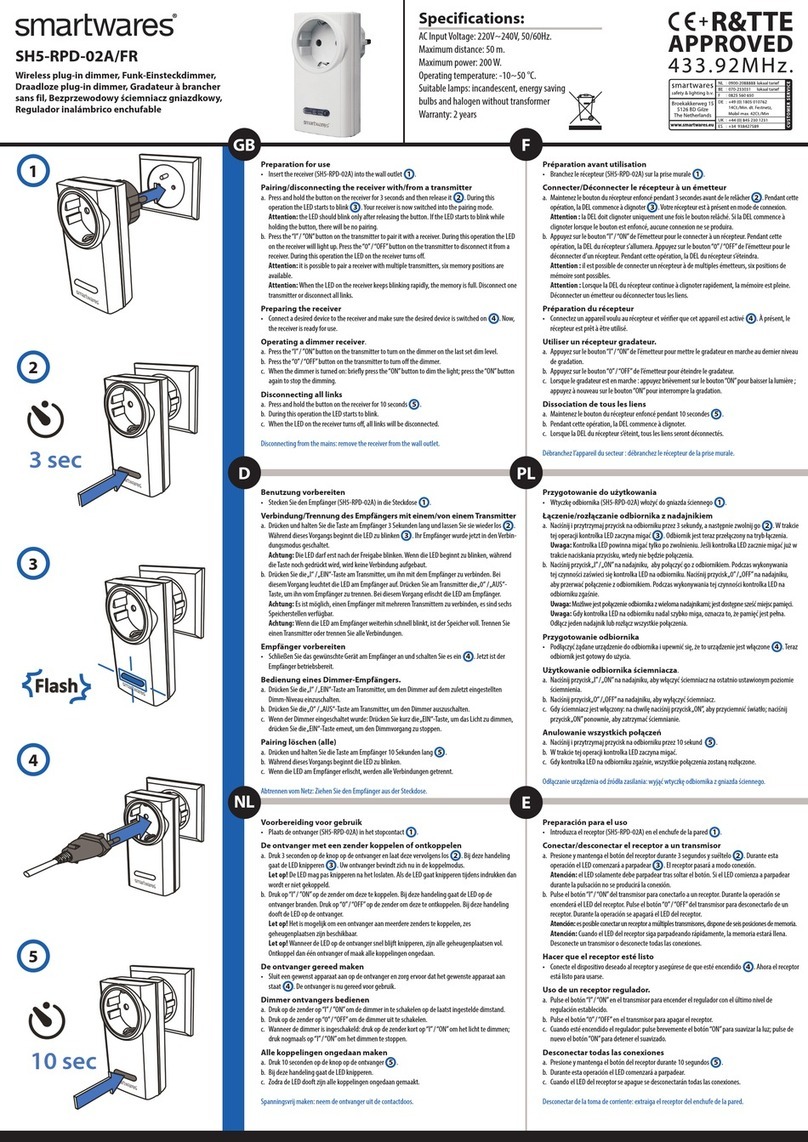
Smartwares 10.037.28 User manual

Smartwares

Smartwares 10.037.28 User manual

Smartwares SH4-90158 User manual

Smartwares

Smartwares SH4-90158 User manual

Smartwares SH4-99565AT User manual

Smartwares

Smartwares SH4-99565AT User manual

Smartwares Byron 7900 User manual

Smartwares

Smartwares Byron 7900 User manual

Smartwares SC45 Operating instructions

Smartwares

Smartwares SC45 Operating instructions

Smartwares Byron User manual

Smartwares

Smartwares Byron User manual

Smartwares 10.037.10 User manual

Smartwares

Smartwares 10.037.10 User manual

Smartwares VD40W User manual

Smartwares

Smartwares VD40W User manual

Smartwares 10.037.08 User manual

Smartwares

Smartwares 10.037.08 User manual

Smartwares sa68p User manual

Smartwares

Smartwares sa68p User manual

Smartwares Byron DIC-23112 User manual

Smartwares

Smartwares Byron DIC-23112 User manual

Smartwares 10.043.79 User manual

Smartwares

Smartwares 10.043.79 User manual

Smartwares SC07/3 User manual

Smartwares

Smartwares SC07/3 User manual

Smartwares Byron DIC-23216 User manual

Smartwares

Smartwares Byron DIC-23216 User manual

Smartwares SH4-90155 User manual

Smartwares

Smartwares SH4-90155 User manual

Smartwares SH5-TSY-A User manual

Smartwares

Smartwares SH5-TSY-A User manual

Smartwares SH8-90901 User manual

Smartwares

Smartwares SH8-90901 User manual

Smartwares SH4-99565AT-FR User manual

Smartwares

Smartwares SH4-99565AT-FR User manual

Smartwares SH5-RPD-02A User manual

Smartwares

Smartwares SH5-RPD-02A User manual

Smartwares Byron 4260 User manual

Smartwares

Smartwares Byron 4260 User manual

Smartwares SH5-RPD-02A/FR User manual

Smartwares

Smartwares SH5-RPD-02A/FR User manual

Popular Accessories manuals by other brands

Melexis SensorEyeC Series General description

Melexis

Melexis SensorEyeC Series General description

Emos LX 20 installation and connection

Emos

Emos LX 20 installation and connection

Vega VEGAFLEX 86 operating instructions

Vega

Vega VEGAFLEX 86 operating instructions

Domino 1100 RC Fitting and operating instructions

Domino

Domino 1100 RC Fitting and operating instructions

MediaMatrix nWall Hardware manual

MediaMatrix

MediaMatrix nWall Hardware manual

MGC MIX-4010-DUCT installation instructions

MGC

MGC MIX-4010-DUCT installation instructions

Advaning S series How to replace

Advaning

Advaning S series How to replace

Pfeiffer Vacuum CCR 371 operating instructions

Pfeiffer Vacuum

Pfeiffer Vacuum CCR 371 operating instructions

Teledyne TIENet 310 Ex Installation and operation guide

Teledyne

Teledyne TIENet 310 Ex Installation and operation guide

Hama LP11 operating instructions

Hama

Hama LP11 operating instructions

PCB Piezotronics 426A11 Installation and operating manual

PCB Piezotronics

PCB Piezotronics 426A11 Installation and operating manual

SICK WTL16 operating instructions

SICK

SICK WTL16 operating instructions

Focusrite Clarett 2Pre USB user guide

Focusrite

Focusrite Clarett 2Pre USB user guide

Rotronic HygroClip2 ADVANCED user manual

Rotronic

Rotronic HygroClip2 ADVANCED user manual

Nivus NivuBar Plus II instruction manual

Nivus

Nivus NivuBar Plus II instruction manual

SELT CASABLANCA installation manual

SELT

SELT CASABLANCA installation manual

CMA Dishmachines CURRENT SENSOR BT21i user guide

CMA Dishmachines

CMA Dishmachines CURRENT SENSOR BT21i user guide

Philips CPWBS154 Quick start quide

Philips

Philips CPWBS154 Quick start quide

manuals.online logo
manuals.online logoBrands
  • About & Mission
  • Contact us
  • Privacy Policy
  • Terms and Conditions

Copyright 2025 Manuals.Online. All Rights Reserved.