Printed in Canada
November 21, 2012
(#108429)
(Page 2 of 2)
For further information contact: Solinst Canada Ltd.
Fax: +1 (905) 873-1992; (800) 516-9081 Tel: +1 (905) 873-2255; (800) 661-2023
35 Todd Road, Georgetown, Ontario Canada L7G 4R8
Replacing the Circuit Board (#102977)
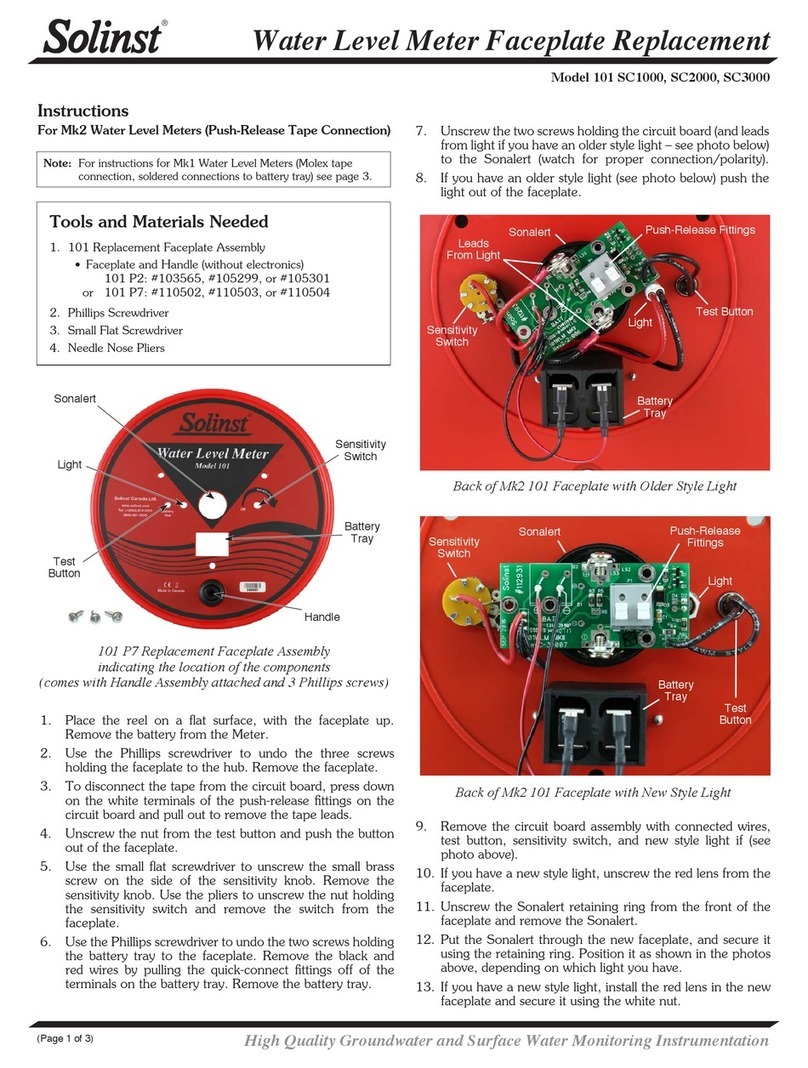
1. Remove the battery. Unscrew the three screws and remove
the faceplate. Unplug the Molex connector from the circuit
board to the tape.
2. Watch for proper connection/polarity on the Sonalert and
remove the two screws to disconnect the old circuit board
from the Sonalert and the wires connected to the light.
3. Cut the wires from the circuit board at the connections to
the test button, sensitivity switch, and battery tray. Note the
order/polarity in which they are connected. Remove the
old circuit board assembly.
4. Solder the wires from the new circuit board assembly to
the correct connections on the test button, battery tray and
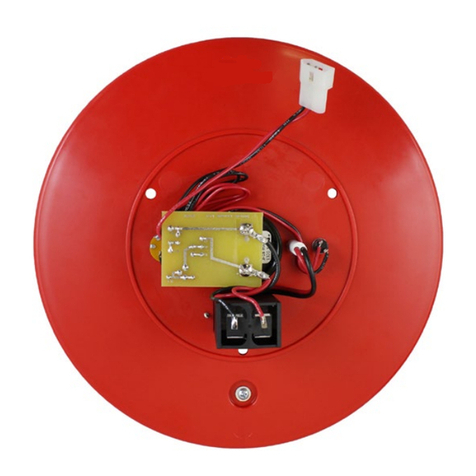
sensitivity switch. Use steps 12 - 17 overleaf, along with the
diagram on the right, as a reference.
5. Place the new circuit board assembly over the connections
to the Sonalert and reattach the wires from the light to the
Sonalert using the two screws through the circuit board.
6. Connect the Molex connector from the new circuit board
assembly to the connector on the tape.
7. Replace faceplate and re-fasten the three screws. Replace
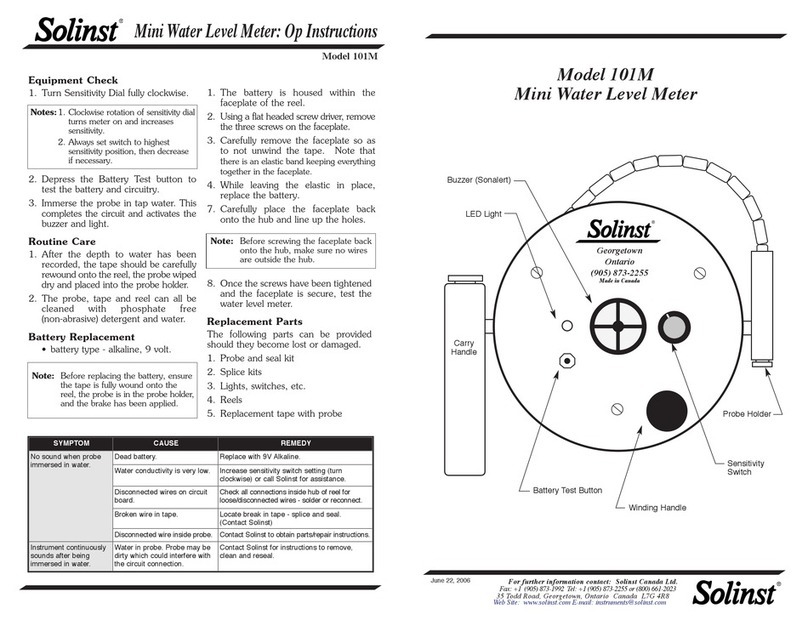
the battery. Circuit Board Showing Wire Connections
Molex
Connector
Sensitivity
Switch
Light
Sonalert
Battery
Tray
B
Replacing the Test Button (#109080)
1. Take out the battery, and remove the faceplate by
unfastening the three screws.
2. Unplug the Molex connector from the circuit board to the
tape.
3. Cut off the wires at the connections to the test button (note
the polarity of the black and red wire) and strip the wires.
4. Unscrew the old test button and remove from the faceplate.
5. Screw in the new test button.
6. Attach the wires to the new test button by soldering.
7. Reconnect the Molex connector. Replace the faceplate by
fastening the three screws. Replace the battery.
Replacing the On/Off Sensitivity Switch
(#102976 or 110119)
1. Remove the battery.
2. Unscrew the small brass screw on the side of the sensitivity
knob. Remove the sensitivity knob.
3. Unscrew and remove the faceplate. Unplug the Molex
connector from the circuit board to the tape.
Note: To gain better access to the sensitivity switch, you may want
to unscrew the two screws holding the circuit board to the
Sonalert, in order to move the circuit board out of the way.
4. Cut and strip the wires at the connection to the sensitivity
switch; note the order in which they are connected.
5. Unscrew the nut holding the sensitivity switch. Remove the
switch from the faceplate.
6. Install the new sensitivity switch through the faceplate with
the three connection prongs positioned opposite the battery
drawer and slightly towards the centre of the reel. Tighten
the nut.
7. Attach the wires to the correct positions by soldering. Use
the diagram above as a reference.
8. Reconnect the Molex connector. Replace the faceplate,
with three screws.
9. Fasten the sensitivity knob using the brass screw.
10. Replace the battery.
Replacing the Sonalert (#109075)
1. Remove the battery.
2. Unscrew and remove the faceplate. Unplug the Molex
connector from the circuit board to the tape.
3. Unscrew the Sonalert retaining ring from the front of the
faceplate. Push out the old Sonalert.
4. Unscrew the two screws holding the Sonalert to the circuit
board (watch for proper connection/polarity). Remove the
Sonalert from circuit board.
5. Insert the new Sonalert through the faceplate, and fasten the
Sonalert retainer ring until finger tight. Screw the circuit board
to the new Sonalert, making sure the wires from the light are
connected (red to +ve and black to -ve).
6. Reconnect the Molex connector. Replace the faceplate
using the three screws. Replace the battery.
Replacing the Light (#106660)
1. Remove the battery. Unscrew and remove the faceplate.
Unplug the Molex connector from the circuit board to the
tape.
2. Unscrew the two screws holding the wires from the light,
through the circuit board and onto the Sonalert (watch for
proper polarity).
3. Push the old light out and put the new light through the
faceplate.
4. Reconnect the two wires, using screws through the circuit
board and onto the Sonalert.
5. Reconnect the Molex connector. Replace faceplate using
the three screws. Replace the battery.
Test Button
Back of
Circuit Board
(wires connected
to other side)
B+
