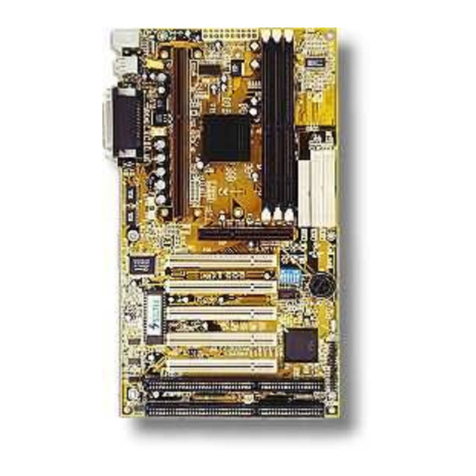
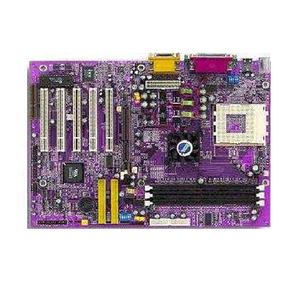
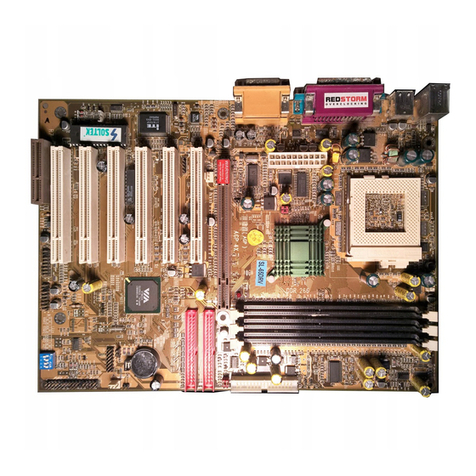
SOLTEK SL-67D User manual

i
Notice to End Users
This UserÕs Guide & Technical Reference is for assisting system
manufacturers and end users in setting up and installing the
mainboard.
Every effort has been made to ensure that the information in this
manual is accurate. Soltek Computer Inc. is not responsible for
printing or clerical errors. Information in this document is subject to
change without notice and does not represent a commitment on the
part of Soltek Computer Inc.
No part of this manual may be reproduced, transmitted, translated
into any language in any form or by any means, electronic or
mechanical, including photocopying and recording, for any purpose
without the express written permission of Soltek Computer Inc.
Companies and products mentioned in this manual are for
identification purposes only. Product names appearing in this
manual may or may not be registered trademarks or copyrights of
their respective companies.
SOLTEK COMPUTER INC. PROVIDES THIS MANUAL ÒAS ISÓ
WITHOUT WARRANTY OF ANY KIND, EITHER EXPRESS OR IMPLIED,
INCLUDING BUT NOT LIMITED TO THE IMPLIED WARRANTIES OR
CONDITIONS OF MERCHANTABILITY OR FITNESS FOR A
PARTICULAR PURPOSE. IN NO EVENT SHALL SOLTEK COMPUTER
INC. BE LIABLE FOR ANY LOSS OR PROFITS, LOSS OF BUSINESS, LOSS
OF USE OR DATA, INTERRUPTION OF BUSINESS, OR FOR INDIRECT,
SPECIAL, INCIDENTAL, OR CONSEQUENTIAL DAMAGES OF ANY
KIND, EVEN IF SOLTEK COMPUTER INC. HAS BEEN ADVISED OF THE
POSSIBILITY OF SUCH DAMAGES ARISING FROM ANY DEFECT OR
ERROR IN THIS MANUAL OR PRODUCT.
© Copyright 1998 Soltek Computer Inc. All right reserved
Web site: http://www.soltek.com.tw
email: [email protected]
Edition: September 1998
Version: 1.0
SL-67D SERIALS
®


Contents iii
Contents
Chapter 1: Introduction --------------------------------------- 1
Features -------------------------------------------------------------------------1
CPU ------------------------------------------------------------------------1
Chipset -------------------------------------------------------------------- 1
L2 Cache ------------------------------------------------------------------1
Main Memory ----------------------------------------------------------- 1
BIOS ------------------------------------------------------------------------ 2
Super I/O Function ----------------------------------------------------2
OPTi 933 Sound Chip Features-------------------------------------- 2
Other Functions --------------------------------------------------------- 3
Mainboard Layout with Default Settings ------------------------------4
Chapter 2: Hardware Setup---------------------------------- 5
CPU Type Configuration---------------------------------------------------5
CPU 3.5X Clock Setting ----------------------------------------------- 5
Deschutes Ð 350/100MHz ---------------------------------------5
Pentium II (Celeron) Ð 233/66MHz---------------------------5
CPU 4.0X Clock Setting ----------------------------------------------- 6
Deschutes Ð 400/100MHz ---------------------------------------6
Pentium II (Celeron) Ð 266/66 MHz -------------------------- 6
CPU 4.5X Clock Setting ----------------------------------------------- 6
Deschutes Ð 450/100MHz ---------------------------------------6
Pentium II (Celeron) Ð 300/66 MHz -------------------------- 6
CPU 5.0X Clock Setting ----------------------------------------------- 7
Deschutes Ð 500/100MHz ---------------------------------------7
Pentium II (Celeron) Ð 333/66 MHz -------------------------- 7
System Memory Configuration------------------------------------------- 7
CPU Installation -------------------------------------------------------------- 8

iv
Jumper Settings ------------------------------------------------------------- 12
FANX: Onboard FAN (12V) Connector ------------------------ 12
JBAT1: Clear CMOS Data ------------------------------------------ 12
JP1: Onboard Sound Chip Enabled/Disabled ---------------- 12
J5, J6: Sound Amplifier Control (Speaker/Line Out) ------- 13
SW1: 5Ð6 Bus Clock Select ----------------------------------------- 13
SW1: 1Ð4: Bus Ratio Select ----------------------------------------- 14
IDE LED Activity Light: (J2 pin1Ð4)------------------------------ 14
Sound Connector:----------------------------------------------------- 14
J3/J4: CD-ROM Audio Connector ------------------------- 14
Game/MIDI Port ------------------------------------------------ 14
Mic: Microphone Jack ----------------------------------------- 14
Line In: Audio in Jack ----------------------------------------- 14
Speaker Out/Line Out: Audio Out Jack ------------------ 14
Infrared Port Module Connector (J2 pin6Ð10) ----------------- 15
J2 pin12, 13: PWR Switch------------------------------------------- 15
SLEEP Switch (J2 pin14, 15) ---------------------------------------- 15
Speaker Connector (J1 pin1Ð4) ------------------------------------ 15
Reset Switch (J1 pin5, 6)--------------------------------------------- 15
JSB1: Audio Socket (SB Link)-------------------------------------- 15
Power LED and Keylock Switch (J1 pin8Ð12)------------------ 15
JWOL1: Wake On Lan (WOL) Connector ---------------------- 16
Turbo LED (J1 pin14, 15)-------------------------------------------- 16
J2 Switch Signal Summary ----------------------------------------- 17
J1 Switch Signal Summary ----------------------------------------- 18
Chapter 3: BIOS Setup ---------------------------------------19
Standard CMOS Setup ---------------------------------------------------- 20
BIOS Features Setup ------------------------------------------------------- 22
Chipset Features Setup --------------------------------------------------- 26
Power Management Setup ----------------------------------------------- 29
PnP/PCI Configuration Setup ------------------------------------------ 33
Load Setup Defaults ------------------------------------------------------- 37
Integrated Peripherals ---------------------------------------------------- 38
Supervisor/User Password---------------------------------------------- 41
IDE HDD Auto Detection ------------------------------------------------ 42
Save & Exit Setup ---------------------------------------------------------- 42
Exit Without Saving ------------------------------------------------------- 42
Introduction 1
Chapter 1
Introduction
Features
CPU
1. Supports Intel Pentium II, Deschutes, and Celeron
(Mendocino) CPUs using SLOT1 at 233 ~ 533 MHz
(PII/Celeron (Mendocino)) or 800MHz (Deschutes)
2. Supports CPU voltage autodetect circuit
3. Supports 66/100MHz Bus Clock (BIOS provides
75/103/112/124 MHz Bus Clock without auto detect)
Chipset
1. VIA Apollo Pro chipset
2. PCI Rev 2.1, 5V, 33MHz interface compliant
3. Supports AGP 1X/2X Mode, 3.3V AGP (Accelerated
Graphics Port) slot
4. Onboard built-in OPTi 933 sound chip
L2 Cache
1. Mendocino (Celeron A), PII (Deschutes) supports
128K/512k write back cache with Pipelined Burst
SRAMs
Main Memory
1. Memory range from 8MB (minimum) to 768 (SDRAM)
(maximum) with DRAM Table Free configurations
2. Supports SDRAM with 12/10/8ns DRAM speed

2
3. Supports 3 pcs 168pin DIMM sockets (3.3V
Unbuffered type)
4. DRAM supports ECC or Parity function
BIOS
1. AWARD Plug and Play BIOS
2. Supports Advanced Power Management Function
3. Flash Memory for easy upgrade
Super I/O Function
1. Integrated USB (Universal Serial Bus) controller with
two USB ports.
2. Supports 2 IDE channels with 4IDE devices (including
120MB IDE floppy)
3. Provides PCI IDE Bus Master function and supports
Ultra DMA33 function
4. One floppy port, one Game port
5. Two high speed 16550 FIFO UART ports
6. One parallel port with EPP/ECP/SPP capabilities
7. PS/2 mouse connector
8. Built-in RTC, CMOS, keyboard controller on single I/O
chip
9. Peripherals boot function (with ATX power)
OPTi 933 Sound Chip Features
1. Integrated sound controller compatible with:
Ñ Sound Blaster Proª
Ñ AdLibª
Ñ Microsoft¨ Windowsª Sound Systemª
Ñ MPU-401 MIDI interface
2. Microsoft¨ PC-97 compliant
3. Built-In QSound QXpanderª 3D Sound Enhancement
Processor
4. Built-in high-quality 22 voice, 52 operator, OPTIFMª
music synthesizer with enhanced bass
5. Built-in 7-channel mixer: five stereo, two mono
6. Built-in 16-bit sigma delta stereo codec
7. ISA Plug and Play Specification 1.0a compatible:
Ñ Sound Blaster Pro, Windows Sound System, FM
synthesis

Introduction 3
8. Full duplex operation: record and playback
simultaneously using two 8- or 16-bit DMA channels
9. Supports IMA ADPCM, µ-law, A-law decompression
10. 8- or 16-bit stereo sound data up to 48KHz stereo
11. Supports 16-bit Type F DMA playback, accelerates
telephony-audio applications
12. Digital joystick interface support, improves
responsiveness (Microsoft SideWinderª)
13. DirectSoundª interface support.
Other Functions
1. ATX size 19cm x 30.5cm
2. 4 PCI Master slots, 2 ISA slots, and 1 AGP slot
3. Supports CPU temperature warning function (optional)
4. Provides DIP switch setting
5. Supports 66/100MHz Bus Clock*
6. Supports Wake On LAN function**
7. BIOS supports 75/103/112/124MHz Bus clock.
*: For 100MHz CPU environment, the SDRAM specification
must be compliant with PC-100 Spec.
**: For support WOL, the ATX power supply has to have at
least 5V/720mA standby current.

4
Mainboard Layout with Default Settings
The default settings of the following figure is for the
Pentium II (Celeron (Mendocino)) 300/66MHz.
VIA
VT82C596
Chipset
J2
HD/LED IR PWR/SW
J1
GRN-LED
EXTSM1
KEYLOCKRESETSPK
16Bit ISA Slot
Li
Battery
PCI1
JBAT1
1
AGP1
FDD1
IDE2
SLOT1 (Pentium II, Celeron (Mendocino), or Deschutes)
VIA
Apollo Pro
Chipset
SW1
6
5
4
3
2
1
Off
Off
On
On
On
Off
LPT1
COM1 COM2
USB0
USB1
PS/2
K/B
Upper
Lower
JWOL1
16Bit ISA Slot
FLASH BIOS
PCI2
PCI3
PCI4
JP1
1
Multi I/O
OPTi
82C933
FAN1
JSB1
2
6
1
5
J3J4
J5
1
J6
1
FAN2
FAN3
DIMM 3
DIMM 2
DIMM 1
IDE1
ATX Power Conn
MIC
Game/MIDI Port
LIN
IN SPK/
LINE
OUT
Figure 1–1. Motherboard Layout
Note: For 100MHz CPU environment, the SDRAM
specification must comply with PC-100 spec.

Hardware Installation 5
Chapter 2
Hardware Setup
CPU Type Configuration
CPU 3.5X Clock Setting
Deschutes – 350/100MHz
Pentium II (Celeron) – 233/66MHz
SLOT1
SW1
6
5
4
3
2
1
LPT1
COM1 COM2 USB0
USB1 PS/2
K/B
MIC
Game/MIDI Port
LIN SPK
Deschutes – 350/100MHz
SW1
654321
Off
Off
On
On
On
Off
Penrium II – 233/66MHz
SW1
654321
Off
Off
On
On
On
Off
ONON
Figure 2–1. CPU Type Configuration

6
CPU 4.0X Clock Setting
Deschutes – 400/100MHz
Pentium II (Celeron) – 266/66 MHz
SLOT1
SW1
6
5
4
3
2
1
LPT1
COM1 COM2
USB0
USB1
PS/2
K/B
MIC
Game/MIDI Port
LIN SPK
Deschutes – 400/100MHz
SW1
654321
Off
On
On
On
On
Off
Penrium II – 266/66MHz
SW1
654321
Off
On
On
On
On Off
ONON
Figure 2–2. CPU Type Configuration
CPU 4.5X Clock Setting
Deschutes – 450/100MHz
Pentium II (Celeron) – 300/66 MHz
SLOT1
SW1
6
5
4
3
2
1
LPT1
COM1 COM2
USB0
USB1
PS/2
K/B
MIC
Game/MIDI Port
LIN SPK
Deschutes – 450/100MHz
SW1
654321
Off
Off
On
On
On
Off
Penrium II – 300/66MHz
SW1
654321
Off
Off
On
On
On Off
ONON
Figure 2–3. CPU Type Configuration

Hardware Installation 7
CPU 5.0X Clock Setting
Deschutes – 500/100MHz
Pentium II (Celeron) – 333/66 MHz
SLOT1
SW1
6
5
4
3
2
1
LPT1
COM1 COM2
USB0
USB1
PS/2
K/B
MIC
Game/MIDI Port
LIN SPK
Deschutes – 500/100MHz
SW1
654321
Off
Off
On
On
On
Off
Penrium II – 333/66MHz
SW1
654321
Off
Off
On
On
On Off
ONON
Figure 2–4. CPU Type Configuration
System Memory Configuration
This VIA Apollo Pro motherboard supports 168 pin DIMM
of 4MB, 8MB, 16MB, 32MB or 64MB to form a memory size
between 8MB to 768MB (SDRAM). Apollo Pro chipsets
provide ÒTable-FreeÓ function. It means that users can
install DRAM with any configuration and in any bank, and
that is why the DRAM table is not needed but do remember
that the DRAM must be 3.3V type. For 100MHz CPU
environment, the SDRAM specification must comply with
PC-100 spec.

8
CPU Installation
Follow the following steps in order to install your Intel
Pentium II , Celeron (Mendocino), and Deschutes properly.
Step 1:
Be sure you are in contact with heat sink vendors for
attaching the heat sink on to the CPU.
Heat Sink
Latch
Intel Pentium II (or Celeron)
CPU Side View
Heat Sink
Intel Pentium II, Celeron (Mendocino), Deschutes
Latch
CPU Top View
Notice that the heat sink may be different from the drawings
shown here.
Step 2:
Install the 2 pairs of screws, which are shown in the
following drawing, onto the mainboard under the SLOT1
Socket.
Two of the screws are right around the SLOT1 Socket and
the other pair of screws should be inserted opposite the first
pair. The screws should be inserted from the bottom of the
motherboard upward.

Hardware Installation 9
Step 3:
Retention clip is shown in the following figure:
Set the board according to the following diagram before
installing the retention clip.

10
CPU Heatsink should
be on this side.
The retention clip should be inserted so that the small
rectangle window is more toward to the right hand side of
the board.
If installed incorrectly, you will not be able to insert the CPU
into the retention clip and in this situation you might need
to rotate the retention clip by 180¡.
Tighten the 4 screws on the retention clip till the neck of the
screws can not be seen from the bottom of the board
Step 4:
Pull the latches up on the base of the CPU supporter and
insert it into the two holes directly to the left of the retention
clip so that the larger hole is on the bottom.
Press the base of the CPU supporter down in to the holes
and lock the latches.

Hardware Installation 11
Latch Latch
Side View of CPU Supporter Base
Step 5:
Flatten the two latches on the side of CPU. Insert the CPU
into the retention clip and notice that the heat sink is on the
right hand side of the board. Lock the two latches to secure
the CPU.
Step 6:
Insert the clip portion of the CPU supporter so that the heat
sink can sit on the top of the whole CPU supporter.
Top View of CPU Support Clip
Notice that the base and the clip of CPU Supporter may be
different from the figures shown here.

12
Jumper Settings
FANX: Onboard FAN (12V) Connector
FAN# Function
FAN3 System FAN
FAN2 CPU FAN
FAN1 Chasis FAN
JBAT1: Clear CMOS Data
Clear the CMOS memory by shorting this jumper
momentarily; then remove the cap to retain new settings.
CMOS Data
Clear Data
Retain Data
(default)
JBAT1
31
31
JP1: Onboard Sound Chip Enabled/Disabled
This jumper allows user to control onboard sound chip
function.
Disabled
Enabled
(default)
JP1
1
3
1
3

Hardware Installation 13
This feature must work with BIOS. Please refer to the
ÒPower On After PWR-FailÓ section on page 29 for
description.
J5, J6: Sound Amplifier Control (Speaker/Line Out)
31
J6
J5
USB Port J5/J6
31
J6
J5
Line Out
(w/o amplifier)
Speaker Out
(w/i amplifier)
(default)
SW1: 5–6 Bus Clock Select
65
On
On
Off
Bus Clock SW: 5~6
66MHz
65
On
Off
100MHz
On

14
SW1: 1–4: Bus Ratio Select
3.0x
4321
Off
On
On
On
ON
Bus Ratio SW: 1~4
5.0x
4321
Off
Off
On
On
ON
Bus Ratio
3.5x
4321
Off
Off
On
On
ON
5.5x
4321
Off
Off
Off
On
ON
4.0x
4321
Off
On
On
On
ON
6.0x
4321
Off On
On
On
ON
6.5x
4321
Off
On
On
Off
ON
4.5x
4321
Off
Off
On
On
ON
SW: 1~4
7.0x
4321
Off
Off On
On
ON
Bus Ratio
7.5x
4321
Off
Off
Off On
ON
8.0x
4321
Off On
On
Off
ON
SW: 1~4
IDE LED Activity Light: (J2 pin1–4)
This connector connects to the hard disk activity indicator
light on the case.
Sound Connector:
J3/J4: CD-ROM Audio Connector
Connect J3/J4 to the CD-ROM Audio Connector.
Game/MIDI Port
Connect the joystick or MIDI to this connector.
Mic: Microphone Jack
Line In: Audio in Jack
Speaker Out/Line Out: Audio Out Jack
Use J5/J6 to control speaker out of line in.

Hardware Installation 15
Infrared Port Module Connector (J2 pin6–10)
The system board provides a 5-pin infrared connectorÑIR1
as an optional module for wireless transmitting and
receiving. Pin 6 through 10 are Transmit, GND, Receive
(low speed), Receive (high speed), and Vcc, respectively.
J2 pin12, 13: PWR Switch
Power Switch: Toggle this pin for turnning on/off of the
power supply (for ATX power only).
SLEEP Switch (J2 pin14, 15)
Toggle this jumper forces the system to sleep and the system
wonÕt wake up until the hardware event is coming. (The
BIOS Power Management setting muse be Enabled.)
Speaker Connector (J1 pin1–4)
The speaker connector is a 4-pin connector for connecting
the system and the speaker. (See the following drawing for
jumper position.)
Reset Switch (J1 pin5, 6)
The system board has a 2-pin connector for rebooting your
computer without having to turn off your power switch.
This prolongs the life of the systemÕs power supply.
JSB1: Audio Socket (SB Link)
This socket is designed for using SoundBlast PCI sound
card.
Power LED and Keylock Switch (J1 pin8–12)
The keylock switch is a 5-pin connector for locking the
keyboard for security purposes. (See the following drawing
for jumper position, and pin1~3 is connected to power LED
and pin 4~5 is connected to keylock switch.)

16
JWOL1: Wake On Lan (WOL) Connector
This connector is designed to use Lan to bootup the system.
Connect the wake on signal from Lan card to this connector.
Turbo LED (J1 pin14, 15)
Reserved.
J2
HD/LED IR PWR/SW
J1
GRN-LED
SMI
KEYLOCKRESETSPK
J2
HD/LED IR PWR/SW
J1
Turbo-LED
EXTSMI
KEYLOCKRESETSPK
Table of contents
Other SOLTEK Motherboard manuals

SOLTEK
SOLTEK 75DRV User manual

SOLTEK
SOLTEK SL-65GS User manual

SOLTEK
SOLTEK SL-75KAV User manual

SOLTEK
SOLTEK SL-855GEI-FDGR User manual

SOLTEK
SOLTEK SL-63AV Use and care manual

SOLTEK
SOLTEK KT400 User manual

SOLTEK
SOLTEK SL-865G3 User manual

SOLTEK
SOLTEK SL-67EB Plus User manual

SOLTEK
SOLTEK SL-53D5-S Use and care manual

SOLTEK
SOLTEK SL-75DRV-X User manual

SOLTEK
SOLTEK SL-845GVI User manual

SOLTEK
SOLTEK SL-53D2 Use and care manual

SOLTEK
SOLTEK 85MR3-R User manual

SOLTEK
SOLTEK SL-75KAV User manual

SOLTEK
SOLTEK 85DRV5-L User manual

SOLTEK
SOLTEK SL-65ME User manual

SOLTEK
SOLTEK SL-85LIR3 User manual

SOLTEK
SOLTEK SL-75ERV User manual

SOLTEK
SOLTEK KT400-C User manual

SOLTEK
SOLTEK SL-75DRV2 User manual