FR - Par la présente Somfy déclare que l’équipement radio couvert par ces instructions est conforme aux exigences de la Directive Radio
2014/53/UE et aux autres exigences essentielles des Directives Européennes applicables.
Le texte complet de la déclaration UE de conformité est disponible sur www.somfy.com/ce.
Antoine Crézé, responsable des homologations, agissant au nom du Directeur de l’Activité, Cluses, 06/2016.
DE - Somfy erklärt hiermit, dass das in dieser Anleitung beschriebene Funkgerät die Anforderungen der Funkanlagenrichtlinie 2014/53/
EU sowie die grundlegenden Anforderungen anderer geltender europäischer Richtlinien erfüllt.
Der vollständige Text der EU-Konformitätserklärung ist unter der Internetadresse www.somfy.com/ce verfügbar.
Antoine Crézé, Bevollmächtiger für Zulassungen, in Vertretung des Directeur de l‘Activité, Cluses, Frankreich, 06/2016.
EN - Somfy hereby declares that the radio equipment covered by these instructions is in compliance with the requirements of Radio
Directive 2014/53/EU and the other essential requirements of the applicable European Directives.
The full text of the EU declaration of conformity is available at www.somfy.com/ce.
Antoine Crézé, Approval manager, acting on behalf of Activity director, Cluses, 06/2016.
IT - Con la presente Somfy dichiara che il dispositivo radio coperto da queste istruzioni è conforme ai requisiti della Direttiva Radio
2014/53/UE e agli altri requisiti essenziali delle Direttive Europee applicabili.
Il testo completo della dichiarazione UE di conformità è disponibile all’indirizzo Internet www.somfy.com/ce.
Antoine Crézé, responsabile delle omologazioni, che agisce per conto del Direttore dell’Attività, Cluses, 06/2016.
A
C
The images are not contractually binding. - PATENTS AND DESIGN PATENTS PENDING FOR SOME COUNTRIES (e.g. : US) - 1/2
io-homecontrol®repose sur une technologie avancée, sécurisée et sans-fil, facile à
installer. Les produits io-homecontrol®communiquent entre eux pour offrir plus de
confort, de sécurité et d’économies d’énergie.
www.io-homecontrol.com
1. Introduction
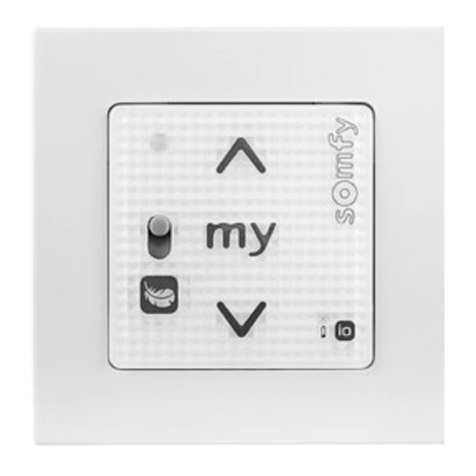
Le Smoove 1 Tw io est un point de
commande mural radio sans l qui
permet de piloter des volets roulants à
projection utilisant la technologie radio
io-homecontrol®.
Le Smoove 1 Tw io peut être associé avec
des cadres et des enjoliveurs intermédiaires
répondant à la norme DIN 49075.
2. Sécurité
2.1. Sécurité et responsabilité
Avant d’installer et d’utiliser ce produit, lire
attentivement cette notice.
Ce produit Somfy doit être installé par
un professionnel de la motorisation et de
l’automatisation de l’habitat auquel cette
notice est destinée. L’installateur doit
par ailleurs se conformer aux normes et
à la législation en vigueur dans le pays
d’installation, et informer ses clients des
conditions d’utilisation et de maintenance
du produit.
Toute utilisation hors du domaine
d’application déni par Somfy est interdite.
Elle entraînerait, comme tout irrespect
des instructions gurant dans cette notice,
l’exclusion de la responsabilité et de la
garantie Somfy.
Avant toute installation, vérier la
compatibilité de ce produit avec les
équipements et accessoires associés.
2.2. Consignes spéciques de sécurité
Pour ne pas endommager le Smoove 1 Tw io :
1) Éviter les chocs !
2) Éviter les chutes !
3) Ne pas faire de projection de liquides ni
l’immerger.
4) Ne pas utiliser de produits abrasifs ni de
solvants pour le nettoyer.
3. Contenu
$Figure A
Q. Désignation
1
Plaque de xation pour Smoove 1 Tw io
ou
Plaque de xation pour Smoove 1 io IN
A
B
1Cadre Somfy (optionnel) C
1Module Smoove 1 Tw io D
4. Mise en service
4.1. Le Smoove 1 Tw io en détails
$Figure B
a) Touche sensitive (monter) ,
b) Touche sensitive (stopper, aller en
position favorite) ,
c) Touche sensitive (descendre) ,
d) Voyant témoin d’appui sur les touches et
boutons du module,
e) Voyant “Pile faible”,
f) Sélecteur de mode Projection et de
Déprojection,
g) Bouton On/Off,
h) Bouton PROG.
4.2. Bouton ON/OFF
$Figure C
Le bouton ON/OFF permet d’activer ou
de désactiver le clavier sensitif selon le
descriptif ci-après, cependant le bouton
prog. reste actif :
ON =
Activation du
clavier
Appuyer sur le bouton
jusqu’à la n des bips : le
voyant témoin s’allume xe :
- les touches sensitives sont
actives
OFF =
Désactivation
du clavier
Appuyer sur le bouton
jusqu’à la n des bips et
du clignotement du voyant
témoin :
- les touches sensitives sont
inactives
Pour éviter une consommation inutile
de la batterie, il est recommandé de
remettre le module en OFF tant que celui-ci
n’est pas installé sur le mur.
4.3. Sélecteur de projection/
déprojection ( )
$Figure D
1) Mode Projection :
Le volet roulant va en projection et les
lames sont ajourées.
2) Mode Déprojection :
Le volet roulant se déprojette et se ferme
complètement.
4.4. Enregistrer le Smoove 1 Tw io
dans une application non équipée
de point de commande local io
Se référer à la notice du moteur Twipso io.
4.5. Ajout/Suppression d’un
Smoove 1 Tw io
$Figure E
La procédure à suivre pour l’ajout ou la
suppression d’un point de commande io est
identique.
PourajouterousupprimerunSmoove 1 Tw io,
utiliser le point de commande local io déjà
associé à l’application.
Si nécessaire activer le module Smoove 1 Tw io
voir chapitre « Bouton ON/OFF »
Placer l’application en position médiane.
1) Faire un appui long sur le bouton PROG
du point de commande local Somfy io
déjà associé, jusqu’au va-et-vient de
l’application : le moteur Twipso io est en
mode programmation pendant 10 min.
2) Faire un appui bref sur le bouton
PROG (i) du Smoove 1 Tw io: l’application
effectue un va-et-vient : le Smoove 1 Tw io
est enregistré ou supprimé.
5. Installation
$Figure F
L’utilisation d’appareils radios (par
exemple un casque radio Hi-Fi) utilisant
la même fréquence peut engendrer des
interférences et réduire les performances du
produit.
- Le bâtiment dans lequel le produit est
utilisé peut réduire la portée radio.
La portée radio est de 15 m.
Ne jamais installer le Smoove 1 Tw io à
proximité ou sur des surfaces
métalliques ni avec un cadre métallique, ceci
peut réduire la portée radio.
Contrôler la portée radio avant de xer le
Smoove 1 Tw io.
Ce produit doit être installé sur une paroi et
Somfy recommande que cette surface soit
plane.
Laisser le module dans la plaque de xation ou
dans le cadre lors des différentes phases de
programmation pour faciliter les manipulations.
Ne pas poser le module sur sa face
avant (côté touches) pour éviter tout
envoi d’ordres involontaires.
Le fonctionnement est garanti uniquement
avec un touché tactile propre et sec (pas de
gants).
5.1. Installation du point de commande
Smoove 1 Tw io
$Figure G
1) Fixer la plaque de xation à l’aide de vis
(Somfy recommande l’utilisation de vis de
3 mm de diamètre à tête fraisée).
2) Placer le cadre Somfy sur la plaque de
xation.
3) Clipper le module sur l’ensemble (Cadre +
plaque de xation).
FR io-homecontrol®provides advanced and secure radio technology that is easy to install.
io-homecontrol®labelled products communicate with each other, improving comfort,
security and energy savings.
www.io-homecontrol.com
1. Introduction
Smoove 1 Tw io is a wall-mounted wireless
radio control point for controlling angled
roller shutters using io-homecontrol® radio
technology.
Smoove 1 Tw io can be used together with
frames and intermediate trim which comply
with the DIN 49075 standard.
2. Safety
2.1. Safety and responsibility
Please read this guide carefully before
installing and using this product.
This Somfy product must be installed by a
professional motorisation and home installer
for whom this guide is intended. Moreover,
the installer must comply with standards and
legislation in the country in which the product
is being installed, and inform his customers
of the operating and maintenance conditions
for the product.
Any use outside the sphere of application
dened by Somfy is forbidden. This
invalidates the warranty and discharges
Somfy of all liability, as does any failure to
comply with the instructions given herein.
Before beginning installation, check that this
product is compatible with the associated
equipment and accessories.
2.2. Specic safety advice
To avoid damage to the Smoove 1 Tw io:
1) Avoid impacts!
2) Do not drop it!
3) Do not spill liquid on the product or
immerse it in liquid.
4) Do not use abrasive products or solvents
to clean it.
3. Contents
$Figure A
Q. Description
1
Mounting plate for Smoove 1 Tw io
or
Mounting plate for Smoove 1 io IN
A
B
1Somfy frame (optional) C
1Smoove 1 Tw io Module D
4. Commissioning
4.1. The Smoove 1 Tw io in detail
$Figure B
a) Touch-sensitive key (raise)
b) Touch-sensitive key (stop, go to
favourite position)
c) Touch-sensitive key (lower)
d) Indicator light showing that the module’s
keys and buttons have been activated
e) “Battery low” indicator light
f) Angled out and Angled in position
selector
g) On/Off button
h) PROG button
4.2. ON/OFF button
$Figure C
The ON/OFF button activates or deactivates
the touch-sensitive keypad as described
below. However, the PROG button
remains active:
ON = To
activate
keypad
Hold down the button until
the acoustic signal stops:
the indicator light glows
constantly:
- the touch-sensitive keys
are active
OFF = To
deactivate
keypad
Hold down the button until
the acoustic signal stops and
the indicator light ashes:
- the touch-sensitive keys are
inactive
To avoid wasting battery power, it is
advisable to switch the module to OFF
until it is installed on the wall.
4.3. Angled out / Angled in position
selector ( )
$Figure D
1) Angled out position : The roller shutter
moves to its angled out position and the
slats are slightly open.
2) Angled in position : The roller shutter
moves to its angled in position and closes
fully.
4.4. Programming the Smoove 1 Tw io
in an end-product not equipped
with a local io control point
Refer to the guide for the Twipso io motor.
4.5. Adding/Deleting a Smoove 1 Tw io
$Figure E
The procedures for adding or deleting an io
control point are the same.
To add or delete a Smoove 1 Tw io, use the
local io control point already associated
with the end-product.
If necessary, activate the Smoove 1 Tw io
module, see section “ON/OFF button”
Set the end product to the halfway position.
1) Press and hold the PROG button on the
already associated Somfy io local control
point until the end-product moves
back and forth: the Twipso io motor is now
in programming mode for 10 minutes.
2) Briey press the PROG button (i) on the
Smoove 1 Tw io: the end product moves
back and forth: the Smoove 1 Tw io is
now programmed or deleted.
5. Installation
$Figure F
The use of radio appliances (e.g. Hi-Fi
radio headphones) operating on the
same frequency may cause interference and
reduce the product’s performance.
- The building in which the product is used
may reduce the radio range.
The radio range is 15 m.
Never install the Smoove 1 Tw io near
or on metal surfaces or with a metal
frame, as this can reduce the radio range.
Check the radio range before tting the
Smoove 1 Tw io.
This product must be installed on an internal
wall and Somfy recommends that the wall
surface should be at.
Leave the module in the mounting plate or in the
frame during the different programming phases
to make it easier to perform the operations.
Do not rest the module on its front
panel (the side with the keys) to avoid
the accidental emission of commands.
Operation is only guaranteed if the touch
received by the module is clean and dry (no
gloves).
5.1. Installation of the Smoove 1 Tw io
control point
$Figure G
1) Use screws to x the mounting plate
(Somfy recommends the use of
countersunk head screws of 3 mm
diameter).
2) Place the Somfy frame on the mounting
plate.
3) Clip the module onto the assembly (frame
+ mounting plate).
EN
io-homecontrol
®
bietet eine fortschrittliche und sichere Radio-Funktechnologie, die einfach
zu installieren ist. io-homecontrol
®
gekennzeichnete Produkte kommunizieren miteinander,
wodurch Komfort, Sicherheit und Energieeinsparungen sichergestellt werden.
www.io-homecontrol.com
1. Einleitung
Der Smoove 1 Tw io ist ein drahtloser
Funkwandsender zur Steuerung
ausstellbarer Rollläden, die mit der
Funktechnologie io-homecontrol®
ausgestattet sind.
Der Smoove 1 Tw io kann zusammen mit
Rahmen und Adaptern verwendet werden,
die der DIN-Norm 49075 entsprechen.
2. Sicherheitshinweise
2.1. Sicherheit und
Gewährleistung
Lesen Sie bitte vor der Installation und
Verwendung dieses Produkts diese
Anleitung sorgfältig durch.
Dieses Somfy-Produkt muss von einer
fachlich qualizierten Person für Antriebe und
Automatisierungen im Haustechnikbereich
installiert werden, für die diese Anleitung
bestimmt ist. Außerdem muss die fachlich
qualizierte Person die gültigen Normen und
Vorschriften des Landes befolgen, in dem das
Produkt installiert wird, und ihre Kunden über
die Betriebs- und Wartungsbedingungen des
Produkts informieren.
Jede Verwendung, die nicht dem von
Somfy bestimmten Anwendungsbereich
entspricht, gilt als nicht bestimmungsgemäß.
Im Falle einer nicht bestimmungsgemäßen
Verwendung, wie auch bei Nichtbefolgung
der Hinweise in dieser Anleitung, entfällt
die Haftung und Gewährleistungspicht von
Somfy.
Prüfen Sie vor der Montage die
Kompatibilität dieses Produkts mit
den vorhandenen Ausrüstungs- und
Zubehörteilen.
2.2. Spezische Sicherheitshinweise
Vermeidung von Schäden am Produkt:
1) Vermeiden Sie Stöße.
2) Lassen Sie das Produkt nicht fallen.
3) Schützen Sie das Produkt vor
Spritzwasser und tauchen Sie es nicht in
Flüssigkeiten.
4) Verwenden Sie zur Reinigung des
Produkts keine Scheuer- oder
Lösungsmittel.
3. Lieferumfang
$Abb. A
Anz. Bezeichnung
1
Befestigungsplatte für Smoove 1 Tw io
oder
Befestigungsplatte für Smoove 1 io IN
A
B
1Somfy-Rahmen (optional) C
1Modul Smoove 1 Tw io D
4. Inbetriebnahme
4.1. Der Smoove 1 Tw io im Detail
$Abb. B
a) Sensortaste (auf-/einfahren)
b) Sensortaste (stoppen, in die
Lieblingsposition fahren)
c) Sensortaste (ab-/ausfahren)
d) Statusanzeige LED, die die Aktivierung
der Tasten des Moduls anzeigt
e) Statusanzeige LED „Batteriespannung
niedrig“
f) Wahlschalter Rollladen ausstellen/nicht
ausstellen
g) ON/OFF-Taste
h) PROG-Taste
4.2. ON/OFF-Taste
$Abb. C
Mit der ON/OFF-Taste aktivieren und
deaktivieren Sie das Sensortastenfeld wie
nachstehend beschrieben; die PROG-Taste
bleibt immer aktiv:
ON =
Tastenfeld
aktivieren
Halten Sie die ON/OFF-Taste
gedrückt, bis das akustische
Signal ausgeht: Die
Statusanzeige LED leuchtet
konstant:
- die Sensortasten sind aktiv
OFF =
Tastenfeld
deaktivieren
Halten Sie die ON/OFF-Taste
gedrückt, bis das akustische
Signal ausgeht und die
Statusanzeige LED blinkt:
- die Sensortasten sind
inaktiv
Um Batteriespannung zu sparen,
empehlt es sich, das Modul
auszuschalten (OFF), bis es an der Wand
angebracht wird.
4.3. Wahlschalter Rollladen
ausstellen/nicht ausstellen ( )
$Abb. D
1) Rollladen ausstellen : Der Rollladen
wird ausgestellt und die Lamellen werden
geneigt.
2) Rollladen nicht ausstellen : Der
Rollladen wird nicht ausgestellt und
komplett geschlossen.
4.4. Einlernen des Smoove 1 Tw io in
eine Anwendung ohne lokalen
io-Funksender
Siehe die Anleitung für den Antrieb Twipso
io.
4.5. Hinzufügen/Löschen eines
Smoove 1 Tw io
$Abb. E
Die Vorgehensweise für das Hinzufügen
und Löschen eines io-Funksenders ist
identisch.
Wenn Sie einen Smoove 1 Tw io hinzufügen
oder löschen möchten, verwenden Sie den
lokalen io-Funksender , der bereits in der
Anwendung eingelernt ist.
Bei Bedarf aktivieren Sie das Modul
Smoove 1 Tw io (siehe Kapitel „ON/
OFF-Taste“).
Bringen Sie die Anwendung in eine mittlere
Position.
1) Halten Sie die PROG-Taste auf dem
bereits eingelernten io-Funksender
gedrückt, bis die Anwendung mit einer
kurzen Auf-/Abbewegung bestätigt: Der
Antrieb Twipso io bendet sich jetzt für
10 Minuten in Lernbereitschaft.
2) Drücken Sie kurz die PROG-Taste (i) auf
dem Smoove 1 Tw io: Die Anwendung
bestätigt mit einer kurzen Auf-/
Abbewegung: Der Smoove 1 Tw io ist
jetzt eingelernt oder wurde gelöscht.
5. Installation
$Abb. F
Die Verwendung von Funkgeräten (z.
B. Funk-Kopfhörern), die mit derselben
Frequenz betrieben werden, kann zu
Störungen führen und die Leistungen des
Produkts beeinträchtigen.
- Je nach Gebäude, in dem das Produkt
verwendet wird, kann die Funkreichweite
geringer sein.
Die Funkreichweite beträgt 15 m.
Installieren Sie den Smoove 1 Tw io
nicht in der Nähe von oder auf
Metallächen oder mit einem Metallrahmen,
da dies die Funkreichweite einschränken
könnte.
Überprüfen Sie die Funkreichweite, bevor
Sie den Smoove 1 Tw io befestigen.
Das Produkt muss auf einer Innenwand,
möglichst mit einer glatten Oberäche,
angebracht werden.
Lassen Sie das Modul während der
verschiedenen Einlernphasen auf der
Befestigungsplatte bzw. im Rahmen.
Dies erleichtert die Durchführung der
entsprechenden Vorgänge.
Legen Sie das Modul nicht auf der
Frontplatte (Seite mit den Tasten) ab,
damit nicht versehentlich Befehle ausgelöst
werden.
Der einwandfreie Betrieb ist nur dann
garantiert, wenn das Modul eine eindeutige
und trockene Berührung (ohne Handschuhe)
empfängt.
5.1. Installation des Funksenders
Smoove 1 Tw io
$Abb. G
1) Bringen Sie die Befestigungsplatte an
(Somfy empehlt Flachkopfschrauben,
Durchmesser 3 mm).
2) Platzieren Sie den Somfy-Rahmen auf der
Befestigungsplatte.
3) Befestigen Sie das Modul auf
der Anordnung (Rahmen +
Befestigungsplatte).
DE
io-homecontrol
®
offre una avanzata tecnologia in radio frequenza sicura e facile da
installare. Tutti i prodotti contraddistinti dal marchio io-homecontrol
®
si interfacciano
automaticamente tra loro per offrire maggiore comfort, sicurezza e risparmio energetico.
www.io-homecontrol.com
1. Introduzione
Smoove 1 Tw io è un punto di comando
radio wireless da parete che consente
di controllare le tapparelle con telaio
a sporgere tramite la tecnologia radio
io-homecontrol®.
Smoove 1 Tw io può essere utilizzato con
telai e finiture intermedie conformi alla norma
DIN 49075.
2. Sicurezza
2.1. Sicurezza e responsabilità
Prima di installare e utilizzare questo
prodotto, leggere attentamente il presente
manuale.
Questo prodotto Somfy deve essere
installato da un professionista di impianti
di motorizzazione e domotica al quale è
destinato il presente manuale. L’installatore
deve inoltre conformarsi alle norme e alla
legislazione in vigore e informare il cliente
circa le condizioni di utilizzo e manutenzione
del prodotto.
È vietato utilizzare il dispositivo per prodotti
diversi da quelli specicati da Somfy. Il
mancato rispetto di tale prescrizione,
così come di tutte le istruzioni fornite nel
presente manuale, comporta la decadenza
della garanzia e solleva Somfy da qualsiasi
responsabilità.
Prima di iniziare l’installazione, vericare
la compatibilità del prodotto con le
apparecchiature e gli accessori associati.
2.2. Istruzioni specifiche per la
sicurezza
Per evitare danni a Smoove 1 Tw io:
1) Evitare gli urti!
2) Non farlo cadere!
3) Non spruzzare liquidi sul prodotto e non
immergerlo.
4) Non utilizzare prodotti abrasivi o solventi
per pulire il prodotto.
3. Componenti
$Figura A
Q. Designazione
1
Piastra di montaggio per Smoove 1 Tw io
oppure
Piastra di montaggio per Smoove 1 io IN
A
B
1Telaio Somfy (opzionale) C
1Modulo Smoove 1 Tw io D
4. Messa in servizio
4.1. Smoove 1 Tw io nel dettaglio
$Figura B
a) Tasto a sfioramento (alzare)
b) Tasto a sfioramento (arrestare,
raggiungere la posizione preferita)
c) Tasto a sfioramento (abbassare)
d) Spia che indica l’attivazione dei tasti e
dei pulsanti del modulo,
e) Spia “Batteria quasi scarica”,
f) Selettore della modalità Sporgere o
Verticale,
g) Tasto On/Off,
h) Tasto PROG
4.2. Tasto ON/OFF
$Figura C
Il tasto ON/OFF consente di attivare o
disattivare il tastierino a sfioramento in
base alla descrizione qui di seguito (il tasto
PROG rimane tuttavia attivo):
Tasto ON =
attivazione
del tastierino
Tenere premuto il tasto
fino al termine del segnale
acustico: la spia resta
accesa con luce fissa:
- i tasti a sfioramento sono
attivi
Tasto OFF =
disattivazione
del tastierino
Tenere premuto il tasto
fino al termine del segnale
acustico: la spia lampeggia:
- i tasti a sfioramento sono
disattivati
Per evitare di sprecare la carica della
batteria, si consiglia di spegnere il
modulo (pulsante OFF) fino alla sua
installazione sulla parete.
4.3. Selettore Sporgere/Verticale( )
$Figura D
1) Modalità Sporgere : la tapparella si
sporge e le stecche si aprono.
2) Modalità Verticale : la tapparella si
ritira e si chiude completamente.
4.4. Programmazione di
Smoove 1 Tw io per un prodotto
portante non dotato di punto di
comando locale io
Consultare il manuale del motore Twipso io.
4.5. Aggiunta/Eliminazione di
Smoove 1 Tw io
$Figura E
Le procedure per aggiungere o eliminare un
punto di comando io sono identiche.
Per aggiungere o eliminare un punto di
comando Smoove 1 Tw io, utilizzare il punto
di comando locale io già associato al
prodotto portante.
Nel caso sia necessario attivare il modulo
Smoove 1 Tw io, consultare il capitolo “Tasto
ON/OFF”
Portare il prodotto portante a metà altezza.
1) Tenere premuto il pulsante PROG del
punto di comando locale Somfy io
già associato fino a quando il prodotto
portante controllato si muove su e giù:
il motore Twipso io resta in modalità di
programmazione per 10 minuti.
2) Premere brevemente il tasto PROG
(i) di Smoove 1 Tw io: il prodotto
portante controllato si muove su e giù:
Smoove 1 Tw io viene registrato o
eliminato.
5. Installazione
$Figura F
L’utilizzo di apparecchiature radio (ad
esempio, cuffie radio Hi-Fi) funzionanti
alla stessa frequenza potrebbero causare
interferenze e compromettere le prestazioni
del prodotto.
- La struttura dell’edificio in cui viene
utilizzato il prodotto potrebbe ridurre la
portata della trasmissione radio.
La portata della trasmissione radio è di
15 m.
Non installare mai Smoove 1 Tw io in
prossimità o a contatto con superfici
metalliche né con un telaio in metallo, in
quanto potrebbero ridurre la portata della
trasmissione radio.
Prima di installare Smoove 1 Tw io,
verificare la portata della trasmissione radio.
Questo prodotto deve essere installato
su una parete e Somfy raccomanda di
installarlo su una superficie piana.
Lasciare il modulo nella piastra di montaggio
o nel telaio durante le varie operazioni di
programmazione per agevolarne l’esecuzione.
Non appoggiare il modulo sul pannello
anteriore (il lato con i tasti) per evitare
l’emissione accidentale di comandi.
Il funzionamento è garantito solo se i tasti
del modulo vengono sfiorati in modo diretto
e preciso (senza guanti).
5.1. Installazione del punto di
comando Smoove 1 Tw io
$Figura G
1) Utilizzare le viti per fissare la piastra di
montaggio (Somfy consiglia di utilizzare
viti a testa svasata con diametro di 3 mm).
2) Posizionare il telaio Somfy sulla piastra di
montaggio.
3) Fissare il modulo al gruppo (telaio +
piastra di montaggio).
IT
F1
15 m
868.95 MHz
G
Somfy SAS, capital 20.000.000 Euros, RCS Annecy 303.970.230
AC
B
D
55 mm
55 mm
60 mm
80 mm
80 mm
Ø 3 mm
2
3
2
2
1
1
D
PROG.
PROG. (i)
E
B
g
fb
c
e
d
a
h
Ref. 5113076B
Smoove 1 Tw io
FR Notice d’Installation
DE Installationsanleitung
EN Installer Guide
IT Manuale d’installazione
ÍS-'È6AwÎ
www.somfy.com
Somfy SAS
50 avenue du Nouveau
Monde
F - 74300 CLUSES
www.somfy.com
