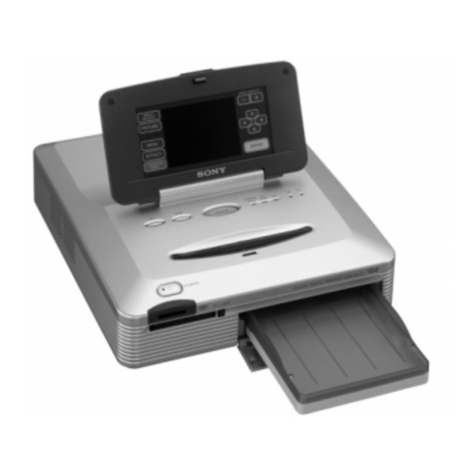
Sony CVP-M3 User manual

S
ONY.
3-756-337-23
(1)
Color
Video
Printer
Operating
Instructions
Before
operating
the
unit,
please
read
this
manual
thoroughly
and
retain
it
for
future
reference.
Color
Video
Printer
CVP-M3
This
PRINTER
is
designed
to
use
CARTRIDGES
bearing
the
VP
Vv
mpi
trademark
to
yield
quality
prints.
Y
\
VP
and
Design
is
a
trademark
used
under
license.

Jwner’s
Record
he
model
and
serial
numbers
are
located
at
the
rear.
tecord
these
numbers
in
the
space
provided
below.
Refer
to
these
umbers
whenever
you
call
upon
your
Sony
dealer
regarding
this
roduct.
fodel
No.
CVP-M3
‘Oo
prevent
fire
or
shock
hazard,
do
not
xpose
the
unit
to
rain
or
moisture.
Serial
No.
)
avoid
electrical
shock,
do
not
open
the
cabinet.
Refer
servicing
qualified
personnel
only.
Or
NOREIC]N
RISK
OF
ELECTRIC
SHOCK
00
NOT
OPEN
CAUTION:
TO
REOUCE
THE
RISK
OF
ELECTRIC
SHOCK,
DO
NOT
REMOVE
COVER
(OR
BACK).
NO
USER-SERVICEABLE
PARTS
INSIDE.
REFER
SERVICING
TO
QUALIFIED
SERVICE
PERSONNEL.
This
symbol
is
intended
to
alert
the
user
to
the
presence
of
uninsulated
“dangerous
voltage”
within
the
product’s
enclosure
that
may
be
of
sufficient
magnitude
to
constitute
a
risk
of
electric
shock
to
persons.
presence
of
important
operating
and
maintenance
(servicing)
instructions
in
the
i
This
symbol
is
intended
to
alert
the
user
to
the
e
literature
accompanying
the
appliance.
he
graphical
symbols
are
on
the
bottom
enclosure.
WARNING
This
equipment
has
been
tested
and
found
to
comply
with
the
limits
for
a
Class
B
digital
device,
pursuant
to
Part
15
of
the
FCC
Rules.
These
limits
are
designed
to
provide
reasonable
protection
against
harmful
interference
in
a
residential
installation.
This
equipment
generates,
uses,
and
can
radiate
radio
frequency
energy
and,
if
not
installed
and
used
in
accordance
with
the
instructions,
may
cause
harmful
interference
to
radio
communications.
However,
there
is
no
guarantee
that
interference
will
not
occur
in
a
particular
installation.
If
this
equipment
does
cause
harmful
interference
to
radio
or
television
reception,
which
can
be
determined
by
turning
the
equipment
off
and
on,
the
user
is
encouraged
to
try
to
correct
the
interference
by
one
or
more
of
the
following
measures:
—Reorient
or
relocate
the
receiving
antenna.
—
Increase
the
separation
between
the
equipment
and
receiver.
—Connect
the
equipment
into
an
outlet
on
a
circuit
different
from
that
to
which
the
receiver
is
connected.
—
Consult
the
dealer
or
an
experienced
radio/TV
technician
for
help.
You
are
cautioned
that
any
changes
or
modifications
not
expressly
approved
in
this
manual
could
void
your
authority
to
operate
this
equipment.
CAUTION
TO
PREVENT
ELECTRIC
SHOCK,
DO
NOT
USE
THIS
POLARIZED
AC
PLUG
WITH
AN
EXTENSION
CORD,
RECEPTACLE
OR
OTHER
OUTLET
UNLESS
THE
BLADES
CAN
BE
FULLY
INSERTED
TO
PREVENT
BLADE
EXPOSURE.
Notice
for
the
customers
in
Canada
This
apparatus
complies
with
the
Class
B
limits
for
radio
noise
emissions
set
out
in
Radio
Interference
Regulations.
CAUTION
TV
programs,
films,
video
tapes
and
other
materials
may
be
copyrighted.
Unauthorized
video
printing
of
such
materials
may
be
contrary
to
the
provisions
of
the
copyright
laws.

qn
|
at
i
Color
Video
Pr
wid
What
is
the
Color
Video
Printer?
The
CVP-MS
is
a
color
video
printer
which
stores
the
pictures
played
back
on
a
video
equipment
or
those
broadcast
on
TV,
and
then
prints
the
stored
images.
Basic
operation
is
very
simple.
You
can
make
a
basic
full-size
printout
using
only
the
four
buttons
on
the
unit
or
the
remote
commander.
Going
beyond
the
basics,
you
can
make
a
variety
of
printouts
by
changing
the
way
to
store
the
pictures
(MEMORY
MODE
Setting)
and
the
way
to
print
the
stored
images
(PRINT
MODE
Setting)
according
to
the
menus
on
the
screen.
Buttons
for
advanced
operations
How
to
Use
This
Manual
This
manual
is
comprised
of
the
following
five
chapters:
introduction
This
chapter
provides
preliminary
information
for
using
the
printer,
such
as
supplied
accessories,
optional
accessories,
and
precautions.
Setting
Up
This
chapter
expiains
the
steps
involved
in
setting
up
the
printer,
such
as
connecting
the
printer
to
a
monitor
television
and
video
equipment,
using
the
supplied
remote
commander,
and
loading
the
video
print
cartridge
and
the
print
paper.
Make
sure
to
read
this
chapter
before
starting
operation.
Making
Basic
Printouts
This
chapter
teaches
you
step
by
step
how
to
make
a
full-size
basic
printout.
It
also
explains
the
steps
involved
in
printing
TV
broadcast
pictures.
if
you
are
using
the
printer
for
the
first
time,
read
this
chapter
to
get
a
basic
idea
of
how
to
use
it.
Going
Beyond
the
Basics
This
chapter
explains
the
advanced
operations
which
use
the
menus
on
the
screen,
such
as
how
to
make
a
variety
of
printouts,
how
to
insert
a
date
and
a
title,
and
how
to
adjust
the
picture
quality
of
printouts.
If
you
are
familiar
with
the
basic
operations
and
want
to
use
the
variety
of
other
functions
this
printer
has,
read
the
appropriate
sections
required
in
this
chapter.
Other
Information
This
chapter
gives
the
location
and
function
of
parts
and
controls,
technical
information
on
the
printer,
how
to
handle
error
messages,
and
how
to
deal
with
paper
jams.
Refer
to
this
chapter
when
questions
arise
or
problems
occur.

Introduction
Setting
Up
Making
Basic
Printouts
Going
Beyond
the
Basics
Other
Information
Precautions
Supplied
Accessories
and
Optional
Accessories
Coe
rececercvecccccccccvccccsenees
Connecting
the
Color
Video
Using
the
Remote
Commander
Printer
Coro
ere
necsecsresseereresereoors
Printing
a
Full-
Size
Image
Menus
for
Advanced
Operations
and
Storing
different
images
in
1/4
Storing
strobe
images
in
1/4
siz
Storing
multiple
inset
images
Their
Organization
A
Variety
of
Print
|
Settings
(PRINT
|
MODE
Setting)
|
Oe
eee
rsoeerereoersesescseseeoes
rae
a
\
2
Printing
Repeatedly
| |
Adjusting
the
Picture
(PRINT
OTY
er
ey
‘ :
.
(quali
(quantity)
Setting)
adjustment)
Setting)
sesserescesccncensenserseseseero
DO
|
|
seesessereesorsnsosssessensesers
41
Location
and
Function
of
Parts
and
Controls
Error
MESSAGES
.........s.0s0essee0
:
If
the
paper
jam
...............0
Main
unit
Remote
commander

Loading
the
Video
Print
Cartridge
Loading
the
Video
Print
Paper
Coon
eererereonoerereseesssooreos
Porc
cccccovcvereessvcsscccerores
Printing
TV
Broadcast
Pictures
Core
eseersocvereveroresereseoee
ZO
OF
1/16
SIZE
oo...
cercosseeeee
IAG
SIZE:
cciicissccseacsssessocesse
sees
POO eee
ee
en ee
rereercensereereeeeeee
eer
ereenenene
Printing
with
a
Date
and
a
Title
(CAPTION
iy
Printing
with
a
date
.............
=
Printing
with
a
title
............04
36
hae
11.3,
93
Storing
One
Image
FRAME
Mode
and
FIELD
while
Printing
Another
|
|
Mode
(About
Memory
(FIELD
Memory
Mode)
|
|
(Capture)
Mode)
Pere
rerreorerereseeesseeseserees
Pome
ercacccoseeereroneseseeeees
Specifications
Coo
rerevevrecreseressesesoeoees

Introduction
Supplied
accessories
The
printer
is
packed
together
with
the
following
accessories.
Check
that
nothing
is
missing
from
your
package.
How
to
attach
the
supplied
carrying
strap
Attach
the
supplied
carrying
strap
as
illustrated
to
carry
the
unit.
“NY
:
ae.
To
detach,
lift
up
the
end
of
the
strap
slightly
as
illustrated,
and
remove
it,
pushing
it
forward.
Optional
accessories
The
video
print
cartridge
and
the
video
print
paper
are
not
reusable.
Besides
regular
video
print
paper,
sticker
print
paper
is
available.
The
S$
video
connecting
cable
is
also
available.
VP
This
PRINTER
is
designed
to
use
CARTRIDGES
bearing
the
VP
trademark
to
yield
quality
prints.
Video
Print
Pack
for
trial
use
(1)
Paper
tray
(1)
Video
Print
Cartridge
Regular
Print
Paper
Sticker
Print
Paper
(1
cartridge
for
25
prints)
(15
sheets)
(10
sheets)
Video
connecting
cable
Remote
commander
(RMT-8A)
(1)
AC
power
cord
(1)
(3
m)
(10
feet)
(1)
2a———at-
Carrying
strap
(1)
Operating
instructions
(1)
aT
e
Video
Print
Pack
VPM-PS50ST
(One
cartridge
of
ink
ribbon
for
50
prints
and
two
25-sheet
packs
of
regular
print
paper)
e
Video
Print
Pack
VPM-P100ST
(One
cartridge
of
ink
ribbon
for
100
prints
and
four
25-sheet
packs
of
regular
print
paper)
«
Video
Print
Pack
VPM-P50WS
(One
cartridge
of
ink
ribbon
for
50
prints
and
two
25-sheet
packs
of
sticker
print
paper)
-
@
Video
connecting
cable
VMC-1S
(for
video
signals
only)
¢
$
video
connecting
cable
YC-15V
(for
S
video
signals
only)
¢
LCD
color
monitor
XV-M30
Notes
e
Use
only
the
print
cartridge
and
print
paper
packed
in
the
same
carton
in
order
to
yield
quality
prints.
¢
Retain
the
bags
which
contained
the
video
print
paper
and
the
video
print
cartridge.
Be
sure
to
store
partially-used
packs
of
print
paper
and
cartridge
in
their
original
bags.

Introduction
On
safety
Operate
the
printer
on
120
V
AC,
60
Hz
only.
Be
careful
not
to
set
or
drop
any
heavy
objects
on
the
power
cord,
or
to
damage
the
cord
in
any
way.
Never
operate
this
printer
with
a
damaged
power
cord.
Should
any
solid
object
or
liquid
fall
into
the
cabinet,
unplug
the
printer
and
have
it
checked
by
qualified
personnel
before
operating
it
any
further.
Never
disassemble
the
printer.
To
disconnect
the
cord,
pull
it
out
by
the
plug.
Never
pull
the
cord
itself.
When
the
printer
is
not
going
to
be
used
for
an
extended
period,
disconnect
the
power
cord
from
the
wall
outlet.
Do
not
handie
the
printer
roughly.
¢
To
reduce
the
risk
of
electric
shock,
always
unplug
the
printer
from
electrical
outlet
before
cleaning
and
servicing
the
printer.
|
On
moisture
i
e
If
the
printer
is
brought
directly
from
a
cold
location
to
warm
place
or
placed
in
an
extremely
warm
or
|
condensation
humid
room,
moisture
may
condense
inside
the
unit.
In
such
cases
the
printer
will
probably
not
work
:
properly
and
may
even
develop
a
fault
if
you
persist
in
using
it.
If
moisture
condensation
forms,
turn
|
off
the
power
and
do
not
use
the
printer
for
at
least
one
hour.
_
Oncleaning
Clean
the
cabinet,
panel
and
controls
with
a
soft
dry
cloth,
or
a
soft
cloth
lightly
moistened
with
a
mild
detergent
solution.
Do
not
use
any
type
of
solvent,
such
as
alcohol
or
benzine,
which
may
damage
the
finish.
On
installation
Avoid
placing
the
unit
in
a
location
subject
to:
—vibration
—high
humidity
—excessive
dust
—direct
sunlight
—extremely
high
or
low
temperatures
Do
not
use
electronic
equipment
near
the
unit.
The
unit
will
not
work
properly
in
electromagnetic
fields.
The
unit
is
designed
to
operate
horizontally.
Never
attempt
to
operate
the
printer
in
a
tilted
position.
If
the
unit
was
placed
on
its
side
or
with
its
top
panel
facing
down,
make
sure
to
remove
the
paper
tray
and
check
that
print
paper
is
placed
properly
before
starting
operation.
e
Do
not
place
heavy
objects
on
the
printer.
Leave
enough
room
around
the
printer
so
that
the
ventilation
holes
are
not
blocked.
Blocking
these
holes
may
cause
internal
heat
build-up.
Ventilation
holes

Connect
the
video
source
(camcorder,
VCR,
or
MDP,
etc.)
and
the
video
display
(TV
or
monitor)
to
the
printer.
Use
the
devices
equipped
with
VIDEO
input/output
connectors.
(You
cannot
use
the
devices
which
have
only
aerial
connectors.)
Connect
the
necessary
devices
to
the
printer
according
to
the
following
procedures.
Notes
e
Turn
off
the
power
of
the
other
equipment
you
will
connect
the
printer
to
before
making
the
connection.
¢
Do
not
connect
the
AC
power
cord
of
the
printer
to
the
wall
outlet
until
all
of
the
other
connections
are
completed.
e
For
connection,
also
refer
to
the
operating
instructions
of
the
other
equipment
you
will
connect
the
printer
to.
e
When
using
the
twin-lead
cable
(flat)
to
connect
the
video
equipment
to
the
aerial,
noise
may
be
heard
if
you
install
the
video
device
near
the
printer.
Keep
it
away
from
the
printer.
Connect
the
printer
to
the
television/monitor.
Connect
the
VIDEO
OUTPUT
connector
of
the
printer
to
the
VIDEO
input
connector
of
TV,
using
the
supplied
video
connecting
cable.
CVP-M3
to
the
S
VIDEO
To
the
VIDEO
OUTPUT
‘OUTPUT
TV
with
an
S
VIDEO
input
3
|]
Tothe
s
viDEO
E}
input
TV
with
a
VIDEO
input
to
the
VIDEO
input
=
co.
:
Signal
flow
If
you
have
a
television
with
S
VIDEO
input’
output
connectors,
connect
the
S
VIDEO
OUTPUT
connector
of
the
printer
to
the
S
VIDEO
input
connector
of
the
television,
using
the
S
video
connecting
cable
YC-15V
(not
supplied).
Note
You
cannot
use
a
television
which
has
aerial
connectors
only.
Connect
the
printer
to
the
video
equipment.
Connect
the
VIDEO
INPUT
connector
of
the
printer
to
the
VIDEO
output
connector
of
the
video
equipment.
CVP-M3
To
the
VIDEO
INPUT
Camcorder
or
VCR
with
an
S
VIDEO
output
a)
|
To
the
S
woeo/|
a
output
Camcorder
or
VCR
with
a
VIDEO
output
only
{
Ct}
to
the
VIDEO
output
=)
-
cN.__:
Signal
flow
If
you
have
video
equipment
with
an
S
VIDEO
output
connector.
connect
the
S
VIDEO
INPUT
connector
of
the
printer
to
the
S
VIDEO
output
connector
of
the
video
eqipment.
using
the
S
video
connecting
cable
YC-15
(not
supplied).
Note
You
cannot
use
the
video
equipment
with
aerial
connectors
only.

3
Connect
the
supplied
AC
power
cord
to
the
AC
IN
jack
of
the
printer
and
the
wall
outlet.
S
VIDEO
connectors
and
VIDEO
connectors
The
printer
has
both
S
VIDEO
connectors
for
separate
luminance
(Y)
and
chrominance
(C)
signals
and
VIDEO
connectors
for
composite
NTSC
video
signals.
When
the
video
and
television
units
that
the
printer
will
be
connected
to
have
both
types
of
connectors,
connect
to
the
S
VIDEO
connectors,
using
the
S
video
connecting
cable
YC-15V
(not
supplied).
You
can
enjoy
printouts
with
higher
quality
picture.
lf
you
connect
the
S
VIDEO
OUTPUT
connector
of
the
printer
to
the
VIDEO
input
connector
of
the
video
device,
the
printer
will
output
video
output
signals
automatically.
If
you
connect
the
VIDEO
INPUT
connector
of
the
printer
to
the
S
VIDEO
output
connector
of
the
video
device,
the
printer
will
input
video
input
signals
automatically.
if
you
use
both
the
S
VIDEO
and
VIDEO
INPUT
connectors
of
the
printer
simultaneously,
the
input
circuit
will
select
the
S
VIDEO
input
signals
automatically.
Even
if
you
have
no
video
equipment
You
can
print
TV
broadcast
pictures
if
your
TV
has
S
VIDEO
or
VIDEO
input/output
connectors.
For
details,
refer
to
“Printing
TV
Broadcast
Pictures”
on
page
19.
Watching
video
and
TV
after
connecting
to
the
printer
As
long
as
you
leave
the
supplied
AC
power
cord
connected
to
the
AC
In
jack
of
the
printer
and
the
wall
outlet,
you
can
enjoy
watching
video
and
TV
as
usual,
even
if
the
printer
itself
has
been
turned
off.
Whenever
the
unit
is
connected
to
the
AC
power
source,
the
POWER
lamp
lights
in
red.
(The
printer
is
in
a
standby
mode.)
If
you
unplug
the
AC
power
cord
from
the
wall
outlet,
you
cannot
watch
video
or
TV.
POWER
switch
Lights
in
red
eX.
:
Signal
flow
Seeing
pictures
on
LCD
color
monitor
(not
supplied)
Connect
the
LCD
color
monitor
to
the
accessory
shoe
of
the
printer,
and
connect
the
video
input
connector
of
the
monitor
to
the
VIDEO
OUTPUT
connector
of
the
printer.
Since
the
monitor
screen
is
so
smail
that
you
may
not
be
able
to
judge
if
the
picture
is
blurred
or
not.
(See
page
17.)

Setting
Up
Function
of
the
buttons
on
the
remote
commander
The
supplied
remote
commander
has
the
same
basic
operation
buttons
as
the
main
unit.
It
also
has
some
buttons
to
control
the
tape
transport
of
Sony
video
equipment,
which
can
be
selected
by
the
COMMAND
MODE
switch
at
the
rear
of
the
commander.
For
details,
refer
to
“Location
and
Function
of
Parts
and
Controls”
on
page
47.
A
lithium
battery
is
already
installed.
If
the
operating
range
of
the
commander
becomes
noticeably
short,
replace
the
battery
with
a
Sony
CR2025
lithium
battery.
Point
the
head
of
the
remote
commander
toward
the
remote
sensor
on
the
printer.
You
can
operate
the
printer
with
the
remote
commander
within
5
meters
(16
feet
5
inches)
of
the
printer.
Remote
sensor
4
m
5
PPrOx.
39.
prox
39
5
a
rene
Notes
e
Keep
the
remote
sensor
of
the
printer
away
from
direct
sunlight
or
the
strong
light
of
lighting
equipment.
e
Be
careful
that
there
is
no
obstacle
between
the
printer
and
the
remote
commander.
How
long
is
the
battery
life
?
In
normal
operation,
the
lithium
battery
will
last
for
about
one
year.
(Its
life
span
depends
on
how
offen
the
remote
commander
is
used.)
if
the
operating
range
of
the
commander
becomes
noticeably
short,
replace
the
battery
with
a
Sony
CR2025
lithium
battery.
Use
of
batteries
other
than
CR2025
may
create
a
risk
of
fire
or
explosion.
Caution
on
lithium
battery
e
Keep
the
lithium
battery
and
the
remote
commander
out
of
the
reach
of
children.
e
Should
the
battery
be
swallowed,
consult
a
doctor
immediately.
e
Wipe
the
battery
with
a
dry
cloth
to
assure
a
good
contact.
e
Do
not
hold
the
battery
with
metallic
tweezers
as
doing
so
may
cause
a
short
circuit.
WARNING
Battery
may
explode
if
mistreated.
Do
not
recharge,
disassemble
or
dispose
of
in
fire.

Replacing
the
lithium
battery
Be
sure
to
insert
the
battery
with
correct
polarity.
If
you
insert
it
with
wrong
polarity,
you
cannot
operate
the
remote
commander.
Lithium
battery
529
+
(plus)
side
-
(minus)
side
Remove
the
lithium
Insert
a
new
lithium
battery
compartment
battery
(CR2025)
in
at
the
rear
of
the
the
battery
remote
commander.
compartment
with
the
+
(plus)
side
facing
up.
+
(plus)
side
(rear)
@)
@
While
pressing
the
lock
switch
with
a
ball-point
pen
or
other
pointed
object
in
the
direction
of
the
arrow,
@®
remove
the
lithium
battery
compartment.
Wipe
the
surface
of
the
lithium
battery
carefully
with
a
dry
cloth.
install
the
battery
compartment
as
before.

Setting
Up
Load
the
video
print
cartridge
with
the
VP
mark
according
to
the
following
procedures.
Open
the
cartridge
Insert
the
video
print
Use
only
the
video
print
cartridge
and
the
video
print
paper
compartment
lid.
cartridge
firmly
and
packed
in
the
same
carton.
close
the
cartridge
compartment
lid.
\f
you
load
mismatched
video
print
paper
and
video
print
cartridge,
the
error
message
“Print
paper
and
ink
ribbon
are
mismatched."
appears
on
the
screen
and
you
cannot
start
operation.
Note
on
handling
video
print
cartridge
When
you
put
the
cartridge
down,
stand
it
as
illustrated
so
that
dust
will
not
get
on
the
ink
ribbon.
Do
not
touch
the
ink
ribbon
or
place
the
cartridge
in
a
dusty
location.
Fingerprints
or
dust
on
the
ink
ribbon
may
result
in
imperfect
printing.
Side
of
the
unit
Open
the
lid
while
pulling
down
the
tab.
Ink
ribbon
Close
the
lid
If
the
ink
ribbon
of
the
cartridge
is
slack,
rewind
to
remove
the
slack,
and
then
insert
the
cartridge.
If
you
insert
a
cartridge
with
a
slack
ink
ribbon,
the
ribbon
may
be
damaged.
If
the
cartridge
compartment
lid
will
not
close
Remove
the
cartridge.
and
then
reinsert
it.
12

Replacing
the
video
print
cartridge
You
cannot
reuse
a
cartridge
which
has
been
completely
used.
Replace
the
cartridge
with
a
new
one.
If
the
completely
used
cartridge
is
still
loaded
in
the
unit,
the
error
message
“Out
of
ink
ribbon
please
insert
new
cartridge.”
appears
on
the
screen.
Pull
down
the
lever
and
remove
the
cartridge
as
illustrated.
Pull
down
the
lever.
Pull
out
the
cartridge.
Caution
Never
put
your
hand
into
the
cartridge
compartment.
The
thermal
head
reaches
high
temperatures,
especially
after
repeated
printing.
Notes
on
storing
video
print
cartridges
¢
Avoid
placing
the
cartridge
in
a
location
subject
to:
—
high
temperatures
—
high
humidity
—
excessive
dust
—direct
sunlight
When
you
are
going
to
store
a
partially-used
cartridge
for
an
extended
period
of
time,
store
it
in
its
original
bag.
If
your
ink
ribbon
should
tear
Repair
the
ribbon
with
transparent
tape.
There
should
be
no
problem
with
using
the
remaining
portion
of
the
ribbon.
When
you
use
a
partially-
used
video
print
cartridge
Wind
the
ink
ribbon
until
the
black
bar
appears
on
the
left.
Also,
remove
any
slack.
Wind
the
spools
of
the
cartridge
alternately
as
illustrated
until
a
black
bar
extending
full-width
of
the
ribbon
appears
on
the
extreme
left.

Setting
Up
Load
the
video
print
paper
according
to
the
following
procedures.
Use
only
the
video
print
paper
and
the
video
print
Cartridge
packed
in
the
same
carton.
Note
on
handling
the
video
print
paper
Do
not
touch
the
printing
surface
(the
side
where
nothing
is
printed).
Do
not
place
the
print
paper
in
a
dusty
location.
Fingerprints
or
dust
on
the
printing
surface
may
result
in
impertect
printing.
Use
the
print
paper
recommended
for
this
printer
only.
If
you
use
a
different
type
of
paper,
the
printer
may
not
print
properly
or
may
cause
problems.
14
@
Open
the
printout
cover,
@)
open
the
paper
compartment
lid
and
@
remove
the
paper
tray.
Printout
cover
How
to
reattach
the
printout
cover
If
you
open
the
printout
cover
forcibly
or
put
force
on
the
hinges,
the
printout
cover
may
come
off
from
the
unit.
In
this
case,
fit
the
two
hinges
onto
the
pins
from
directly
above
to
reattach
the
cover.
(If
it
is
NOT
done
from
directly
above
or
too
much
force
is
put
on
the
hinges,
the
hinges
or
the
pins
may
be
damaged.)
2
Insert
the
video
print
paper
in
the
paper
tray.
Determine
which
side
is
the
printing
surface.
For
regular
and
sticker
print
paper,
the
printing
surface
is
the
shiny
side
where
nothing
is
printed.
Printing
surface
(sticker
print
paper)
2
Ruffle
the
print
paper.
mm
3
Make
sure
that
the
tray
spacer
is
lifted.
If
you
insert
the
regular
print
paper
or
the
sticker
print
paper
in
the
paper
tray
while
the
spacer
is
down
and
continue
operations,
paper
jams
may
occur.
For
regular
and
sticker
print
paper.
keep
the
spacer
raised
4
Check
that
the
corners
of
the
print
paper
are
not
bent.
and
then
place
the
paper
in
the
paper
tray
with
the
printing
surface
facing
up.
Printing
surface
Make
sure
that
the
Pnni
paper
is
placed
below
the
paper
holder

Notes
The
paper
tray
holds
up
to
25
sheets.
When
you
add
paper
to
a
partly-full
tray,
be
careful
that
the
total
number
of
sheets
does
not
exceed
25.
If
you
exceed
this
limit,
Paper
jams
may
occur.
Do
not
place
different
types
or
sizes
of
paper
in
the
tray
at
the
same
time.
If
you
do,
paper
jams
may
occur.
After
you
have
carried
or
stood
the
printer
on
its
side,
check
that
the
print
paper
is
placed
properly
in
the
paper
tray.
Then
start
operation.
Do
not
remove
or
insert
the
paper
tray
with
the
unit
standing
on
one
side
or
the
other.
If
you
do,
malfunction
may
occur.
Peel
off
the
film
of
the
sticker
print
paper
after
printing.
If
you
peel
it
off
before
printing,
it
may
cause
paper
jams
or
other
troubles.
Slide
the
paper
tray
back
into
the
printer,
close
the
paper
compartment
lid,
and
close
the
printout
cover.
Push
the
paper
tray
in
until
it
clicks
into
place.
compartment
lid
first,
and
then
@
close
the
printout
cover.
Notes
on
storing
the
video
pri
e
int
paper
Avoid
placing the
print
paper
in
a
location
subject
to:
—high
temperatures
—high
humicity
—
excessive
dust
—direct
sunlight
When
you
are
going
to
store
a
partially-used
pack
of
the
print
paper
for
an
extended
period
of
time,
store
it
in
its
original
bag.

Use
the
four
buttons
on
the
front
top
side
of
the
unit
for
basic
operations.
Making
Basic
Printouts
Printout
cover
You
can
see
the
finished
printout
coming
out
through
this
window.
The
following
are
the
steps
to
make
a
full-size
basic
printout*
of
Turn
on
the
power
of
the
printer
When
the
image
you
want
to
print
the
pictures
played
back
on
the
and
the
video
equipment,
and
play
appears
on
the
screen’,
press
the
video
equipment,
using
the
four
back
the
pictures
on
the
video
CAPTURE
button
to
store
it
in
buttons
on
the
front
top
side
of
equipment.
memory.
the
unit.
*
Video
print
paper
with
the
picture
printed
:
Set
the
TV/VCR
switch
to
Store
the
image
you
want
to
Play
back
the
pictures.
,
Ctveremy)
pint
|
ams)
Ol]
1
Ao
a
‘
:
:
:
Check
whether
the
image
you
want
to
print
is
blurred
or
not
on
the
screen.
The
image
stored
in
memory
appears
on
the
u
L
screen
so
that
you
can
confirm
the
image
for
Not
pening.
blurred.
1
=
'
Indicates
that
the
displayed
picture
is
the
stored
image
(indication:
CONFIRM).
Current
print
quantity
Select
FIELD
Aor
FIELD
B
mode.
Front
side
of
the
unit
ary:
The
green
lamp
lights
when
you
|
Tha
picture
press
the
switch
to
turn
on
the
Start
printing.
printer,
stored
in
memory
on
ERROR
Once
you
understand
the
oC
sTANOBY
operation
explained
in
this
A
BACK
TO
Sint
section,
you
can
do
any
basic
operations
of
the
printer.
For
The
pictures
being
played
back
on
the
video
printing
from
the
TV,
refer
to
equipment
appear
on
the
screen.
“Printing
TV
Broadcast
Pictures”
*
You
can
store
a
still
picture
created
by
on
page
19.
} ;
pressing
the
pause
button
on
the
VCR,
Indicates
that
the
displayed
However,
the
quality
of
a
still
picture
is
inferior
5
picture
is
a
playback
picture
‘
|
(indication:
SOURCE)
or
a
to
that
of
a
picture
being
played
back
on
the
:
stored
image
(indication:
VCR:
consequently,
the
quality
of
the
printout
CONFIRM).
may
be
rather
poor.
Therefore,
we
recommend
storing
the
playback
picture
whenever
possible.
Current
Playback
picture
The
button
to
be
Next
operation
options
pressed
Note
If
the
video
print
cartridge
and
the
video
print
paper
are
not
loaded
in
the
printer
when
you
turn
it
on,
the
error
messages,
“Please
insert
Video
Print
Cartridge.”
and
“Please
place
Video
Print
Paper
in
tray.”
appear
on
the
screen
one
after
another.
Load
the
cartridge
and
paper
according
to
the
procedures
shown
in
the
chapter
“Setting
Up"
on
pages
12
—
15.
16

Confirming
and
error
beeps
When
you
press
a
button
on
the
main
unit
or
remote
commander,
a
beep
sounds
to
show
that
you
have
done
an
expected
step
of
the
operation.
If
you
have
done
an
unacceptable
step,
repeated
beeps
sound
to
show
that
the
printer
rejected
your
operation.
Repeat
the
operation
carefully,
referring
to
the
steps
shown
in
this
manual.
if
the
stored
image
is
blurred,
press
the
FIELD/FRAME
button
to
select
the
FIELD
A
or
FIELD
B
mode.
(If
the
stored
image
is
not
blurred,
proceed
to
step
4.)
To
change
the
image
stored
in
memory
Press
the
SOURCE
button.
Each
time
you
press
the
FIELD/FRAME
button,
the
indication
on
the
screen
changes
in
the
order
of
FRAME
—
FIELD
A
>
FIELD
B
>
FRAME.
Select
the
FRAME/FIELD
mode,
checking
which
mode
eliminates
the
blur
most.
Image
in
FRAME
mode
(blurred)
g
>
S
The
stored
image
disappears
and
the
playback
picture
returns
to
the
screen.
When
the
image
you
want
to
print
appears,
press
the
CAPTURE
button
again
to
store
a
new
image.
The
previous
image
in
memory
is
replaced
with
the
new
one.
What
blurs
the
stored
image
?
The
stored
image
is
blurred
because
the
motion
of
the
image
is
so
fast
that
the
image
changes
while
the
printer
is
storing
the
image
in
the
FRAME
mode.
If
you
print
this
image,
the
picture
on
the
printout
will
also
be
blurred.
To
eliminate
the
blur,
press
the
FIELD/FRAME
button
to
select
the
FIELD
A
or
FIELD
B
mode,
checking
which
mode
eliminates
the
blur
more.
The
picture
quality,
however,
may
become
coarse
when
printed
in
the
FIELD
mode.
When
the
Stored
image
is
not
blurred,
we
recommend
you
to
print
in
the
FRAME
mode.
For
details,
refer
to
“FRAME
mode
and
FIELD
mode
(About
Memory
(Capture)
Mode)”
on
page
45.
17
(to
be
continued)

Making
Basic
Printouts
Press
the
PRINT
To
see
the
playback
picture
Press
the
SOURCE
Notes
on
preserving
your
button.
during
printing
button.
printouts
Press
the
SOURCE
button
to
The
playback
picture
¢
Do
not
stick
cellophane
tape
display
the
playback
picture.
reappears.
or
leave
plastic
erasers
on
a
Wait
about
60
seconds
for
the
printout
(regular
and
sticker
print
paper)
to
emerge
from
the
paper
outlet.
Open
the
printout
cover
and
take
it
out.
if
you
print
in
the
FIELD
mode,
FIELD
A
or
FIELD
B
appears
here.
BACK
TO
BOURCE
A
running
figure
appears
while
printing
process
proceeds.
When
the
printing
is
over,
the
following
indications
reappear
on
the
screen.
[I-CONF
IRM
PRINT
BACK
TO
(SOURCE
(You
cannot
store
a
new
image
until
the
printing
is
finished.)
Notes
¢
To
avoid
malfunction,
do
not
unplug
the
power
cord
from
the
wall
outlet
during
printing
or
other
operation.
If
you
should
turn
off
the
printer
during
printing,
it
will
complete
the
printing
in
process
and
then
turn
off
automatically.
¢
If
you
turn
off
the
unit,
the
stored
image
is
cancelled.
«
Do
not
open
the
hatches
for
checking
a
paper
jam
under
the
printout
cover
and
on
the
bottom
panel
during
printing.
e
As
long
as
an
error
message
is
displayed
on
the
screen,
you
cannot
start
printing.
Refer
to
“Error
Messages”
on
page
48.
e
Do
not
leave
more
than
25
printouts
on
the
paper
outlet.
e
A
black
line
may
appear
on
the
right
or
left
end
of
a
printout
although
no
such
line
appears
on
the
screen.
This
is
due
to
a
distortion
in
the
video
signals
and
not
due
to
some
trouble
with
the
printer.
printout.
Also
avoid
putting
a
printout
under
a
plastic
desk
mat.
The
color
may
stick
to
the
plastic
surface.
Be
careful
not
to
spill
volatile
organic
solvents
such
as
alcohol
onto
the
printouts.
If
you
do,
picture
on
the
printout
may
be
discolored.
To
avoid
degradation
of
the
color,
do
not
place
a
printout
in
locations
subject
to:
—high
temperatures
—high
humidity
—direct
sunlight
—excessive
dust

Making
Basic
Printouts
You
can
print
TV
broadcast
pictures
by
connecting
the
printer
Connect
the
printer
Turn
on
the
power
of
When
the
image
you
to
a
TV
with
the
VIDEO
input/
to
the
TV.
the
printer
and
the
want
to
print
output
connectors.
TV.
appears
on
the
screen,
®
press
the
CAPTURE
button
to
Connect
the
VIDEO
INPUT/
Set
the
TV/VCR
switch
on
the
store
it
in
memory
OUTPUT
connectors
of
the
TV
to
“TV.”
(You
can
watch
the
and
@)
press
the
printer
to
the
VIDEO
input/
TV
programs
as
usual.)
PRINT
button
to
output
connectors
of
the
TV
as
print.
illustrated,
using
the
supplied
video
connecting
cable.
The
playback
picture
which
appeared
on
the
screen
when
you
pressed
the
CAPTURE
to
the
VIDEO
button
is
stored
and
the
OUTPUT
printout
emerges
from
the
paper
outlet.
(
to
the
S
VIDEO
To
change
the
image
stored
in
memory
1
Set
the
TV/VCR
switch
on
the
TV
to
“TV.”
ith
VIDEO
2
Press
the
SOURCE
button.
output
op
3
Press
the
CAPTURE
button
to
store
a
new
image.
4
Press
the
PRINT
button
to
print.
To
check
the
image
stored
in
memory
Set
the
TV/VCR
switch
on
the
TV
to
“VCR.”
The
stored
image
is
displayed
on
the
screen.
If
the
stored
image
is
not
displayed,
press
the
MEMORY
RECALL
button
(page
25).
Notes
to
an
S
VIDE
‘
‘
;
pico
TV
with
S
VIDEO
e
When
you
want
to
make
a
variety
of
printouts
using
the
inpuvoutput
MENU
screen,
set
the
TV/VCR
switch
on
the
TV
to
“VCR.”
Display
the
MENU
screen.
After
finishing
the
MENU
settings,
co
.
:
Signal
flow
set
the
switch
to
“TV”
and
store
the
image
in
memory
and
print.
When
you
turn
off
the
printer,
the
image
stored
in
memory
is
inout/
erased.
When
you
print
from
video
equipment,
you
can
store
oe
se
LaSiintihcaes
the
the
same
image
again.
When
printing
from
the
TV,
however,
s
Vibes
INPUT/OUTPUT
be
careful
because
you
cannot
store
the
same
broadcast
connectors
of
the
printer
to
the
pene
age.
S
VIDEO
input/output
connectors
of
the
TV,
using
the
S
video
connecting
cable
YC-15V
(not
supplied).
*
To
check
the
image
to
be
printed,
the
connections
indicated
with
---
are
necessary.

Going
Beyond
the
Basics
For
advanced
operations,
open
the
sliding
lid
on
the
top
of
the
unit
and
use
the
buttons
(menu
operations
buttons)
under
the
lid.
You
can
make
a
variety
of
printouts
by
changing
how
to
store
the
image
in
memory
(MEMORY
MODE
setting)
and
how
to
print
the
stored
image
(PRINT
MODE
setting)
according
to
the
MENU
screen.
For
the
settings
of
print
quantity
and
picture
quality
adjustment,
also
use
the
MENU
screen.
The
MENUS
are
organized
as
illustrated
on
the
right:
the
main
MENU,
five
sub-menus
and
three
menus
under
the
sub-menus.
Siding
le
Press
here
and
slide
the
lid
in
the
direction
of
the
arrow.
Buttons
for
advanced
operations
Controls
the
cursor
on
the
screen
to
select
the
item
required
and
to
change
the
position
to
store
the
image
you!
want
to
print.
Displays
the
menu
screen
or
erases
it.
Executes
what
is
set
in
the:
menu
screen.
The
Organization
of
the
Menus
Sub-menus
(Setect
the item
required
on
the
main
MENU
and
press
the
EXEC
PRINT
QTY
button.
One
oa
the
following
menus
; .
appears
on
the
screen
)
on)
setting
Tor
To
set
the
print
quantity.
PAINT
QTY:
|
Set:
1.
na:
i
CAPTION
setting
menu
FCAPTION
SELECT
+
PNO
CAPTION
OATE
ONLY
TITLE
ONLY
CATERTITLE
|
To
input
a
date
or
a
title
or
both
below
=
the
image.
|
'
i
Main
MENU
|
(Press
the
MENU
button
to
display
the
main
MENU.)
sooo
MENU
eevee
DPRAT
QTY
—-
trem:
J
MEMORY
MODE
setting
menu
To
set how
to
store
the
image
in
MEMORY
MODE
CAPTION
=-
NO
CAPTIO
memory.
a
PAT
MDE
—
NOWAL
ren
PCTURE
ADI.
-
STANDARD
STROBE
16
~
NORM
Item:
EF
speed::D
Eng:
i:
trem:
(T4
Next
:
(ERE)
End
:
iia]
PRINT
MODE
setting
menu
To
set
how
to
print.
j
PRINT
MODE
en
€nd:
it,
naae
PICTURE
ADJ.
(quality
adjustment)
setting
menu
“FONE
ADUST
To
adjust
the
picture
quality
of
the
>
STANDARD
.
printouts.
RED
=
mie
¢
GREEN
=
isin
+
BLUE
=
a
+
GRIGHT
==
anu
+
SHARP
=
manent
+
(tem:
f°
SET:
Leng:
Zee
Table of contents
Other Sony Printer manuals

Sony
Sony UPX-C300 User manual

Sony
Sony DPP-MP1 User manual

Sony
Sony UP-21MD User manual

Sony
Sony UPX-DP10 User manual

Sony
Sony UP-895 User manual

Sony
Sony DPP-MS300 Marketing User manual

Sony
Sony UP25MD User manual

Sony
Sony UP-51MDP User manual

Sony
Sony DPP-FP50 Fall 2005 User manual

Sony
Sony UP-DR100 User manual

Sony
Sony UPA-PC105 User manual

Sony
Sony UP-D898MD User manual

Sony
Sony UP-910 User manual

Sony
Sony Professional Monitor User manual

Sony
Sony DPP-SV55 User manual

Sony
Sony UP-D897 User manual

Sony
Sony UP-D711MD User manual

Sony
Sony UP-DR200 User manual

Sony
Sony UPX-C100 User manual

Sony
Sony DPP-EX50 User manual