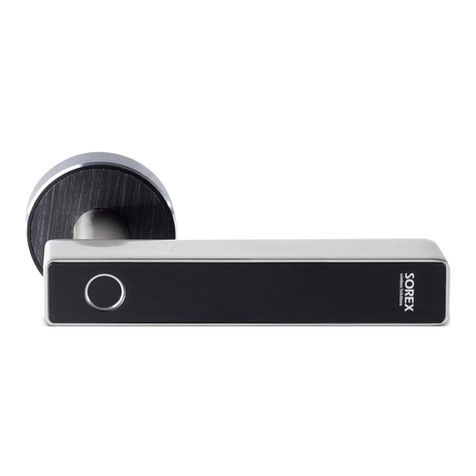
SOREX FLEX EASY User manual

SOREX FLEX EASY fingerprint door handle
operation manual
Machine Translated by Google

SOREX wireless Solutions GmbH
Imprint
Version
1.1 © Copyright: February 2023
Viktor-Kaplan-Strasse 2B
T +43 2622 320130
Technology and Research Center WN
A-2700 Wiener Neustadt
Austria
F +43 2622 3201315
w³ www.sorex.eu
CE www.sorex.eu/eu-conformity-declaration
Machine Translated by Google

4.1. Installation ................................................ ................................................ ............................................. 10
4.4.2. Invite users ................................................ ................................................ ..........................12
3. Installing the door handle .......................................... ................................................ ................................ 3
4. Smartphone app ............ ................................................ ................................................ ....................... 10
4.4.7. Remove device from app ................................................ ................................................ .............
14 4.5. Gateway ................................................ ................................................ ................................................ .16
4.4.1. Opening via Bluetooth ................................................ ................................................ .................12
4.5.1. Preparing the lock ................................................ ................................................ ....................16
2. Technical data .......................................... ................................................ ................................................... 2
4.4.6. Reading logs ................................................ ................................................ ....................14
4.4. Functions ................................................ ................................................ ............................................. 12
4.4.4. Learn fingerprint ................................................ ................................................ ............ 13 4.4.5.
Delete fingerprint ................................................ ................................................ ..............14
1. Scope of delivery .......................................... ................................................ ................................................ 1
4.2. Registration ................................................. ................................................ ..........................................
10 4.3. Initial setup ................................................. ................................................ ................................... 11
4.4.3. Remove user ................................................ ................................................ ....................13
4.5.2. Add gateway ................................................ ................................................ ................... 16 4.5.3.
Delete gateway ................................................ ................................................ ........................... 17 4.5.4.
Opening via gateway ................................................ ................................................ .................... 18 4.6.
Connection to Smart Home Services .......................................... ................................................ 18 5. Mode
“ “Normal door handle” ................................................ ................................................ ................... 19 6.
Battery warning ........................... ................................................ ................................................ ......... 19 7.
Reset to factory settings ................................... ................................................ .........20
Table of contents
German
Machine Translated by Google

German
2. 8mm square
10. Emergency key
3. 4x screw adapter long 4. 4x
screw adapter short 5. Door
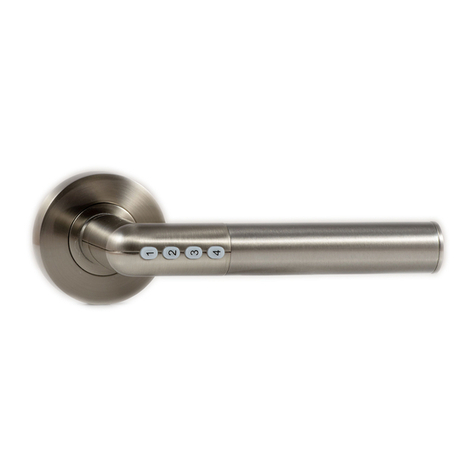
handle - interior and exterior part 6.
4x fastening screws 7.
Replacement screw for battery compartment/inside cover 8.
Replacement worm screw for attaching the outer door handle to the mounting plate 9.
Allen key
1. Screwdriver
1. Scope of delivery
1
Machine Translated by Google
German
Temperature range
EAN
Number of media
Battery life
frequency
Storage of access media
item number
Power supply
2
2. Technical data
0096224847170 & 0096224847163
Permanent (even when changing batteries)
Unlimited eKeys (smartphone
~ 1 year with normal use (10 openings
per day)
2.4GHz
30 fingerprints
BH104100 (black) & BH104200 (silver)
4xAAA
-20° to 50°C
User)
Machine Translated by Google
German
• First, remove your old door handle.
3. Installing the door handle
3
Machine Translated by Google
German
• Take the outer part of the door handle (with cable) and the 8mm square (2.). Guide the
cable through the square and insert the square into the square hole provided until it
stops.
• Mount either two of the long (3.) or two of the short screw adapters (4.).
the outside of the door handle.
4
Machine Translated by Google

German
• Insert the square and the screw adapters from the outside through the designated ones
Standard holes in the door (38mm spacing).
5
Machine Translated by Google

German
• Mount the mounting plate on the inside of the door using two fastening screws (6.).
Make sure that the notch in the mounting plate will be on the same side as the
worm screw in the door handle.
• Now guide the cable and the square into the inner part of the door handle.
6
Machine Translated by Google

German
• Attach the door handle to the previously screwed mounting plate using the worm screw
(picture above). Now connect the plug to the socket in the battery compartment
at. Make sure that the red marked side of the plug and the red marked side of the socket
are on the same side.
7
Machine Translated by Google

German
Screw (7th).
• Insert 4x AAA batteries.
• Now close the cover and fasten it with the one provided
8th
Machine Translated by Google

German
9
Machine Translated by Google

German
4. Smartphone app
4.1. installation
4.2. Registration
10
• Search for the “SOREX SmartLock”
app in the Google Play Store or
Apple Store.
Register with your email address
or phone number. This is
important so that you can
regain access to the SOREX FLEX
EASY door handle if you lose your
smartphone or password.
Or scan the following QR code:
Machine Translated by Google

German
or until the LED on the outside
• Attention: In order for the lock to be found, you
must wake it up by briefly holding a finger
against the fingerprint sensor or on the
number pad.
using a needle for about 5 seconds
• First press the reset button
Please press the lock you found.
• Please note that the door handle opens with any
finger when delivered.
located locks.
please select “All locks”.
please click on “Add lock”.
. In the menu that opens, press
• A page opens where you
• It will now be close
• Open the app and first press on the top left of
the main page
lights up solid red. As soon as you
release the reset button, the color of
the LED changes to green.
Assign a descriptive name and complete
the setup with “OK”.
• Now you can create one for your lock
4.3. initial setup
11
Machine Translated by Google

German
4.4.2. Invite Users • To
invite users to the app, please first press
on the home page
12
4.4.1. Opening via Bluetooth
• You can use the large lock button to
open your lock within the Bluetooth
4.4. Features
• A window will appear in which you can 4
Main page.
"eKeys".
have different options to grant access: o
Timed: From-
To period o Permanent: Permanent
access
• And then click “eKey” at the bottom
Unlock range.
send".
• You will now see your lock on the
Machine Translated by Google

13
4.4.4. Learn fingerprint
German
"Delete" button.
Click “Fingerprints” and then click “Add
fingerprint” at the bottom.
To delete, press the red one
User Information. To the user
• First, press on the home page
• A window opens with
"Send" to send the invitation.
corresponding user to select it.
Specify information such as the period
of time in which access should be valid.
Finally press on
Additionally you can do more
• Then press the
Specify the recipient account
(phone number or email) and name.
o One-time: Access applies to
one-
time opening o Cyclical: Recurring
access, e.g. every week Mon-Fri
• You always have to do this
has permanent or temporary access.
• Now you can enter a name and select whether
the user
4.4.3. Remove users • To
remove users again, first call up the user list using
"eKeys".
Machine Translated by Google

the
Select app. Then open the device's
settings.
"Records".
input.
onHome pageShe
• First, press on the home page
• In the next window, press “Delete” to
remove the selected user.
• At the bottom there is the “Delete” button.
on
Click on “Fingerprints” and then click
on the user to be deleted.
• After clicking on “Next”, please follow
the instructions in the app to train
the finger.
button. If you remove the device, you
will need to confirm your password
German
14
4.4.7. Remove device from app •
You can delete a device by first removing the
lock from the list in the
4.4.6. Read out logs • Press
to read out the logs
4.4.5. Delete fingerprint
Machine Translated by Google

15
German
and that the device automatically
Attention: If you no longer have access
to your device (e.g. device defective),
you can delete it from the app in the
following way: Open the app and on the
main page, first press on the top
left of the menu that opens, please press
" Settings". Now select “Transfer the
lock” and select the desired lock. You
can now delete the device using the
“Move to trash” button. Confirm with
your account password.
Important: Only erase the device this
way if you no longer have access to the
device.
• Attention: Please note that the
The device must be within reach
is reset.
. In the
Machine Translated by Google

German
• Make sure the light on the gateway is flashing
blue and red alternately.
on the top right.
• In the next window, select yours
You can achieve this by removing the gateway
from the power supply and plugging it back in.
• Then select “Remote-controlled opening”.
Gateway types.
• Now press “Turn on”.
Please press “Gateway” in the menu. In the
window that opens, press
16
4.5.1. Preparing the lock
• You must first activate the remote
opening for your lock. To do this,
first press “Settings” on the home
page.
4.5.2. Add a gateway • On
the main page, first press at the top left.
In the opening
4.5. Gateway
(sold separately)
Machine Translated by Google

17
German
and adds this to the remote opening.
Open and/or manage remotely.
4.5.3. Delete gateway • First
press on the top left of the main page. In the
opening
• The gateway then automatically searches for
nearby locks
• Now you can also remove the lock
additional gateways must be purchased.
• Attention: The gateway must always be within
the Bluetooth range of the locks, both during
the learning process and during further use
Gateway that you want to delete.
• After you have selected the gateway, you can
remove it using the “Delete” button.
want to control both from a distance,
Please press “Gateway” in the menu. In the
window that opens, select that
(up to 10m - depending on local conditions).
Are locks further apart and you
This process may take a few minutes.
• Now configure your gateway by selecting the
correct WLAN, entering the corresponding
WLAN password and assigning the gateway a
name. Confirm the process with "OK".
Machine Translated by Google
This manual suits for next models
2
Table of contents
Other SOREX Door Lock manuals
Popular Door Lock manuals by other brands

IOne Digital
IOne Digital Icops I product manual

YEEUU
YEEUU S1 Smart Lock quick start guide

hentech
hentech FP6010Q-2 user manual

CRP Securities
CRP Securities CAL-ROYAL Grade1 Installation and programming instructions

hager
hager 4500 Series installation instructions

BQT Solutions
BQT Solutions COBALT-mini YD39M Installation and operating instructions