Steren POD-150 User manual


Before using your new Remote Control with Dock
connector, please read this instruction manual to prevent
any damage. Put it away in a safe place for future
references.
FEATURES
Playback music stored in the iPod
Control the iPod through the remote control
Playback video into a TV, using an AV cable (only iPod
Video)
Compatible with all iPod with Dock connector
PACKAGE CONTENT
1 Base
4 iPod adapters
1 AV cable
1 USB cable
1 AC adapter
1 User’s manual
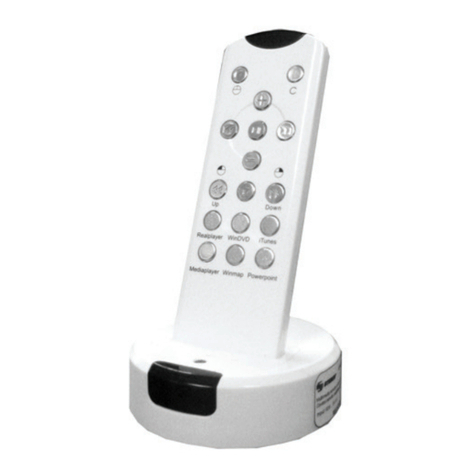
REMOTE CONTROL
1. IR transmitter
2. Forward
3. Backward
4. Play / Pause
5. Volume +
6. Volume –
7. Battery compartment
•
•
•
•
ENGLISH
ENGLISH-2
Before usin
g
y
our new Remote Control with Dock
c
onnector,
p
lease read this instruction manual to
p
revent
a
n
y
dama
g
e. Put it awa
y
in a safe place for future
references
.
1
2
3
45
6
7
1
2
3
4
5
6
7

BASE
1. Dock connector
Allows you to connect the iPod to the base
2. In-use indicator
Lights on when the base is in use
3. IR sensor
Receives the IR signal from the remote control
4. Line OUT
Allows you to connect the AV cable or an external audio device
such as speakers or headphones
5. USB connector
Plug the supplied USB cable to synch and charge the iPod via
PC
6. Firewire connector
Allows you to connect a Firewire cable (not included in the
package) to synch the iPod and recharged the battery through a
PC
1
2
3
4
5
6
1
2
3
4
5
6
ENGLISH
ENGLISH-3

CHARGING THE IPOD’S BATTERY
If you want to charge the iPod’s battery, follow these steps:
1.- Plug the USB / Firewire cable into an available port in the
computer, the extreme connector, plug it into the base.
2.- The indicator LED in the base will light on.
3.- Place an iPod adapter into the base, in accord to your iPod
model.
4.- Place the iPod into the Dock connector.
5.- Now, the iPod will be synchronized with iTunes and the
message Do not disconnect displays in the screen. The charging
process begins.
6.- While the battery is charging, a battery icon displays in the
iPod’s screen . When the battery is fully charged, the icon
will change to In this moment you can disconnect the iPod
from the base.
Firstly, remove the equipment using the software, then click
on the left button of the mouse over the icon “Remove
hardware securely”, located on task bar, and choose the
device. Once the system displays that you can remove
hardware securely, unplug it from the USB / Firewire port.
LISTENING TO MUSIC
Use the base to listen to your favourite music, using external
speakers or headphones.
1.- Place the base in a flat surface.
2.- Find an iPod adapter, in accord to your iPod mode.
3.- Plug an earphone into the Line OUT connector.
4.- Place the iPod into the Dock connector. The indicator LED
will light in green.
5.- Select the desired songs, as the normal way you do.
6.- While listening to music, use the remote control to set the
volume level and select previous or next songs.
7.- Turn the device off and release from the base after their use.
In this mode, the battery will be not charged.
Firstl
y
, remove the equipment usin
g
the software, then click
o
n the left button of the mouse over the icon “Remove
h
ar
d
ware secure
ly”
,
l
ocate
d
on tas
k
b
ar, an
d
c
h
oose t
h
e
d
evice. Once the s
y
stem displa
y
s that
y
ou can remove
hardware securel
y
, unplu
g
it from the USB / Firewire port
.
I
n this mode, the batter
y
will be not char
g
ed
.
ENGLISH
ENGLISH-4

LISTENING TO MUSIC WHILE THE BATTERY IS
RECHARGED
1.- Plug the USB cable to the base. The extreme connector plug
it to AC power adapter.
2.- Connect the AC power adapter to an outlet. The indicator
LED will light in red.
3.- Insert a pair of headphones into Line Out connector.
4.- Place the iPod into the Dock connector. The charging
indicator will light on.
5.- Turn the iPod on, search, select and begin the songs
playback.
6.- Use the headphones to listen the music.
7.- Use the remote control to set the volume level or choose a
different song.
8.- If the battery is fully charged or you don’t want to use the
iPod, turn it off and release from the base.
WATCHING VIDEOS OR PHOTOGRAPHS IN A TV
SET (Function available only for certain models)
The base allows you to connect an AV cable in order to watch
movies, videos or photographs in your TV set.
1.- Place the base in a flat surface, near your TV.
2.- Plug the 3,5mm connector of the AV cable into Line OUT jack.
3.- Plug the RCA connectors into the AV jacks of the TV set.
Make sure to match the colours from the cable and the TV jacks,
otherwise the video may not visualize correctly.
4. Turn the TV and the iPod on.
5.- Playback a video, movie or pictures slide. The image will be
displayed in the monitor.
6.- Turn the device off and unplug it after their use.
Please, refers to iPod’s instruction manual in order to know
how to visualize videos, movies or photographs in a TV.
Due to TV has higher video resolution than iPod, the
displayed image may not be good enough.
P
lease, refers to iPod’s instruction manual in order to know
how to visualize videos, movies or photo
g
raphs in a TV
.
D
ue to
TV
h
as
high
er v
id
eo reso
l
ut
i
on t
h
an
iP
o
d
, t
h
e
d
ispla
y
ed ima
g
e ma
y
not be
g
ood enou
g
h
.
ENGLISH
ENGLISH-5

TROUBLESHOOTING
SPECIFICATIONS
Input: 5V 150mA
Remote control
Input: 3V (CR2032)
AC power adapter
Input: 100-250V ~ 60/50Hz 8W
Output: 5V 1A max.
Product design and specifications are subject to change
without previous notice.
This set does not contain an iPod®.
All brands and product names mentioned on this user’s
manual may be trademarks or registered trademarks of their
respective owners.
Trouble Solution
Make sure the iPod® is
p
la
y
in
g
music
Check the iPod® is well connected to Dock
Make sure the connections are correct
Make sure the batter
y
has enou
g
h ener
gy
Check the iPod® is well connected to Dock
The remote control does not
respond
No sound
P
roduct desi
g
n and specifications are sub
j
ect to chan
g
e
wi
t
h
out
p
rev
i
ous not
i
ce
.
T
his set does not contain an iPod
®.
A
ll brands and
p
roduct names mentioned on this user’s
m
anual ma
y
be trademarks or re
g
istered trademarks of their
res
p
ective owners
.
ENGLISH
ENGLISH-6


Antes de utilizar su nuevo Control Remoto y Cargador
Compatible con iPod®, lea este instructivo para evitar
cualquier mal funcionamiento. Guárdelo para futuras
referencias.
CARACTERÍSTICAS
Reproduce música almacenada en el iPod®
Controla el iPod® a través del control remoto
Reproducción de vídeo en un televisor a través de cable AV
(sólo iPod® Vídeo)
Compatible con todos los modelos de iPod® con conector
Dock
CONTENIDO
1 Base
4 Adaptadores para iPod®
1 Cable AV
1 Cable USB
1 Adaptador AC
1 Manual de instrucciones
CONTROL REMOTO
1. Transmisor IR
2. Adelantar
3. Regresar
4. Reproducir / Pausa
5. Volumen +
6. Volumen –
7. Compartimiento de baterías
•
•
•
•
ESPAÑOL
A
ntes de utilizar su nuevo Control Remoto
y
Car
g
ador
C
om
p
atible con iPod
®
, lea este instructivo
p
ara evita
r
c
ual
q
uier mal funcionamiento. Guárdelo
p
ara futuras
referencias
.
1
2
3
45
6
7
ESPAÑOL-2
1
2
3
4
5
6
7

BASE
1. Conector Dock
Permite conectar el iPod® a la base
2. Indicador de uso
Enciende cuando la base está en uso
3. Sensor IR
Recibe la señal IR del control remoto
4. Conector de salida
Permite conectar el cable de AV, bocinas o audífonos
5. Conector USB
Inserte el cable USB suministrado para sincronizar y cargar el
iPod® en la computadora
6. Conector Firewire
permite conectar un cable Firewire (no suministrado) para
sincronizar y cargar el iPod® en la computadora
1
2
3
4
5
6
1
2
3
4
5
6
ESPAÑOL
ESPAÑOL-3

CARGA DE BATERÍAS
Si desea cargar la batería de su iPod® siga los siguientes
pasos:
1.- Conecte el cable USB o Firewire en un puerto disponible de
la computadora, el extremo contrario conéctelo a la base.
2.- El LED indicador de la base se encenderá.
3.- Coloque un adaptador en la base, de tal forma que coincida
con su modelo de iPod®.
4.- Inserte el iPod® en el conector Dock.
5.- El iPod® se sincronizará con la computadora y aparecerá en
la pantalla No Desconectar. El proceso de carga comenzará.
6.- En la pantalla del iPod® aparecerá un ícono de carga
Una vez que haya concluido, el ícono cambiará a En
este momento, podría desconectar el iPod® de la base.
Primero retire el equipo por medio de software, presione
con el botón izquierdo del ratón sobre el ícono de
Quitar software con seguridad, y seleccione su equipo.
Una vez que el sistema indique que puede retirar el equipo,
desconéctelo del puerto USB o Firewire.
ESCUCHANDO MÚSICA
Así mismo puede utilizar la base para escuchar su música
favorita ya sea a través de bocinas externas o de audífonos.
1.- Coloque la base en una superficie plana.
2.- Localice y coloque el adaptador de base, de acuerdo al
modelo de iPod® con el que cuente.
3.- Conecte un par de audífonos en el conector Line OUT de la
base.
4. Inserte el iPod® en el conector Dock. El LED indicador se
encenderá de color verde.
5.- Seleccione las canciones que desea, de la forma que
normalmente lo hace.
6.- Una vez que la reproducción ha comenzado, puede utilizar el
control remoto incluido en el paquete para adelantar o regresar
canciones, así como ajustar el nivel de volumen.
7.- Una vez que haya terminado de utilizar el equipo, apáguelo y
retírelo de la base.
En este modo, la batería NO se cargará mientras esté
escuchando música.
E
n este modo, la batería NO se car
g
ará mientras esté
e
scuchando música
.
P
rimero retire el e
q
ui
p
o
p
or medio de software,
p
resione
c
on el botón iz
q
uierdo del ratón sobre el ícono de
Q
uitar software con se
g
uridad,
y
seleccione su equipo.
U
na vez
q
ue e
l
s
i
stema
i
n
diq
ue
q
ue
p
ue
d
e ret
i
rar e
l
e
q
u
ip
o,
d
esconéctelo del
p
uerto USB o Firewire
.
ESPAÑOL
ESPAÑOL-4
ESCUCHAR MÚSICA MIENTRAS LA BATERÍA SE
RECARGA
Para realizar esta función, deberá utilizar el adaptador USB
incluido en el paquete.
1.- Conecte el cable USB suministrado con el equipo al
conector de la base. El extremo contrario conéctelo al adaptador
de corriente.
2.- Conecte el adaptador de corriente en un contacto casero. El
LED indicador del adaptador se encenderá de color rojo.
3.- Conecte un par de audífonos en el conector 3,5mm de la
base.
4.- Inserte el iPod® en el conector Dock de la base. El indicador
de carga se encenderá.
5.- Encienda el iPod®, busque, seleccione y comience la
reproducción de canciones.
6.- Mediante los audífonos podrá escuchar la música
seleccionada.
7.- Utilice el control remoto para ajustar el nivel de volumen y
seleccionar las canciones deseadas.
8.- Una vez que la batería se haya cargado o cuando ya no
requiera seguir utilizando el iPod®, apáguelo y desconéctelo de
la base.
COMO VISUALIZAR VÍDEOS O FOTOGRAFÍAS
EN EL TELEVISOR (Disponible sólo para algunos
modelos de iPod®)
La base le permite conectar un cable AV para que pueda
visualizar sus películas, vídeos o fotografías en un televisor
convencional desde el iPod®.
1.- Coloque la base en una superficie plana, cercana al televisor.
2.- Inserte el conector 3,5mm del cable de AV suministrado en la
entrada correspondiente de la base.
3.- Los conectores RCA insértelos en las entradas de AV de su
televisor. Asegúrese de que los colores de los conectores
corresponden con las entradas en el televisor, de otra forma
podría no visualizarse correctamente.
4.- Encienda el televisor y el iPod®.
5.- Comience la reproducción de una película, vídeo o
secuencia de fotografías. La imagen se visualizará en el
televisor.
ESPAÑOL
ESPAÑOL-5

6.- Cuando ya no requiera utilizar el equipo, apáguelo y
desconéctelo.
Refiérase al manual de instrucciones del iPod® para
conocer el método de visualización de vídeos, películas o
fotografías en el televisor.
Debido a que la resolución de vídeo del iPod® es menor a la
del televisor, la imagen visualizada podría no ser lo
suficientemente buena.
PROBLEMAS Y SOLUCIONES
ESPECIFICACIONES
Entrada: 5V 150mA
Control Remoto
Entrada: 3V (CR2032)
Adaptador de corriente
Entrada: 100-250V ~ 60/50Hz 8W
Salida: 5V 1A máx.
El diseño del producto y las especificaciones pueden
cambiar sin previo aviso.
El empaque no contiene iPod®.
Todas las marcas y nombres de productos mencionados en
este manual de instrcciones, pueden ser marcas registradas
de sus respectivos dueños.
Problema Solución
Asegúrese de que el iPod® esté reproduciendo
música
Compruebe que el iPod® esté correctamente
colocado en el conector Dock
Compruebe que los cables de conexión están
conectados adecuadamente
Compruebe que la batería tiene suficiente
ener
g
ía
Compruebe que el iPod® esté correctamente
colocado en el conector Dock
No hay sonido
El control remoto no responde
E
l diseño del producto
y
las especificaciones pueden
c
ambiar sin
p
revio aviso
.
E
l em
p
a
q
ue no contiene iPod
®.
T
o
d
as
l
as marcas
y
nom
b
res
d
e pro
d
uctos menc
i
ona
d
os en
e
ste manual de instrcciones, pueden ser marcas re
g
istrada
s
d
e sus res
p
ectivos dueños.
Refiérase al manual de instrucciones del iPod®
p
ara
c
onocer el método de visualización de vídeos,
p
elículas o
f
oto
g
rafías en el televisor
.
D
ebido a
q
ue la resolución de vídeo del iPod® es menor a la
d
el televisor, la ima
g
en visualizada podría no ser lo
s
uficientemente buena
.
ESPAÑOL
ESPAÑOL-6

WARRANTY
This Steren product is warranted under normal usage against defects in workmanship and materials
to the original purchaser for one year from the date of purchase.
CONDITIONS
1.- This warranty card with all the required information, invoice or purchase ticket, product box or
package, and product, must be presented when warranty service is required.
2.- If the product stills on the warranty time, the company will repair it free of charge.
3.- The repairing time will not exceed 30 natural days, from the day the claim was received.
4.- Steren sell parts, components, consumables and accesories to costumer, as well as warranty
service, at any of the addresses mentioned later.
THIS WARRANTY IS VOID IN THE NEXT CASES:
If the product has been damaged by an accident, acts of God, mishandling, leaky batteries, failure
to follow enclosed instructions, improper repair by unauthorized personnel, improper safe keeping,
among others.
a) The consumer can also claim the warranty service in the purchase establishment.
b) If you lose the warranty card, we can reissue it, if you show the invoice or purchase ticket.
RETAILER INFORMATION
Name of the retailer
Address
Product
Brand
Part number
Serial number
Date of delivery
In case your product fails or have any doubt, please contact a closest retailer. If you are in
Mexico, please give a call to our Call Center.
Call Center
Mexico City: 53 54 22 90
Province: 01 800 500 9000
Product: Remote Control with Dock connector
Part number: POD-150
Brand: Steren

PÓLIZA DE GARANTÍA
Esta póliza garantiza el producto por el término de un año en todas sus partes y mano de obra,
contra cualquier defecto de fabricación y funcionamiento, a partir de la fecha de entrega.
CONDICIONES
1.- Para hacer efectiva la garantía, presente ésta póliza y el producto, en donde fue adquirido o en
Electrónica Steren S.A. de C.V.
2.- Electrónica Steren S.A de C.V. se compromete a reparar el producto en caso de estar defectuoso
sin ningún cargo al consumidor. Los gastos de transportación serán cubiertos por el proveedor.
3.- El tiempo de reparación en ningún caso será mayor a 30 días, contados a partir de la recepción
del producto en cualquiera de los sitios donde pueda hacerse efectiva la garantía.
4.- El lugar donde puede adquirir partes, componentes, consumibles y accesorios, así como hacer
válida esta garantía es en cualquiera de las direcciones mencionadas posteriormente.
ESTA PÓLIZA NO SE HARA EFECTIVA EN LOS SIGUIENTES CASOS:
1.- Cuando el producto ha sido utilizado en condiciones distintas a las normales.
2.- Cuando el producto no ha sido operado de acuerdo con el instructivo de uso.
3.- Cuando el producto ha sido alterado o reparado por personal no autorizado por Electrónica
Steren S.A. de C.V.
El consumidor podrá solicitar que se haga efectiva la garantía ante la propia casa comercial donde
adquirió el producto. Si la presente garantía se extraviara, el consumidor puede recurrir a su
proveedor para que le expida otra póliza de garantía, previa presentación de la nota de compra o
factura respectiva.
DATOS DEL DISTRIBUIDOR
Nombre del Distirbuidor
Domicilio
Producto
Marca
Modelo
Número de serie
Fecha de entrega
ELECTRONICA STEREN S.A. DE C.V.
Camarones 112, Obrero Popular, 02840, México, D.F. RFC: EST850628-K51
STEREN PRODUCTO EMPACADO S.A. DE C.V.
Biólogo MaximIno Martínez No. 3408 Int. 3 y 4, San Salvador Xochimanca, México, D.F. 02870,
RFC: SPE941215H43
ELECTRONICA STEREN DEL CENTRO, S.A. DE C.V.
Rep. del Salvador 20 A y B, Centro, 06000, México. D.F. RFC: ESC9610259N4
ELECTRONICA STEREN DE GUADALAJARA, S.A.
López Cotilla No. 51, Centro, 44100, Guadalajara, Jal. RFC: ESG810511HT6
ELECTRONICA STEREN DE MONTERREY, S.A.
Colón 130 Pte., Centro, 64000, Monterrey, N.L. RFC: ESM830202MF8
ELECTRONICA STEREN DE TIJUANA, S.A
Calle 2a, Juárez 7636, Centro, 22000, Tijuana, B.C.N. RFC: EST980909NU5
Producto: Control Remoto y Cargador Compatible Con iPod®
Modelo: POD-150
Marca: Steren
En caso de que su producto
presente alguna falla, acuda
al centro de distribución más
cercano a su domicilio y en caso
de tener alguna duda o pregunta
por favor llame a nuestro Centro
de Atención a Clientes, en
donde con gusto le atenderemos
en todo lo relacionado con su
producto Steren.
Centro de Atención a Clientes
Ciudad de México:
53 54 22 90
Interior de la República:
01 800 500 9000
Table of contents
Languages:
Other Steren Remote Control manuals

Steren
Steren RM-20 User manual

Steren
Steren RM-115 User manual

Steren
Steren 208-187 User manual

Steren
Steren COM-235 User manual

Steren
Steren RM-200 User manual

Steren
Steren RM-956 User manual

Steren
Steren K-560 User manual

Steren
Steren RM-110 User manual

Steren
Steren RM-150 User manual

Steren
Steren RM-310 User manual

Steren
Steren RM-110 User manual

Steren
Steren RM-20 User manual

Steren
Steren MOV-042 User manual

Steren
Steren RM-1 User manual

Steren
Steren COM-230 User manual

Steren
Steren SWI-600 User manual

Steren
Steren RN-KID User manual

Steren
Steren RM-500 User manual

Steren
Steren RM-25 User manual

Steren
Steren RM-8 User manual