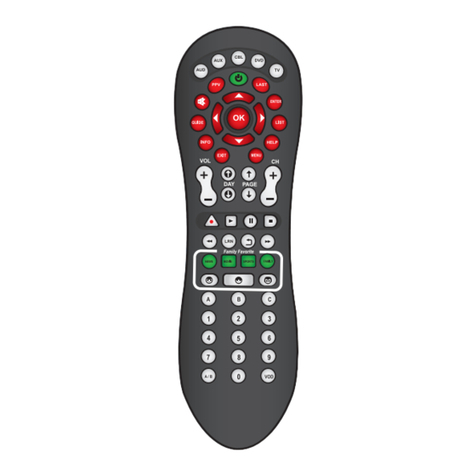
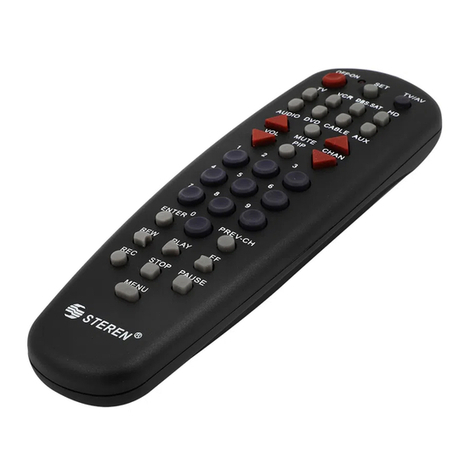
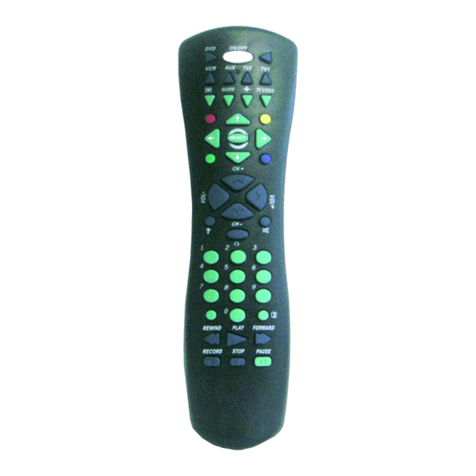
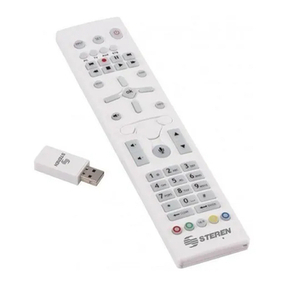
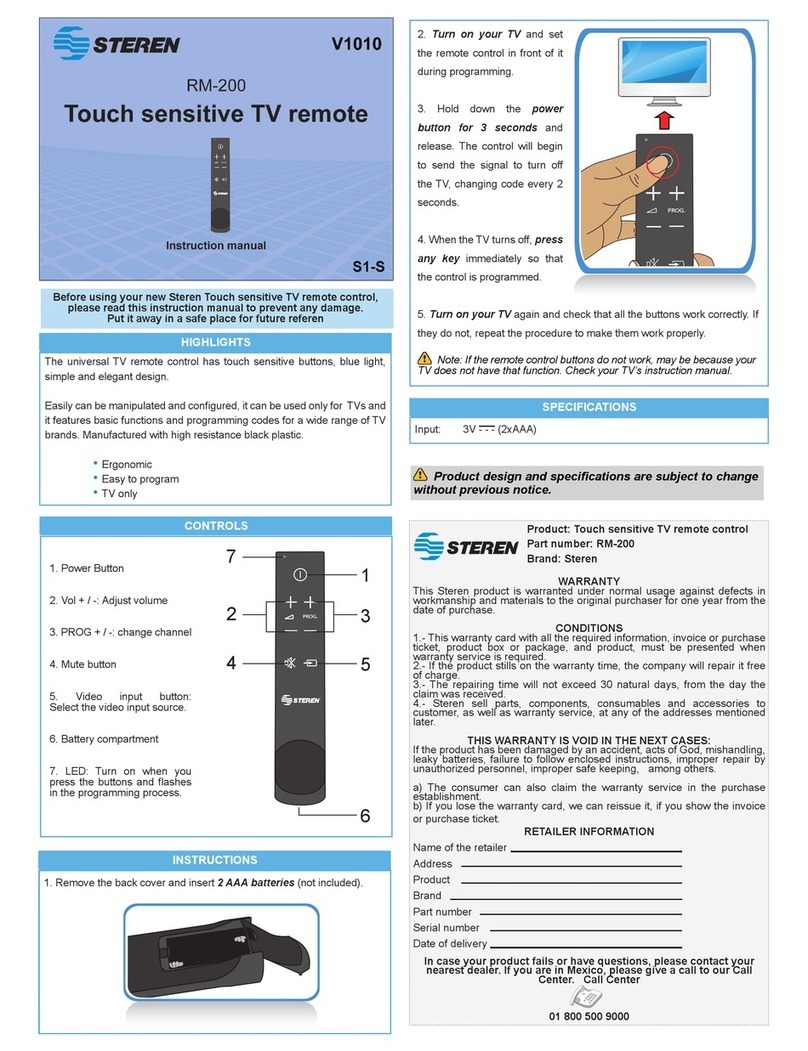
Steren RM-20 User manual

Product / Producto: DSS UNIVERSAL
REMOTE CONTROL / CONTROL
REMOTO PARA TV SATELITAL
Model / Modelo: RM-20
Brand / Marca: Steren
CONDICIONES
1. Para hacer efectiva esta garantía se requiere: La presentación de esta póliza y del producto, en el lugar en donde fue adquirido o en ELECTRONICA STEREN S.A. DE C.V.
2. ELECTRONICA STEREN S.A. DE C.V. se compromete a reparar el producto en caso de estar defectuoso sin ningún cargo al consumidor.
3. El tiempo de reparación en ningún caso será mayor a 30 días contados a partir de la recepción del producto en cualquiera de los sitios en donde pueda hacerse efectiva la
garantía.
4. El lugar donde puede adquirir partes, componentes, consumibles y accesorios, así como hacer válida esta garantía es: En cualquiera de las direcciones arriba mencionadas.
ESTA GARANTIA NO ES VALIDA EN LOS SIGUIENTES CASOS:
1. Cuando el producto ha sido utilizado en condiciones distintas a las normales.
2. Cuando el producto no ha sido operado de acuerdo con el instructivo de uso.
3. Cuando el producto ha sido alterado o reparado por personas no autorizadas por ELECTRONICA STEREN S.A. DE C.V.
Nota: El consumidor podrá solicitar que se haga efectiva la garantía ante la propia casa comercial, donde adquirió el producto. Si la presente garantía se extraviara, el
consumidor puede recurrir a su proovedor para que le expida otra póliza de garantía, previa presentación de la nota de compra o factura respectiva.
DATOS DEL DISTRIBUIDOR
DISTRIBUTION / NOMBRE / DISTRIBUIDOR:
ADDRESS / DOMICILIO:
PRODUCT / PRODUCTO: BRAND / MARCA:
MODEL / MODELO: SERIAL NUMBER / No. DE SERIE:
DATE OF DELIVERY / FECHA DE ENTREGA:
Call Center / Centro de Atención a Clientes
del Interior 01 800 500 9000
Mexico City / Cd. de México: 53 54 22 90
Warranty
CONDITIONS:
1. This warranty card with all the required information, the invoice or purchase ticket, the packing or package, must be presented with the product when warranty
service is required.
2. If product hasn’t exceed warranty period, the company will repair it free of charge including transportation charges.
3. The repairing time will not exceed 30 natural days, from the day the claim was received.
4. Steren sells parts, components, consumables and accessories to customer, as well as warranty service, at any of the following addresses:
THIS WARRANTY IS VOID ON THE NEXT CASES:
If the product has been damage by an accident, acts of God, mishandling, leaky batteries, failure to follow enclosed instructions, improper repair by unauthorized
personnel, improper safe keeping.
Notes:
a) The customer can also claim the warranty service on the purchase establishment.
b) If you lose the warranty card, we can reissue it just showing the invoice or purchase ticket.
Póliza de Garantía
This Steren product is guaranteed under
normal usage against defects in
workmanship and materials to the original
purchaser for one year from the date of
purchase.
Garantiza este producto por el término de
un año en todas sus partes y mano de obra
contra cualquier defecto de fabricación y
funcionamiento, a partir de la fecha de
entrega.

INSTRUCTIVO DE USO DE CONTROL REMOTO PARA TV SATELITAL
Modelo: RM-20
Marca: Steren
Antes de utilizar su nuevo Control Remoto Universal lea este
instructivo para evitar cualquier mal funcionamiento. Guárdelo para
futuras referencias.
Su nuevo control remoto universal es la solución perfecta para todas sus
necesidades de controlar diferentes equipos. Diseñado especialmente
para operar sistemas de satélite, puede ser programado para operar
diferentes componentes, hasta 6. Incluye características de fácil uso, tales
como: botón navegador, modo de búsqueda automática, botón de
encendido multi-componente, entre otras.
IMPORTANTE
Siempre utilice un paño suave y seco para limpiar su equipo.
Anote los códigos correspondientes de cada aparato programado ya que
cuando se vaya a realizar un reemplazo de baterías, contará con 5
minutos antes de que se borre la memoria del control remoto.
CONTROLES
1.- Teclas de equipos ....................... Permite seleccionar el equipo que
se desea programar / utilizar
(DVD, Satélite, VCR, Aux, TV2 o
TV1)
2.- Encendido / Apagado ................. Enciende / apaga el equipo
seleccionado
3.- Mosaico ........................................ Muestra menús exclusivos de los
sistemas de Satélite
4.- Guía (Guide) ................................ Muestra todos los canales
5.- Más (+) ......................................... Cambio de idioma. Muestra un
resume acerca del programa
visualizado
6.- TV Vídeo ...................................... Cambia entre el modo de Vídeo y
de Televisión
7.- Botones de juego ........................ Depende de su sistema de
Satélite
8.- Flechas de desplazamiento ........ Permite moverse a través de las
diferentes opciones en la guía de
programas y menús
9.- Seleccionar (Select) .................... Permite seleccionar una opción
de un menú o guía de un
dispositivo específico
10.- Canales ..................................... Utilice estos botones para
cambiar de canales
11.- Volumen .................................... Permite ajustar el nivel de
volumen
12.- Ayuda ......................................... Muestra información diversa
acerca del programa visualizado
13.- Canal anterior ............................. Regresa al último canal
visualizado
14.- Silenciar ..................................... Desactiva el volumen
15.- Teclas numéricas ....................... Permite acceder a los canales de
forma directa
16.- Interactive ................................... Permite entrar al menú Interactivo
de su sistema de Satélite
17.- Teclas de vídeo ........................... Utilice esta teclas para controlar
un DVD o un VCR on un
reproductor de CD
a) Regresar (Rewind)
b) Reproducir (Play)
c) Adelantar (Forward)
d) Grabar (Record)
e) Detener (Stop)
f) Pausa (Pause)
18.- LED indicador .............................. Enciende cuando el equipo está
en uso
19.- Compartimiento de baterías
INSTRUCTION MANUAL FOR DSS UNIVERSAL REMOTE CONTROL
Model: RM-20
Brand: Steren
Before using your new DSS Universal Remote Control, please read
this instruction manual to prevent any damage. Put it away in a safe
place for future references.
Your new DSS Universal Remote Control is the complete solution for all of
your DSS remote control needs. Specifically designed to operate the
features of your DSS satellite system, it can be programmed to operate a
variety of components, up to six. It is packed with easy-to-use features
such as: navigator control, auto scan code search, multi-component Power
Key, among others.
IMPORTANT
Clean only with a soft, dry cloth.
In order to avoid having to re-program your control remote after you
remove the batteries, you will need to insert new batteries within 5
minutes.
KEYS AND FUNCTIONS
1.- Component keys ........................ Press DVD, Satellite, VCR, AUX,
TV2 or TV1 once to select a
home entertainment component
to control
2.- On / Off ....................................... Turn on/off the selected
equipment
3.- Mosaic ........................................ Press Mosaic to see exclusive
menus from your Satellite system
4.- Guide ......................................... Displays all available channels
5.- Plus (+) ...................................... Press + to change the language.
Displays a summary of the
current program
6. TV Video ..................................... Switch between Video mode and
TV mode
7.- Game buttons ............................ Its functions depends of the
Satellite system
8.- Directional arrows ...................... Use this directional arrows to
move the cursor in the program
guide and menu screens
9.- Select ......................................... Choose options from your
selected component’s menu or
guide
10.- Channel .................................... Use to select the next higher (or
lower) channel
11.- Volume ..................................... Use Vol + / - to raise (or lower)
the sound volume
12.- Help ........................................... Displays diverse information
about the visualized channel
13.- Last ........................................... Press once to recall the last
channel
14.- Mute .......................................... Turn sound off or on
15.- Keypad ...................................... Use the keypad to directly enter in
channels
16.- Interactive ................................. Allows you to enter to Interactive
Menu in the satellite system
17.- VCR Transport keys .................. Use the VCR transport keys to
control your VCR, as well as CD
or DVD player
a) Rewind
b) Play
c) Forward
d) Record
e) Stop
f) Pause
18.- Red indicator light ...................... This light blinks to show that the
remote control is working
19.- Battery compartment

BATERÍAS
Su control remoto requiere 2 baterías alcalinas AAA (no incluidas).
Asegúrese de respetar la polaridad y de no mezclar baterías nuevas con
usadas o de diferentes tipos.
COMO UTILIZAR LA PROGRAMACIÓN RÁPIDA
Usted puede utilizar la programación rápida con los códigos enlistados en
las siguientes páginas. Si al introducir algún código el control remoto no
realiza la mayoría de las funciones de su aparato programado, por favor
intente con los códigos de la lista que corresponden a su marca. De ser
necesario utilice el método de búsqueda automática.
1.- Localice el código de programación para el equipo que desee
programar (Satélite, TV, DVD, VCR o Audio) en la lista de códigos anexa.
2.- Encienda el equipo que desee programar, manualmente.
3.- Presione el botón del equipo que desee programar. Sin soltar el botón
del equipo introduzca el código de programación que previamente
localizó.
4.- Suelte todos los botones.
5.- Oprima la tecla de Encendido (On / Off). Su aparato deberá apagarse.
De ser así, anote el código que utilizó para futuras referencias. Encienda
el equipo, observe y asegúrese que la mayoría de las funciones del
control remoto funcionan adecuadamente, en caso de no funcionar intente
la programación con los códigos de la lista que corresponden a su marca,
repitiendo los pasos 2 al 4. De ser necesario utilice el método de
búsqueda automática.
Notas:
No exceda de más de 10 segundos entre cada paso ya que el control
remoto se saldrá del modo de programación y tendrá que comenzar de
nuevo.
Puede haber más de un código que controle su equipo, pero sólo un
código accionará la mayoría de las funciones, trate de encontrar el código
más adecuado.
Si introduce un código equivocado, el LED indicador parpadea 4 veces y
sale del modo de programación.
ABOUT BATTERIES
The DSS remote control requires two (2) new “AAA” alkaline batteries (not
supplied). Make sure to check the polarity and do not mix old and new
batteries or mix alkaline with manganese-type batteries.
HOW TO USE THE QUICK PROGRAM METHOD
You can use the quick program with the enlisted codes, that you can see
on the next pages. If your device does not respond or is not functioning
properly, please try with each code listed for your brand. If it’s necessary,
try the Search Method.
1.- Find the code for your device (Satellite, TV; DVD; VCR or Audio) in the
codes listed under Manufacturer’s Codes.
2.- Manually, turn on a component (e.g. TV, VCR, etc).
3.- Press and hold the button of the desired component to program. Then
enter the first four-digit code for your brand of component.
4.- Release the buttons.
5.- Aim the remote control at the component and press On / Off button, It
should turn off. If this happen, write the code for future references. Turn
the component on, watch and keep that your device works properly with
the remote control. If your device does not respond or is not functioning
properly, please try with each code listed for your brand, repeating from
step 2 to 4. If it’s necessary, try the Search Method.
Notes:
Press each key within 10 seconds of the previous entry. Otherwise, the
remote control will exit the programming mode.
Probably there are more than one code for your device, but only one of
them will control almost the total of functions, try to find the more
appropriated code for your brand.
If you enter a wrong code, the red indicator light will flash 4 times, then will
exit the programming mode.
1
2
3
45
6
7
7
77
89
10
11 14
12 13
15
16
abc
d
e
f
18
19

MÉTODO DE BÚSQUEDAAUTOMÁTICA
1.- Encienda el equipo que desee programar, manualmente.
2.- Presione el botón del equipo que desee programar y sin soltar
presione el botón de Encendido (On / Off) hasta que el indicador LED se
encienda.
3.- Suelte los botones, el indicador debe permanecer encendido.
4.- Coloque el control remoto enfrente del dispositivo que desea
programar y presione el botón de Reproducir (Play), el LED indicador
parpadeará 10 veces.
5.- El equipo se deberá apagar. Si es así, presione el botón de Regresar
(Rewind) haciendo una pausa de un segundo, cada vez que presiona el
botón, hasta que el equipo se encienda.
6.- Una vez que el equipo se encienda, presione el botón de Detener
(Stop) para finalizar el proceso y guardar el código de programación en
memoria. El LED indicador se apagará.
Nota:
Si en el paso 5, el equipo no se apaga, repita los pasos 2 al 4.
Le suplicamos sea paciente. Si después de varios intentos presionando la
tecla de Encendido (On / Off) no se enciende su equipo, repita las
instrucciones.
No presione botones diferentes a los indicados en este instructivo.
No exceda de más de 30 segundos entre cada paso, de lo contrario se
saldrá del modo de búsqueda y tendrá que repetir todo el proceso.
BORRADO DE CÓDIGOS
Si Usted quisiera borrar el código de un aparato en específico, utilice los
métodos de programación rápida o de búsqueda automática; se
reemplazará el viejo código por el nuevo.
COMO SABER EL CÓDIGO DE PROGRAMACIÓN DE UN APARATO YA
PROGRAMADO
Cuando su equipo ya realiza la mayoría de las funciones con el control
remoto, es útil conocer el código del aparato para una futura referencia, ya
sea que haya utilizado el método de búsqueda automática o mediante
código preestablecidos.
El código de programación se compone de 4 dígitos, para conocer el
código de un equipo en específico:
1.- Presione la tecla del equipo que programó (TV, VCR, etc.), el LED
indicador se enciende. Sin soltarla, presione el botón de Ayuda (?), el LED
indicador se apaga.
2.- Libere las teclas. Para conocer el primer dígito del código presione la
tecla 1. Debe de contar los destellos del LED indicador. Si no hay
destellos, el dígito es “0”.
3.- Para el segundo dígito, presione la tecla 2. Cuente los destellos.
4.- Para el tercer dígito, presione la tecla 3. Cuente los destellos.
5.- Para el cuarto dígito, presione la tecla 4. Cuente los destellos y apunte
el código en su tabla de referencia rápida.
COMO CAMBIAR DE UN APARATO A OTRO
Simplemente presione el botón del aparato que desea utilizar (TV, DVD,
Aux, VCR, etc.). Las teclas de función varían dependiendo del equipo
seleccionado.
SOLUCIÓN DE PROBLEMAS
AUTOMATIC SEARCH MODE
1.- Manually, turn on a component (e.g. TV, VCR, etc).
2.- Press and hold the button of the desired component to program and On
/ Off button, at the same time, until the red indicator light turns on.
3.- Release the buttons, the red indicator light should keep on.
4.- Aim the remote control at the component and press Play button, the red
indicator light will blinks 10 times.
5.- The equipment should turn off. If this happen, press Rewind button
within 10 seconds of the previous entry, until the component turn on.
6.- Once the component turns on, press Stop to finalize the process and
store the programming code in memory. Red indicator light turns off.
Notes:
Back and repeat steps 2, 3 and 4 if the equipment doesn’t turns off at step
5.
Be patient. If your device don’t turn off after few tries pressing On / Off
button, repeat the instructions.
Do not press other buttons as we mentioned in this instruction manual.
Do not exceed more than 30 seconds between each step. Otherwise the
remote control exit from the Search mode and you must to repeat all
process.
HOW TO ERASE PROGRAMMED CODES
If you want to erase a specific code, you can use the quick program
method or the automatic search method; when you enter the new code,
automatically will erase the old code.
HOW TO FIND OUT WHICH CODE IS CURRENTLY PROGRAMMED
Once you have set your remote control and control your device, you can
blink back your setup code for future reference, even if you used the
Automatic Search Method or the Quick Program Method.
In order to know a specific device code:
1.- On the remote control, press and hold a component key once (e.g. TV,
VCR, etc.). The red indicator light turns on. Then, press Help (?) button,
the red indicator light turns off.
2.- Release the buttons. To view the code for the first digit, press 1 once
and count the red light blinks. If a code digit is “0” the red light will not
blink.
3.- For the second digit, press 2 once and count the blinks.
4.- For the third digit, press 3 once and count the blinks.
5.- For the fourth digit, press 2 once and count the blinks and write the
number in quick reference table.
HOW TO SWITCH BETWEEN DEVICES
Just press the button of the desired device that you want to use (TV, DVD,
Aux, VCR, etc.). The function of the keys depending of the selected
component.
TROUBLESHOOTING
Problema / Trouble Solución / Solution
Su equipo no aparece en la lista de códigos Pruebe con el Método de Búsqueda Automática
Your brand is not listed in the code section Try the Automatic Search Method.
El control remoto no controla los equipos
Pruebe todos los códigos para la marca del aparato que quiere
programar. Pruebe el método de búsqueda automática.
Asegúrese de que la tecla correspondiente a su equipo esté
presioanda. Ejemplo: si desea controlar el Televisor, asegúrese de
que la tecla TV esté presionada.
The remote control do not operate your device (s)
Try all listed codes for the component brand being set up. Try the
Automatic Search Method.
Make sure that the correct key was pressed. For example. If you
want to control the TV set, make sure that the TV key was pressed.

SOLUCIÓN DE PROBLEMAS (Cont.)
ESPECIFICACIONES
Entrada: 3V (2xAAA)
Dimensiones: 230 x 67 x 37mm
Peso: 125,2g (sin baterías)
Nota:
El diseño del producto y las especificaciones pueden cambiar sin previo
aviso.
TROUBLESHOOTING (Cont.)
SPECIFICATIONS
Input: 3V (2xAAA)
Dimensions: 9 x 2,6 x 1,4in
Weight: 125,2g (without batteries)
Note:
Product design and specifications are subject to change, without notice.
Problema / Trouble Solución / Solution
El control remoto no efectúa los comandos adecuadamente
Puede que el código sea incorrecto. Pruebe el próximo código
listado para su marca. En caso de que ningún código funcione,
utilice el método de búsqueda automática.
The remote control is not performing commands properly
You may be using the wrong code. Try the next code listed for your
brand. Start the automatic Search Method
El control remoto no funciona tras presionar una tecla
Asegúrese de que las baterías estén nuevas y/o colocadas
correctamente. Apunte directamente el control remoto a su aparato.
The remote control does not respond after pressing a key
Make sure you are using new batteries and they put on the right
position. Aim the remote control, directly to your device.
El LED indicador no se enciende
Asegúrese de que las baterías estén nuevas y/o colocadas
correctamente.
Red indicator LED does not blink when you press a key
Make sure you are using new batteries and they put on the right
position.

Marca / Brand Código / Code
Admiral 1001, 1083, 1173
Aiko 1016
Akai 1002
Amtron 1038
Anam National 1003,1038
AOC 1004,1005,1006,1007,1082
Apex 1236
Audiovox 1038
1001,1048,1049,1073,1083
1162
Broksonic 1239
Candle 1004,1006,1008,1132
Celebrity 1002
1004,1006,1008,1016,1038
1105,1132,1171
Colortyme 1004, 1006
Contec/Cony 1012,1013,1038,1063
Craig 1038
Crown 1038,1062,1130
1000,1004,1006,1015,1048
1049,1073,1105,1162,1171
1212
1004,1005,1006,1016,1017
1082,1171,1190
Daytron 1004,1006,1171
Dimensia 1000,1212
Dumont 1004
Electroband 1002
1002,1003,1004,1006,1019
1022,1064
1004,1006,1012,1023,1025
1026,1029,1030,1033,1035
1036,1037,1038,1041,1042
1043,1048,1049,1073,1123
1162,1171,1177,1179,1191
Envision 1004,1006
1048,1049,1051,1073,1162
1180
Funai 1038
1000,1003,1004,1006,1022
1052,1054,1055,1064,1087
1100,1165,1166,1167,1181
1212,1233
1004,1005,1006,1012,1019
1056,1082,1155,1156,1171
1172
Hallmark 1004, 1006
1004,1006,1012,1013,1059
1060,1063,1135,1136,1145
1148,1179,1185
Infinity 1062,1130
JBL 1062,1130
1000,1004,1005,1006,1008
1013,1022,1052,1054,1055
1063,1064,1072,1082,1087
1100,1104,1105,1109,1132
1166,1167,1171,1172,1181
1212,1233
Jensen 1004,1006
1012,1013,1054,1055,1060
1063,1065,1066,1123,1157
1159,1242
Kawasho 1002,1004,1006
Kenwood 1004,1006,1019
Kloss Novabeam 1038,1068,1069,1183
KTV 1038,1171,1177
LG 1005,1082
Loewe 1062,1130
Logik 1001,1083
Luxman 1004,1006
1000,1006,1048,1049,1062
1072,1073,1100,1109,1130
Citizen
Hitachi
JVC
LXI
Goldstar
JC Penney
Fisher
GE
Curtis Mathes
Daewoo
Electrohome
Emerson
TV
Bell Howell
1004,1006,1008,1019,1062
1068,1069,1075,1076,1077
1088,1130,1132,1133,1134
1183,1219,1235
Majestic 1001,1083
Marantz 1004,1006,1059,1062,1130
Megatron 1006,1059
1001,1005,1006,1048,1049
1073,1082,1083,1162
1004,1005,1006,1019,1022
1051,1064,1079,1080,1082
1054,1055,1100,1171,1172
1181,1233
1004,1005,1006,1019,1022
1051,1064,1079,1080,1082
1125
Montgomary Ward 1001,1083
Motorola 1003,1173
MTC 1004,1005,1006,1082,1105
Memorex
Mitsubishi
Magnavox
MGA
Midland
Multitech 1038
NAD 1006,1072,1109,1136,1185
NEC 1003,1004,1005,1006,1082
Nikko 1006,1016
Onwa 1038
Optimus 1136,1185
Optonica 1095,1173
Orion 1035,1191
1003,1054,1055,1062,1130
1170
1003,1004,1005,1006,1008
1012,1019,1062,1068,1069
1075,1077,1082,1088,1130
1132,1134,1183
1003,1004,1008,1012,1019
1062,1068,1069,1075,1087
1088,1130,1132,1134,1167
1183
Pilot 1004,1171
Pioneer 1004,1006,1136,1179,1185
1004,1005,1006,1016,1082
1171
Price Club 1105
Prism 1054,1055
Proscan 1000,1100,1181,1212,1233
Proton 1004,1006,1012
Pulsar 1004
Quasar 1003,1054,1055
1000,1048,1049,1073,1162
1212
1004,1006,1012,1038,1048
1049,1073,1095,1162,1171
1172
1000,1003,1004,1005,1006
1007,1019,1082,1096,1098
1099,1100,1103,1129,1179
1181,1188,1190,1203,1212
1233,1240
1000,1048,1049,1073,1162
1212
1004,1005,1006,1012,1015
1019,1082
1104,1105,1106,1171,1172
Sansui 1191
1004,1048,1049,1073,1080
1162,1169,1180
Scott 1004,1006,1012,1035,1038
1000,1004,1006,1013,1019
1048,1049,1051,1063,1066
1072,1073,1100,1109,1162
1180,1181,1189,1212,1233
1004,1006,1012,1026,1029
1095,1111,1112,1171,1173
Shogun 1004
Signature 1001,1083
Sony 1002,1218
Soundesign 1004,1006,1008,1038,1132
Starlite 1038
1004,1006,1008,1019,1062
1068,1069,1075,1076,1077
1088,1130,1132,1134,1183
Symphonic 1033,1038,1189
Tandy 1173
Tatung 1003
Technics 1054,1055
Techwood 1004,1006,1054,1055
1001,1004,1005,1006,1008
1012,1013,1016,1038,1063
1076,1082,1083,1105,1132
1170,1171
TMK 1004,1006
1048,1049,1072,1073,1105
1109,1118,1160,1162,1241
Totevision 1171
Sharp
Sylvania
Teknika
Toshiba
Realistic
Samsung
Sanyo
Sears
Portland
Radio Shack
Radio shack/Realistic
RCA
Panasonic
Philco
Philips
Universal 1052,1087,1166,1167
Victor 1066
1000,1001,1004,1005,1006
1019,1033,1052,1062,1068
1069,1075,1076,1082,1083
1087,1088,1095,1130,1134
1166,1167,1183,1212
Yamaha 1004,1005,1006,1019,1082
Zenith 1001,1004,1083,1152,1154
Wards
Marca / Brand Código / Code
Admiral 2001
Adventura 2026
Aiko 2027
Aiwa 2026
Akai 2003,2007,2061
VCR
American High 2021
Asha 2013
Audio Dynamics 2009,2010
Audiovox 2014,2054
Beaumark 2012,2013
Bell Howell 2011
Broksonic 2012,2025
Calix 2014,2054
2013,2014,2015,2016,2017
2018,2019,2054
Canon 2021,2022
Carver 2057
CCE 2027
2013,2014,2015,2016,2017
2018,2019,2027,2054
Colortyme 2009
Craig 2013,2014,2023,2054
2000,2009,2013,2016,2018
2021,2022,2024
Cybernex 2013
2015,2017,2019,2025,2026
2027
DBX 2009,2010
Dimensia 2000
Dynatech 2026
Electrohome 2014,2029,2054
Electrophonic 2014,2054
2003,2007,2012,2014,2015
2021,2024,2025,2026,2029
2031,2032,2033,2054
Fisher 2011,2023,2049,2051
Fuji 2021,2061
Funai 2026
Garrard 2026
GE 2000,2013,2021,2022,2062
Goldstar 2009,2014,2018,2054
Gradiente 2026
Harley Davidson 2026
Harman Kardon 2009
Headquarter 2011
Hi-Q 2023
Hitachi 2055,2056,2058,2062
Instant Replay 2021
2009,2010,2011,2012,2013
2014,2021,2022,2051,2054
2055,2056,2057,2058
JCL 2021
Jensen 2055,2056,2058
JVC 2009,2010,2011,2018
Kenwood 2009,2010,2011,2016,2018
Kodak 2014,2021,2054
LG 2014,2054
Lloyd’s 2026
LXI 2014,2054
Magnavox 2021,2022,2057,2063
Magnin 2014,2054
2009,2010,2011,2016,2018
2021,2057
Marta 2014,2054
Matsushita 2021
Emerson
JC Penney
Marantz
Candle
Citizen
Curtis Mathes
Daewoo
MEI 2021
2001,2011,2013,2014,2021
2023,2026,2054
MGA 2029
MGA Technology 2013
Midland 2053
Minolta 2055,5056,2058
Mitsubishi 2029,2055,2056,2058
Montgomery Ward 2001
Motorola 2001,2021
MTC 2013
Multitech 2013,2016,2026,2053
NEC 2009,2010,2011,2016,2018
Nikko 2014,2054
Noblex 2013
Olympus 2021
Optimus 2001,2014,2054
Panasonic 2021,2022
Pentax 2016,2055,2056,2058,2062
Pentax Research 2018
Philco 2021,2022,2057
Philips 2021,2057,2063
Pilot 2014,2054
Pioneer 2010,2055
Portland 2016,2017,2019
Proscan 2000
Quarter 2011
Quartz 2011
Quasar 2021,2022
Radio Shack 2001,2014,2054
2011,2013,2014,2021,2022
2023,2026,2029,2049,2054
Radix 2014,2054
Radio Shack/Realistic
Memorex
LISTA DE CÓDIGOS / MANUFACTURER’S CODES
1162,1181,1212,1233

Randex 2014,2054
2000,2003,2007,2013,2021
2055,2056,2058,2062
2001,2011,2013,2014,2015
2021,2022,2023,2026,2029
2049,2054
Samsung 2013,2015,2033,2053
Sanky 2001
Sansui 2010
Sanyo 2011,2013,2023
Scott 2012,2015,2025,2032
2011,2014,2021,2023,2049
2051,2054,2055,2056,2058
Sharp 2001,2017,2029
Shintom 2056,2058,2059,2061
Shogun 2013
Signature 2001
Singer 2021
Sony 2059,2060,2061
STS 2021
Sylvania 2021,2022,2026,2057,2063
Symphonic 2026
Tandy 2011
Tashiko 2014,2054
Teac 2026
Technics 2021
Teknika 2014,2021,2026,2054
TMK 2013,2024
Toshiba 2015,2049,2051,2055
Totevision 2013,2014,2054
Unitech 2013
Vector research 2009,2010,2015,2016
Victor 2010
Video Concepts 2009,2010,2015,2016
Videosonic 2013
2001,2013,2014,2015,2021
2023,2026,2029,2054,2055
2056,2058
XR-1000 2021,2026
Yamaha 2009,2010,2011,2018
Zenith 2059,2061
Wards
RCA
Realistic
Sears
Marca / Brand Código / Code
Aiwa 3030
Apex 3063,3064,3069
Broksonic 3059
Daewoo 3065
Emerson 3066,3067
Funai 3067
Go Video 3052
Hitachi 3001,3031
JVC 3021,3032,3053
Kenwood 3002
Konka 3033,3034
Magnavox 3003,3022,3037,3038
Memorex 3004
Mintek 3005
Mitsubishi 3023
NAD 3066
Norcent 3006
Onkyo 3007
Ontron 3012
Panasonic 3008,3035
3022,3036,3037,3038,3051
3057
Pioneer 3009,3010,3025
Proscan 3020,3050
Qwestar 3012
RCA 3013,3020,3050,3054,3000
Samsung 3014,3015,3048,3055
Sansui 3028
Sanyo 3039,3056
Sharp 3016,3018,3049
3017,3019,3024,3026,3040
3041
Sylvania 3067
3027,3029,3042,3043,3045
3046,3061
Zenith 3044,3047,3058
DVD
Philips
Sony
Toshiba
Marca / Brand Código / Code
JBL 4225
JVC 4226
Koss 4227,4228
Onkyo 4229
Panasonic 4230,4231
Amplificadores / Amplifiers
Philips 4232
Pioneer 4233
RCA 4234,4003
Sony 4235,4237
Venturer 4236
Marca / Brand Código / Code
4175,4176,4177,4178,4179
4180,4181
JVC 4182
Kenwood 4183
RCA 4184,4189,4190,4191
Sony 4185,4186
Yamaha 4187,4188
Receptor / Sintonizador (Receiver / Tuner)
Aiwa
Marca / Brand Código / Code
Philips 5000
Pace 5001
UEC 5002
Zenith / Motorola 5003
RCA (Thomson) 5004
Satélite / Satellite
Other manuals for RM-20
1
Table of contents
Other Steren Remote Control manuals

Steren
Steren RM-110 User manual

Steren
Steren RM-8 User manual

Steren
Steren POD-150 User manual

Steren
Steren COM-230 User manual

Steren
Steren RM-100 User manual

Steren
Steren RM-150 User manual

Steren
Steren RM-956 User manual

Steren
Steren 208-187 User manual

Steren
Steren RN-KID User manual

Steren
Steren RM-115 User manual

Steren
Steren K-560 User manual

Steren
Steren RM-20 User manual

Steren
Steren RM-4 User manual

Steren
Steren RM-310 User manual

Steren
Steren RM-500 User manual

Steren
Steren MOV-042 User manual

Steren
Steren RM-100 User manual

Steren
Steren RM-5 User manual

Steren
Steren RM-110 User manual

Steren
Steren SWI-600 User manual