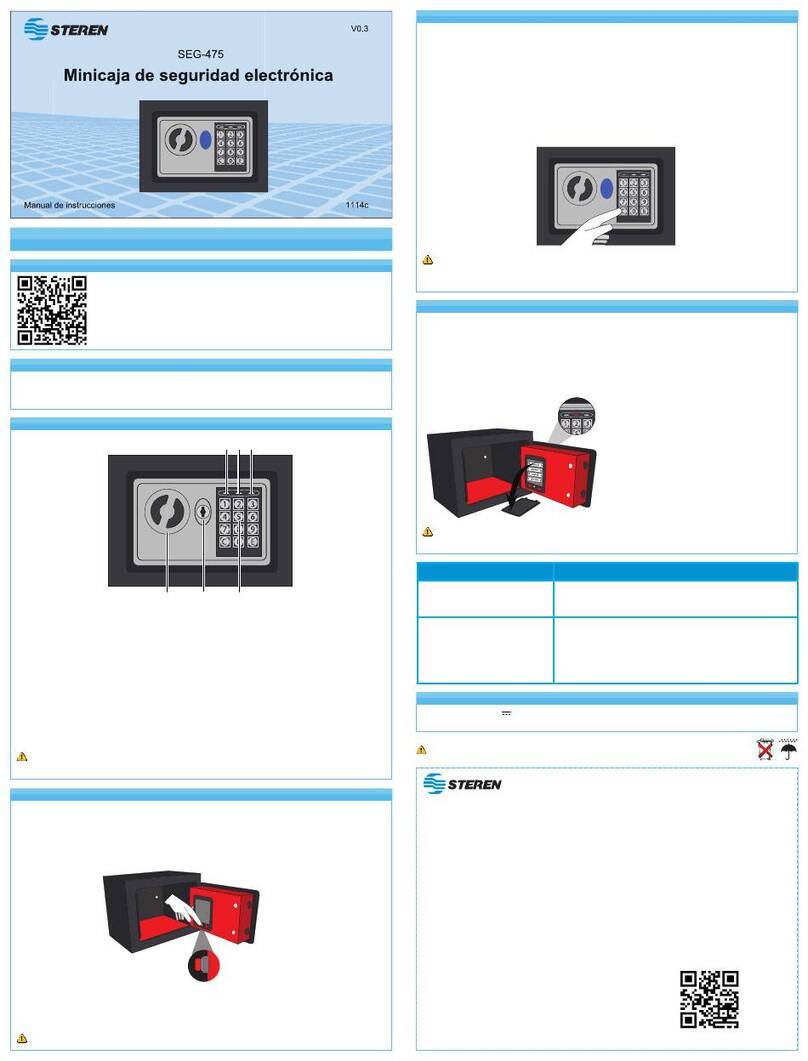
Steren SEG-510 User manual


ENGLISH
ENGLISH-02
Before using your new Fingerprint access safe, please read this
instruction manual to prevent any damage. Put it away in a safe
place for future references.
IMPORTANT
Do not mix old batteries with new one.
Check the batteries regularly
Do not use solvents or liquids to clean the box
Clean only with a soft, dry cloth.
Do not place the box in an unstable surface, may fall down and
cause damages or injures
Do not try to repair the box by yourself, please contact to your
nearest Steren dealer in case you need some service
FEATURES
Child proof
Wall mount
Low battery alert system
Stores up to 30 fingerprints
No more passwords to remember
•
•
•
•
•
•
•
•
•
•
•
Before usin
g
y
our new Fin
g
erprint access safe, please read this
i
nstruction manual to prevent an
y
dama
g
e. Put it awa
y
in a safe
p
lace for future references
.

ENGLISH
ENGLISH-03
CONTROLS
1.- Knob
2.- Fingerprint sensor
3.- Start button
4.- LED indicator
5.- Security key
1
2
3
4
5

ENGLISH
ENGLISH-04
6.- Battery compartment
7.- Restart
8.- Register
8
6
7

ENGLISH
ENGLISH-05
PLACING THE BATTERIES
Before using the box, install 4 AA alkaline batteries.
1.- Open the door.
2.- Behind the door, you will find the battery compartment.
3.- Remove the battery compartment cover and place 4 AAalkaline
batteries, paying attention to polarity.
Do not use carbon batteries
If the LED indicator lights in red, you must replace the batteries
immediately
To open the door, you need to use the security key. Please refer to
Emergency Opening for details.
D
o not use car
b
on
b
atter
i
e
s
If the LED indicator li
g
hts in red,
y
ou must replace the batteries
i
mme
di
ate
ly
T
o open the door,
y
ou need to use the securit
y
ke
y
. Please refer to
E
mer
g
enc
y
Openin
g
for details
.

ENGLISH
ENGLISH-06
Replacing the batteries
1.- Open the door.
2.- Open the battery compartment cover, remove old batteries and
replace them for new ones. Pay attention to polarity.
3.- Replace the battery compartment cover.
Always replace all the batteries at once, and never use old and
fresh batteries together
Do not mix different types of batteries
REGISTERING FINGERPRINTS
The secure box does not include any fingerprint in their memory, you
must register at least 2 different types of fingerprints before using it.
1.- Open the door using the security key.
2.- Press the green button, the LED indicator will light in green, two
beeps will sound and the fingerprint sensor will light on.
3.- Place the forefinger over the fingerprint sensor, it will turn off and you
will hear two beeps, remove the finger and immediately place it again,
remove it and repeat the process once again. You will hear a long beep,
indicating the process was successful.
Three beeps at the end of the process means it was not successful
If you hear three beeps after pressing green button, the memory is
full
You can store up to 30 digital prints
If the memory is full, you must restart the box
A
lwa
y
s replace all the batteries at once, and never use old and
f
resh batteries to
g
ether
D
o not mix different t
y
pes of batteries
T
hree bee
p
s at the end of the
p
rocess means it was not successfu
l
If
y
ou hear three beeps after pressin
g
g
reen button, the memor
y
is
f
ull
You can store up to 30 di
g
ital print
s
If the memor
y
is full,
y
ou must restart the bo
x

ENGLISH
ENGLISH-07
To improve the fingerprint recognition process, follow these
recommendations:
Before starting fingerprint recognition process, clean your
fingerprint
Each user must register between 2 and 4 different fingerprints
Women and child should use middle or thumb fingers to register a
fingerprint
During fingerprint recognition, softly press the fingerprint sensor
window
Keep free of dust the fingerprint sensor window
If the environment of use is dry, breath on your fingerprint before to
use the box
OPENING THE BOX
1.- Press Start button, the fingerprint sensor window will light up.
2.- Place your finger over the window.
3.- If the process is correct, the indicator LED will light in green and you
will hear a long beep.
4.- Slightly, turn the knob to the left, then turn to the right and pull out,
the door will be open.
5.- If the indicator LED turns in red and you hear three beeps, you must
repeat steps from 1 to 4.
Remember, you have 6 seconds to open the door, otherwise, the
system will close the door automatically, and you should repeat
the opening process.
•
•
•
•
•
•
Remember,
y
ou have 6 seconds to open the door, otherwise, the
s
y
stem will close the door automaticall
y
, and
y
ou should repeat
t
he openin
g
process
.

ENGLISH
ENGLISH-08
If the fingerprint recognition system fails, you have an
emergency key to open the box. Remove the frontal cover and
place the key, slightly turn it to the left and move the knob to the
right, door should be opened.
SYSTEM RESTARTING
This function allows you to restart the system in case the stored
fingerprints cannot be used.
Also, if the memory is full, use this button to add new fingerprints.
1.- Open the door as you normally do, if it is necessary use the
emergency key.
2.- Press and hold Restart button 10 seconds.
3.- Release it; the indicator light in green and you will hear a long beep,
it indicates that the process finished correctly.
When you press the restart button, all stored fingerprints will be
deleted and you must register them once again.
If the fin
g
erprint reco
g
nition s
y
stem fails,
y
ou have an
e
mer
g
enc
y
ke
y
to open the box. Remove the frontal cover and
p
lace the ke
y
, sli
g
htl
y
turn it to the left and move the knob to the
r
i
g
ht, door should be opened.
When
y
ou press the restart button, all stored fin
g
erprints will be
d
e
l
ete
d
an
d
y
ou must re
gi
ster t
h
em once a
g
a
i
n
.

ENGLISH
ENGLISH-09
DIFFERENT MANNERS OF TOUCHING THE WINDOW
Correct
Incorrect
Make sure your finger is not wet or too dry.
EMERGENCY DOOR OPENING
If the energy from batteries is empty, or exist a malfunction in the
electronic circuit, you can use the emergency key to open the box.
1.- Remove the frontal cover, as shown in figure.
2.- Place the key in the lock.
3.- Slightly press and turn it counterclockwise.
4.- Then, turn the knob clockwise.
Please keep the key in a safe and secret place to avoid abuses
M
ake sure
y
our fin
g
er is not wet or too dr
y.
P
lease keep the ke
y
in a safe and secret place to avoid abuses

ENGLISH
ENGLISH-10
MOUNTING
Preparation
Place the box in a place where cannot be easily removable
It can be installed inside of a cabinet or mounted using a special bracket
Make sure to install it in a flat surface, otherwise may fall down and
cause damages or injures.
Mounting method
The box can be mounted by the rear or the bottom side. Installation may
vary depending the place where you want to mount.
First locate the place where you want to mount the box, then use the
mounting pattern to mark the holes (can be at the bottom or the rear of
the box).
Use adequate screws for their mounting and avoid its detachment.
SPECIFICATIONS
Input: 6V (4xAA)
Material: Steel
Dimensions: 13,53x9,8x9,8in
Weight: 26,45lb
Product design and specifications are subject to change without
previous notice.
P
roduct desi
g
n and specifications are sub
j
ect to chan
g
e without
p
revious notice
.

WARRANTY
This Steren product is warranted under normal usage against defects in workmanship and
materials to the original purchaser for one year from the date of purchase.
CONDITIONS
1.- This warranty card with all the required information, invoice or purchase ticket, product
box or package, and product, must be presented when warranty service is required.
2.- If the product stills on the warranty time, the company will repair it free of charge.
3.- The repairing time will not exceed 30 natural days, from the day the claim was received.
4.- Steren sell parts, components, consumables and accesories to costumer, as well as
warranty service, at any of the addresses mentioned later.
THIS WARRANTY IS VOID IN THE NEXT CASES:
If the product has been damaged by an accident, acts of God, mishandling, leaky batteries,
failure to follow enclosed instructions, improper repair by unauthorized personnel, improper
safe keeping, among others.
a) The consumer can also claim the warranty service in the purchase establishment.
b) If you lose the warranty card, we can reissue it, if you show the invoice or purchase ticket.
Product: Fingerprint access safe
Part number: SEG-510
Brand: Steren

RETAILER INFORMATION
Name of the retailer
Address
Product
Brand
Part number
Serial number
Date of delivery
In case your product fails or have any doubt, please contact your nearest retailer. If
you are in Mexico, please give a call to our Call Center.
Call Center
01 800 500 9000


Antes de utilizar su nueva Caja de Seguridad con Acceso de huella
digital lea este instructivo para evitar cualquier mal
funcionamiento. Guárdelo para futuras referencias.
IMPORTANTE
No mezcle baterías nuevas con usadas
Revise regularmente el estado de las baterías
No utilice líquidos para limpiar el equipo
Limpie el equipo con un paño suave y seco
No coloque el equipo en un lugar inestable, puede caer y lastimar
personas o provocar que el equipo se dañe
No intente reparar el equipo, en caso de ser necesario acuda con
el distribuidor Steren más cercano
CARACTERÍSTICAS
A prueba de niños
Se puede montar en la pared
Sistema de alerta de batería baja
Puede registrar hasta 30 huellas digitales
No necesita recordar contraseñas
•
•
•
•
•
•
•
•
•
•
•
ESPAÑOL-02
ESPAÑOL
A
ntes de utilizar su nueva Ca
j
a de Se
g
uridad con Acceso de huella
digi
ta
l
l
ea este
i
nstruct
i
vo para ev
i
tar cua
l
qu
i
er ma
l
f
uncionamiento. Guárdelo para futuras referencias
.

CONTROLES
1.- Perilla de apertura
2.- Sensor de huella digital
3.- Botón de inicio
4.- Luz indicadora
5.- Llave de seguridad
ESPAÑOL-03
ESPAÑOL
1
2
3
4
5

6.- Compartimiento de baterías
7.- Botón de reinicio
8.- Botón de registro
ESPAÑOL-04
ESPAÑOL
8
6
7

COLOCACIÓN DE BATERÍAS
Antes de comenzar a utilizar la caja de seguridad, debe instalar 4
baterías AA.
1.- Abra la tapa de la caja fuerte.
2.- En la parte trasera de la tapa, encontrará el compartimiento de
baterías.
3.- Retire la tapa del compartimiento de baterías, e inserte 4 baterías
AA alcalinas nuevas, poniendo atención a la polaridad.
No utilice baterías de carbón
Cuando el LED indicador encienda en rojo, deberá cambiar las
baterías inmediatamente.
Para abrir la tapa de la caja de seguridad es necesario que utilice
la llave de seguridad. Consulte la sección correspondiente para
apertura de emergencia.
ESPAÑOL-05
ESPAÑOL
No utilice baterías de carbón
Cuando el LED indicador encienda en ro
j
o, deberá cambiar las
b
aterías inmediatamente
.
P
ara abrir la tapa de la ca
j
a de se
g
uridad es necesario que utilice
l
a llave de se
g
uridad. Consulte la sección correspondiente para
a
pertura de emer
g
encia
.

Reemplazo de baterías
1.- Abra la puerta de la caja de seguridad.
2.- Abra el compartimiento de baterías, retire las baterías viejas y
coloque unas nuevas, poniendo atención a la polaridad.
3.- Vuelva a colocar la tapa del compartimiento.
Siempre reemplace las 4 baterías, nunca mezcle nuevas con
viejas baterías.
No mezcle diferentes tipos de baterías.
ASIGNACIÓN DE HUELLAS DIGITALES
La caja de seguridad no cuenta con ninguna huella digital registrada,
por lo que antes de comenzar a utilizarla deberá registrar por lo menos
2 huellas digitales diferentes.
1.- Abra la tapa de la caja de seguridad, utilizando la llave de seguridad.
2.- Presione el botón verde de registro una vez, el LED indicador frontal
se encenderá de color verde, escuchará dos bips y el sensor de huella
se encenderá.
3.- Coloque el dedo índice en el sensor de huella, éste se apagará y
escuchará dos bips, retire el dedo e inmediatamente después coloque
nuevamente el dedo, retírelo y repita el proceso una vez más.
Finalmente escuchará un bip largo indicando que el proceso se realizó
correctamente.
ESPAÑOL-06
ESPAÑOL
Siempre reemplace las 4 baterías, nunca mezcle nuevas con
v
ie
j
as baterías
.
No mezcle diferentes tipos de baterías
.

Si escucha tres bips al finalizar el proceso, significa que éste no se
realizó correctamente.
Si presiona el botón verde de registro y escucha tres bips significa
que la memoria se encuentra llena.
Puede almacenar hasta 30 huellas digitales
En caso de que la memoria se encuentre llena deberá reiniciar el
equipo.
Para mejorar el proceso de asignación y reconocimiento de huella
digital, siga estas recomendaciones:
Antes de comenzar el proceso de reconocimiento, limpie
perfectamente el área de la huella digital a utilizar
Cada usuario debe registrar entre 2 y 4 diferentes huellas digitales
Las mujeres y los niños deben utilizar el dedo pulgar y/o medio
Presione ligeramente la ventana del sensor de huella cuando
realice el proceso de reconocimiento
Regularmente limpie la ventana del sensor de huella
Si el medio ambiente es seco, exhale directamente sobre la huella
digital a utilizar antes de utilizar el equipo
ABRIR LA CAJA DE SEGURIDAD
1.- Presione el botón de Inicio, la ventana del sensor de huella se
enciende.
2.- Coloque el dedo que registró previamente sobre la ventana del
sensor de huella, ésta se apagará.
3.- Si el proceso es correcto, el LED indicador se encenderá de color
verde y escuchará un bip largo.
•
•
•
•
•
•
ESPAÑOL-07
ESPAÑOL
Si escucha tres bips al finalizar el proceso, si
g
nifica que éste no se
realizó correctamente
.
Si presiona el botón verde de re
g
istro
y
escucha tres bips si
g
nifica
que
l
a memor
i
a se encuentra
ll
ena
.
P
uede almacenar hasta 30 huellas di
g
itales
E
n caso de que la memoria se encuentre llena deberá reiniciar el
e
qu
i
po
.

4.- Gire la perilla de apertura ligeramente hacia la izquierda y
posteriormente gire a la derecha, y jale hacia fuera, la puerta estará
abierta.
5.- En caso de que el LED indicador se encienda de color rojo y se
escuchen 3 bips, deberá repetir los pasos 1 al 4.
Recuerde que cuenta con 6 segundos para abrir la puerta, en caso
contrario, el sistema automáticamente se cerrará y deberá repetir
el proceso de apertura.
Si por alguna razón no puede abrir la caja utilizando el
reconocimiento de huella dactilar, cuenta con una llave de
emergencia que le permite abrirla. Retire la tapa que cubre la
cerradura de emergencia e introduzca la llave, luego gire a la
izquierda ligeramente y mueva la perilla de apertura a la derecha,
la puerta deberá abrirse.
REINICIO DE SISTEMA
Esta función permite reiniciar el sistema de la caja de seguridad en
caso de que las huellas digitales almacenadas no puedan ser
utilizadas.
De igual forma, utilice esta función si la memoria se encuentra llena, y
desea ingresar una nueva huella dactilar.
1.- Abra la tapa de la caja de seguridad como normalmente lo hace, en
caso de ser necesario utilice la llave de emergencia.
2.- Presione el botón de Reinicio por 10 segundos.
ESPAÑOL-08
ESPAÑOL
R
ecuerde que cuenta con 6 se
g
undos para abrir la puerta, en caso
c
ontrario, el sistema automáticamente se cerrará
y
deberá repeti
r
el
proceso
d
e apertura
.
Si por al
g
una razón no puede abrir la ca
j
a utilizando el
r
econoc
i
m
i
ento
d
e
h
ue
ll
a
d
act
il
ar, cuenta con una
ll
ave
d
e
e
mer
g
enc
i
a que
l
e perm
i
te a
b
r
i
r
l
a.
R
et
i
re
l
a tapa que cu
b
re
l
a
c
erra
d
ura
d
e emer
g
enc
i
a e
i
ntro
d
uzca
l
a
ll
ave,
l
ue
g
o
gi
re a
l
a
i
zqu
i
er
d
a
lig
eramente
y
mueva
l
a per
ill
a
d
e apertura a
l
a
d
erec
h
a,
l
a puerta deberá abrirse
.
Table of contents
Languages:
Other Steren Safe manuals
Popular Safe manuals by other brands

Burtonsafes
Burtonsafes BURTON HOME G1 instructions

SereneLife
SereneLife SLSFE18FP user manual

Burtonsafes
Burtonsafes Biosec Home User instructions

Homak
Homak HS30103660 Owner's manual & operating instructions

Homak
Homak HS50131160 Owner's Manual and Operating Instructions

Renkforce
Renkforce 20 operating instructions