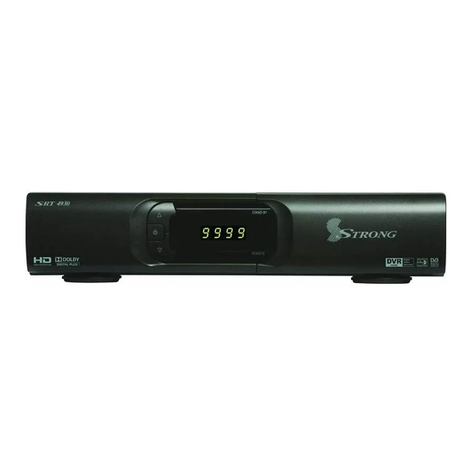
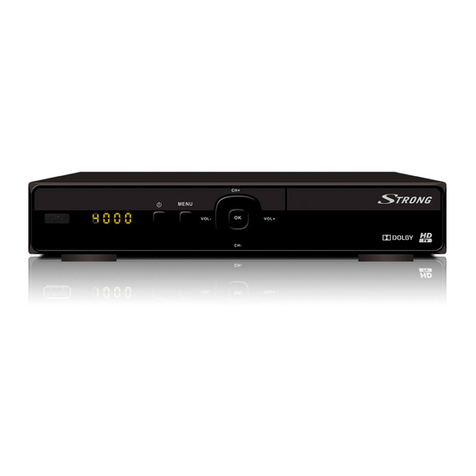
Strong SRT-4950H User manual

1

1
Warranty Information
This product carries the manufacturer’s warranty
against defects in workmanship for a period of 12
months from the date of purchase.
A faulty unit may be replaced within 30 days from date
of purchase.
Within that period, the faulty unit must be returned with
all original accessories to either the place of purchase
or STRONG Australia, along with the original purchase
receipt.
Beyond the 30-day period, a faulty unit must be
returned to STRONG Australia for evaluation. If
deemed faulty, it will be repaired or replaced (at the
discretion of STRONG Australia Pty Ltd.) and returned
to its owner.
A faulty product may be sent for evaluation either
directly to STRONG Australia, or via the place of
purchase.
STRONG Australia will cover the costs incurred for
returning for evaluation a faulty product, when the
product is deemed truly faulty. In case the product is
found to have no fault, the costs incurred in delivering
product to and from STRONG Australia will be borne by
the customer.
STRONG products carry the guarantees that cannot be

2
excluded under the Australian Consumer Law. You are
entitled to a replacement or refund in the event of a
major failure, and for compensation for any other
reasonably foreseeable loss or damage resulting from
such failure. You are also entitled to have the goods
repaired or replaced if the goods fail to be of
acceptable quality and the failure does not amount to a
major failure.
STRONG Australia PTY LTD.
60 WEDGEWOOD ROAD, HALLAM, VICTORIA 3803
PHONE: +61 3 8795 7990 - FAX: +61 3 8795 7991

3
Safety Precaution……………………………………………………...3
1. Reference .................................................................................... 6
1.1 General Features .................................................................... 6
1.2 Accessories ............................................................................. 6
2. Product Overview ....................................................................... 7
2.1Front Panel............................................................................... 7
2.2 Rear Panel .............................................................................. 7
2.3 Remote Control Unit (RCU) .................................................... 8
3. Installation................................................................................... 9
3.1 Powering On ......................................................................... 10
3.2 Antenna Setting for Satellite.................................................. 10
3.3 Search Channels from Satellite............................................. 10
3.4 Antenna Setting for Motor ..................................................... 11
3.5 Factory Default...................................................................... 12
4 . Basic Operation ....................................................................... 12
4.1 Audio ..................................................................................... 12
4.2 Zoom In ................................................................................. 13
4.3 Satellite List........................................................................... 13
4.4 EPG....................................................................................... 13
4.5 Subtitle .................................................................................. 14
4.6 Teletext.................................................................................. 14
4.7 Timer ..................................................................................... 15
4.8 Sleep ..................................................................................... 15
4.9 Multi Pictures......................................................................... 16
4.10 Program Information ........................................................... 16
5 . Channel Manager..................................................................... 17
5.1 Edit Channels........................................................................ 17

4
5.2 Edit Favorite .......................................................................... 17
5.3 Sort Channels ....................................................................... 17
5.4 Delete Satellite channels....................................................... 17
5.5 User Channel List.................................................................. 17
6 . Channel List ............................................................................. 18
6.1 OK List .................................................................................. 18
6.2 Favorite List........................................................................... 18
7 . Preferences .............................................................................. 19
7.1 System Setting ...................................................................... 19
7.2 OSD Setting .......................................................................... 20
7.3 Timer Setup........................................................................... 20
7.4 Parental Control .................................................................... 21
7.5 USALS Setup ........................................................................ 21
8. USB Control .............................................................................. 21
8.1 Play Files............................................................................... 21
8.2 Recording and Timeshift ....................................................... 23
8.3 Other Operations................................................................... 24
9. Network...................................................................................... 25
9.1 Connecting to the Wi-Fi......................................................... 25
9.2 Network Application............................................................... 26
10. Additional Information ........................................................... 27
10.1 Trouble Shooting................................................................. 27
10.2 Technical Specification ........................................................ 29
10.3 Glossary .............................................................................. 30

5
Safety Precaution
This STB has been designed and manufactured to satisfy the international
safety standards. Please read the following safety precautions carefully before
operating this receiver.
Main Supply:
Before operating, please check the units operating voltage is 90~250V AC
50/60Hz.
Overload:
Do not overload a wall outlet, extension cord or adapter, neither use damaged
power cord or touch it with wet hand as this may result in electric shock.
Liquid:
The receiver shall not be exposed to dripping or splashing water, and that no
objects filled with liquids, such as vase, shall be placed on the apparatus.
Ventilation:
Keep the slots on top of the receiver uncovered to allow sufficient airflow to the
unit. Do not put the receiver on soft furnishings or carpets. Do not expose the
receiver to direct light or do not place it near a heater or in humid conditions. Do
not stack other electronic equipment on top of the receiver.
Cleaning:
Unplug the receiver from the wall outlet before cleaning. Clean the receiver by a
soft cloth or mild solution of washing-up liquid (no solvents).
Connection:
Disconnect the receiver from the mains when you connect it to satellite LNB or
disconnect it from LNB. Failure to do this could possibly cause damage to the
LNB.
Uncover:
Do not remove the cover, to reduce the risk of electric shock. Contact qualified
and licensed service personnel to repair the receiver, or contact your dealer.
0

6
1. Reference
1.1 General Features
DVB-S/DVB-S2 Satellite Compliant (MPEG-II/ MPEG-IV/ H.264)
SCPC & MCPC receivable from Ku and C band satellites
Universal, Single, Single S & C Band Wideband LNB
RF Modulator
DiSEqC1.0/1.1/1.2/1.3 (USALS)
Blind search supported
Auto DiSEqC Search
PAL/NTSC/SECAM Conversion
True full Color (32 bits) on screen display (OSD)
Storing memory: 100 satellite, 4000 transponders and 10000 channels
8 favorite group and parental lock supported
Multi-language menu supported
Multi-language audio supported
Multi-language DVB Subtitle output
7 days Electronic Program Guide (EPG)
Teletext output through VBI and OSD
Multi-Picture supported
USB 2.0 Interface
1.2 Accessories
Users manual/Remote Control Unit/Batteries/AV Cable/HDMI Cable/ Wi-Fi
Dongle
1

7
2. Product Overview
2.1FrontPanel
1. POWER: Switch between operation and STAND-BY modes.
2. VOL+/-: Change volume while watching program or change option from left to
right.
3. CH+/-: Change channels while watching program or change option from up to
down.
4. POWER LED: Power Indicator.
5. SIGNAL LED: Signal Indicator.
6. DISPLAY: It displays channel number. In STAND-BY mode it displays local
time.
7. USB: USB 2.0 port.
2.2 Rear Panel
1. LNB IN: Connect the satellite antenna cable.
2. HDMI: Connect to the TV using an HDMI cable.
3. AUDIO/ VIDEO: Connect to the TV using an RCA cable.

8
4. SPDIF: Digital Audio output (Coaxial).
5. RF OUT: Connect to TV set using modulator.
6. TV ANT IN: Connect to TV antenna.
7. RS232C: Connect to the computer using serial line.
8. USB2.0: One USB 2.0 Host Port Front. One USB Port Rear for Wi-Fi Dongle
9. ON/OFF: Power on/off.
2.3 Remote Control Unit (RCU)
You can control this receiver by this remote controller
with full function.
1.POWER: Switch between operation and low power
modes.
2.STAND-BY: Switch between operation and standby
modes
3.TEXT: Display the Teletext.
4.SUBTITLE: Display the subtitle language list.
5.AUDIO: Display audio track list.
6.MUTE: Mute audio.
7.NUMERIC KEY (0~9): Enter a TV/radio channel
number, menu option number.
8.TV/RAD: Switch between TV and RADIO.
9.SLEEP: enter the sleep timer menu.
10.EPG: Display the program guide.
11.INFO: Display the program information.
12.RECALL: Show the previous viewed channels list.
Or switch to the previous viewed channel.
13.SAT: Show the scanned satellite list.
14.MENU: Activate main menu or exit to live
channel.
15.EXIT: Exit current menu step by step.
16.VOL+/VOL-: Change volume.

9
17.CH+/CH-: Change program.
18.OK: Confirm the selected operation or display the channel list while watching
a program.
19.PVR List: Enter the PVR folder.
20.FAV: Display favorite channel list.
21.Page / : Page up/down on menu.
22.REW: Fast rewind.
23.TIME SHIFT: Time shift.
24.: Play
25.FWD: Fast forward.
26.REC: Record.
27.STOP: Stop USB DVR function.
28. I: Previous.
29. I: Next.
30.MULTIPC: Display multi-picture menu mode list.
31.FREEZE: Freeze the picture.
32.ZOOM: Picture zooming function.
33.WWW: enter into network application.
34.F1: Accessory function.
35.F2: Switch 4:3 & 16:9 Screen Formats.
36.F3: Setup event timer.
37.F4: Setting network type.
3. Installation
Installation Procedure.
Tip: The default password is 0000. If you have forgotten your password, please
contact your local product distributor.

10
3.1 Powering On
1. Connect the power cord of the product to a wall outlet.
2. Ensure the ON/OFF switch at the rear of the product is switched to ON.
3. Power on by pressing the POWER button on the remote control or the
STAND-BY button at the front of the product.
3.2 Antenna Setting for Satellite
Antenna Setting allows you to configure the antenna setting parameters.
Menu->Installation -> Antenna Setting
In this menu, while the cursor is
highlighting the Satellite option,
pressing the OK button will display
the help menu to Select, Add,
Delete, Move or Rename the
satellite. While the cursor is
highlighting the Transponder
option, pressing the OK button will
display the help menu to Select,
Add, Delete or edit the
transponder.
3.3 Search Channels from Satellite
3.3.1 Satellite Search
1. Select the desired satellite.
2. Complete the antenna setting of this satellite.
3. Move the cursor to Start Search and select Satellite, then press the OK
button to search.
4. Enter the satellite scan menu, you can also select satellite, then press the

11
yellow button to search.
3.3.2 TP Search
1. Select the satellite and the transponder you require.
2. Complete the antenna setting of this satellite.
3. Move the cursor to Start Search and select Transponder, then press the
OK button to search.
4. Enter the Manual Scan menu, you can also select the satellite and the
transponder you require, then press the yellow button to search.
3.3.3 Blind Search
1. Select the satellite you want or add a new satellite.
2. Complete the antenna setting of this satellite.
3. Move the cursor to Start Search and select Blind Search, then press the
OK button to search.
4. After searching, it will save all the transponders automatically.
3.3.4 Multi-Sat Search
1. Move the cursor to Start Search and select Multi-Sat.
2. Press the OK button and select the satellites you want.
3. Press the EXIT button can start search.
3.4 Antenna Setting for
Motor
Menu->Installation ->Motor
Mode->DiSEqC1.2&USALS
Move the cursor to Motor Mode,
Select DiSEqC 1.2 or USALS
using the VOL+/VOL- button.
DiSEqC 1.2: General motor

12
antenna using DiSEqC 1.2.
USALS: Motor antenna using USALS.
1. Position auto: Press the VOL+/VOL- button, the motor will drive
automatically until it gets the signal.
2. Continuously move: The motor can drive only when you hold on down the
VOL+/VOL- button.
3. Move steps: Input the number to set the driving step and press the
VOL+/VOL- button, the motor will drive several steps.
4. Limit set: You can set the maximum motor limit for both East and West to
prevent damage to the antenna. When you set Disable the Motor limit setting is
released.
5. Command Type:
A). Save Position: Save current position of Motor.
B). Go to Position: Drive Motor to the position which you saved previous.
C). Go to Reference: Drive Motor to zero point.
D). Go to XX: Drive Motor according to USALS Setup
3.5 Factory Default
You can restore the product to the factory default by following these steps.
1. Menu->Channel Manager->Factory Default
2. Input the password.
3. Highlight the option you want and press the OK button to execute it.
4 . Basic Operation
4.1 Audio
You can select the language you prefer in Audio if the current program is available
in multiple audio languages.
1. Press the AUDIO button.

13
2. Press the OK button to select the audio language you prefer.
3. Select audio direction (Left, Right, Stereo) using the VOL+/VOL- button.
4. Press the EXIT button to close.
4.2 Zoom In
You can zoom in the current video picture.
1. Press the ZOOM button.
2. Press the CH+/CH-/ VOL+/VOL- button to move the icon to the position you
want to zoom in.
3. Press the OK button to display.
4. Press the EXIT button to close.
4.3 Satellite List
You can select or hide the satellite that you want.
1. Press the SAT button.
2. Highlight the satellite that you want.
3. Press the OK button, channels from this satellite will only be available.
4. Press the RED button to hide or show the satellite. If it is hidden, the channels
of this satellite will be hidden in the channel list.
4.4 EPG
You can view the EPG information of all channels in time and date order.
1. Press the EPG button.
2. Press the RED button to switch EPG mode between Weekly EPG and Daily
EPG.
Weekly EPG:
1) Press the OK button to switch between EPG list and channel list.
2) Press the CH+/CH- button to change channel or EPG event.

14
3) Press the VOL+/VOL- button to change the date, and it displays the EPG list
in one day of the highlighted channel.
4) Highlight the EPG event which you want, press the GREEN button to enter
Timer Setup menu. After setup, press the OK button to add the EPG event to the
Timer.
Day EPG:
1) Press the CH+/CH- button to change channel.
2) Press the VOL+/VOL- button to change EPG event of the highlighted channel.
3) Press the YELLOW button to display the detailed information of the
highlighted EPG event.
4) Highlight the EPG event which you want, press the GREEN button to enter
Time Setup menu. After setup, press the OK button to add the EPG event to the
Timer.
4.5 Subtitle
You can select the language for the subtitle if the program provides subtitle
information.
1. Press the SUB button and press the VOL+/VOL- change to the subtitle mode.
2. Select the required subtitle language and press the OK button. The subtitle
will be displayed in the selected language at the bottom of the screen.
4.6 Teletext
You can view the Teletext information of this program should Teletext be available.
1. Press the TEXT button.
2. Press the CH+/CH- button to page up or page down.
3. Press the NUMERIC (0-9) buttons can go to the designated page directly.
4. Press the color button can back to the previous page.

15
5. Press the VOL+/VOL- button to change the sub-page of this page.
4.7 Timer
You can set 32 timer events. It will record or play the program automatically
according to the timer event list that you set.
1. Go to Menu->Timer Adjust->Event Timer.
2. Press the GREEN button to
setup a timer, and press the OK
button to save the timer after setup.
Source: Switch TV and radio.
Channel: Press the VOL+/VOL-
button to display the channel
list and press the OK button to
select the channel.
Date: Input the date of the timer.
Start: Input the start time of the timer.
Stop: Input the stop time of the timer.
Repeat: Select the repeat times of the timer. (one time/every day/one week/from
Monday to Friday/from Saturday to Sunday).
Record: To set if you want to record the timer.
STB Off: Set YES, the receiver will go to STAND-BY mode after the timer, set NO
it will not go into STAND-BY mode after the timer is complete.
3. In Event Timer menu, highlight one event, press the RED button will
cancel this timer and press the YELLOW button to edit this timer.
4.8 Sleep
You can set the automatic turn off time.
1. Go to Menu->Timer Adjust->Sleep Timer.

16
2. Press the OK button and then press the VOL+/VOL- button to select the
option or input the number at “-- Min” option.
3. Press the OK button to save.
4.9 Multi Pictures
You can view multi programs at one time.
1. Press the MULTIPIC button.
2. Select the mode you want and press the OK button to enter multi-picture.
3. Press the CH+/CH-/ VOL+/VOL- button to switch program.
4. Press the OK or EXIT button to exit multi-picture.
4.10 Program Information
You can view the program information by pressing the INFO button while watching
a program.
1. General Information
2. EPG Information
Press the INFO button when the
information menu is displayed to
view detailed EPG information,
press the VOL+/VOL- to switch
current and next and press the
INFO button once more to hide
the detailed EPG information.

17
5 . Channel Manager
5.1 Edit Channels
Menu->Channel Manager ->Edit Channels
In this menu, press the CH+/- button to change channel, press the VOL+/- button
to change the function, and automatically play the highlighted channel.
Edit Channels enables you to delete, rename, view or lock/unlock the
channels in the channel list.
5.2 Edit Favorite
Menu->Channel Manager->Edit Favorite
In this menu, press the CH+/- button to change program, press the VOL+/- button
to change the favorite group, and press the OK button to set favorite.
5.3 Sort Channels
You can sort the channels list.
Menu->Channel Manager ->Sort Channels
Highlight the option you want and press the OK button to sort the channel list.
5.4 Delete Satellite channels
You can delete one or all channels of a satellite.
Menu-> Channel Manager ->Delete Satellite Channels
1. Highlight the satellite you want to delete.
2. Press the OK button.
3. Selecting Yes will execute it.
5.5 User Channel List
You can save or load the channel list you want.

18
1. Save Channel list
Menu-> Channel Manager ->User Channel List->Save
1) Select Yes to enter the keyboard menu. Here you can name the channel list.
2) Press the RED button to save the name and the channel list.
2. Load Channel list
Menu->Channel Manager->User Channel List->Load
1) Highlight the list name you want to load.
2) Press the OK button to load it, press the RED button to delete it and
pressing the GREEN button will delete all the lists.
6 . Channel List
This chapter will help you edit the channel list.
6.1 OK List
1) Press the OK button to enter the channel list while watching a program.
2) Press the RED button to
display the satellite list.
3) Press the GREEN button to
find the program.
4) Pressing the YELLOW
button can help you quickly find
the channel according to the
alphabet.
5) Press the BLUE button to
edit the program.
6.2 Favorite List
1) If you have set several favorite lists, press the FAV button to enter the all

19
channels list first then press the VOL+/VOL- button to enter the favorite list.
2) Press the RED button to move channel in the favorite list.
3) Press the GREEN button to delete the channel from the favorite list.
4) Press the YELLOW button to help you quickly find the channel you want.
5) Press the BLUE button to rename the favorite list.
Note: If you selected a favorite list, pressing the CH+/CH- button will only change
the channels in this favorite list, pressing the OK button will only display the
channels within this favorite list.
7 . Preferences
7.1 System Settings
Menu->System Settings->System
1. Menu Language: Set the menu language.
2. Audio1: Set the preferred audio language.
3. Audio2: Set the sub-prime audio language.
4. EPG Language: Set the
preferred EPG language.
5. Auto Channel Selection: If
this is set to ON, in the channel
list when you highlight the
channel, it will display it
automatically. If set to OFF, in the
channel list when you highlight
the channel, you should press the
OK button to display it.
6. Recall List: If set to ON, when you press the RECALL button, it will
display the channel list you viewed previously. If set to OFF, when you press the
RECALL button, it will take you back to the previously viewed channel.
7. Volume Per Channel: If set to ON, you can set different volume levels for
Table of contents
Other Strong Receiver manuals

Strong
Strong SRT 5390 User manual

Strong
Strong SRT 8110 User manual

Strong
Strong SRT 7511 User manual

Strong
Strong SRT 5016 User manual

Strong
Strong SRT 6200 User manual

Strong
Strong SRT 8108 User manual

Strong
Strong STR 8106 User manual

Strong
Strong SRT 6010 User manual

Strong
Strong SRT 4669 XII User manual

Strong
Strong SRT_4669Z User manual

Strong
Strong STR 8102 + User manual

Strong
Strong SRT 5303 User manual

Strong
Strong SRT 5120 User manual

Strong
Strong SRT 4668X User manual

Strong
Strong SRT 7040 User manual

Strong
Strong SRT 6365 PDR User manual

Strong
Strong SRT 6126 User manual

Strong
Strong SRT 8221 User manual

Strong
Strong SRT 7505 User manual

Strong
Strong SRT 4300 User manual