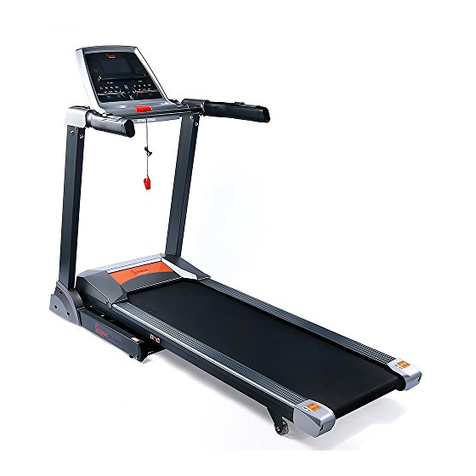
Sunny SF-T808M User manual

MANUAL TREADMILL
SF-T808M
IMPORTANT:
PLEASE READ THIS MANUAL CAREFULLY BEFORE USING THE TREADMILL
For Customer Service, please contact: support@sunnyhealthfitness.com

1
Table of Contents
2
■
Features of the Equipment /
Safety Precautions
3
■
Parts List
4
■
Hardware Packing List /
Overview Drawing
5
■
Assembly Instructions
7
■
Folding and Moving
8
■
Running Belt Adjustments
9
■
Maintenance and Malfunction
10
■
Operating Instructions
11
■
Warm Up Exercises

2
1. Features of the Equipment
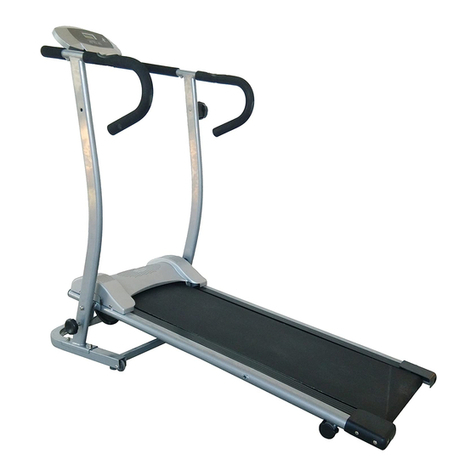
This foldable treadmill integrates the functions of running and jogging. Its LCD screen displays
Scan, Time, Speed, Distance, Calories, and Total Distance. This treadmill‘s set up dimensions
are47L x 23.2W x 47.5Hinch and the fold up dimensions are47.5L x 23.2W x 15.5H inch.
Wheels at the base of the treadmill allow for easy movement and relocation.
2. Safety Precautions
Warning: Before beginning exercise, you should consult a physician first in order to
ensure that your body is healthy enough for such activity. Besides a suitable amount of
exercise, it’s very important to insist on exercising daily in order to attain ideal results.
1) This foldable treadmill is home stationary fitness equipment, and also aerobic training
equipment designed to help develop your cardio-vascular function.
2) Before uses ensure that you properly inspect each part of the equipment, if there are any
defective components replace them immediately. Equipment should remain out of use until
repaired.
3) Before attempting any type of use, ensure all parts of the equipment including the nuts and
bolts are properly secure and fastened.
4) To avoid bodily injury as well as damage to the equipment, never place fingers, hands or
clothing on joints of moving parts of the machine.
5) Do not use this equipment one hour prior to or one hour previous to eating.
6) For your safety, as well as comfort please wear suitable clothing, including athletic shoes
during exercise.
7) For your safety handrails should always be held whenever starting or stopping an exercise or
whenever increasing or decreasing speeds.
8) During exercise, if chest pains, nausea, dizziness or shortness of breath occur, you should
stop exercising immediately and consult your physician before continuing any kind of
exercise.
9) The minimum free space required for safety operation is 80×40 inch.
10) The maximum capacity for a user is 250 lbs.
11) When in use, the equipment should always be placed on flat even ground to insure proper
stability.
12) For their safety, both children and pets should be kept away from equipment whenever it is
in use. If children are permitted to use the equipment they should be supervised by an adult
at all times while using the equipment.
13) The treadmill is not suitable for medical purposes.
14) This equipment is designed for indoor and home use only not intended for commercial use.
Warning: Incorrect use or excessive exercise could lead to injuries to the user
and damage to the equipment.

3
3. Parts List
No.
Description
Qty
No.
Description
Qty
1
Main frame
1
30
Left rail
1
2
Left handlebar support
1
31
Front wheel
2
3
Right handlebar support
1
32
End plug
1
4
Front handlebar
1
33
Buffer cushion
4
5
Computer
1
34
Anti-slip cloth
2
6
Base support
1
35
Magnetic sensor
1
7
Ball bearing
2
36
Sensor
1
8
Ball bearing
2
37
M8X35 Bolt
2
9
Connection bolt M10x55
2
38
M6X70 Bolt
2
10
Flywheel cover
1
39
Sensor wire I
1
11
Running deck
1
40
M4X16 Screw
12
12
Running belt
1
41
M3X10 Screw
2
13
Ф24×Ф12×2 washer
2
42
M8X40 Bolt
2
14
M8*30 screw
2
43
M10X40 Bolt
4
15
Roller’s bearing bracket
4
44
M6 X35 Bolt
6
16
Right rail
1
45
M8 Lock nut
2
17
Right end cap
1
46
M6 Lock nut
6
18
Foot cushion
2
47
Ф8 Flat washer
2
19
Hole plug
2
48
Ф10 Flat washer
2
20
Handlebar end plug
2
49
Ф8 Arc washer
2
21
Left end cap
1
50
Ф6 Flat washer
8
22
Front end cap
1
51
Ф4 Flat washer
8
23
Lock knob
1
52
Sensor wire II
1
24
Hand foam
2
53
Ф12 Spring spacer
2
25
Roller spacer
2
54
Ф12Spring spacer
2
26
Front roller axis
1
55
Allen wrench (S6)
1
27
Front roller
1
56
Allen wrench (S5)
1
28
Rear roller axis
1
57
Lubricant box (for maintenance)
1
29
Rear roller
1

4
4. Hardware Packing List
5. Overview Drawing

5
6. Assembly Instructions
Assembly of this treadmill requires two people. Remove all parts from box and place them
down in a clear workable space on the floor, follow the assembly instructions below to properly
assemble the treadmill.
Step 1: Install the Flywheel Cover
Attach the Flywheel cover (10) to the Main frame (1) with two Screws (40) and Flat washers
(51). (See figure 1)
Step 2: Install the Base Support
Attach the Base support (6) to the Left and Right handlebar supports (2, 3) with four Bolts (43).
(See figure2)
Step 3: Install the Main Frame
With help from another person, raise the front part
of Main frame (1). Attach the front part of Main
frame (1) to the Left and Right handlebar supports
(2, 3) using two Connection bolts (9) and two Flat
washers (48). Attach the Lock knob (23) to the
lower hole at the Left handlebar (2) and secure it
to the Main frame (1). Connect the Sensor wire I
(39) from the Right handlebar support (3) to the
Sensor (36) from the Main frame (1). (See figure
3)

6
Step 4: Install the Front Handlebar
Connect the Sensor wire I (39) from the Right handlebar support (3) to the Sensor wire II (52)
from the Front handlebar (4). (See figure 4a).
Attach the Front handlebar (4) onto the arc plates of Left and Right handlebar supports (2, 3)
with two Bolts (37) and two Arc washers (49). (See figure 4b)
*To place the Front handlebar (4), you will need second party to hold the Left and Right
handlebar supports (2, 3) and push inward in order to align.
Step 5: Install the Computer
Connect the Sensor wire II (52) to the wire that
comes from the Computer (5). Insert the Computer (5)
to the computer plate of Front handlebar (4). (See
figure 5)
Warning: Be sure that you have
properly tightened all bolts before
beginning any kind of exercise.

7
7. Folding and Moving
Folding: To fold up the treadmill, turn the Lock knob (23) counterclockwise and remove it from
Left handlebar support (2). Raise the rear end of the Main frame (1) all the way up to a vertical
position, then insert the Lock knob (23) to the upper hole of Left handlebar support (2) and
tighten It. (See figure 6a)
Moving: Once you have properly folded and secured the treadmill, hold the handlebars with
your hands, slowly lean the treadmill back towards your body, once the wheels touch the
ground you can safely move the treadmill to your desired location. (See figure 6b)
Warning:
1) When folding or unfolding the equipment always insures that the Lock knob is
inserted correctly, and properly tightened.
2) For their safety, children should be kept away from the equipment, even when
folded.

8
8. Running Belt Adjustments
Upon the completion of assembly, a trial use should be conducted in order to insure that the
equipment and all functions of the equipment operate correctly. While running, check the
following points:
1) Check if values of the computer display properly or not; please note, to insure that the wire
and the plug are both connected correctly, and that the computer screen has batteries.
2) Check if the running belt turns smoothly or not, and whether the belt deviates or not when
operating. Under normal condition, the running belt should turn freely, keeping its position in the
middle. Because the belt is pre-adjusted by the factory prior to shipping, it may run defectively
after any kind of rude transportation. To make adjustments to correct this possible issue, please
refer to Figure 7.
1) To adjust the tension of the running belt, locate both bolts on the end caps of the main frame,
to avoid deviation to the belt, you must be sure to adjust both bolts at the same time. Turning
both bolts counter clockwise will release the belt, turning them clockwise will tighten the belt.
2) If the running belt deviates to left side, insert the hex end of the screwdriver into the
hexangular hole on the right side of the rear roller, turn 1/2 circle counterclockwise, and try
running again. Please operate conversely if the running belt deviates to right side. If
necessary, repeat this process until the belt runs in the middle, during the operation, keep the
belt in a proper tension state. (See Figure 7)

9
9. Maintenance and Malfunction
Maintenance
You may feel the resistance of the running belt grow larger after use over a long period of time.
The running belt and the plate require periodic cleaning and lubricating. To maintain optimal
performance of the equipment, user’s normal maintenance is very essential. Please clean and
lubricate the belt and belt plate as indicated in the instructions below;
1) Raise the belt up on one side, apply lubricant (57) to the belt plate, using a rag thoroughly
wipe the lubricant over the belt plate; repeat the same process the other side.
2) Check and tighten bolts in each part of the equipment regularly. The moving parts should
turn freely and quietly, abnormality of moving parts will affect the safety of the equipment.
3) Keep the equipment clean; do not clean the equipment with strong solvent.
4) The running belt is easy to wear out, if you find it worn or broken, you should contact a
technician to replace it. Until the belt is repaired you should not use the equipment.
Malfunction
Malfunction
Reason
Explanation
Base is unstable.
1) The ground is not flat or there is
small object on the ground.
2) The lock knob is not tightened.
1) Remove the objects.
2) Tighten the lock knob.
Noise from the
moving parts.
The magnets are too close.
Open the cover to adjust.
The running belt
deviates when
Operating.
See #8 Running Belt Adjustments.

10
10. Operating instructions
Unfold the equipment in a desired exercise location; insure that the area contains enough open
space for the equipment to be accessible and safe to use. Adjust the equipment, insure that the
lock knob is in place and tightened in order to properly secure the base on the equipment.
Before beginning an exercise it’s important to first perform a warm-up exercise, and then you
can proceed to the exercise.
1) When stepping, hold the handlebars with your hands, lean your body forward slightly and
step on the running belt stably.
2) When jogging, hold the handlebars with your hands; straighten your body, and keeping
proper form jog on the running belt stably.
3) When running, you may, depending on your preference decide to hold the handlebars or not
to hold the handlebars, (your decision is of your own will). Keep your body straight and
maintain proper form, running on the belt at a suitable speed.
4) Operation of the computer (JS-125). (See right figure)
FUNCTIONS:
SCAN Press MODE button until “▼” sign appears at SCAN
position, monitor will rotate through the following functions: Time,
speed, distance, calorie and total distance, each display will be hold
for 4 seconds.
TIME Display the time from start to finish; (minutes: seconds)
SPEED Display the current speed. (Mile /hour)
DISTANCE Display the exercise distance from start to finish. (Mile)
CALORIES Display the total burned calories for start to finish. (Kcal)
TOTAL DIST Display the total distance. (Mile)
AUTO ON/OFF To turn on press the button, note that as long as the equipment is in use
and the flywheel is in motion the computer will remain on, without any signal for 8 minutes the
power will turn off automatically.
REPLACING THE BATTERY:
Open the battery cover and place two AA batteries in the battery slots, close cover. When the
computer screen display is not clearly visible it’s an indicator that the batteries need to be
replaced.
Please Note: The computer display screen may take up to 15 seconds to recover prior to
replacing the batteries. Memory data will be erased upon changing the batteries.

11
11. Warm Up Exercises
A successful exercise program consists of a warm-up, aerobic exercise, and a cool-down. Do
the entire program at least two and preferably three times a week, resting for a day between
workouts. After several months, you can increase your workouts to four or five times per week.
Warming up is an important part of your workout, and should begin every session. It prepares
your body for more strenuous exercise by heating up and stretching out your muscles,
increasing your circulation and pulse rate, and delivering more oxygen to your muscles. At the
end of your workout, repeat these exercises to reduce sore muscle problems. We suggest the
following warm-up and cool-down exercises:
Inner Thigh Stretch
Shoulder Lift
Lift your right shoulder up toward your ear for
one count. Then lift your left shoulder up for
one count as you lower your right shoulder.
Hamstring Stretch
Sit with your right leg extended. Rest the sole of your
left foot against your right inner thigh. Stretch toward
your toe as far as possible. Hold for 15 counts. Relax
and then repeat with left leg extended.
Sit with the soles of your feet together with your knees pointing
outward. Pull your feet as close into your groin as possible.
Gently push your knees towards the floor. Hold for 15 counts.
Head Roll
Rotate your head to the right for one count, feeling the stretch
up the left side of your neck. Next, rotate your head back for
one count, stretching your chin to the ceiling and letting your
mouth open. Rotate your head to the left for one count, and
finally, drop your head to your chest for one count.

12
Warm Up Exercises
Calf-Achilles Stretch
Lean against a wall with your left leg in front of the right and your arms
forward. Keep your right leg straight and the left foot on the floor; then
bend the left leg and lean forward by moving your hips toward the wall.
Hold, then repeat on the other side for 15 counts.
Toe Touch
Slowly bend forward from your waist, letting your
back and shoulders relax as you stretch toward
your toes. Reach down as far as you can and hold
for 15 counts.
Side Stretch
Open your arms to the side and continue lifting them until they are
over your head. Reach your right arm as far upward toward the
ceiling as you can for one count. Feel the stretch up your right
side. Repeat this action with your left arm.
Other manuals for SF-T808M
1
Table of contents
Other Sunny Treadmill manuals

Sunny
Sunny SF-T1407M User manual

Sunny
Sunny SF-T7514 User manual

Sunny
Sunny SF-T7610 User manual

Sunny
Sunny SF-T7946 User manual

Sunny
Sunny SF-T7512 User manual

Sunny
Sunny TreadPad SF-T7970 User manual

Sunny
Sunny SF-T7917 User manual

Sunny
Sunny SF-T7610 User manual

Sunny
Sunny SF-T722021 User manual

Sunny
Sunny SF-T7603 User manual

Sunny
Sunny SF-T7857 User manual

Sunny
Sunny SF-T723007 User manual

Sunny
Sunny SF-T7705 User manual

Sunny
Sunny SF-T722022 User manual

Sunny
Sunny SF-T7515 User manual

Sunny
Sunny SF-T7971 User manual

Sunny
Sunny SF-T7635 User manual

Sunny
Sunny SF-T1408M User manual

Sunny
Sunny SF-T1413 User manual

Sunny
Sunny SF-T4400 User manual