manuals.online logo
Brands
  1. Home
  2. •
  3. Brands
  4. •
  5. Sunshower
  6. •
  7. Bathroom Fixture
  8. •
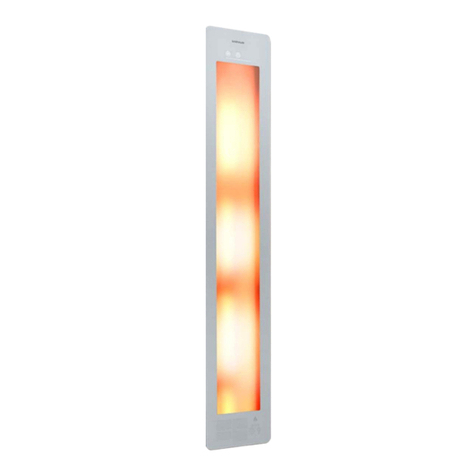
  9. Sunshower ONE PLUS S User manual

Sunshower ONE PLUS S User manual

Other manuals for ONE PLUS S

7

This manual suits for next models

2

Other Sunshower Bathroom Fixture manuals

Sunshower PURE WHITE User manual

Sunshower

Sunshower PURE WHITE User manual

Sunshower ONE PLUS S User manual

Sunshower

Sunshower ONE PLUS S User manual

Sunshower PURE 80073 User manual

Sunshower

Sunshower PURE 80073 User manual

Sunshower COMBI BLACK User manual

Sunshower

Sunshower COMBI BLACK User manual

Sunshower ONE PLUS S User manual

Sunshower

Sunshower ONE PLUS S User manual

Sunshower DELUXE User manual

Sunshower

Sunshower DELUXE User manual

Sunshower Combi Full Body User manual

Sunshower

Sunshower Combi Full Body User manual

Sunshower ONE PLUS S User manual

Sunshower

Sunshower ONE PLUS S User manual

Sunshower PURE SOLO User manual

Sunshower

Sunshower PURE SOLO User manual

Sunshower ONE S User manual

Sunshower

Sunshower ONE S User manual

Sunshower DELUXE HEALTH User manual

Sunshower

Sunshower DELUXE HEALTH User manual

Sunshower Pure User manual

Sunshower

Sunshower Pure User manual

Sunshower PURE XL 80074 User manual

Sunshower

Sunshower PURE XL 80074 User manual

Sunshower DUO WHITE User manual

Sunshower

Sunshower DUO WHITE User manual

Sunshower ONE PLUS S User manual

Sunshower

Sunshower ONE PLUS S User manual

Sunshower Duo User manual

Sunshower

Sunshower Duo User manual

Sunshower DELUXE User manual

Sunshower

Sunshower DELUXE User manual

Sunshower SOLO White User manual

Sunshower

Sunshower SOLO White User manual

Sunshower ONE PLUS S User manual

Sunshower

Sunshower ONE PLUS S User manual

Popular Bathroom Fixture manuals by other brands

Kohler Mira Sport Max J03G Installation and user guide

Kohler

Kohler Mira Sport Max J03G Installation and user guide

Moen 186117 Series installation guide

Moen

Moen 186117 Series installation guide

Hans Grohe Raindance Showerpipe 27235000 Instructions for use/assembly instructions

Hans Grohe

Hans Grohe Raindance Showerpipe 27235000 Instructions for use/assembly instructions

Signature Hardware ROUND SWIVEL BODY SPRAY 948942 Install

Signature Hardware

Signature Hardware ROUND SWIVEL BODY SPRAY 948942 Install

fine fixtures AC3TH installation manual

fine fixtures

fine fixtures AC3TH installation manual

LIXIL HP50 Series quick start guide

LIXIL

LIXIL HP50 Series quick start guide

KOLO ATOL PLUS installation manual

KOLO

KOLO ATOL PLUS installation manual

Hans Grohe PuraVida 15073000 Instructions for use/assembly instructions

Hans Grohe

Hans Grohe PuraVida 15073000 Instructions for use/assembly instructions

Toto TS111B8 Installation and owner's manual

Toto

Toto TS111B8 Installation and owner's manual

Kohler K-1158-H2 Homeowner's guide

Kohler

Kohler K-1158-H2 Homeowner's guide

Coram Showers OFFSET QUADRANT manual

Coram Showers

Coram Showers OFFSET QUADRANT manual

baliv DU-2010 manual

baliv

baliv DU-2010 manual

odass OD-1710 instruction manual

odass

odass OD-1710 instruction manual

Oxygenics Evolution Easy installation instructions

Oxygenics

Oxygenics Evolution Easy installation instructions

Bradley Express SS Series installation instructions

Bradley

Bradley Express SS Series installation instructions

Helvex TH-974 installation guide

Helvex

Helvex TH-974 installation guide

DURAVIT C.1 C15240 0090 Instructions for mounting and use

DURAVIT

DURAVIT C.1 C15240 0090 Instructions for mounting and use

Heatstore HSTRL500WTN Installation and operating instructions

Heatstore

Heatstore HSTRL500WTN Installation and operating instructions

manuals.online logo
manuals.online logoBrands
  • About & Mission
  • Contact us
  • Privacy Policy
  • Terms and Conditions

Copyright 2025 Manuals.Online. All Rights Reserved.

Installatiehandleiding | Installation guide | Installationsanleitung | Guida all’installazione | Guide d’installation | Instrukcja montażu
inbouw |build-in
ENNL DE IT FR PL
INSTALLATIEHANDLEIDING LARGE, MEDIUM, SMALL I SUNSHOWER ONE - PLUS I P6094 REV D 32
!!!!!!
Lees deze instructies zorgvuldig
door voordat u met de installatie
begint. Installatie dient enkel
uitgevoerd te worden door
geschoold en erkend
vakpersoneel. De elektrische
aansluiting van Sunshower-
componenten mag alleen door
een erkend elektricien worden
uitgevoerd. Sunshower is niet
aansprakelijk voor schade
veroorzaakt door onjuiste
installatie.
De elektrische aansluiting van
Sunshower-componenten mag
alleen door een erkend
elektricien worden uitgevoerd.
De montage en elektrische
aansluiting van de Sunshower
moet worden uitgevoerd in
overeenstemming met de gel-
dende internationale en
nationale normen en richtlijnen
(bijvoorbeeld voor Nederland:
nen 1010 – 701).
Be sure to read this instruction
carefully before installation.
Installation can only be carried
out by qualified installers. The
electrical connection of
Sunshower components can only
be carried out by qualified
electricians. Sunshower is not
liable for damage caused by
incorrect installation.
The electrical connection of
Sunshower components may
only be carried out by a qualified
electrician. The installation
and electrical connection of the
Sunshower installation must be
carried out in accordance with
the applicable
international and national
standards and guidelines.
Lesen Sie diese Anleitung vor
dem Einbau sorgfältig durch.
Die Installation darf nur von
qualifizierten Fachkräften
durchgeführt werden. Der
elektrische Anschluss von
Komponenten von Sunshower
darf nur von qualifizierten
Elektrofachkräften ausgeführt
werden. Sunshower haftet nicht
für Schäden, die durch
unsachgemäße Installation
verursacht werden.
Der elektrische Anschluss von
Komponenten der Sunshower
darf nur von einer qualifizierten
Elektrofachkraft durchgeführt
werden. Die Montage und der
elektrische Anschluss der
Sunshower müssen in
Übereinstimmung mit den
geltenden internationalen und
nationalen Normen und
Richtlinien, wie z.B. DIN VDE
0100 durchgeführt werden. Die
Sunshower muss über einen
separaten, bauseitig
vorzusehenden
Fehlerstrom-Schutzschalter
RCD)abgesichert werden (siehe
Elektroanschluss).
GENERAL
INSTRUCTIONS
ALLGEMEIN
ANWEISUNGEN
ALGEMENE
INSTRUCTIES
NL EN DE
!!!!!!
!!!!!!
Leggere attentamente queste
istruzioni prima di procedere
con l’installazione.
L’installazione può essere fatta
solo da un professionista
qualificato. El connessioni
elettroniche del Sunshower
devono essere fatta un
elettricista qualificato.
Sunshower non e’ responsabile
dei danni causati da un
installazione non errata.
Le connessioni elettriche dei
componenti Sunshower devono
essere fatta da un professionista
qualificato. L’installazione e la
connessione del sunshower
devone essere fatta in acordo
con le regolamentazioni e le
linee guida internazionali e
nazionali. Il Sunshower deve
essere protetta da impianto di
messa a terra (vedi connessioni
elettriche).
Lisez attentivement cette
instruction avant de procéder
à l’installation. L’installation
ne peut être effectuée que par
des installateurs qualifiés. Le
raccordement électrique des
composants de douche solaire
ne peut être effectué que par
des électriciens qualifiés.
Sunshower n’est pas
responsable des dommages
causés par une installation
incorrecte.
Le raccordement électrique
des éléments de Sunshower ne
doit être effectué que par un
électricien qualifié. L’installation
et le raccordement électrique
de l’installation de Sunshower
doivent être effectués
conformément aux normes
et directives internationales
et nationales applicables. La
Sunshower doit être protégée
par un disjoncteur différentiel
séparé (rcd) (voir raccordement
électrique).
Przed rozpoczęciem montażu należy
uważnie przeczytać niniejsze
instrukcje. Instalacja może być
wykonywana wyłącznie przez
przeszkolony i autoryzowany,
wykwalifikowany personel.
Podłączenie elektryczne elementów
systemu Sunshower powinien
wykonać wyłącznie
wykwalifikowany elektryk. Firma
Sunshower nie ponosi odpowied-
zialności za szkody spowodowane
niewłaściwą instalacją.
Podłączenie elektryczne elementów
systemu Sunshower powinien
wykonać wyłącznie
wykwalifikowany elektryk.
Montaż i podłączenie elektryczne a
Sunshower należy wykonać zgodnie
z obowiązującymi normami i
wytycznymi międzynarodowymi i
krajowymi.
GÉNÉRAL
INSTRUCTIONS
OGÓLNE
INSTRUKCJE
GENERALE
ISTRUZIONI
IT FR PL
!!!!!!
INSTALLATIEHANDLEIDING LARGE, MEDIUM, SMALL I SUNSHOWER ONE - PLUS I P6094 REV D 54
Nederland, Amsterdam, 1 januari 2022
M. Wegdam, Technisch Directeur
NL ITEN FRDE PL
DECLARATION OF
CONFORMITY
CONFORMITÉ
DÉCLARATION
KONFORMITÄTSBE-
SCHEINIGUNG
ZGODNOŚĆ
DEKLARACJA
CONFORMITEITS-
VERKLARING
DICHIARAZIONE DI
CONFORMITÀ
NL ITEN FRDE PL
Sunshower B.V.
Hoogoorddreef 63-65
1101 BB Amsterdam, Nederland
verklaart hierbij op eigen verantwoorde-
lijkheid, dat deze Sunshower ROUND is
gefabriceerd volgens de voorschriften in
de volgende richtlijnen:
• Laagspanningsrichtlijn 2014/35/EU
• Richtlijn 2014/30/EU voor elektromag-
netische compatibiliteit van het Europees
Parlement
Normen gebruikt om de conformiteit te
ondersteunen:
• EN60335-1:2012 + A11:2014 + AC2014 +
A13:2017 + A1:2019
+ A2:2019 + A14:2019
• EN60335-2-27:2014 + A1:2020 + A2:2020
• EN61000-6-3:2007 + A1:2011 + AC:2012
• EN61000-6-1:2007
• EN61000-6-1:2019
• EN61000-3-3:2013
• EN61000-3-2:2014
Dit Sunshower product is IPX5 gekeurd
en speciaal ontwikkeld voor gebruik en
installatie in de douche (zone 1).
Ondertekend voor en namens:
Sunshower B.V.
Hoogoorddreef 63-65
1101 BB Amsterdam, I Paesi Bassi
dichiara, sotto la propria responsabi-
lità, che il prodotto Sunshower ROUND
stato fabbricato secondo i requisiti delle
seguenti direttive:
• Direttiva LVD 2014/35/EU
• Direttiva 2014/30/EU per compati-
bilità Elettromagnetica della Comunità
Europea
E in conformità con le seguenti norme:
• EN60335-1:2012 + A11:2014 + AC2014 +
A13:2017 + A1:2019
+ A2:2019 + A14:2019
• EN60335-2-27:2014 + A1:2020 + A2:2020
• EN61000-6-3:2007 + A1:2011 + AC:2012
• EN61000-6-1:2007
• EN61000-6-1:2019
• EN61000-3-3:2013
• EN61000-3-2:2014
Questo prodotto Sunshower è certificato
IPX5 e sviluppato appositamente per l’u-
so e l’installazione nella doccia (zona 1).
Firmato in nome e per conto di:
Sunshower B.V.
Hoogoorddreef 63-65
1101 BB Amsterdam, the Netherlands
hereby declares under our sole respon-
sibility, that the Sunshower ROUND is
in accordance with the conditions of the
following directives:
• Low-Voltage Directive 2014/35/EU
• Directive 2014/30/EU for Electro-
magnetic compatibility of the European
Parliament
And are in conformity with the following
standards:
• EN60335-1:2012 + A11:2014 + AC2014 +
A13:2017 + A1:2019
+ A2:2019 + A14:2019
• EN60335-2-27:2014 + A1:2020 + A2:2020
• EN61000-6-3:2007 + A1:2011 + AC:2012
• EN61000-6-1:2007
• EN61000-6-1:2019
• EN61000-3-3:2013
• EN61000-3-2:2014
This Sunshower product is IPX5 ap-
proved and specially designed for use
and installation in zone 1.
Signed for and on behalf of:
Sunshower B.V.
Hoogoorddreef 63-65
1101 BB Amsterdam, Les Pays-Bas
déclarons que le produit Sunshower
ROUND est conforme aux dispositions
des Directives suivantes:
• Directive 89/336/CEE de la Communau-
té européenne
• Directive sur les basses tensions
2006/95/CE de la Communauté euro-
péenne
Et des normes suivantes:
• EN60335-1:2012 + A11:2014 + AC2014 +
A13:2017 + A1:2019
+ A2:2019 + A14:2019
• EN60335-2-27:2014 + A1:2020 + A2:2020
• EN61000-6-3:2007 + A1:2011 + AC:2012
• EN61000-6-1:2007
• EN61000-6-1:2019
• EN61000-3-3:2013
• EN61000-3-2:2014
Ce produit Sunshower est certifié IPX5
et spécialement développé pour une
utilisation et une installation dans la
douche (zone 1).
Signé pour et au nom de:
Sunshower B.V.
Hoogoorddreef 63-65
1101 BB Amsterdam, Niederlande
erklärt hiermit eigenverantwortlich, dass
das Produkt Sunshower ROUND herge-
stellt ist gemäß den Bestimmungen der
Richtlinien:
• Richtlinie 2014/30/EU der Europäi-
schen Gemeinschaft
• Niederspannungsrichtlinie 2014/35/EU
der Europäischen Gemeinschaft
Und gemäß den folgenden Standards:
• EN60335-1:2012 + A11:2014 + AC2014 +
A13:2017 + A1:2019
+ A2:2019 + A14:2019
• EN60335-2-27:2014 + A1:2020 + A2:2020
• EN61000-6-3:2007 + A1:2011 + AC:2012
• EN61000-6-1:2007
• EN61000-6-1:2019
• EN61000-3-3:2013
• EN61000-3-2:2014
Dieses Sunshower-Produkt ist IPX5-zer-
tifiziert und wurde speziell für die Ver-
wendung und Installation in der Dusche
(Zone 1) entwickelt.
Unterzeichnet für und im Namen von:
Sunshower B.V.
Hoogoorddreef 63-65
1101 BB Amsterdam, Holandia
niniejszym oświadcza na własną
odpowiedzialność, że niniejszy ROUND
Sunshower został wyprodukowany
zgodnie z wymogami następujących
dyrektyw:
• Dyrektywa niskonapięciowa 2014/35/
EU
• Dyrektywa Parlamentu Europejskiego
w sprawie kompatybilności
elektromagnetycznej 2014/30/UE
Normy stosowane do wspierania
zgodności:
• EN60335-1:2012 + A11:2014 + AC2014 +
A13:2017 + A1:2019
+ A2:2019 + A14:2019
• EN60335-2-27:2014 + A1:2020 + A2:2020
• EN61000-6-3:2007 + A1:2011 + AC:2012
• EN61000-6-1:2007
• EN61000-6-1:2019
• EN61000-3-3:2013
• EN61000-3-2:2014
Ten produkt Sunshower jest
sklasyfikowany jako IPX5 i specjalnie
zaprojektowany do użytku i instalacji pod
prysznicem (strefa 1).
Podpisano w imieniu i na rzecz:
INSTALLATIEHANDLEIDING LARGE, MEDIUM, SMALL I SUNSHOWER ONE - PLUS I P6094 REV D 76
Contents |Inhoud
Items p. 9
Preparation
• Dimensions p. 10
• Electrics p. 16
Installation p. 20
Finishing p. 47
Fournitures p. 9
Préparation
• Dimensions p. 10
• Électricité p. 16
Installation p. 20
Finalisation p. 47
Benötigte Materialien p. 9
Vorbereitung
• Installationsort p. 10
• Stromversorgung p. 16
Installation p. 20
Fertigstellen p. 47
Materiały eksploatacyjne p. 9
Procedura wstępna
• Pasowanie p. 10
• Sprzęt elektryczny p. 16
Instalacja p. 20
Zakończenie p. 47
Benodigdheden p. 9
Voorbereiding
• Bemating p. 10
• Elektra p. 16
Installatie p. 20
Afronden p. 47
CONTENTS
CONTENU
INHALT
SPIS TREŚCI
INHOUD
CONTENUTO
NL
IT
EN
FR
DE
PL
Attrezzatura p. 9
Preparazione
• Dimensionamento p. 10
• Impianto elettrico p. 16
Installazione p. 20
Conclusione p. 47
INSTALLATIEHANDLEIDING LARGE, MEDIUM, SMALL I SUNSHOWER ONE - PLUS I P6094 REV D 98
Clean
Behuizing | Housing | Gehäuse | Alloggiamento | Boîtier | Obudowa
Glasplaat | Glass plate | Glasplatte | Lastra di vetro | Plaque en verre | Płyta szklana
Montage zakje | Mounting bag | Montagematerialpackung | Sacchetto di montaggio | Sac de montage | Woreczek montażowy
Montagekit | Sealant | Installationskit | Serratura vetrov | Joint d’étanchéité | Uszczelniacz
In the box
1x Body
1x Glass pane
1x Assembly bag
1x Glass lock
2x Degreasing cloth
1x Sealant
1x Hex key 4 mm
Not included
1x Tape measure
1x Screwdriver ( + )
1x Spirit level
1x Drill (optional)
1x Ø10 mm spiral drill
(optional)
Dans la boîte
1x Boîtier
1x Plaque en verre
1x Sac de montage
1x Verrou de vitre
2x Chiffon de dégraissage
1x Joint d’étanchéité
1x Clé Allen de 4 mm
Non fournis
1x Mètre-ruban
1x Tournevis ( + )
1x Niveau à bulle
1x Perceuse (éventuellement)
1x Foret de Ø10 mm
(éventuellement)
In der Verpackung
1x Gehäuse
1x Glasplatte
1x Montagematerialpackung
1x Glasverriegelung
2x Entfettungstuch
1x Installationskit
1x Sechskantschlüsse 4mm
Nicht im Lieferumfang enthalten
1x Bandmaß
1x Schraubenzieher ( + )
1x Wasserwaage
1x Bohrmaschine (falls erforderlich)
1x Ø10 mm Spiralbohrer (falls erforderlich)
W pudełku
1x Obudowa
1x Płyta szklana
1x Woreczek montażowy
1x Zamek szklany
2x Ściereczka do odtłuszczania
1x Uszczelniacz
1x Klucz imbusowy 4 mm
Nie wchodzi w skład zestawu
1x Miara taśmowa
1x Śrubokręt ( + )
1x Poziomica
1x Wiertarka elektryczna
(opcjonalnie)
1x Wiertło spiralne Ø10 mm
(opcjonalnie)
In de doos
1x Behuizing
1x Glasplaat
1x Montage zakje
1x Glas slot
2x Ontvet doekje
1x Montagekit
1x Inbus sleutel 4 mm
Niet meegeleverd
1x Rolmaat
1x Schroevendraaier ( + )
1x Waterpas
1x Boormachine (evt.)
1x Ø10 mm spiraalboor (evt.)
Nella scatola
1x Alloggiamento
1x Lastra di vetro
1x Sacchetto di montaggio
1x Serratura vetro
2x Panno per sgrassare
1x Sigillante
1x Chiave a brugola da 4 mm
Non incluso
1x Metro a nastro
1x Cacciavite ( + )
1x Livellamento
1x Trapano (opzionale)
1x Trapano a spirale da Ø10 mm
(opzionale)
SUPPLIES
FOURNITURES
BENÖTIGTE MATERIALIEN
MATERIAŁY EKSPLOATACYJNE
BENODIGDHEDEN
ATTREZZATURA
NL
IT
EN
FR
DE
PL
INSTALLATIEHANDLEIDING LARGE, MEDIUM, SMALL I SUNSHOWER ONE - PLUS I P6094 REV D 1110
Sunshower Large
Construeer de uitsparing in
de muur volgens de getoonde
afmetingen.
Zie de instructies vanaf pagina 16
bij het gebruik van de minimale nis
diepte van 100 mm.
De onderzijde van de nis
moet minimaal 30 kg kunnen
dragen.
Voor gebruikers met een lengte
tot en met 190 cm adviseert
Sunshower de aangegeven maten.
Voor lengtes daarboven wordt het
volgende geadviseerd voor
maat D;
Lichaamslengte - 179cm
Benodigdheden
1x Rolmaat
1x Waterpas
Ga verder vanaf pagina 16 voor de
volgende stappen van de installatie.
450 mm
263 mm
1769 mm
110 mm
≥100 mm
BEMATING | DIMENSIONS | MAẞEN | ACCOPPIAMENTO | DIMENSIONS | WYMIAR
Sunshower Large
Realizza l’incavo nel muro secondo le
dimensioni indicate.
Vedi le istruzioni da pagina 16 in poi
riguardo all’utilizzo della profondità
minima della nicchia (100 mm).
La parte inferiore della nicchia
deve poter sostenere almeno
30 kg.
Possono essere utilizzate le misure
indicate per utilizzatori fino a 190 cm
di altezza.
Per altezze superiori, si raccomanda
la seguente misura D;
Altezza corpo - 179cm
Attrezzatura
1x Metro a nastro
1x Livellamento
Prosegui da pagina 16 per conoscere
i prossimi passaggi dell’installazione.
Sunshower Large
Construct the recess in the wall in
accordance with the dimensions
shown.
See instructions starting on page
16 when using the minimum recess
depth of 100 mm.
The bottom of the niche must
be able to support at least
30 kg.
For users with a height up to 190 cm,
Sunshower recommends the sizes
indicated.
For users who are taller,
the following is recommended for
size D;
Body height - 179cm
Required tools
1x Tape measure
1x Spirit level
Continue from page 16 for the next
steps of the installation.
Sunshower Large
Construisez le renfoncement dans
le mur en fonction des dimensions
indiquées.
Voir les instructions à partir de la page
16 relatives à l’utilisation d’une niche
de profondeur minimale de 100 mm.
La partie inférieure de la
niche doit pouvoir supporter
une charge minimale de 30 kg.
Les dimensions indiquées peuvent
être utilisées pour des utilisateurs
mesurant jusqu’à 190 cm.
Pour des tailles supérieures, il est
conseillé ce qui suit pour la
dimension D;
Longueur du corps - 179 cm
Fournitures
1x Mètre-ruban
1x Niveau à bulle
Passez aux étapes suivantes
d’installation à partir de la page 16.
Sunshower Large
Legen Sie die Aussparung mit den
angegebenen Maßen in der Wand an.
Siehe Anweisungen ab Seite 16 bei
Verwendung der minimalen
Aussparungstiefe von 100 mm.
Die Unterseite der Ausspar
ung muss mindestens 30 kg
tragen können.
Für Benutzer mit einer Körpergröße
von bis zu 190 cm können die
angegebenen Maße angehalten
werden.
Für größere Körpergrößen wird
Folgendes empfohlen für
Größe D:
Körpergröße - 179cm
Benötigte Materialien
1x Bandmaß
1x Wasserwaage
Fahren Sie auf Seite 16 fort für die
nachfolgenden Installationsschritte.
Sunshower Large
Wykonaj wnękę w ścianie zgodnie z
podanymi wymiarami.
W przypadku stosowania minimalnej
głębokości wnęki wynoszącej
100 mm, sprawdź instrukcje
zamieszczone od strony 16.
Spód wnęki musi być w stanie
utrzymać minimum 30 kg.
Dla użytkowników o wzroście do 190
cm mogą być stosowane wskazane
rozmiary.
W przypadku wzrostu powyżej tej
wartości dla rozmiaru D zalecane są
następujące rozmiary;
Długość ciała - 179 cm
Materiały eksploatacyjne
1x Miara taśmowa
1x Poziomica
Przejdź dalej, od strony 16 znajdują
się kolejne etapy montażu.
NL
IT
EN
FR
DE
PL
INSTRUCTIONS
INSTRUCTIONS
ANWEISUNGEN
INSTRUKCJE
INSTRUCTIES
ISTRUZIONI
LARGE
INSTALLATIEHANDLEIDING LARGE, MEDIUM, SMALL I SUNSHOWER ONE - PLUS I P6094 REV D 1312
450 mm
263 mm
1319 mm
380 mm
≥100 mm
BEMATING | DIMENSIONS | MAẞEN | DIMENSIONAMENTO | DIMENSIONS | KOJARZENIE
Sunshower Medium
Construeer de uitsparing in
de muur volgens de getoonde
afmetingen.
Zie de instructies vanaf pagina 16
bij het gebruik van de minimale nis
diepte van 100 mm.
De onderzijde van de nis
moet minimaal 30 kg kunnen
dragen.
Voor gebruikers met een lengte
tot en met 190 cm adviseert
Sunshower de aangegeven maten.
Voor lengtes daarboven wordt het
volgende geadviseerd voor
maat D;
Lichaamslengte - 152 cm
Benodigdheden
1x Rolmaat
1x Waterpas
Ga verder vanaf pagina 16 voor de
volgende stappen van de installatie.
Sunshower Medium
Construct the recess in the wall in
accordance with the dimensions
shown.
See instructions starting on page
16 when using the minimum recess
depth of 100 mm.
The bottom of the niche must
be able to support at least
30 kg.
For users with a height up to 190 cm,
Sunshower recommends the sizes
indicated.
For users who are taller,
the following is recommended for
size D;
Body height - 152 cm
Required tools
1x Tape measure
1x Spirit level
Continue from page 16 for the next
steps of the installation.
Sunshower Medium
Wykonaj wnękę w ścianie zgodnie z
podanymi wymiarami.
W przypadku stosowania minimalnej
głębokości wnęki wynoszącej
100 mm, sprawdź instrukcje
zamieszczone od strony 16.
Spód wnęki musi być w stanie
utrzymać minimum 30 kg.
Dla użytkowników o wzroście do 190
cm mogą być stosowane wskazane
rozmiary.
W przypadku wzrostu powyżej tej
wartości dla rozmiaru D zalecane są
następujące rozmiary;
Długość ciała - 152 cm
Materiały eksploatacyjne
1x Miara taśmowa
1x Poziomica
Przejdź dalej, od strony 16 znajdują
się kolejne etapy montażu.
NL
IT
EN
FR
DE
PL
INSTRUCTIONS
INSTRUCTIONS
ANWEISUNGEN
INSTRUKCJE
INSTRUCTIES
ISTRUZIONI
MEDIUM Sunshower Medium
Legen Sie die Aussparung mit den
angegebenen Maßen in der Wand an.
Siehe Anweisungen ab Seite 16 bei
Verwendung der minimalen
Aussparungstiefe von 100 mm.
Die Unterseite der Ausspar
ung muss mindestens 30 kg
tragen können.
Für Benutzer mit einer Körpergröße
von bis zu 190 cm können die
angegebenen Maße angehalten
werden.
Für größere Körpergrößen wird
Folgendes empfohlen für
Größe D:
Körpergröße - 152 cm
Benötigte Materialien
1x Bandmaß
1x Wasserwaage
Fahren Sie auf Seite 16 fort für die
nachfolgenden Installationsschritte.
Sunshower Medium
Realizza l’incavo nel muro secondo le
dimensioni indicate.
Vedi le istruzioni da pagina 16 in poi
riguardo all’utilizzo della profondità
minima della nicchia (100 mm).
La parte inferiore della nicchia
deve poter sostenere almeno
30 kg.
Possono essere utilizzate le misure
indicate per utilizzatori fino a 190 cm
di altezza.
Per altezze superiori, si raccomanda
la seguente misura D;
Altezza corpo - 152 cm
Attrezzatura
1x Metro a nastro
1x Livellamento
Prosegui da pagina 16 per conoscere
i prossimi passaggi dell’installazione.
Sunshower Medium
Construisez le renfoncement dans
le mur en fonction des dimensions
indiquées.
Voir les instructions à partir de la page
16 relatives à l’utilisation d’une niche
de profondeur minimale de 100 mm.
La partie inférieure de la
niche doit pouvoir supporter
une charge minimale de 30 kg.
Les dimensions indiquées peuvent
être utilisées pour des utilisateurs
mesurant jusqu’à 190 cm.
Pour des tailles supérieures, il est
conseillé ce qui suit pour la
dimension D;
Longueur du corps - 152 cm
Fournitures
1x Mètre-ruban
1x Niveau à bulle
Passez aux étapes suivantes
d’installation à partir de la page 16.
INSTALLATIEHANDLEIDING LARGE, MEDIUM, SMALL I SUNSHOWER ONE - PLUS I P6094 REV D 1514
450 mm
263 mm
869 mm
720 mm
≥100 mm
BEMATING | DIMENSIONS | MAẞEN | DIMENSIONAMENTO | DIMENSIONS | KOJARZENIE
Sunshower Small
Construeer de uitsparing in
de muur volgens de getoonde
afmetingen.
Zie de instructies vanaf pagina 16
bij het gebruik van de minimale nis
diepte van 100 mm.
De onderzijde van de nis
moet minimaal 30 kg kunnen
dragen.
Voor gebruikers met een lengte
tot en met 190 cm adviseert
Sunshower de aangegeven maten.
Voor lengtes daarboven wordt het
volgende geadviseerd voor
maat D;
Lichaamslengte - 118 cm
Benodigdheden
1x Rolmaat
1x Waterpas
Ga verder vanaf pagina 16 voor de
volgende stappen van de installatie.
Sunshower Small
Construct the recess in the wall in
accordance with the dimensions
shown.
See instructions starting on page
16 when using the minimum recess
depth of 100 mm.
The bottom of the niche must
be able to support at least
30 kg.
For users with a height up to 190 cm,
Sunshower recommends the sizes
indicated.
For users who are taller,
the following is recommended for
size D;
Body height - 118 cm
Required tools
1x Tape measure
1x Spirit level
Continue from page 16 for the next
steps of the installation.
Sunshower Small
Wykonaj wnękę w ścianie zgodnie z
podanymi wymiarami.
W przypadku stosowania minimalnej
głębokości wnęki wynoszącej
100 mm, sprawdź instrukcje
zamieszczone od strony 16.
Spód wnęki musi być w stanie
utrzymać minimum 30 kg.
Dla użytkowników o wzroście do 190
cm mogą być stosowane wskazane
rozmiary.
W przypadku wzrostu powyżej tej
wartości dla rozmiaru D zalecane są
następujące rozmiary;
Długość ciała - 118 cm
Materiały eksploatacyjne
1x Miara taśmowa
1x Poziomica
Przejdź dalej, od strony 16 znajdują
się kolejne etapy montażu.
NL
IT
EN
FR
DE
PL
INSTRUCTIONS
INSTRUCTIONS
ANWEISUNGEN
INSTRUKCJE
INSTRUCTIES
ISTRUZIONI
SMALL Sunshower Small
Legen Sie die Aussparung mit den
angegebenen Maßen in der Wand an.
Siehe Anweisungen ab Seite 16 bei
Verwendung der minimalen
Aussparungstiefe von 100 mm.
Die Unterseite der Ausspar
ung muss mindestens 30 kg
tragen können.
Für Benutzer mit einer Körpergröße
von bis zu 190 cm können die
angegebenen Maße angehalten
werden.
Für größere Körpergrößen wird
Folgendes empfohlen für
Größe D:
Körpergröße - 118 cm
Benötigte Materialien
1x Bandmaß
1x Wasserwaage
Fahren Sie auf Seite 16 fort für die
nachfolgenden Installationsschritte.
Sunshower Small
Realizza l’incavo nel muro secondo le
dimensioni indicate.
Vedi le istruzioni da pagina 16 in poi
riguardo all’utilizzo della profondità
minima della nicchia (100 mm).
La parte inferiore della nicchia
deve poter sostenere almeno
30 kg.
Possono essere utilizzate le misure
indicate per utilizzatori fino a 190 cm
di altezza.
Per altezze superiori, si raccomanda
la seguente misura D;
Altezza corpo - 118 cm
Attrezzatura
1x Metro a nastro
1x Livellamento
Prosegui da pagina 16 per conoscere
i prossimi passaggi dell’installazione.
Sunshower Small
Construisez le renfoncement dans
le mur en fonction des dimensions
indiquées.
Voir les instructions à partir de la page
16 relatives à l’utilisation d’une niche
de profondeur minimale de 100 mm.
La partie inférieure de la
niche doit pouvoir supporter
une charge minimale de 30 kg.
Les dimensions indiquées peuvent
être utilisées pour des utilisateurs
mesurant jusqu’à 190 cm.
Pour des tailles supérieures, il est
conseillé ce qui suit pour la
dimension D;
Longueur du corps - 118 cm
Fournitures
1x Mètre-ruban
1x Niveau à bulle
Passez aux étapes suivantes
d’installation à partir de la page 16.
INSTALLATIEHANDLEIDING LARGE, MEDIUM, SMALL I SUNSHOWER ONE - PLUS I P6094 REV D 1716
Voer deze stap alleen uit als de
minimale inbouwdiepte van
100 mm wordt aangehouden.
Omdat de behuizing vlak tegen
de binnenwand gemonteerd is
moet er een doorgang gemaakt
worden voor de elektra kabel.
Boor zoals afgebeeld het
kabelgat uit met een Ø10 mm
spiraalboor.
Let op:
Zorg dat de er geen scherpe
randen achterblijven. Schuur de
rand bij indien nodig.
Benodigdheden
1x Boormachine
1x Ø10 mm spiraalboor
Esegui questo passaggio solo se
viene rispettata la profondità
minima di installazione (100 mm).
Dato che l’alloggiamento è montato
al livello della parete interna, è
necessario creare un foro per il
cavo elettrico.
Esegui il foro per il cavo
utilizzando un trapano a spirale
di Ø10 mm.
Attenzione:
Assicurati che non ci siano bordi
taglienti. Leviga i bordi se neces-
sario.
Attrezzatura
1x Trapano
1x Trapano a spirale da Ø10 mm
Only perform this step if the
minimum installation depth of
100 mm is used.
Because the body is mounted
flush against the interior wall,
a duct must be created for the
electrical cable.
Drill out the cable hole as shown
using a Ø10 mm spiral drill.
Caution:
Make sure that there are no
sharp edges left. Sand the edge
if necessary.
Required tools
1x Drill
1x Ø10 mm spiral drill
Effectuez cette étape uniquement
si la profondeur d’installation
minimale de 100 mm est
respectée.
Il est nécessaire de prévoir un
passage pour le câble électrique,
du fait que le boîtier doit être
monté bien à plat contre la paroi
intérieure.
Percez un trou pour le câble,
comme indiqué dans l’illustration,
avec un foret de Ø10 mm.
Attention:
Veillez à ce qu’il n’y ait pas de
bord tranchant. Poncez le bord si
nécessaire.
Fournitures
1x Perceuse
1x Foret de Ø10 mm
Führen Sie diesen Schritt nur
aus, wenn die Mindesteinbautiefe
von 100 mm eingehalten wird.
Da das Gehäuse bündig mit der
Innenwand montiert wird, muss
ein Durchgang für das
Stromkabel angelegt werden.
Bohren Sie das Kabelloch wie
abgebildet mit einem Ø10 mm
Spiralbohrer.
Achtung:
Achten Sie darauf, dass es keine
scharfen Kanten gibt. Schleifen
Sie die Kanten, falls erforderlich.
Benötigte Materialien
1x Bohrmaschine
1x Ø10 mm Spiralbohrer
Krok ten należy wykonać tylko
wtedy, gdy zachowana jest
minimalna głębokość
montażu 100 mm.
Ponieważ obudowa jest
montowana w jednej płaszczyźnie
ze ścianąwewnętrzną, należy
wykonać przejście dla przewodu
elektrycznego.
Wywierć otwór na przewód w
sposób pokazany na rysunku,
używając wiertła spiralnego Ø10 mm.
Uwaga:
Upewnij się, że nie ma żadnych
ostrych krawędzi. W razie potrzeby
przeszlifuj krawędź.
Materiały eksploatacyjne
1x Wiertarka
1x Wiertło spiralne Ø10 mm
INSTRUCTIONS
INSTRUCTIONS
ANWEISUNGEN
INSTRUKCJE
INSTRUCTIES
ISTRUZIONI
NL
IT
EN
FR
DE
PL
ELEKTRA | ELECTRICITY | STROMVERSORGUNG
ÉLECTRICITÉ | ÉLECTRICITÉ | PODŁĄCZENIE ELEKTRYCZNE
INSTALLATIEHANDLEIDING LARGE, MEDIUM, SMALL I SUNSHOWER ONE - PLUS I P6094 REV D 1918
450 mm
109 mm
9 mm
Zorg voor een YMVK-kabel
van minimaal 3x 2,5mm².
De Sunshower moet worden
aangesloten op een eigen
groep voorzien van een
aardlekschakelaar, met 230V~
50Hz en een 16A zekering.
Alle elektrische werkzaamheden
moeten worden uitgevoerd door
een erkend elektricien in
overeenstemming met de
geldende richtlijnen (Hd 60364-
7-701 e.D.) en de nationale
voorschriften (bv. voor
Nederland nen 1010 - 701).
Er moet een aparte
stroomaansluiting worden
voorzien.
Procurati un cavo YMVK di
almeno 3x 2,5mm².
La Sunshower deve essere col-
legata al proprio gruppo dotato
di dispositivo differenziale, con
230V~50Hz e un fusibile da 16A.
Tutte le operazioni elettriche
devono essere eseguite da un
elettricista qualificato ai sensi
delle direttive applicabili (Hd
60364-7-701 ecc.) e dei
regolamenti nazionali.
È necessario provvedere a una
connessione elettrica separata.
Provide a YMVK-cable of at least
3x 2.5mm².
The Sunshower must be
connected to its own group with
a residual-current circuit breaker
(RCCB), with 230V~50Hz and a
16A fuse.
All electrical work must be
carried out by a certified
electrician in accordance with
the applicable guidelines (Hd
60364-7-701 e.D.) and national
regulations. A separate power
connection must be provided.
Prévoyez la mise en place d’un
câble YMVK d’au moins 3x 2,5mm².
La Sunshower doit être reliée à
un groupe séparé comportant un
disjoncteur différentiel, avec une
tension 230V~50Hz et un fusible
de 16A.
Tous les travaux électriques
doivent être réalisés par un
électricien agréé conformément
aux directives en vigueur (Hd
60364-7-701 e.D.) et aux
prescriptions nationales.
L’alimentation électrique doit être
séparée.
Bereiten Sie ein YMVK-Kabel von
mindestens 3 x 2,5 mm² vor.
Der Sunshower muss an eine
eigene Gruppe mit einem
FI-Schutzschalter, 230V~50Hz
und einer 16A-Sicherung ange-
schlossen werden.
Alle elektrischen Arbeiten
müssen von einer ausgebildeten
Elektrofachkraft in Überein-
stimmung mit den geltenden
Richtlinien (Hd 60364-7-701 e.D.)
und den nationalen Vorschriften
ausgeführt werden. Es muss
ein separater Stromanschluss
angelegt werden.
Dostarczyć kabel YMVK
co najmniej 3x 2,5mm².
The Sunshower należy podłączyć
do własnej grupy z wyłącznikiem
różnicowoprądowym, zasilanej
napięciem 230V~50Hz i
wyposażonej w bezpiecznik 16A.
Wszystkie prace elektryczne
muszą być wykonywane przez
wykwalifikowanego elektryka
zgodnie z obowiązującymi
dyrektywami (Hd 60364-7-701
itd.) i przepisami krajowymi.
Należy zapewnić oddzielne
przyłącze zasilania.
INSTRUCTIONS
INSTRUCTIONS
ANWEISUNGEN
INSTRUKCJE
INSTRUCTIES
ISTRUZIONI
NL
IT
EN
FR
DE
PL
ELEKTRA | ELECTRICITY | STROMVERSORGUNG
ÉLECTRICITÉ | ÉLECTRICITÉ | PODŁĄCZENIE ELEKTRYCZNE