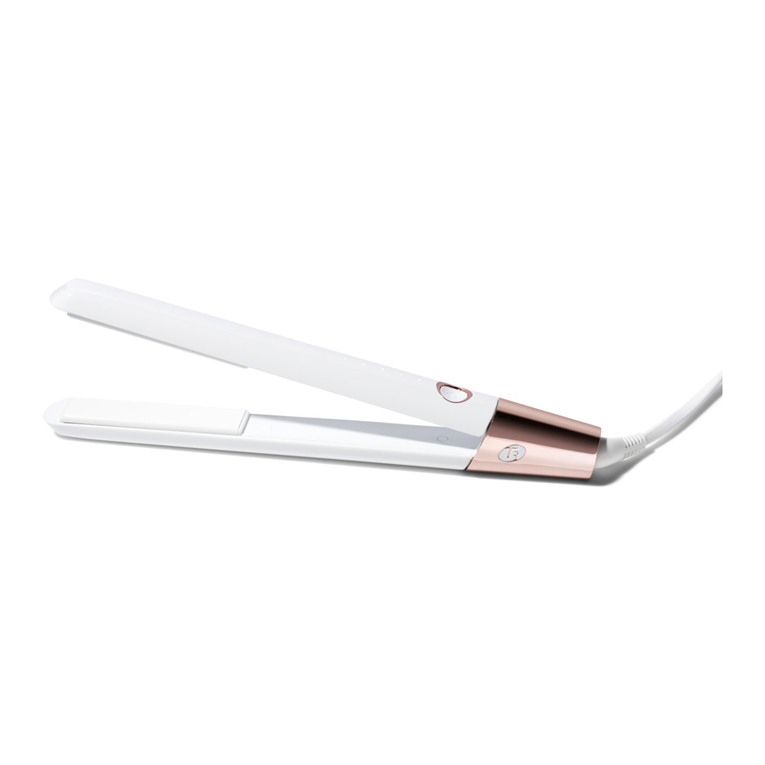
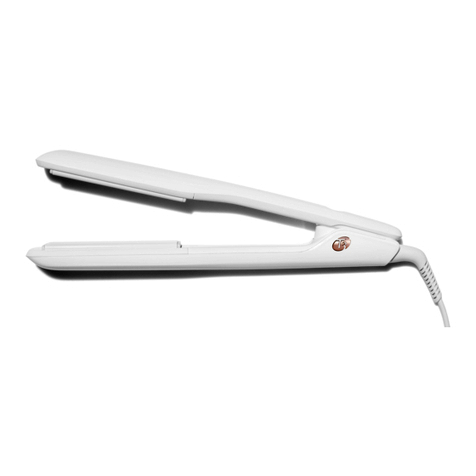
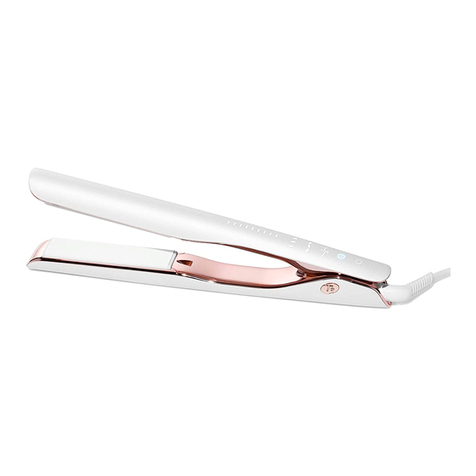
T3 SMOOTH ID User manual

T3 SMOOTH ID
User Guide
Guide de l’utilisateur
Manual del usuario
1" smart straightening and styling iron
Fer plat et à coiffer intelligent de 25 mm
Plancha inteligente para alisado y peinado
de 25 mm
Model No./Node modèle/N.º de modelo
76535, 76536, 76537, 76538, 76539, 77534,
77535, 76535-CAD, 76536-CAD, 76537-CAD,
76538-CAD, 76539-CAD, 77534-CA,
77535-CA

Heat
just got
personal.
2 3
ENGLISH
ENGLISH
IMPORTANT SAFETY
INSTRUCTIONS
KEEP AWAY FROM WATER
Electricity and water are a dangerous
combination and can cause death by
electric shock. Do not allow electrical
cords to come into contact with water
or other liquids.
ELECTRICAL APPLIANCES ARE
ELECTRICALLY LIVE WHEN
PLUGGED IN, EVEN IF TURNED OFF.
To reduce the risk of death by
electric shock:
1. Always unplug the appliance
immediately after using.
2. Do not use while bathing.
3. Do not place or store the appliance
where it can fall or be pulled into a
bath tub or sink.
4. Do not place in or drop into water
or other liquid.
5. If the appliance falls into water,
unplug it immediately. Do not reach
into the water.
READ ALL INSTRUCTIONS
BEFORE USING
When using electrical appliances,
especially when children are present,
basic safety precautions should always
be followed, including the following:
T3Micro.com/MeetSmoothID
Scan for
interactive start-up

4 5
ENGLISH
ENGLISH
IMPORTANT SAFETY
INSTRUCTIONS
To reduce the risk of burns,
electrocution, fire or injury
to persons:
1. An appliance should never be left
unattended when plugged in.
2. Close supervision is necessary
when this appliance is used on, or
near children or individuals with
certain disabilities.
3. Use this appliance only for its
intended use as described in this
manual. Do not use attachments
not recommended by
the manufacturer.
4. Never operate this appliance if
it has a damaged cord or plug, if
it is not working properly, or if it
has been dropped, damaged, or
dropped into water. Return the
appliance to a service center for
examination and repair.
5. Keep the cord away from heated
surfaces. Do not wrap the cord
around the appliance.
6. Never use while sleeping.
7. Never insert any object into
the styling iron.
8. Do not use outdoors or operate
where aerosol (spray) products are
being used or where oxygen is
being administered.
9. Do not use an extension cord
with this appliance.
10.This styling iron is hot when in use.
Do not let eyes and bare skin touch
the heated surfaces.
11. Do not place the heated styling iron
directly on any surface while it is
hot or plugged in.
12. Do not use if the plug is loose in the
outlet, as there may be risk of fire,
electric shock, electrical shortage
and burning.
13. Make sure to remove the plug from
the wall outlet after use.
Do not use the appliance
near a bath tub,
washbasin or other vessel
filled with water. Never
place the appliance in
water or any other liquid.
SAVE THESE
INSTRUCTIONS
IMPORTANT SAFETY
INSTRUCTIONS

6 7
ENGLISH
ENGLISH
MAINTENANCE
INSTRUCTIONS
1. Your appliance is virtually
maintenance free. It contains no user
serviceable parts, and no lubrication
is needed.
2. Keep heated surfaces clean and free
of dust, dirt & hairspray.
3. If cleaning becomes necessary,
disconnect the appliance from the
power source and let it cool. Wipe
the exterior with a damp cloth.
4. If any malfunction occurs, unplug the
appliance, allow it to cool and return
it to a service center to repair.
5. Never wrap the cord around the
appliance since this will cause the
cord to wear prematurely and break.
If the cord becomes twisted, untwist
it prior to use.
6. Handle the cord carefully for longer
life and do not put any stress on
the cord where it enters the handle.
Avoid jerking, twisting or straining
especially at the plug connections.
It could cause the cord to fray and
possibly break.
7. Do not attempt to repair the
appliance yourself.
STORAGE
When not in use, your styling iron
should be disconnected and stored
in a safe, dry location, out of reach of
children. Do not wrap the cord around
the styling iron. Allow the cord to hang
or lie loose and straight at the point of
entry into the styling iron.
SERVICING OF
DOUBLE-INSULATED APPLIANCES
In a double-insulated appliance, two
systems of insulation are provided
instead of grounding. No grounding
means is provided on a double-
insulated appliance, nor should a
means for grounding be added to
the appliance.
Servicing a double-insulated appliance
requires extreme care and knowledge
of the system, and should be done
only by qualified service personnel.
Replacement parts for double-
insulated appliance must be identical
to the parts they replace. A double-
insulated appliance is marked with
the words “DOUBLE INSULATION” or
“DOUBLE INSULATED”. The symbol
(square within a square) may also be
marked on the appliance.
MAINTENANCE
INSTRUCTIONS
Do not let the heated
plates touch your skin
as you may get burnt.
Ion
Generator
Temperature
Panel
HeatID Inputs
Refresh Mode
Main Body
Heating
Plate
PrecisionControl
Hinge Power
Button
Cord
Plug
8 9
ENGLISH
ENGLISH
This appliance is intended for
household use. Use on Alternating
Current (60/50Hz) only.
This appliance has a polarized plug
(one blade is wider than the other).
As a safety feature, this plug will fit in
a polarized outlet only one way. If the
plug does not fit fully in the outlet,
reverse the plug. If it still does not fit,
contact a qualified electrician. Do not
attempt to defeat this safety feature.
AUTO SHUT-OFF
After approximately one hour, the unit
will automatically shut itself off. To
reactivate the unit, press and hold the
lit Power Button until the iron vibrates,
and lights start to cascade up.
AUTO WORLD VOLTAGE
This appliance contains a special
electronic circuit that automatically
converts it for worldwide usage - from
120VAC 60 Hz to 240VAC 50 Hz. Just
plug it into the local power outlet
and use it as normal; the styler will
automatically adjust to the local
current. You may need a plug
adapter to allow the plug to fit into
the local outlets.
Note: Tool heat up time may vary
based on country and voltage.
OPERATING
INSTRUCTIONS
T3 SMOOTH ID
OPERATING
INSTRUCTIONS
T3 SMOOTH ID

HeatID Inputs
Touch Screen
9 heat settings
Hair Texture
Hair Length
Color Treatment
Refresh Mode Button
Power Button
10 11
ENGLISH
ENGLISH
OPERATING
INSTRUCTIONS
T3 SMOOTH ID
Note: To prevent
accidental activation,
avoid touching Power
Button during styling.
OPERATING
INSTRUCTIONS
T3 SMOOTH ID
TURN ON
Connect the styling iron to a power source.
The Power Button will light up.
To turn on, press and hold the lit Power Button
until the tool vibrates, and lights start to
cascade up. The styling iron will automatically
start in HeatID mode. The screen will be
unlocked and the HeatID icons will light up
and blink for you to input your hair profile. See
page 13 to set your hair profile.
Note:
• Do not touch the area above the power
button when turning the iron ON or OFF.
• The screen will be unlocked the very first
time you turn on the iron.
SWITCHING BETWEEN HeatID
AND MANUAL MODE
If you prefer to manually select your
temperature, you can switch to Manual Mode.
See page 17 for operation in Manual Mode.

12 13
ENGLISH
ENGLISH
OPERATING
INSTRUCTIONS
T3 SMOOTH ID
LOCK/UNLOCK SCREEN
Double tap the Power Button to lock and
unlock the screen. You will hear a locking
sound to indicate lock and unlock.
Note: Screen must be locked to
begin heat up.
IDENTIFYING A
LOCKED/UNLOCKED SCREEN
Locked: Screen is inactive, thus you cannot
change settings if locked.
Unlocked: Screen is active, thus you can
change settings if unlocked.
TURN OFF
To turn off, first unlock the tool by quickly
double tapping the Power Button. Then
press and hold the Power Button until the
iron vibrates and the lights start to cascade
down. The Power Button will remain on until
unplugged.
Note:
• Do not touch the area above the Power
Button when turning the iron ON or
OFF.
• On second time use, the iron will imme-
diately begin heat up to your previous
heat setting. To adjust settings follow
instructions on page 14.
HeatID MODE
Enter your hair texture, length, and color
treatment inputs, and T3 Smooth ID will
automatically tailor your heat setting to help
protect against heat damage and deliver
one-pass results.
OPERATING
INSTRUCTIONS
T3 SMOOTH ID
IDENTIFYING YOUR HAIR PROFILE
TEXTURE
Run one hair strand between your fingers.
Can you barely feel and see the strand?
Select Fine hair texture.
Can you feel the strand, but it does
not feel very thick and textured?
Select Medium hair texture.
Does the strand feel and look thick and
textured? Select Coarse hair texture.
Note: If still unsure about your hair texture,
select the Medium hair texture. You may
need to manually adjust heat as necessary.
LENGTH
Is your hair length above the chin?
Select Short hair length
Is your hair neck to shoulder-length?
Select Medium hair length
Is your hair below the shoulder?
Select Long hair length
COLOR TREATMENT
If you answer yes to any of these questions,
select the Color Treatment option.
Is your hair 3 or 4 shades lighter or darker
than your natural color?
Is your hair fragile?
Is your hair damaged?
Is your hair bleached?
Is your hair chemically-treated?

14 15
ENGLISH
ENGLISH
SELECT YOUR HeatID PROFILE
The HeatID icons will be blinking on first
time use. Tap through each icon to select
desired hair profile input.
Icons will stop blinking upon first tap and
your selection will become brighter as you
continue to tap.
Fine Medium Coarse
1SELECT HAIR TEXTURE
Short Medium Long
2SELECT HAIR LENGTH
Color-treated Not color-treated
3SELECT COLOR TREATMENT
OPERATING
INSTRUCTIONS
T3 SMOOTH ID
5READY TO USE
Once the styling iron beeps and the
lights turn solid, it has reached your
HeatID setting and is ready to use.
4LOCK YOUR HeatID PROFILE
Double tap the Power Button to lock in
your HeatID profile. The temperature
lights will cascade up to your
personalized heat setting and the iron
will begin to heat up.
1If you experience
accidental activation
• Keep your hand away from the
Power Button to avoid unintended
interface activation during styling.
If interface is not responsive
• Ensure you are only touching a
single area of the interface at a time.
If contact is made with more than
one area at the same time, the tool
may not respond.
• Ensure the screen is unlocked. To
unlock screen, quickly double tap the
Power Button.
• If tool is still unresponsive, unplug,
wait 15 seconds, and plug in again.
If power button is not visible
• Ensure the tool is plugged in.
• If tool is plugged in, unplug, wait 15
seconds, and plug in again.
If your tool won’t turn on
• Ensure you are holding the Power
Button for a full 3 seconds.
• Avoid touching surface area
above Power Button while turning
on the tool.
• If tool still will not turn on, unplug,
wait 15 seconds, and plug in again.
2
3
4
TROUBLESHOOTING
OPERATING
INSTRUCTIONS
T3 SMOOTH ID
If you continue to experience issues after trouble
shooting your T3 Smooth ID, please contact
customer service at T3Micro.com/contact-us.

16 17
ENGLISH
ENGLISH
OPERATING
INSTRUCTIONS
T3 SMOOTH ID
Use iron with caution, and select
settings with caution. There are
individual variations in how hair
responds to heat. The optimal
selection of settings may vary from
person to person. In the first use, it
is best to test at a low heat and for
a short duration. If there are any
adverse or unexpected effects, stop
use of the iron immediately.
MANUAL MODE
You can manually select or adjust your heat
settings using the Manual Mode.
OPERATING
INSTRUCTIONS
T3 SMOOTH ID
SWITCH TO MANUAL MODE
If first time use:
Tap the Power Button once after turning on
the tool. You will hear a beep. The HeatID
icons will go away and the Temperature
Panel will appear.
If second time use:
The styling iron will immediately begin
heating up to your last used heat setting. To
manually adjust the heat:
2Tap the Power Button one more time
to switch from HeatID to Manual
Mode. You will hear a beep. The
HeatID icons will go away and the
Temperature Panel will appear.
1First unlock the styling iron by quickly
double tapping the Power Button.
You will hear an unlock sound.

18 19
ENGLISH
ENGLISH
OPERATING
INSTRUCTIONS
T3 SMOOTH ID
1SELECT HEAT SETTING
To increase heat: Tap the top of
the Temperature Panel
To decrease the heat: Tap the
bottom of the Temperature Panel
2LOCK YOUR HEAT SETTING
Double tap the Power Button to
lock the screen and T3 Smooth ID
will begin to heat up.
Note: Iron will auto lock after 10
seconds of inactivity.
3READY TO USE
Once the styling iron beeps
and the lights turn solid, the
iron has reached your heat
selection and is ready to use.
OPERATING
INSTRUCTIONS
T3 SMOOTH ID
TEMPERATURE GUIDE
For optimal results, select the right heat
setting for your hair type. See temperature
guide below to determine your heat setting.
We suggest starting at a lower setting and
building your way up as needed.
* If your hair is color-treated or damaged,
reduce temperature by 1-2 heat settings for
optimal results.
— 9 (410ºF / 210ºC)
— 8 (400ºF / 205ºC)
— 7 (390ºF / 199ºC)
— 6 (370ºF / 188ºC)
— 5 (350ºF / 177ºC)
— 4 (325ºF / 163ºC)
— 3 (300ºF / 149ºC)
— 2 (280ºF / 138ºC)
— 1 (260ºF / 127ºC)
Fine — #1-4 Medium — #5-6 Coarse — #7-9

20 21
ENGLISH
ENGLISH
1UNLOCK SCREEN
Double tap the Power Button
to unlock the screen.
2ENTER REFRESH MODE
Tap the Refresh Mode Button.
You will hear a beep and the
temperature panel will turn blue.
Lights will cascade heating up to
your Refresh temperature.
3READY TO USE
When you hear a beep and
lights turn solid, begin styling.
4EXIT REFRESH MODE
Double tap the Power Button
to unlock the screen. Tap the
Refresh Mode Button to return to
your previous heat setting. You
will hear a beep and the HeatID
or Temperature panel lights will
go back to white.
Note: The styling iron will
automatically exit Refresh Mode
when turned off.
REFRESH MODE
Retouch your second-day styles with
less heat. Refresh Mode automatically
reduces your previously saved heat
setting to help protect your hair, boost
shine, and reduce frizz on second-day
retouches.
OPERATING
INSTRUCTIONS
T3 SMOOTH ID
Note: The styling iron will heat up to your last
saved heat setting when turned on again.
OPERATING
INSTRUCTIONS
T3 SMOOTH ID
CORRECT
T3 THERMATOUCH®TECHNOLOGY
Advanced insulation technology makes
the arms of the styling iron more
comfortable to hold. However, as any
other heat styling tool, this styling
iron must be used with caution. Avoid
touching the side of the styling iron arms,
where the plates are hot.
INCORRECT
RESET
To reset the iron to original factory
settings, unlock screen, then press
and hold the Power and Refresh Mode
Buttons simultaneously until the styling
iron turns off. Follow the instructions on
page 13 to set your new settings.

2To avoid kinks, style your hair
using thin, horizontal sections
so the iron can be positioned
close to the roots.
HOW TO USE YOUR
T3 SMOOTH ID
1Start with dry, detangled hair. Twist
the top part of your hair out of the
way and secure it with a sectioning
clip. Gather the rest of your hair
into another clip, leaving a 1-2"
section out to begin styling.
HOW TO USE YOUR
T3 SMOOTH ID
3Glide iron through in the
direction of hair growth at a
speed slower than when
brushing hair.* Continue working
with thin sections, repeating
steps 2 and 3 until hair is
fully styled.
Slow down for perfect results in a single glide:
Fine hair: Glide iron at 2-3 inches per second
Medium Hair: Glide iron at 2 inches per second
Coarse Hair: Glide iron at 1 inch per second
*Expert Tip:
22 23
ENGLISH
ENGLISH

Model Name:
T3 Smooth ID
Model Description:
1" smart straightening and styling iron
Model Number:
76535, 76536, 76537, 76538, 76539, 77534, 77535
Responsible Party in USA:
T3 Micro, Inc.
880 El Segundo Ca 90245
866.376.8880
Test Report Number:
200103100GZU-001
This equipment has been tested and found to
comply with the limits for a Class B digital device,
pursuant to Part 15 of the FCC Rules. These limits
are designed to provide reasonable protection
against harmful interference in a residential
installation. This equipment generates, uses
and can radiate radio frequency energy and, if
not installed and used in accordance with the
instructions, may cause harmful interference
to radio communications. However, there is no
guarantee that interference will not occur in a
particular installation.
If this equipment does cause harmful interference
to radio or television reception, which can be
determined by turning the equipment off and
on, the user is encouraged to try to correct the
interference by one or more of the
following measures:
· Reorient or relocate the receiving antenna.
· Increase the separation between the
equipment and receiver.
· Connect the equipment into an outlet on
a circuit different from that to which the
receiver is connected.
· Consult the dealer or an experienced radio/
TV technician for help.
SUPPLIER’S DECLARATION
OF CONFORMITY 47 CFR §
2.1077 COMPLIANCE
INFORMATION
24 25
ENGLISH
ENGLISH
T3 Micro will repair or replace (at our
option) T3 products for twenty-four (24)
months from the date of purchase if they are
defective in workmanship or materials. This
limited warranty does not cover (1) damage
due to misuse or abuse, such as incorrect
voltage supply, dropping, or failure to follow
enclosed instructions or (2) tampering, such
as repair or attempt to repair. To obtain
service under this warranty, please visit
www.T3Micro.com/warranty-info to submit a
warranty claim, or call us at (866) 376-8880
to receive detailed instructions. You will be
required to provide proof of purchase.
THIS LIMITED WARRANTY IS ONLY VALID
IF THE PRODUCT IS PURCHASED FROM AN
AUTHORIZED SELLER OF T3 GOODS AND
IF THE ORIGINAL SERIAL NUMBER ON THE
PRODUCT HAS NOT BEEN REMOVED OR
OTHERWISE TAMPERED WITH.
Any implied warranties, obligations, or
liabilities, including but not limited to the
implied warranty of merchantability and
fitness for a particular purpose, shall be
limited in duration to the 24 month duration
of this written limited warranty. Some
states do not allow a limitation on how long
an implied warranty lasts, so the above
limitation may not apply to you.
IN NO EVENT SHALL T3 BE LIABLE FOR ANY
SPECIAL, INCIDENTAL, OR CONSEQUENTIAL
DAMAGES FOR BREACH OF THIS OR ANY
OTHER WARRANTY, EXPRESS OR IMPLIED.
Visit www.T3Micro.com/customer-service
to complete your warranty registration.
T3 LIMITED WARRANTY
TERMS & CONDITIONS

SUPPLIER’S DECLARATION
OF CONFORMITY 47 CFR §
2.1077 COMPLIANCE
INFORMATION
FCC Compliance Statement
This device complies with Part 15 of the FCC
Rules. Operation is subject to the following two
conditions: (1) this device may not cause harmful
interference, and (2) this device must accept any
interference received, including interference that
may cause undesired operation.
No change or modification to this equipment shall
be made without the express written approval
of the “responsible party” as defined in the
FCC’s rules.
26 27
ENGLISH
ENGLISH

Une chaleur
adaptée à
vos besoins.
T3Micro.com/MeetSmoothID
Balayer pour accéder au
démarrage interactif
28 29
FRANÇAIS
FRANÇAIS
CONSIGNES DE
SÉCURITÉ IMPORTANTES
ÉVITER TOUT CONTACT AVEC L’EAU
L’électricité et l’eau ne font pas bon
ménage, et leur association peut
entraîner la mort par électrocution.
Ne pas laisser les cordons d’alimentation
entrer en contact avec l’eau ou tout
autre liquide.
LES APPAREILS ÉLECTRIQUES
CONTIENNENT DES COMPOSANTS QUI
DEMEURENT SOUS TENSION MÊME SI
L’APPAREIL EST ÉTEINT.
Pour réduire les risques de décès
par électrocution:
1. Toujours débrancher l’appareil
immédiatement après l’avoir utilisé.
2. Ne pas l’utiliser en prenant son bain.
3. Éviter de déposer ou d’entreposer
l’appareil dans un endroit où il
pourrait tomber dans une baignoire
ou un lavabo.
4. Ne pas immerger ou plonger l’appareil
dans l’eau ou tout autre liquide.
5. Si l’appareil tombe dans l’eau, le
débrancher immédiatement.
Ne pas mettre les mains
dans l’eau pour le récupérer.
LIRE TOUTES LES CONSIGNES RELATIVES
À L’APPAREIL AVANT DE L’UTILISER
Il convient de toujours prendre des
mesures de sécurité élémentaires
lorsqu’on fait usage d’appareils
électriques, surtout en présence
d’enfants. En voici quelques-unes:

Pour réduire les risques de brûlures,
d’électrocution, d’incendie ou
de blessures:
1. Ne jamais laisser un appareil sans
surveillance s’il est branché.
2. Une étroite supervision est
nécessaire lorsque cet appareil est
utilisé sur des enfants ou près d’en-
fants ou de personnes handicapées.
3. Cet appareil ne doit servir qu’aux fins
prévues, décrites dans le présent
manuel. Ne pas utiliser d’accessoires
non recommandés par le fabricant.
4. Ne jamais faire fonctionner cet
appareil si sa fiche ou son cordon
d’alimentation est endommagé, s’il
ne fonctionne pas correctement, s’il
est tombé par terre ou dans l’eau ou
s’il est endommagé. Confier
l’appareil à un centre d’entretien
pour inspection et réparation.
5. Tenir le cordon d’alimentation à
l’écart des sources de chaleur. Ne
pas enrouler le cordon d’alimenta-
tion autour de l’appareil.
6. Ne jamais laisser fonctionner
l’appareil pendant le sommeil.
7. Ne jamais insérer d’objet dans le fer
à coiffer.
8. Ne jamais utiliser à l’extérieur ou
faire fonctionner dans des milieux
exposés à des produits aérosols
(vaporisateurs) ou à de l’oxygène
sous pression.
CONSIGNES DE
SÉCURITÉ IMPORTANTES
8. Ne jamais utiliser à l’extérieur ou
faire fonctionner dans des milieux
exposés à des produits aérosols
(vaporisateurs) ou à de l’oxygène
sous pression.
9. Ne jamais utiliser de fil de rallonge
avec cet appareil.
10.Ce fer à coiffer devient chaud
pendant son utilisation. Tenir les
surfaces chaudes éloignées des yeux
et de la peau.
11. Ne jamais déposer le fer directement
sur une surface lorsqu’il est chaud
ou branché.
12. Ne pas utiliser l’appareil si la fiche
est lâche dans la prise afin de
réduire les risques d’incendie,
d’électrocution, de court-circuit et
de brûlures.
13. Veiller à retirer la fiche d’alimenta-
tion de la prise après l’utilisation.
Ne pas utiliser l’appareil
près d’une baignoire, d’un
lavabo ou de tout autre
récipient contenant de
l’eau. Ne jamais immerger
l’appareil dans l’eau ou tout
autre liquide.
CONSERVER LES
PRÉSENTES CONSIGNES
30 31
FRANÇAIS
FRANÇAIS
CONSIGNES DE
SÉCURITÉ IMPORTANTES

32 33
FRANÇAIS
FRANÇAIS
DIRECTIVES D’ENTRETIEN
1. L’appareil n’exige presque aucun
entretien. Il ne comporte aucune pièce
pouvant être réparée par l’utilisateur, et
aucune lubrification n’est nécessaire.
2. Garder les surfaces chaudes exemptes
de poussière, de saleté et de fixatif.
3. Si l’appareil a besoin d’être nettoyé, le
débrancher de la source d’alimentation
et le laisser refroidir. Essuyer l’appareil
avec un linge humide.
4. En cas de fonctionnement inhabituel,
débrancher l’appareil, le laisser
refroidir, puis le confier à un centre
d’entretien pour réparation.
5. Pour éviter l’usure précoce ou la
rupture du cordon, ne jamais l’enrouler
autour de l’appareil. Si le cordon
s’entortille, le détortiller avant
de l’utiliser.
6. Manipuler le cordon avec précaution
pour qu’il dure longtemps et n’exercer
aucune pression à l’endroit où il
entre dans le manche. Éviter de tirer
brusquement sur le cordon, d’exercer
une pression sur celui-ci ou de le
tordre, surtout près de la fiche de
raccordement. Le cordon pourrait
s’user, voire se rompre.
7. Ne pas essayer de réparer l’appareil
soi-même.
RANGEMENT
Lorsqu’il n’est pas utilisé, le fer à coiffer
doit être débranché et rangé dans un
endroit sûr, sec et hors de la portée
des enfants. Ne pas enrouler le cordon
d’alimentation autour du fer à coiffer.
Laisser pendre le cordon à partir de son
point d’entrée dans le fer à coiffer.
DIRECTIVES D’ENTRETIEN
RÉPARATION D’UN APPAREIL À
DOUBLE ISOLATION
Les appareils à double isolation sont
dotés de deux systèmes au lieu d’une
mise à la terre. Aucune mise à la terre
n’est fournie sur un appareil à double
isolation, et aucune ne doit être
ajoutée à l’appareil.
La réparation d’un appareil à double
isolation requiert un soin particulier et
une bonne connaissance du système,
et ne doit être confiée qu’à du
personnel qualifié.
Les pièces de rechange des appareils
à double isolation doivent être
identiques aux pièces qu’elles
remplacent. Un appareil à double
isolation porte la mention «DOUBLE
ISOLATION». Un carré double peut
également figurer sur l’étiquette
de l’appareil.

Les plaques chauffantes
ne doivent jamais toucher
la peau afin d’éviter les
brûlures.
ATTENTION
Générateur
d'ions
Panneau de
température
Données HeatID
Mode
Rafraîchissement
Partie centrale
Plaque
chauante
Articulation
PrecisionControl
Bouton de mise
en marche
Câble
Prise
34 35
FRANÇAIS
FRANÇAIS
Cet appareil est conçu pour des
particuliers. Utiliser seulement sur du
courant alternatif (60/50Hz).
Cet appareil est muni d’une fiche
polarisée (une broche est plus large que
l’autre). Par mesure de sécurité, cette
fiche ne se branche que d’une seule
façon sur une prise polarisée. Si la fiche
ne s’insère pas complètement dans la
prise, essayer de l’autre façon. Si la fiche
ne s’insère toujours pas dans la prise,
communiquer avec un électricien qualifié.
Ne pas essayer de contourner cette
mesure de sécurité.
ARRÊT AUTOMATIQUE
Après environ une heure de
fonctionnement continu, l’appareil
s’éteint automatiquement. Pour le
rallumer, appuyez sur le bouton de mise
en marche et maintenez-le enfoncé jusqu'à
ce que le fer vibre et que les témoins
lumineux commencent à s’allumer en
série.
RÉGULATEUR DE TENSION UNIVERSEL
Cet appareil contient un circuit
électronique qui convertit
automatiquement la tension de 120à
240VCA et la fréquence de 60Hz à 50Hz.
Il suffit de le brancher dans la prise de
courant et de l’utiliser comme d’habitude.
Il s’ajustera automatiquement au courant
distribué. Un adaptateur peut s’avérer
nécessaire pour brancher la fiche
dans la prise.
Remarque: Le pays et la tension peuvent
influencer le temps de chauffage requis
de l’appareil.
MODE D’EMPLOI
T3 SMOOTH ID
INSTRUCTIONS DE
FONCTIONNEMENT
T3 SMOOTH ID

Données HeatID
Écran tactile
9 niveaux de chaleur
Texture des cheveux
Longueur des cheveux
Traitement des
Coloration
Bouton du Mode
Rafraîchissement
Bouton de mise
en marche
36 37
FRANÇAIS
FRANÇAIS
INSTRUCTIONS DE
FONCTIONNEMENT
T3 SMOOTH ID
Remarque: Pour
éviter d’activer
accidentellement
l’appareil, ne touchez
pas le bouton de mise
en marche pendant
le coiffage.
ALLUMER
Branchez le fer à coiffer. le bouton
d'alimentation s'allumera.
Pour allumer le fer, appuyez sur le bouton
d'alimentation et maintenez-le enfoncé
jusqu'à ce que l'appareil vibre et que
les témoins lumineux commencent à
s'allumer en série. Le fer à coiffer démarre
automatiquement en mode HeatID. L'écran
sera déverrouillé et les icônes HeatID
s'allumeront et clignoteront pour que vous
puissiez entrer votre type de cheveux. Voir
page 39 pour définir votre type de cheveux.
Remarque:
• Ne touchez pas l’espace situé au-des-
sus du bouton de mise en marche
lorsque vous allumez ou éteignez le fer.
• L’écran sera déverrouillé à la toute
première mise en marche de l’appareil
seulement.
PASSER DU MODE HeatID
AU MODE MANUEL
Si vous préférez sélectionner votre
température manuellement, vous pouvez
passer en Mode Manuel. Voir page 44 pour
le fonctionnement en Mode Manuel.
INSTRUCTIONS DE
FONCTIONNEMENT
T3 SMOOTH ID

38 39
FRANÇAIS
FRANÇAIS
VERROUILLER/DÉVERROUILLER
L'ÉCRAN
Appuyez deux fois sur le bouton
d'alimentation pour verrouiller et
déverrouiller l'écran. Vous entendrez un son
spécifique pour indiquer le verrouillage et le
déverrouillage.
Remarque : l'écran doit être verrouillé pour
que l'appareil commence à chauffer.
IDENTIFICATION DE L'ÉCRAN
VERROUILLÉ/DÉVERROUILLÉ
Verrouillé : l'écran est inactif, vous ne
pouvez donc pas modifier les paramètres.
Déverrouillé : l'écran est actif, vous pouvez
donc modifier les paramètres.
ÉTEINDRE
Pour éteindre l’appareil, commencez
par le déverrouiller en appuyant deux
fois rapidement sur le bouton de mise
en marche. Pour éteindre l’appareil,
maintenez enfoncé le bouton de mise en
marche jusqu’à ce que l’appareil vibre et
que les voyants s’éteignent à tour de rôle. Le
bouton d'alimentation reste allumé jusqu'à
ce que l'appareil soit débranché.
Remarque:
• Ne touchez pas l’espace situé
au-dessus du bouton de
mise en marche lorsque vous allumez
ou éteignez le fer.
• Dès la deuxième mise en marche de
l’appareil, celui-ci se réchauffera selon
les derniers réglages sélectionnés.
Pour ajuster les réglages, suivre les
instructions à la page41.
INSTRUCTIONS DE
FONCTIONNEMENT
T3 SMOOTH ID
MODE HeatID
Entrez vos données de texture, longueur
et couleur de cheveux, et T3 Smooth ID
adaptera automatiquement votre niveau de
chaleur pour aider à protéger vos cheveux
des dommages causés par la chaleur et
fournir des résultats en un seul passage.
IDENTIFIER VOTRE
PROFIL DE CHEVEUX
TEXTURE
Passez une mèche de cheveux entre vos
doigts.
Vous avez du mal à sentir et voir la mèche ?
Alors sélectionnez Texture de cheveux fins.
Vous arrivez à sentir la mèche, mais elle
n'est pas très épaisse et texturée ?
Sélectionnez Texture de cheveux moyens.
La mèche est épaisse et texturée
au toucher et en apparence ?
Sélectionnez Texture de cheveux rêches.
Remarque : si vous n'êtes pas certain(e)
de la texture de vos cheveux, sélectionnez
la texture de cheveux moyens. Vous devrez
peut-être ajuster manuellement la chaleur
au besoin.
INSTRUCTIONS DE
FONCTIONNEMENT
T3 SMOOTH ID
Table of contents
Languages:
Other T3 Styling Iron manuals

T3
T3 SINGLEPASS CURL 76540-EU User manual

T3
T3 CONVERTIBLE COLLECTION 76577 User manual

T3
T3 SINGLEPASS LUXE 76505 User manual

T3
T3 SINGLEPASS CURL User manual

T3
T3 CURLWRAP User manual

T3
T3 SinglePass X User manual

T3
T3 CONVERTIBLE COLLECTION 76577 User manual

T3
T3 LUCEA ID User manual

T3
T3 TWIRL 360 User manual

T3
T3 LUCEA ID User manual