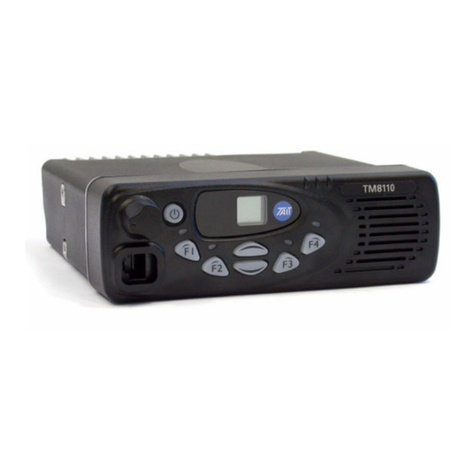
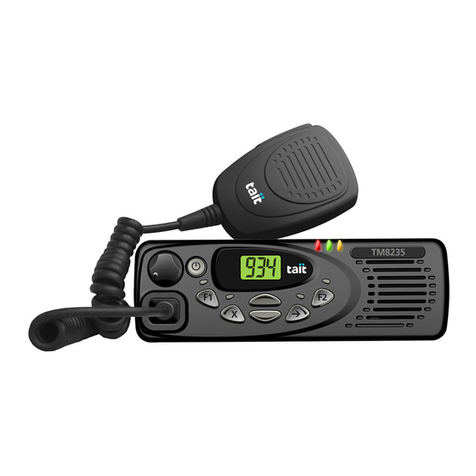
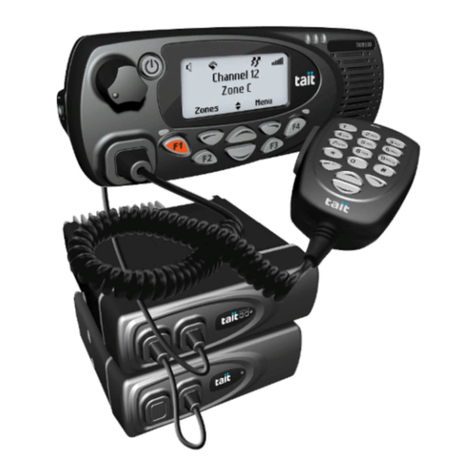
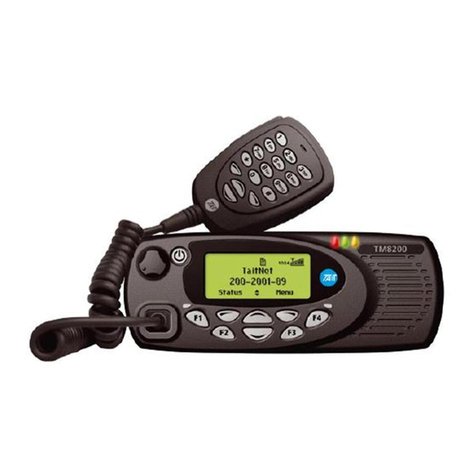
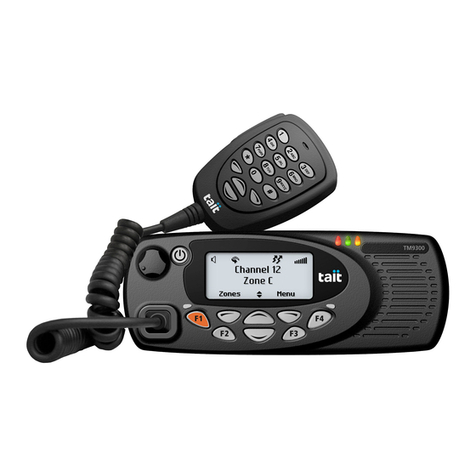
Tait TM8100 mobiles User manual


April 2004 © Tait Electronics Ltd
English
TM8100 User’s Guide

2Tait General Software Licence Agreement
English
Tait General Software Licence Agreement
This legal document is an Agreement
between you (the “Licensee”) and Tait
Electronics Limited (“Tait”). By using
any of the Software or Firmware items
prior-installed in the related Tait prod-
uct, included on this CD or downloaded
from the Tait website, (hereinafter
referred to as “the Software or
Firmware”) you agree to be bound by
the terms of this Agreement. If you do
not agree to the terms of this Agree-
ment, do not install and use any of the
Software or Firmware. If you install and
use any of the Software or Firmware
that will be deemed to be acceptance
of the terms of this licence agreement.
The terms of this agreement shall apply
subject only to any express written
terms of agreement to the contrary
between Tait and the Licensee.
Licence
TAIT GRANTS TO YOU AS LICENSEE THE NON-
EXCLUSIVE RIGHT TO USE THE SOFTWARE OR
FIRMWARE ON ASINGLE MACHINE PROVIDED
YOU MAY ONLY:
1. COPY THE SOFTWARE OR FIRMWARE INTO
ANY MACHINE READABLE OR PRINTED
FORM FOR BACKUP PURPOSES IN SUPPORT
OF YOUR USE OF THE PROGRAM ON THE
SINGLE MACHINE (CERTAIN PROGRAMS,
HOWEVER, MAY INCLUDE MECHANISMS TO
LIMIT OR INHIBIT COPYING, THEY ARE
MARKED “COPY PROTECTED”), PROVIDED
THE COPYRIGHT NOTICE MUST BE REPRO-
DUCED AND INCLUDED ON ANY SUCH COPY
OF THE SOFTWARE OR FIRMWARE; AND / OR
2. MERGE IT INTO ANOTHER PROGRAM FOR
YOUR USE ON THE SINGLE MACHINE (ANY
PORTION OF ANY SOFTWARE OR FIRMWARE
MERGED INTO ANOTHER PROGRAM WILL
CONTINUE TO BE SUBJECT TO THE TERMS
AND CONDITIONS OF THIS AGREEMENT).
THE LICENSEE MAY NOT DUPLICATE, MODIFY,
REVERSE COMPILE OR REVERSE ASSEMBLE ANY
SOFTWARE OR FIRMWARE IN WHOLE OR PART.
Title to Software
THIS AGREEMENT DOES NOT CONSTITUTE A
CONTRACT OF SALE IN RELATION TO THE SOFT-
WARE OR FIRMWARE SUPPLIED TO THE LICEN-
SEE. NOT WITHSTANDING THE LICENSEE MAY
OWN THE MAGNETIC OR OTHER PHYSICAL
MEDIA ON WHICH THE SOFTWARE OR
FIRMWARE WAS ORIGINALLY SUPPLIED, OR HAS
SUBSEQUENTLY BEEN RECORDED OR FIXED, IT IS
AFUNDAMENTAL TERM OF THIS AGREEMENT
THAT AT ALL TIMES TITLE AND OWNERSHIP OF
THE SOFTWARE OR FIRMWARE, WHETHER ON
THE ORIGINAL MEDIA OR OTHERWISE, SHALL
REMAIN VESTED IN TAIT OR THIRD PARTIES
WHO HAVE GRANTED LICENCES TO TAIT.
Term and Termination
THIS LICENCE SHALL BE EFFECTIVE UNTIL TERMI-
NATED IN ACCORDANCE WITH THE PROVISIONS
OF THIS AGREEMENT. THE LICENSEE MAY
TERMINATE THIS LICENCE AT ANY TIME BY
DESTROYING ALL COPIES OF THE SOFTWARE OR
FIRMWARE AND ASSOCIATED WRITTEN MATERI-
ALS. THIS LICENCE WILL BE TERMINATED AUTO-
MATICALLY AND WITHOUT NOTICE FROM TAIT
IN THE EVENT THAT THE LICENSEE FAILS TO
COMPLY WITH ANY TERM OR CONDITION OF
THIS AGREEMENT. THE LICENSEE AGREES TO
DESTROY ALL COPIES OF THE SOFTWARE OR
FIRMWARE AND ASSOCIATED WRITTEN MATERI-
ALS IN THE EVENT OF SUCH TERMINATION.
Limited Warranty
THE SOFTWARE OR FIRMWARE IS SUPPLIED BY
TAIT AND ACCEPTED BY THE LICENSEE “AS IS”
WITHOUT WARRANTY OF ANY KIND EITHER
Tait General Software Licence Agreement 3
English
EXPRESSED OR IMPLIED, INCLUDING BUT NOT
BEING LIMITED TO ANY IMPLIED WARRANTIES
AS TO MERCHANTABILITY OR FITNESS FOR ANY
PARTICULAR PURPOSE. THE LICENSEE
ACKNOWLEDGES THAT THE SOFTWARE OR
FIRMWARE IS USED BY IT IN BUSINESS AND
ACCORDINGLY TO THE MAXIMUM EXTENT
PERMITTED BY LAW NO TERMS OR WARRANTIES
WHICH ARE IMPLIED BY LEGISLATION SHALL
APPLY TO THIS AGREEMENT. TAIT DOES NOT
WARRANT THAT THE FUNCTIONS CONTAINED IN
THE SOFTWARE OR FIRMWARE WILL MEET THE
LICENSEE’SREQUIREMENTS OR THAT THE OPER-
ATION OF THE SOFTWARE OR FIRMWARE WILL
BE UNINTERRUPTED OR ERROR FREE.
Exclusion of Liability
TAIT’SENTIRE LIABILITY AND THE LICENSEE’S
EXCLUSIVE REMEDY SHALL BE THE FOLLOWING:
1. IN NO CIRCUMSTANCES SHALL TAIT BE
UNDER ANY LIABILITY TO THE LICENSEE, OR
ANY OTHER PERSON WHATSOEVER, FOR
ANY DIRECT OR CONSEQUENTIAL DAMAGE
ARISING OUT OF OR IN CONNECTION WITH
ANY USE OR INABILITY OF USING THE SOFT-
WARE OR FIRMWARE.
2. TAIT WARRANTS THE OPERATION OF THE
SOFTWARE OR FIRMWARE ONLY WITH THE
OPERATING SYSTEM FOR WHICH IT WAS
DESIGNED. USE OF THE SOFTWARE OR
FIRMWARE WITH AN OPERATING SYSTEM
OTHER THAN THAT FOR WHICH IT WAS
DESIGNED MAY NOT BE SUPPORTED BY
TAIT, UNLESS OTHERWISE EXPRESSLY
AGREED BY TAIT.
General
THE LICENSEE CONFIRMS THAT IT SHALL
COMPLY WITH THE PROVISIONS OF LAW IN
RELATION TO THE SOFTWARE OR FIRMWARE.
Law and Jurisdiction
THIS AGREEMENT SHALL BE SUBJECT TO AND
CONSTRUED IN ACCORDANCE WITH NEW
ZEALAND LAW AND DISPUTES BETWEEN THE
PARTIES CONCERNING THE PROVISIONS HEREOF
SHALL BE DETERMINED BY THE NEW ZEALAND
COURTS OF LAW. PROVIDED HOWEVER TAIT
MAY AT ITS ELECTION BRING PROCEEDINGS FOR
BREACH OF THE TERMS HEREOF OR FOR THE
ENFORCEMENT OF ANY JUDGEMENT IN RELA-
TION TO ABREACH OF THE TERMS HEREOF IN
ANY JURISDICTION TAIT CONSIDERS FIT FOR THE
PURPOSE OF ENSURING COMPLIANCE WITH THE
TERMS HEREOF OR OBTAINING RELIEF FOR
BREACH OF THE TERMS HEREOF.
No Dealings
THE LICENSEE MAY NOT SUBLICENSE, ASSIGN
OR TRANSFER THE LICENCE OR THE PROGRAM
EXCEPT AS EXPRESSLY PROVIDED IN THIS
AGREEMENT. ANY ATTEMPT OTHERWISE TO
SUBLICENSE, ASSIGN OR TRANSFER ANY OF
THE RIGHTS, DUTIES OR OBLIGATIONS HERE-
UNDER IS VOID.
No Other Terms
THE LICENSEE ACKNOWLEDGES THAT IT HAS
READ THIS AGREEMENT, UNDERSTANDS IT
AND AGREES TO BE BOUND BY ITS TERMS AND
CONDITIONS. THE LICENSEE FURTHER AGREES
THAT SUBJECT ONLY TO ANY EXPRESS WRIT-
TEN TERMS OF AGREEMENT TO THE
CONTRARY BETWEEN TAIT AND THE LICENSEE
THIS IS THE COMPLETE AND EXCLUSIVE STATE-
MENT OF THE AGREEMENT BETWEEN IT AND
TAIT IN RELATION TO THE SOFTWARE OR
FIRMWARE WHICH SUPERSEDES ANY
PROPOSAL OR PRIOR AGREEMENT, ORAL OR
WRITTEN AND ANY OTHER COMMUNICA-
TIONS BETWEEN THE LICENSEE AND TAIT
RELATING TO THE SOFTWARE OR FIRMWARE.

4About this guide
English
About this guide
This user’s guide provides information about TM8105,
TM8110 and TM8115 mobile radios and is divided
into two parts.
■Part 1 explains how the TM8110 and TM8115 radios oper-
ate. The TM8105 radio has a control head without a user
interface, so no TM8105 operating information is needed.
■Part 2 outlines the installation procedure for TM8105,
TM8110 and TM8115 radios, and gives the pin alloca-
tions for the TM8105 programming connector.
Important safety information
This user’s guide also contains important safety information
about using and installing these radios. Refer to page 8 for
user safety instructions and page 22 for installation
safety instructions.
Alert notices
Within this guide, four types of alerts are given to the reader:
warning, caution, important and note. The following para-
graphs illustrate each type of alert and its associated symbol.
Warning: There is a potential risk of death or serious injury.
Caution: There is the risk of minor or moderate injury
to people.
Important: There is a risk of equipment damage
or malfunction.
Note: This highlights information that is required to ensure
that procedures are performed correctly.
Updating this guide
In the interests of improving the performance, reliability or
servicing of the equipment, Tait Electronics Ltd reserves the
right to update both the equipment or this user’s guide,
without prior notice.

Your radio’s settings
Use the following table to list your radio’s programmed settings.
Channel list
Function key settings
ID Description ID Description


Radio operation 7
English
Part 1: Radio operation
About this guide .......................................................................... 4
Important safety information ....................................................................... 4
Alert notices ............................................................................................... 4
Updating this guide .................................................................................... 4
Safety warnings ........................................................................... 8
Warning: Safe operation ............................................................................. 8
Caution: EN 60950 requirements ................................................................ 8
Caution: High temperatures ........................................................................ 8
Warning: FCC RF exposure limits ................................................................ 8
Getting started ........................................................................... 10
Radio controls .......................................................................................... 10
Radio indicators ........................................................................................ 12
Basic operation ........................................................................... 14
Turning the radio on and off ..................................................................... 14
Adjusting the volume ................................................................................ 14
Selecting a channel ................................................................................... 14
Making a call ........................................................................................... 14
Receiving a call ......................................................................................... 15
What you hear on a channel ..................................................................... 15
Monitor .................................................................................................... 16
Scanning .................................................................................................. 16
Voting ...................................................................................................... 17
Troubleshooting ......................................................................... 18
Audible tones ........................................................................................... 18
When your radio won’t turn on ................................................................. 19
Removing the radio from the vehicle ......................................................... 19
Notes ........................................................................................... 20

8Safety warnings
English
Safety warnings
Warning: Safe operation
■Switch the radio off at petrol filling stations or
near flammable liquids or gases.
■Switch the radio off in the vicinity of explosive
devices and blasting zones.
■Using a handheld microphone or a radio while
driving a vehicle may violate the laws and legis-
lation that apply in your country or state. Please
check the vehicle regulations in your area.
Caution: EN 60950 requirements
This radio complies with the European Union standard
EN 60950 when operated up to the rated 33% duty cycle of
two minutes transmit and four minutes receive, and with
ambient temperatures of 30°C or lower.
Operation outside these limits may cause the external temper-
ature of the radio to rise higher than this standard permits.
Caution: High temperatures
The bottom surface of the radio and the heatsink fins can
become hot during prolonged operation. Do not touch these
parts of the radio.
Warning: FCC RF exposure limits
This product generates RF (radio frequency) energy during
transmissions. This device must be restricted to work-related
use in an occupational/controlled exposure environment.
The radio operator must have control of the exposure condi-
tions and duration of all persons exposed to the antenna of
this transmitter to satisfy FCC RF exposure compliance. This
device is not approved for general population use.
■This device must only be used with authorized accessories
and antennas.

Safety warnings 9
English
■The operator must ensure that the minimum safe distance
of 0.9m (35 inches) between persons and the antenna is
maintained during transmissions.
■This minimum safe distance is based on the assumption
that there is a duty cycle of 50% transmit mode to stand-
by or receive modes. The radio is in transmit mode when
the PTT (press-to-talk) key on the microphone is pressed
and the control head red LED (light emitting
diode) glows.
Please refer to the following website for more information on
what RF energy is and how to control your exposure to
assure compliance with established RF exposure limits.
Website: http://www.fcc.gov/oet/rfsafety/rf-faqs.html.
Important: Radio protection
Always remove the fuses from the radio power cable before
charging the vehicle battery, connecting a second battery or
using power from another vehicle (e.g. when
“jump-starting”the vehicle).

10 Getting started
English
Getting started
This section provides a brief description of your radio’s
basic operation. If you need further information, contact
your radio provider.
Radio controls
The radio controls are the PTT key, volume control, on/off
key, channel selection keys and function keys. Some keys may
have functions assigned to both short and long key presses.
A short key press is defined as less than one second and a
long key press is more than one second.
The radio controls and their functions are summarized in the
diagram and table on the following page.

Getting started 11
English
channel
selection keys
on/off key
volume
control
microphone
socket
PTT key
(press-to-talk)
red
LCD
speakergreen
amber
microphone radio status LEDs
function key
LEDs
function keys
3 and 4
function keys
1 and 2
Symbol Name Function
PTT press and hold to transmit and release
to listen
volume control rotate to change the speaker volume
on/off a long press turns the radio on or off
channel selection keys move up and down through the
channel list
function keys
1, 2, 3 and 4
function keys

12 Getting started
English
Radio indicators
The LED indicators and the radio’s audible tones all combine
to give you information about the state of your radio.
Although the way these indicators behave is affected by the
way your radio is programmed, the following sections
describe the most common operation of the radio indicators.
LED Indicators
Audible tones
Note: Refer to page page 18 for a description of other
audible tones.
LED Meaning
red
(transmit)
glowing: your radio is transmitting
flashing: your transmit timer is about to expire
green
(
receive and
monitor
)
glowing: there is activity on the current channel, even
though you may not be able to hear it
flashing: you have received a call with valid special
signalling, or you have activated monitor or squelch
override
amber
(scanning)
glowing: your radio is scanning a group of chan-
nels for activity
flashing: your radio has detected activity on a
channel, and has halted on this channel
function
key LEDs
the operation of these LEDs depends on the type of
function programmed for each function key
Tone type
Meaning
one short beep
after the power-
up beeps
radio locked: you need to enter your PIN
(personal identity number) before you can
use the radio
two short beeps
radio turned on: the radio is powered on
and ready to use

Getting started 13
English
one short beep
radio turned off: the radio is being
powered off, or
valid keypress: the action you have
attempted is permitted, or
function activated: a function key has been
pressed and that function has been initiated
one short, low-
pitched beep
function de-activated: a function key has
been pressed and the corresponding func-
tion has been turned off
one long, low-
pitched beep
invalid keypress: the action you have
attempted is not permitted, or
transmission inhibited: you have attempted
to transmit but for some reason transmis-
sion is not permitted at this time
three short beeps
channel now free: you were prevented from
transmitting on a busy channel and that
channel is now free
three beeps
transmit timeout imminent: in 10 seconds
your transmit timer will expire and your
current transmission will be terminated
Tone type
Meaning

14 Basic operation
English
Basic operation
This section describes the basic operation of your radio,
including turning the radio on and off, adjusting volume,
selecting channels, making calls and receiving calls.
Turning the radio on and off
A long press of the on/off key turns the radio either on or
off. When the radio is first turned on, the red, green and
amber LEDs flash briefly and the radio gives two short beeps.
Adjusting the volume
Rotate the volume control clockwise to increase the speaker
volume and counterclockwise to decrease the volume. The
volume control also changes the volume level of the radio’s
audible indicators.
Selecting a channel
Use the channel selection keys or to scroll through
the channel list until the channel you want is displayed.
Making a call
1. Select the required channel using the channel selection
keys or .
2. Check the green LED.
If the green LED is glowing, the channel is busy and you
cannot transmit.
3. Once the channel is clear (the green LED is off), lift the
microphone off the microphone clip.
4. Hold the microphone about 5cm (2 inches) from your
mouth and press the PTT key to transmit.
5. Speak clearly into the microphone and release the PTT
key when you have finished talking.
Note: You cannot change channels while
transmitting.

Basic operation 15
English
Transmit timer
Your radio may have a transmit timer that limits the amount
of time you can transmit continuously. When the transmit
timer is about to expire, the red LED flashes and the radio
gives three beeps. You must release the PTT before you can
transmit again.
Note: Your radio may be unable to transmit for a short
time after the transmit timer has expired.
Receiving a call
When there is valid activity on your radio’s currently selected
channel or group, the radio then unmutes and you can
hear the call.
If the incoming call contains special signalling that matches
the signalling programmed for your radio, the green LED
flashes and your radio may give a ringing tone.
What you hear on a channel
Your radio may be programmed so that you hear all conver-
sations on a channel, or your user group may be segregated
from other user groups by using special signalling. The
special signalling is used to control the muting and unmuting
of your radio, so that your radio is muted when other user
groups are talking and unmuted for members of your user
group.
There are two muting controls that operate in your radio:
■signalling mute, and
■squelch.
Signalling mute
The radio’s signalling mute only allows the radio to unmute if
the incoming call carries the tones specific to your user
group. Your user group may use tones that are either audible,
subaudible or both.

16 Basic operation
English
Squelch
The radio’s squelch allows the radio to unmute only when the
strength of the incoming signal is above a predetermined
threshold. This means that only signals of reasonable intelli-
gibility are made audible.
Monitor
The monitor function is used to check that the channel is
clear before you make a call. While monitor is on, the green
LED flashes continually.
Activating monitor
1. Press the monitor function key and monitor overrides the
signalling mute, allowing you to hear any traffic on
the channel.
Note: Your radio may be programmed to activate
monitor whenever the microphone is off the
microphone clip.
2. Press the monitor function key again to turn monitor off,
and the green LED no longer flashes.
Activating squelch override
1. Press and hold the monitor function key for longer than
one second to override both squelch and the
signalling mute.
This allows you to hear even faint and noisy signals.
2. Press the monitor function key again to return the radio
to a quiet state.
Note: Squelch cannot be overridden when the
radio is scanning.
Scanning
The scan function is used to monitor a programmed group of
channels, looking for activity. When activity is detected on a
scan group channel, the radio stops on that channel. The

Basic operation 17
English
amber LED flashes and, if the channel signalling is valid, the
radio unmutes and you can hear the call. Scanning resumes
when the channel is no longer busy or the signalling is no
longer valid.
One or two priority scan channels may be set. These channels
are scanned more often than other channels and are scanned
periodically when a non-priority channel is busy.
Activating scanning
1. Place the microphone on the microphone clip.
2. Press the function key assigned to scanning. The amber
LED glows to show that the radio is scanning.
3. Press the scanning function key again to cancel scanning,
and the amber LED no longer glows.
Nuisance delete
If a member channel of the scan group is busy for a long time
and you do not wish to hear the conversation, you can use
the function key assigned to nuisance delete to temporarily
delete it from the scan group.
Alternatively, press and hold the scanning function key.
When the scan group is next selected, the deleted channel is
again part of the scan group.
Note: Priority channels cannot be removed from the
scan group using the nuisance delete function.
Voting
A group of channels carrying the same traffic can be grouped
together in a voting group. When you press the function key
assigned to voting, the best communication channel is
always selected for you to use.
Nuisance delete
If you wish to delete one of the channels from the voting
group, you can use the function key assigned to nuisance
delete to temporarily delete it from the voting group.

18 Troubleshooting
English
Troubleshooting
Audible tones
The following table gives a list of the radio’s audible tones, in
addition to those explained on page 12.
Tone type
Meaning
one long, low-
pitched beep
radio PIN entry unsuccessful: you need to
re-enter your PIN
two short beeps radio PIN entry successful: the radio is
ready to use, or
radio is revived: the radio has made opera-
ble by your service provider
one short, high-
pitched beep
radio is stunned: the radio has been made
inoperable by your service provider
two low-pitched
beeps
radio's temperature is high: the radio's
temperature is in the high-temperature
range, but the radio will continue
to operate
two high-pitched
beeps
radio's temperature is very high: the
radio's temperature is in the very high
temperature range and all transmissions
will now be at low power; if the radio's
temperature rises outside this range,
transmissions will be inhibited
continuous low-
pitched tone
radio system error: a system error has
occurred and the radio may be inoperable
(the LCD usually displays
E
,
E1
or
E2
)
two long low-
high pitched
tone pairs
synthesizer is out-of-lock: the radio's
synthesizer is out-of-lock on the current
channel and you cannot operate on that
channel (the LCD will usually be flashing
L
or
OL
)
Other manuals for TM8100 mobiles
8
Table of contents
Languages:
Other Tait Radio manuals

Tait
Tait TM9300 User manual

Tait
Tait T2020 Series II User manual

Tait
Tait T2000 Series User manual

Tait
Tait TM9356 User manual

Tait
Tait TM8100 mobiles User manual

Tait
Tait TM9300 User manual

Tait
Tait T500 User manual

Tait
Tait TM8250 User manual

Tait
Tait TM8100 mobiles Quick start guide

Tait
Tait TP2210-H5 User manual

Tait
Tait TM9456 User manual

Tait
Tait TM9315 User manual

Tait
Tait TM9100 Series P25 User manual

Tait
Tait TM9400 User manual

Tait
Tait TM8100 mobiles User manual

Tait
Tait TM8250 User manual

Tait
Tait T2000-300 Quick start guide

Tait
Tait T2000 SERIES II User manual

Tait
Tait t2020 Installation and operating instructions

Tait
Tait TM9400 User manual