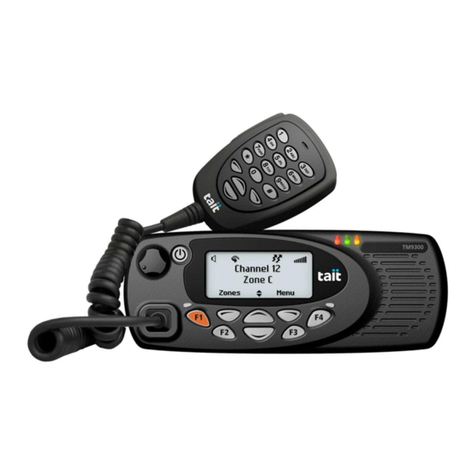
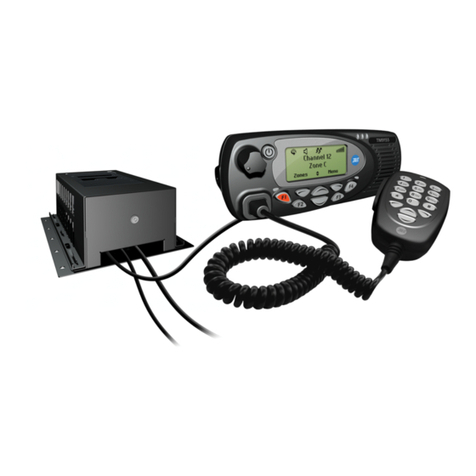
Tait TM9456 Installation guide

TM9456
Dual-Radio
Installation and
Programming Guide
MAI-03301-02-01 · Issue 1 · July 2016


TM9456 Dual-Radio Installation and Programming Guide 3
© Tait Limited July 2016
Contact Information
Corporate Head
Office
New Zealand
Tait L i m i t e d
P.O. Box 1645
Christchurch
New Zealand
For the address and telephone number of regional offices, refer to the Tait
website:
We b s i t e : www.taitradio.com
Technical Support For assistance with specific technical issues, contact Technical Support:
We b s i t e : www.support.taitradio.com
Copyright and Trademarks
All information contained in this document is the property of Tait Limited. All rights
reserved. This document may not, in whole or in part, be copied, photocopied, reproduced,
translated, stored, or reduced to any electronic medium or machine-readable form, without
prior written permission from Tait Limited.
The word TAIT and the TAIT logo are trademarks of Tait Limited.
All trade names referenced are the service mark, trademark or registered trademark of the
respective manufacturers.
Disclaimer
There are no warranties extended or granted by this document. Tait Limited accepts no
responsibility for damage arising from use of the information contained in the document or
of the equipment and software it describes. It is the responsibility of the user to ensure that
use of such information, equipment and software complies with the laws, rules and
regulations of the applicable jurisdictions.
Enquiries and Comments
If you have any enquiries regarding this document, or any comments, suggestions and
notifications of errors, please contact your regional Tait office.
Updates of Manual and Equipment
In the interests of improving the performance, reliability or servicing of the equipment, Tait
Limited reserves the right to update the equipment or this document or both without
prior notice.
Intellectual Property Rights
This product may be protected by one or more patents or designs of Tait Limited together
with their international equivalents, pending patent or design applications, and registered
trade marks: NZ409837, NZ409838, NZ415277, NZ415278, NZ508806, NZ519742 /
NZ516280 , NZ524369, NZ524509, NZ530819, NZ534475, NZ547713, NZ577009,
NZ579051, NZ579364, NZ586889, NZ610563, NZ615954, NZ700387, NZ708662,
NZ710766, NZ711325 , NZ714188, NZ593887, AU2015215962, AU339127,
AU 339391, AU2015904806, AU2016902579, EU000915475-0001, EU000915475-0002,
GB2532863, US20160044572, US20160057051, US640974, US640977, US698339,
US702666, US7758996, US7937661, US8902804, US9107231, US14/834609 Div.,
US20130010718, US20150085799, US20150350090.
This product may also be made under license under one or more of the following U.S.
Patents: 5,146,497, 5,148,482, 5,164,986, 5,185,795, 5,185,796, 5,271,017, 5,377,229 and
5,502,767.
The AMBE+2™ voice coding Technology embodied in this product is protected by
intellectual property rights including patent rights, copyrights and trade secrets of Digital
Voice Systems, Inc. This voice coding Technology is licensed solely for use within this
Communications Equipment. The user of this Technology is explicitly prohibited from
attempting to decompile, reverse engineer, or disassemble the Object Code, or in any other

TM9456 Dual-Radio Installation and Programming Guide 4
© Tait Limited July 2016
way convert the Object Code into a human-readable form. Protected by U.S. Patents
5,870,405, 5,826,222, 5,754,974, 5,701,390, 5,715,365, 5,649,050, 5,630,011, 5,581,656,
5,517,511, 5,491,772, 5,247,579, 5,226,084 and 5,195,166.
To Our European Customers
Tait Limited is an environmentally responsible company which supports waste
minimization, material recovery and restrictions in the use of hazardous
materials.
The European Union’s Waste Electrical and Electronic Equipment (WEEE)
Directive requires that this product be disposed of separately from the general
waste stream when its service life is over. For more information about how to dispose of
your unwanted Tait product, visit the Tait WEEE website at www.taitradio.com/weee.
Please be environmentally responsible and dispose through the original supplier, or contact
Tait Limited.
Tait Limited also complies with the Restriction of the Use of Certain Hazardous Substances
in Electrical and Electronic Equipment (RoHS) Directive in the European Union.
In China, we comply with the Measures for Administration of the Pollution Control of
Electronic Information Products. We will comply with environmental requirements in other
markets as they are introduced.

TM9456 Dual-Radio Installation and Programming Guide Contents 5
© Tait Limited July 2016
Contents
Preface . . . . . . . . . . . . . . . . . . . . . . . . . . . . . . . . . . . . . 7
Scope of Manual. . . . . . . . . . . . . . . . . . . . . . . . . . . . . . . . . . . . 7
Associated Documentation . . . . . . . . . . . . . . . . . . . . . . . . . . . . 8
Publication Record. . . . . . . . . . . . . . . . . . . . . . . . . . . . . . . . . . 8
Safety and Regulatory Warnings . . . . . . . . . . . . . . . . . . . . 9
RF Exposure Hazard . . . . . . . . . . . . . . . . . . . . . . . . . . . . . . . . 9
Vehicle Manufacturer’s Installation Instructions . . . . . . . . . . . . . 9
MPT 1362 Code of Practice . . . . . . . . . . . . . . . . . . . . . . . . . . .10
Safe Radio Mounting . . . . . . . . . . . . . . . . . . . . . . . . . . . . . . . .10
Interference with Vehicular Electronics . . . . . . . . . . . . . . . . . . .10
Preparation when Drilling Holes . . . . . . . . . . . . . . . . . . . . . . . .11
Vehicles Powered by Liquefied Petroleum Gas. . . . . . . . . . . . . .11
Non-standard Radio Installations. . . . . . . . . . . . . . . . . . . . . . . .11
IP54 Protection Class Considerations. . . . . . . . . . . . . . . . . . . . .12
Negative Earth Supply . . . . . . . . . . . . . . . . . . . . . . . . . . . . . . .12
1 Preparing the Installation . . . . . . . . . . . . . . . . . . . . . 13
1.1 Installation Tools . . . . . . . . . . . . . . . . . . . . . . . . . . . . . . .13
1.2 Unpacking and Checking the Equipment for Completeness 13
1.3 Hardware and Firmware Compatibility . . . . . . . . . . . . . . .15
1.4 Installation Considerations . . . . . . . . . . . . . . . . . . . . . . . . .15
1.5 Installation Overview . . . . . . . . . . . . . . . . . . . . . . . . . . . .16
1.6 Removing and Installing Grommets. . . . . . . . . . . . . . . . . .17
2 Installing a Dual-Radio System . . . . . . . . . . . . . . . . . 18
2.1 Overview of Steps Required . . . . . . . . . . . . . . . . . . . . . . .18
2.2 Checking the Firmware Versions and Software Features . . .19
2.3 Downloading Network IDs. . . . . . . . . . . . . . . . . . . . . . . .19
2.4 Installing the Radio Bodies . . . . . . . . . . . . . . . . . . . . . . . .21
2.5 Installing the Antennas . . . . . . . . . . . . . . . . . . . . . . . . . . .26
2.6 Connecting the Power Cables to a Power Source . . . . . . . .28
2.7 Connecting Remote Speakers . . . . . . . . . . . . . . . . . . . . . .31
2.8 Installing the Control Head Solution . . . . . . . . . . . . . . . . .31
2.9 Checking the Installation. . . . . . . . . . . . . . . . . . . . . . . . . .36

TM9456 Dual-Radio Installation and Programming Guide Contents 6
© Tait Limited July 2016
3 Programming a Dual-Radio System. . . . . . . . . . . . . . 37
3.1 Connecting a Dual-Radio System to a PC . . . . . . . . . . . . .38
3.2 Programming a Dual-Radio System . . . . . . . . . . . . . . . . . .38
3.3 Recommended Dual-Radio Settings . . . . . . . . . . . . . . . . .40
3.4 Upgrading Radio Firmware. . . . . . . . . . . . . . . . . . . . . . . .41
3.5 Calibrating a Dual-Radio System. . . . . . . . . . . . . . . . . . . .42
3.6 Loading Encryption Keys . . . . . . . . . . . . . . . . . . . . . . . . .42
3.7 Limitations . . . . . . . . . . . . . . . . . . . . . . . . . . . . . . . . . . . .42
3.8 Troubleshooting . . . . . . . . . . . . . . . . . . . . . . . . . . . . . . . .43
4 Quick Reference . . . . . . . . . . . . . . . . . . . . . . . . . . . 44
Glossary . . . . . . . . . . . . . . . . . . . . . . . . . . . . . . . . . . . . 45

TM9456 Dual-Radio Installation and Programming Guide 7
© Tait Limited July 2016
Preface
Scope of Manual
This manual describes the installation and programming of dual mobile
radio systems. A dual-radio system is where two radio bodies are
connected together, and then connected to a single control head.
The installation of accessories is described in the installation instructions
provided with the equipment, and the relevant section in the service
manual.
Document Conventions
Please follow exactly any instruction that appears in the text as an ‘alert’.
An alert provides necessary safety information as well as instruction in the
proper use of the product. This manual uses the following types of alert:
Warning This alert is used when there is a hazardous situation
which, if not avoided, could result in death or serious injury.
Caution This alert is used when there is a hazardous situation which,
if not avoided, could result in minor or moderate injury.
Notice This alert is used to highlight information that is required to
ensure procedures are performed correctly. Incorrectly performed pro-
cedures could result in equipment damage or malfunction.
This alert is used to highlight significant information that may be
required to ensure procedures are performed correctly, or draw your
attention to ways of doing things that can improve your efficiency or
effectiveness.
Within this manual, the following symbols are used to highlight differences
between radios with a transmit power of more than 25W and radios with a
transmit power of 25W:
This symbol highlights information that is relevant to radios with a transmit
power of 30-50W.
This symbol highlights information that is relevant to radios with a transmit
power of 25W.
25W

TM9456 Dual-Radio Installation and Programming Guide 8
© Tait Limited July 2016
Associated Documentation
The following associated documentation is available for this product:
■MAU-03046-xx TM9456 Dual-Radio Mobile Radio User’s Guide
■MMB-00004-xx TM9300/TM9400 Service Manual
■402-00101-xx T02-00073-AAAx Hand-Held Control Head
Installation Instructions
■3301A2xx TM9400 Dual Torso Programming Application
Online Help
The characters xx represent the issue number of the documentation.
Technical notes are published from time to time to describe applications for
Tait products, to provide technical details not included in manuals, and to
offer solutions for any problems that arise.
All available TM9400 product documentation is published on the Tait
support website.
Publication Record
Issue Publication Date Description
01 July 2016 First release

TM9456 Dual-Radio Installation and Programming Guide 9
© Tait Limited July 2016
Safety and Regulatory Warnings
Warning Incorrect installation of your mobile radio may cause
damage to your vehicle which may result in death or serious injury.
You must read this manual before starting the installation!
You must also read and observe the safety information on radio
operation provided in the safety and compliance information and
the user’s guide!
RF Exposure Hazard
To comply with FCC RF exposure limits:
For radios with a transmit power of 30-50W:
■VHF radios must be installed using an antenna mounted centrally on the
vehicle roof, with a gain of 2.15dBi or 5.15dBi.
■UHF and 800MHz radios must be installed using an antenna mounted
either centrally on the roof with a gain of 2.15dBi or 5.65dBi, or
centrally mounted on the trunk with a gain of 5.65dBi.
For radios with a transmit power of 25W:
■The radio must be installed using an externally mounted antenna with a
gain of either 2.15dBi or 5.15dBi.
In all cases, an antenna must not be mounted at a location such that any
person or persons can come closer than 35 inches (0.9m) to the antenna.
Health Canada
Warning Statement
The installer of this radio equipment must ensure that the antenna is located
or pointed such that it does not emit RF field in excess of Health Canada
limits for the general population; consult Safety Code 6, obtainable from
the Health Canada website http://www.hc-sc.gc.ca.
Vehicle Manufacturer’s Installation Instructions
Installation of this product in a vehicle must be performed according to the
instructions provided by the vehicle manufacturer. For more information,
refer to the vehicle manufacturer’s website or contact the vehicle
manufacturer’s dealer.
25W

TM9456 Dual-Radio Installation and Programming Guide 10
© Tait Limited July 2016
MPT 1362 Code of Practice
Mobile radios should be installed in accordance with the MPT 1362 Code
of Practice.
Safe Radio Mounting
Warning Mount the radio securely so that it will not break loose
in the event of a collision. An unsecured radio is dangerous to the
vehicle occupants.
■Mount the radio and the microphone where they will not
interfere with the deployment of passenger airbags, the
vehicle operator controls, the vehicle operator’s view.
■Do not mount the radio vertically, with the control head
facing down. This will violate compliance with the standards
UL/CSA/EN 60950, Safety of Information Technology
Equipment.
Caution The bottom surface of the radio and the heatsink fins can
become hot during prolonged operation. When installing the radio,
position the radio so that it is not possible for the radio user to touch the
bottom surface of the radio and the heatsink fins.
Interference with Vehicular Electronics
Warning Some vehicular electronic devices may be prone to
malfunction due to the lack of protection from RF energy when
your radio is transmitting.
Examples of vehicular electronic devices that may be affected by RF
energy are:
■electronic fuel injection systems
■electronic anti-skid braking systems
■electronic cruise control systems
■indicators.
If the vehicle contains such equipment, consult the vehicle manufacturer or
dealer to determine whether these electronic circuits will perform normally
when the radio is transmitting.

TM9456 Dual-Radio Installation and Programming Guide 11
© Tait Limited July 2016
Preparation when Drilling Holes
Warning When drilling holes in the vehicle, check that drilling
at the selected points will not damage existing wiring, petrol tanks,
fuel lines, brake pipes, or battery cables.
Vehicles Powered by Liquefied Petroleum Gas
Warning Radio installation in vehicles powered by LPG (lique-
fied petroleum gas) with the LPG container in a sealed-off space
within the interior of the vehicle must conform to the National Fire
Protection Association Standard NFPA 58. This standard states
that the radio equipment installation must meet the following
requirements:
■The space containing the radio equipment shall be isolated by
a seal from the space containing the LPG container and its
fitting.
■Outside filling connections shall be used for the LPG
container and its fittings.
■The LPG container space shall be vented to the outside of
the vehicle.
Non-standard Radio Installations
The installation U-bracket has been designed so that there is enough
airflow around the radio body to provide cooling.
If a non-standard installation method is used, care must be taken that
sufficient heat can be dissipated from the heatsink fins and the ridged
bottom surface of the radio.
For this to be achieved, there must be a gap of more than 3/8 inch (10 mm)
between the bottom surface of the radio chassis and the mounting surface.
This is illustrated in the following diagram:
10 mm (3/8 in.)
mounting surface

TM9456 Dual-Radio Installation and Programming Guide 12
© Tait Limited July 2016
IP54 Protection Class Considerations
A dual-radio system fulfils the requirements of the IP54 protection class.
Notice However, do not mount the radio in areas where it can be tem-
porarily submerged from an accumulation of water or other liquids (e.g.
when using a high-pressure cleaning device).
The IP54 protection class does not apply when:
■a remote interface is removed from the radio body or control head.
■the bungs are removed from the auxiliary connector or the cavity for the
external options connector (fitting an auxiliary connector or external
options connector will not restore the IP54 protection class)
■a grommet is not installed. For example, grommets on the radio
connecting cable, control-head remote cable, and microphone cord.
■adding an accessory that is not rated to IP54, for example, a control-
head interface box, or hand-held control-head remote interface box.
Negative Earth Supply
The radios are designed to operate only in a negative earth system.

TM9456 Dual-Radio Installation and Programming Guide Preparing the Installation 13
© Tait Limited July 2016
1 Preparing the Installation
This section contains the following information:
■Installation Tools
■Unpacking and Checking the Equipment for Completeness
■Hardware and Firmware Compatibility
■Installation Considerations
■Installation Overview.
1.1 Installation Tools
The following tools are required to install the radio system:
■drill and drill bits
■5mm (3/16 inch) flat-bladed screwdriver
■Torx T-10 screwdriver
■Torx T-20 screwdriver
■Pozidriv screwdriver
■8 mm (5/16 inch) socket
■wire cutters/strippers
■RF connector crimp tool
■fuse crimp tool
■in-line RF power meter capable of measuring forward and reflected
power at the operating frequency of each radio.
1.2 Unpacking and Checking the Equipment for
Completeness
To install a dual-radio system, you require the following equipment. This
equipment will usually be supplied in a mobile package like:
■TM9456-ZPJ0-AAUG-2CLB-AP: P25 Trk 136-174M 50W 762-870M
35W BNC Mic U-Crdl R6m E-Spkr Enc

TM9456 Dual-Radio Installation and Programming Guide Preparing the Installation 14
© Tait Limited July 2016
1.2.1 Mobile package example:TM9456-ZPJ0-AAUG-2CLB-AP
■2 x radio bodies; One radio body has the remote control head,
microphone and a different remote interface. One radio body has the
TDMA grounding strap.
TM9456-K5C0-AAUA-1CLB-AP P25 Trk 762-870M 35W BNC
Mic U-Crdl R6m E-Spkr Enc Dual-B 1of2
■T02-00014-XBAA TM9400 FullCrypto 35W 762-870MHz
BNC
■TMAA10-06 TM External Speaker 10W for 30-50W Radio
■TMAA03-22 Install kit BNC 30-50W U-Cradle
■T02-00071-AAAB TM9400 Large Control Head Local Black
■T02-00005-AAAA TM Standard Microphone TDMA
■T02-00009-0103 Cable Shielded 8 Core with RJ45 Grommet 6m
(20ft)
■T02-00071-CAAB TM9400 Large Control Head Primary
Remote Terminated NTID=2 Black
■T02-00081-BBAA TM93/94 Control Head Remote Body End
Multi Body Term No Bias
■TMAA04-05 Cable Ignition Sense 4m (13.12ft)
■TMAS050 SFE Key - P25 Conventional (CAI Included) (91/94)
■TMAS055 SFE Key - P25 Trunking Service (TMAS050
Prerequisite) (91/94)
■TMAS057 SFE Key - DES Encryption & Key Loading (91/94)
■TMAS058 SFE Key - AES Encryption (TMAS057 or 93
Prerequisite) (91/94)
■TMAS091 SFE Key - P25 Phase 2 Trunking (TMAS055
Prerequisite) (94)
■TMAS068 SFE Key - Multi Torso Support (91/94)
TM9456-B1C0-A0U0-1CLB-AP P25 Trk 136-174M 50W BNC
Mic U-Crdl R.6m E-Sprk Enc Dual-B 2of2
■T02-00014-PBAA TM9400 FullCrypto 50W 136-174MHz BNC
■TMAA10-06 TM External Speaker 10W for 30-50W Radio
■TMAA03-22 Install Kit BNC 30-50W U-Cradle
■T02-00009-0101 Cable Shielded 8 Core with RJ45 Grommet
0.6m (2ft)
■T02-00081-BAAA TM93/94 Control Head Remote Body End
Multi Body Terminated+Bias
■TMAA04-05 Cable Ignition Sense 4m (13.12ft)
■TMAS050 SFE Key - P25 Conventional (CAI Included) (91/94)
■TMAS057 SFE Key - DES Encryption & Key Loading (91/94)
■TMAS058 SFE Key - AES Encryption (TMAS057 or 93
Prerequisite) (91/94)
■TMAS068 SFE Key - Multi Torso Support (91/94)

TM9456 Dual-Radio Installation and Programming Guide Preparing the Installation 15
© Tait Limited July 2016
■219-03736-00 CBL assy earth M4-M4 lug 500mm
■345-00071-00 SCRW M4x10 P/H T20+slt BZ T/T
External speakers are optional if a graphical control head with a speaker
is used. External speakers with some spatial seperation are useful in a
dual-radio configuration to help confirm which torso is receiving.
An ignition sense cable is optional.
Warning Danger of fire. The radio’s protection mechanisms rely
on the correct fuses on both the negative and positive power supply
leads being present. Failure to fit the correct fuses may result in fire
or damage to the radio.
The correct fuse types are:
■>25W radios: 20A fuses (Tait IPN 265-00010-81)
■25W radios: 10A fuses (Tait IPN 265-00010-80).
■2 x antennas*appropriate for your radio frequency band or bands, and
antenna coaxial cable1.
1.3 Hardware and Firmware Compatibility
■Control head firmware QCB1F_S00-33.01.xx.0000
■Handheld Control head firmware QCB2F_S00_33.01.xx.0000
■DSP firmware: this must match the version of 33.01.xx.0000 firmware
supplied
■Radio firmware QMB1F_A00_33.01.xx.0000
■TM9400 Dual Torso programming application 3301A2xx
‘xx’ denotes the current version.
1.4 Installation Considerations
Inspect the vehicle and determine the safest and most convenient position
for mounting the radio bodies and control head, and routing the various
cables.
Notice The radio bodies must be less than 0.5m (1.6ft.) apart.
Caution If using accessories that do not provide IP54 protection (for
example, control-head interface box, or hand-held control head remote
interface box), a mounting position away from water, dust, and other
environmental hazards should be selected.
1. Not included in a typical dual-radio package. This equipment may need to
be obtained or ordered separately.
25W>25W

TM9456 Dual-Radio Installation and Programming Guide Preparing the Installation 16
© Tait Limited July 2016
1.5 Installation Overview
Figure 1.1 summarizes how the components in a dual-radio system are
installed. For more detailed instructions, see “Installing a Dual-Radio
System” on page 18.
Figure 1.1 TM9456 dual body installation overview
bexternal speaker (one per
torso)
jradio body
cspeaker flying lead connector 1) body remote interface with
link J4 removed (T02-00081-BBAA)
dBody to body ground
connection
1! to control head, such as graphical-
display (see example) or hand-held
eradio body
fbody remote interface with
link J4 fitted (T02-00081-
BAAA)
Control head example:
ggrommet 1@ control head remote cable
hradio connecting cable 1# control head remote interface
iother connectors, for
example, to GPS receiver,
external alert device, ignition
signal. Applies to both bodies
1$ graphical-display control head
1% supported microphone
ej
f
h
1@
1#
1$
to antenna to second antenna
to power supply to power supply
other
connectors I
to speaker bto speaker b
1%
g
optional
required
1)
c
1!
Control head example
Notice The configuration shown must be
followed to ensure proper functionality.
d
VHF NTID 3 UHF NTID 1
NTID 2

TM9456 Dual-Radio Installation and Programming Guide Preparing the Installation 17
© Tait Limited July 2016
Notice The dual body solution will only operate as a system. The cor-
rect radio body interface must be connected to the corresponding radio,
and both radios and body remote interfaces must be connected before
the system will operate.
1.6 Removing and Installing Grommets
Grommets ensure that the radio system and all connections are sealed
against water, dust and other environmental hazards. A dual-radio system
requires a grommet in the unused remote-interface port (item g in
Figure 1.2 on page 17). A dual-radio system also requires all cable
grommets to be installed.
Removing a
grommet
1. Using your thumb or forefinger, lift up one of the corners of the
microphone grommet. Firmly (but gently) pull that corner until the
seal comes away from the cavity. See Figure 1.2.
Figure 1.2 Removing a grommet
2. Repeat to expose another corner.
3. Pull the exposed corners back and remove the grommet.
4. If removing a cable grommet, slide the grommet along the cable to
reveal the plug.
Installing grommets 1. If installing a cable grommet, slide the grommet along the cable.
2. Push two adjacent corners of the grommet into the socket cavity.
3. Squeeze the grommet and push the remaining corners into position.
4. Check that the grommet is seated correctly in the cavity. See
Figure 1.3.
Figure 1.3 Correct seating when installing a grommet
grommet

TM9456 Dual-Radio Installation and Programming Guide Installing a Dual-Radio System 18
© Tait Limited July 2016
2 Installing a Dual-Radio System
This section describes how to install all components in a dual-radio system,
including downloading NTIDs and removing link J4, installing the radio
bodies and control head, connecting the radio system to a power source,
and installing antennas and remote speakers.
2.1 Overview of Steps Required
Before you start, make sure you have all the necessary tools and
components. See page 13 for more information.
1. Check that the all devices in the radio system have the same
firmware, and the radio bodies have the necessary software features.
See “Checking the Firmware Versions and Software Features” on
page 19.
2. Download Network IDs to all devices in the system. See
“Downloading Network IDs” on page 19.
3. Remove link J4 from the radio body interface that will be connected
to the control head. See “Removing Link J4” on page 21.
4. Assemble the body interfaces. See “Assembling the Body Remote
Interfaces” on page 22.
5. Mount the radio bodies. See “Mounting the Radio Bodies” on
page 23.
6. Install the radio connecting cable. See “Installing the Radio
Connecting Cable” on page 24.
7. Install the antennas. See “Installing the Antennas” on page 26.
8. Connect the radios to a power source. See “Connecting the Power
Cables to a Power Source” on page 28.
9. Connect remote speakers (see “Connecting Remote Speakers” on
page 31).
10. Install the control head or heads. See “Installing the Control Head
Solution” on page 31.
11. Install the fuses and check the installation. See “Checking the
Installation” on page 36.

TM9456 Dual-Radio Installation and Programming Guide Installing a Dual-Radio System 19
© Tait Limited July 2016
2.2 Checking the Firmware Versions and Software
Features
Check that the firmware version of all devices (radio bodies and control
head) is the same. If not, upgrade the appropriate devices by connecting the
control head directly to a radio body. For the firmware version and
programming application version to use, see “Hardware and Firmware
Compatibility” on page 15. For more information, click the Help [?] button
from the programming application’s Download dialog (Tools >
Download).
Check that both radio bodies have the software feature for Multi-Body
Support enabled (default factory configuration). For more information,
click the Help button from the programming application’s Optional
Features dialog (Tools > Optional Features).
2.3 Downloading Network IDs
The Head and Bodies forming the radio system must have a unique NTID
(Network ID) to successfully operate together. The following outlines the
NTID requirements for a dual body, single control head system.
If a dual body radio system has been ordered as a factory kit the NTIDs
will be correctly pre-configured.
The “Duplicate MAC Address” error indicates a problem with NTID
configuration.
If both devices have a standard configuration, the only required change
is to switch the VHF body NTID from 1 to 3.
NTIDs can only be set with a single body connected to the control head.
If connecting using the body remote interface, only the T02-00081-
BAAA interface can be used. This interface has bias fitted.
Note Only items for connected devices will be displayed.
12. For each body requiring an NTID update, connect the control head
(the T02-00081-BAAA remote interface must be used) and apply
power.
Figure 2.1 Example of NTID configuration values
Type Name NTID Priority
Head (TMACxx) Head 2 2
Body (TMBBxx) VHF Radio 3 3
Body (TMBBxx) UHF Radio 1 1

TM9456 Dual-Radio Installation and Programming Guide Installing a Dual-Radio System 20
© Tait Limited July 2016
Notice Connect one radio body at a time. Do not attempt to down-
load NTIDs if both radio bodies are connected together and have power
applied.
13. Connect the control head microphone port to your PC.
14. Download NTID data.
15. Amend the NTID data as required.
16. Upload the NTID data.
17. Check that all required indicators are green.
Other manuals for TM9456
1
Table of contents
Other Tait Radio manuals

Tait
Tait TM8260 User manual

Tait
Tait TM9155 User manual

Tait
Tait T2000-300 Quick start guide

Tait
Tait TM9100 User manual

Tait
Tait TM8200 mobiles User manual

Tait
Tait T8000 Quick start guide

Tait
Tait TM9100 Series P25 User manual

Tait
Tait TM9300 User manual

Tait
Tait TM8100 mobiles User manual

Tait
Tait TM9400 User manual