manuals.online logo
Brands
  1. Home
  2. •
  3. Brands
  4. •
  5. TE Connectivity
  6. •
  7. Tools
  8. •
  9. TE Connectivity 1725062-1 User manual

TE Connectivity 1725062-1 User manual

TE PRODUCT
PART NUMBER DESCRIPTION
1479245-1 CONNECTING BLOCK ASSEMBLY, 4 Pair
1479246-1 CONNECTING BLOCK ASSEMBLY, 5 Pair
1479247-1 WIRING BLOCK ASSEMBLY, 50 Pair with Mounting Legs
1479248-1 WIRING BLOCK ASSEMBLY, 100 Pair with Mounting Legs
1479249-1 WIRING BLOCK ASSEMBLY, 300 Pair with Mounting Legs
1479250-1 WIRING BLOCK ASSEMBLY, 50 Pair without Mounting Legs
1479251-1 WIRING BLOCK ASSEMBLY, 100 Pair without Mounting Legs
1479252-1 KIT, 50 Pair with Mounting Legs and 4 Pair Connecting Blocks
1479253-1 KIT, 50 Pair with Mounting Legs and 5 Pair Connecting Blocks
1479254-1 KIT, 100 Pair with Mounting Legs and 4 Pair Connecting Blocks
1479255-1 KIT, 100 Pair with Mounting Legs and 5 Pair Connecting Blocks
1479256-1 KIT, 300 Pair with Mounting Legs and 4 Pair Connecting Blocks
1479257-1 KIT, 300 Pair with Mounting Legs and 5 Pair Connecting Blocks
1479258-1 FRAME KIT, 300 Pair, with 4 Pair Connecting Blocks
1479259-1 FRAME KIT, 300 Pair, with 5 Pair Connecting Blocks
1479260-1 FRAME KIT, 900 Pair, with 4 Pair Connecting Blocks
1479261-1 FRAME KIT, 900 Pair, with 5 Pair Connecting Blocks
1479262-1 PANEL ASSEMBLY, Wiring Block, 100 Pair
1479263-1 PANEL ASSEMBLY, Wiring Block, 200 Pair
1479264-1 PANEL ASSEMBLY, Wiring Block, 400 Pair
Wire
Inserter Cut Blade
Insert
Impact
Handle
Holder
©2011 Tyco Electronics Corporation, a TE Connectivity Ltd. Company
All Rights Reserved
*Trademark
TE Connectivity, TE connectivity (logo), and TE (logo) are trademarks. Other logos, product and/or Company names may be trademarks of their respective owners.
1of 3
Instruction Sheet
TOOLING ASSISTANCE CENTER
1-800-722-1111

PRODUCT INFORMATION
1-800-522-6752
This controlled document is subject to change.
For latest revision and Regional Customer Service,
visit our website at www.te.com LOC B
408-8852

4-Pair Punch Down Tool 1725062-1 22 AUG 11 Rev A
PROPER USE GUIDELINES
Cumulative Trauma Disorders can result from the prolonged use of manually powered hand tools. Hand tools are intended for occasional use
and low volume applications. A wide selection of powered application equipment for extended-use, production operations is available.
Figure 1
1. INTRODUCTION
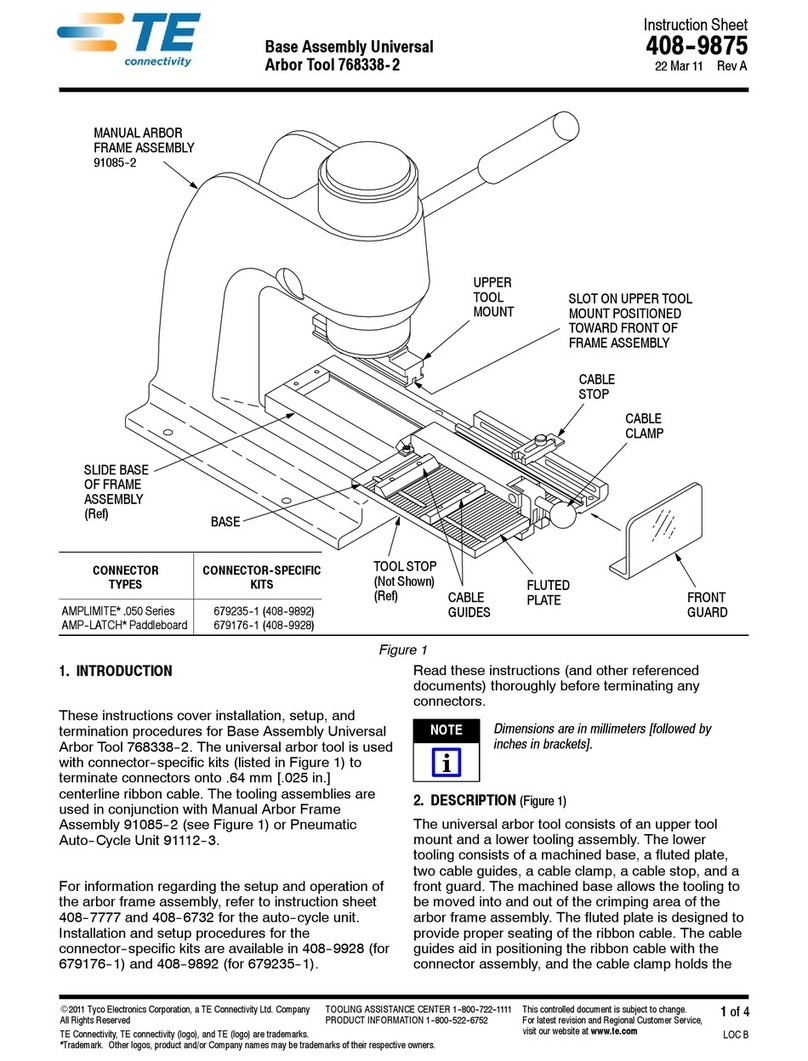
The 4-Pair Punch Down Tool 1725062-1 shown in
Figure 1 is used to insert and trim wire with the
110Connect XC Category 6 connecting blocks, wiring
blocks, and kits listed in Figure 1. The tool is also used
to install the connecting block to the index strip of the
wiring block. For more information on the installation
of connecting blocks and wiring blocks, refer to
instruction sheet 408-8823.
2. DESCRIPTION
The 4-Pair Punch Down Tool is equipped with an
impact mechanism to provide the force required to
insert and trim 4 pairs of wire at once. The tool is also
equipped with a reversible cut blade if the wires are
not to be trimmed.
DANGER
STOP
The 4-Pair Punch Down Tool contains a sharp
cutting blade. Improper use of tool may result in
damage to the tool or bodily injury.
3. CONNECTING BLOCK INSTALLATION PROCEDURE
Installation of the connecting block to the index strip
may be made easier through the use of the 4-Pair
Punch Down Tool. Refer to Figure 2.
4. INSERTING AND TRIMMING WIRE PROCEDURE
1. Hand lace each wire into the appropriate slot on
the connecting block or index strip.
2. Align the inserter blades on the tool with the
wires.
Connecting Block
Punch Down Tool
Index Strip
408-8852
2of 3
Rev A
Figure 2
3. Carefully slide the tool into place over the
connecting block or index strip. Refer to Figure 2.
CAUTION
!
Care should be taken to make sure the tool is
located correctly to prevent damage to the
connecting block or index strip. Damaged products
should not be used.
NOTE
i
If cutting, be sure to verify the cut blade is in the
proper position in the tool and is oriented correctly
with the connecting block or index strip. An arrow
similar to the one shown in Figure 3 indicates the
cut blade location.
4. With the tool located properly, press down on the
handle until the impact mechanism releases.
NOTE
i
Multiple tries may be required if all wires were not
trimmed at start of procedure.
Punch Down Tool
Arrow
Figure 3
5. SWITCHING CUT BLADE ORIENTATION
1. To switch cut blade orientation, pull the head off
the main handle body.
2. Slide the cut blade insert and the wire inserter out
of the holder.
3. Flip the cut blade insert.
4. Slide the cut blade insert and wire inserter back
into the holder.
NOTE
i
Be sure to center the cut blade insert and wire
inserter in the handle inserts.
5. Re-install the handle.
NOTE
i
f the cut blade insert and wire inserter are not
properly centered, the handle can not be installed
correctly. The handle prevents the inserts from
coming out during normal operations.
6. REPLACEMENT/REPAIR
If replacement parts are needed for the Punch Down
Tool, refer to Figure 4 for specific replaceable
components.
A complete inventory should be stocked and
controlled to prevent lost time when replacement of
parts is necessary. Order replacement parts through
your TE representative, or call 1-800-526-5142, or
send a facsimile of your purchase order to
717-986-7605, or write to:
CUSTOMER SERVICE (038-035)
TYCO ELECTRONICS CORPORATION
PO BOX 3608
HARRISBURG PA 17105-3608
For customer repair service, please contact a TE
representative at 1-800-526-5136.
7. REVISION SUMMARY
Revisions to this instruction sheet include:
•Changed company name and logo
ITEM NUMBER DESCRIPTION TE PART NUMBER QTY PER TOOL
1Handle Assembly 1725067-1 1
2Cut Blade Insert 1725064-1 1
3Wire Inserter 1725063-1 1
408-8852
3of 3
Rev A
Figure 4

Other TE Connectivity Tools manuals

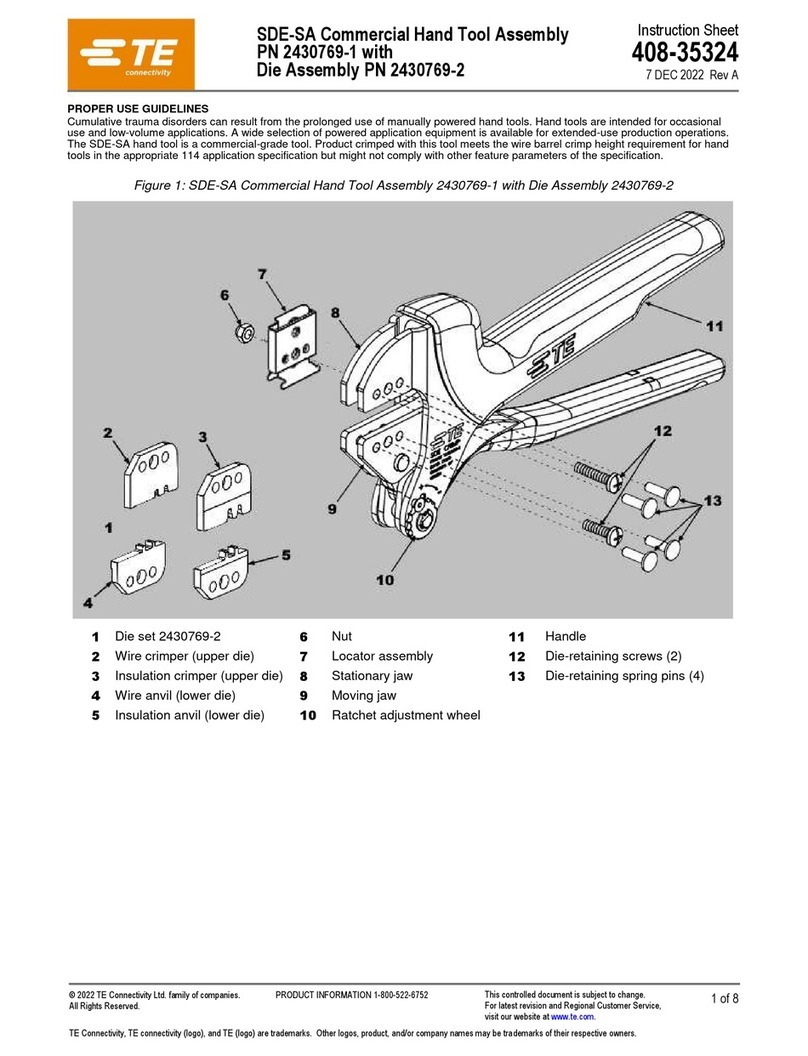
TE Connectivity SDE-SA User manual

TE Connectivity

TE Connectivity SDE-SA User manual

TE Connectivity 2215038-1 User manual

TE Connectivity

TE Connectivity 2215038-1 User manual

TE Connectivity 2255140-1 User manual

TE Connectivity

TE Connectivity 2255140-1 User manual

TE Connectivity 2430769-1 User manual

TE Connectivity

TE Connectivity 2430769-1 User manual

TE Connectivity 768338-2 User manual

TE Connectivity

TE Connectivity 768338-2 User manual

TE Connectivity 90331- 1 User manual

TE Connectivity

TE Connectivity 90331- 1 User manual

TE Connectivity HT11K User manual

TE Connectivity

TE Connectivity HT11K User manual

TE Connectivity SDE-SA User manual

TE Connectivity

TE Connectivity SDE-SA User manual

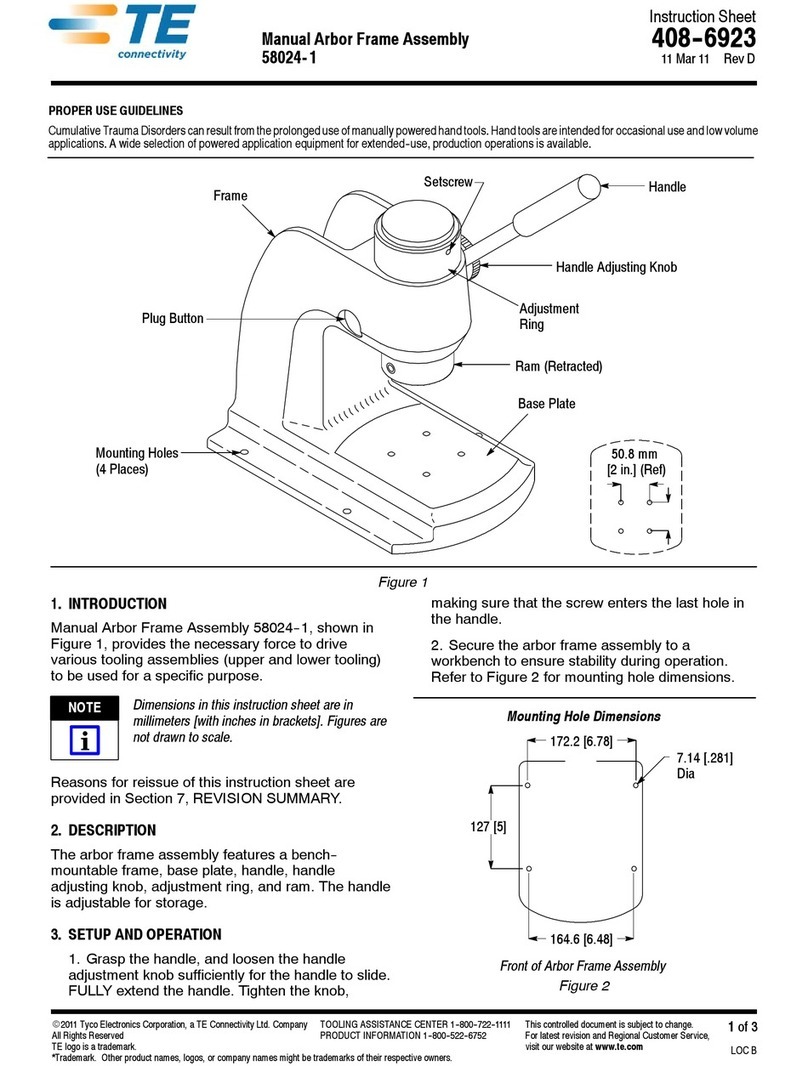
TE Connectivity 58024-1 User manual

TE Connectivity

TE Connectivity 58024-1 User manual

TE Connectivity CXP 2018681-1 User manual

TE Connectivity

TE Connectivity CXP 2018681-1 User manual

TE Connectivity 58372- 1 User manual

TE Connectivity

TE Connectivity 58372- 1 User manual

TE Connectivity CERTI-CRIMP II Reference guide

TE Connectivity

TE Connectivity CERTI-CRIMP II Reference guide

TE Connectivity ERGOCRIMP 6-1579014-1 User manual

TE Connectivity

TE Connectivity ERGOCRIMP 6-1579014-1 User manual

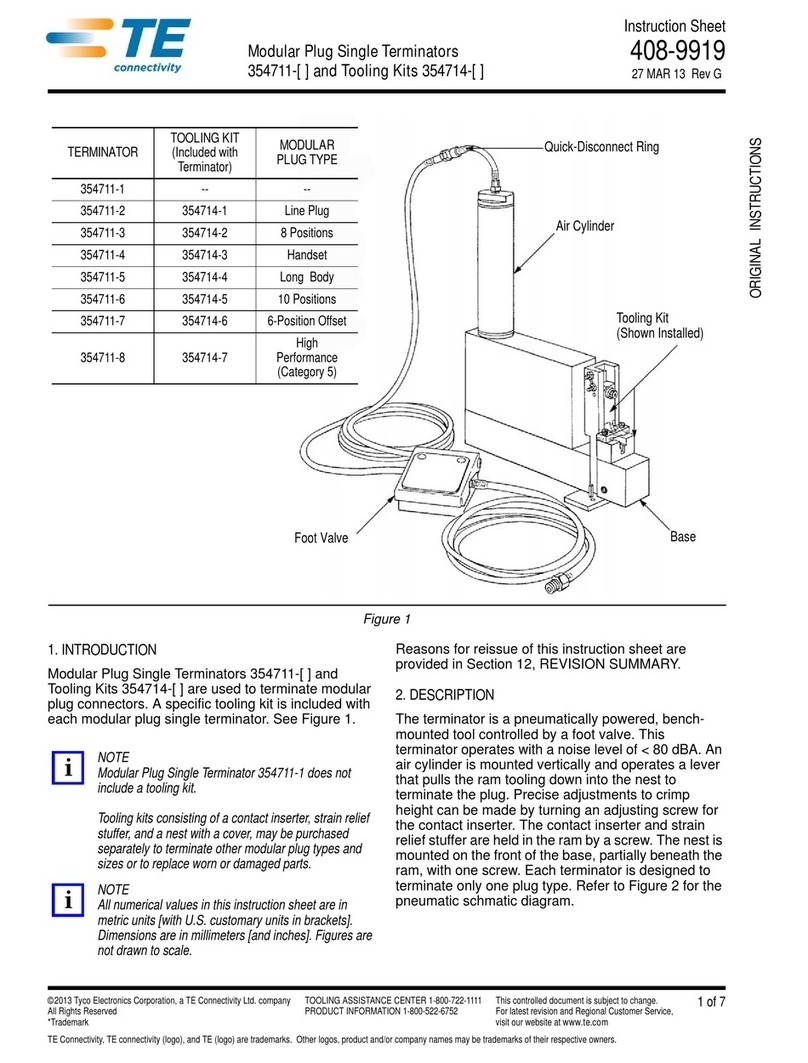
TE Connectivity 354711-1 User manual

TE Connectivity

TE Connectivity 354711-1 User manual

TE Connectivity PRO-CRIMPER III User manual

TE Connectivity

TE Connectivity PRO-CRIMPER III User manual

TE Connectivity CERTI- LOK Hand Tool Frame Assembly 169400 User manual

TE Connectivity

TE Connectivity CERTI- LOK Hand Tool Frame Assembly 169400 User manual

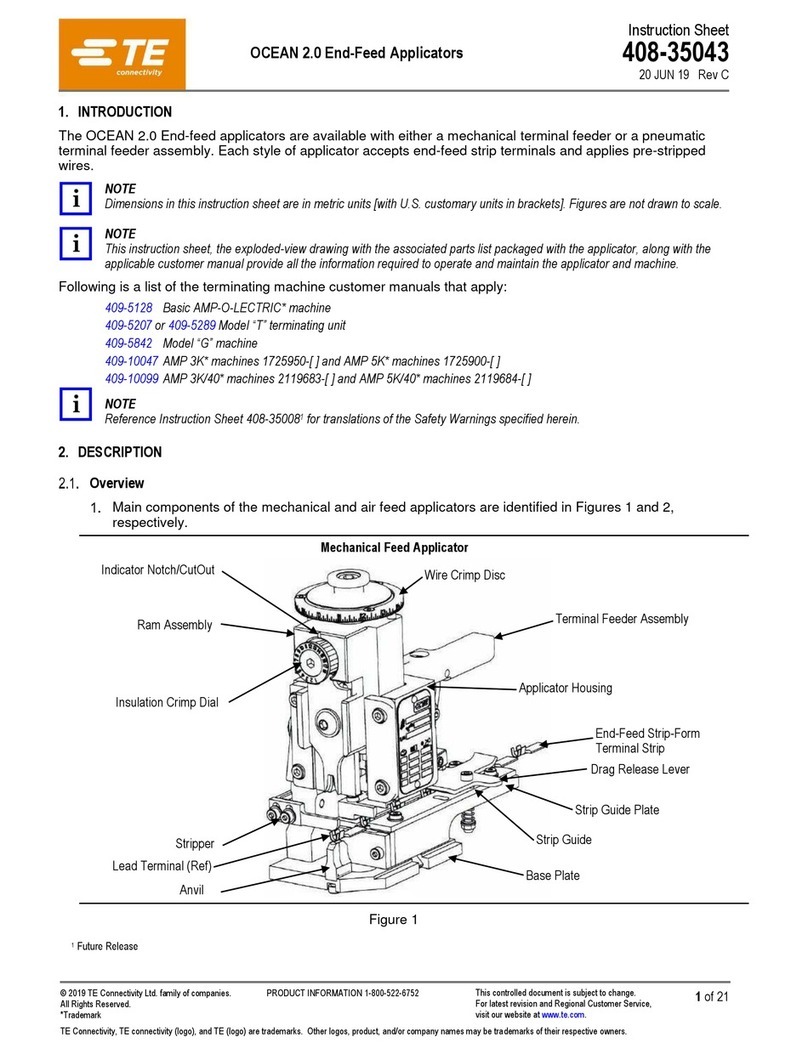
TE Connectivity OCEAN 2.0 User manual

TE Connectivity

TE Connectivity OCEAN 2.0 User manual

TE Connectivity 2379255-1 User manual

TE Connectivity

TE Connectivity 2379255-1 User manual

TE Connectivity 2255143-1 User manual

TE Connectivity

TE Connectivity 2255143-1 User manual

TE Connectivity TERMI-POINT 59865-1 Reference guide

TE Connectivity

TE Connectivity TERMI-POINT 59865-1 Reference guide

TE Connectivity 734185-1 User manual

TE Connectivity

TE Connectivity 734185-1 User manual

TE Connectivity Ocean 1.0 User manual

TE Connectivity

TE Connectivity Ocean 1.0 User manual

Popular Tools manuals by other brands

Stihl BGA 86 instruction manual

Stihl

Stihl BGA 86 instruction manual

Esco Pro Series operating instructions

Esco

Esco Pro Series operating instructions

Casa Systems CTL-2000 user guide

Casa Systems

Casa Systems CTL-2000 user guide

Gardena 2691 Assembly instructions

Gardena

Gardena 2691 Assembly instructions

Fein GSZ4-280EL instruction manual

Fein

Fein GSZ4-280EL instruction manual

Alemlube HR90000 Series Owner technical manual

Alemlube

Alemlube HR90000 Series Owner technical manual

Oliver 6510 owner's manual

Oliver

Oliver 6510 owner's manual

Saker GJ22243-E001 instruction manual

Saker

Saker GJ22243-E001 instruction manual

Atlas Copco P2530-H Safety information

Atlas Copco

Atlas Copco P2530-H Safety information

TREND KWJ750P Original instructions

TREND

TREND KWJ750P Original instructions

Facom DT.VAG instruction manual

Facom

Facom DT.VAG instruction manual

Emerson Roxar user manual

Emerson

Emerson Roxar user manual

molex 57147-6000 operating manual

molex

molex 57147-6000 operating manual

Astro Pneumatic 40SL quick start guide

Astro Pneumatic

Astro Pneumatic 40SL quick start guide

REED Double Squeeze PE user manual

REED

REED Double Squeeze PE user manual

Hitachi W 6VA4 parts list

Hitachi

Hitachi W 6VA4 parts list

JessEm Rout Lift FX 02302 user manual

JessEm

JessEm Rout Lift FX 02302 user manual

KNIPEX 12 62 180 operating instructions

KNIPEX

KNIPEX 12 62 180 operating instructions

manuals.online logo
manuals.online logoBrands
  • About & Mission
  • Contact us
  • Privacy Policy
  • Terms and Conditions

Copyright 2025 Manuals.Online. All Rights Reserved.