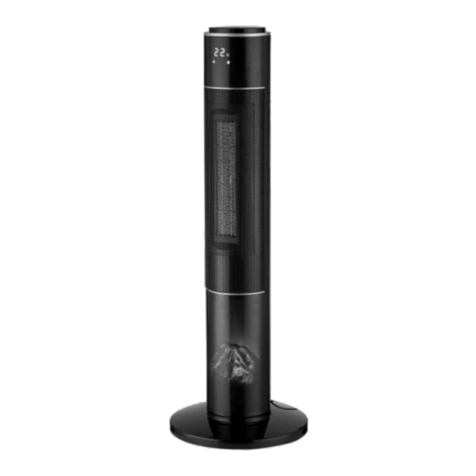
Teesa TSA8037-2 User manual

Electric oil heater
TSA8037-2
DE
CS
EN
GR
PL
RO
SK
Instrukcja obsługi
Manual de utilizare
Owner’s manual
Εγχειρίδιο χρήσης
Návod na použitie
Bedienungsanleitung
Návod k obsluze


CS DE EN GR PL RO SK
Úchyt Gri Handle Λαβή Uchwyt Mâner Úchyt na
prenášanie
LCD displej LCD Display LCD display Οθόνη LCD Wyświetlacz LCD Ecran LCD LCD displej
Tlačítko MODE Taste MODUS
[MODE] MODE button Κουμπί MODE Przycisk MODE Buton MOD Tlačidlo MODE
Tlačítko °C/°F °C/°F
Auswahltaste °C/°F button Κουμπί °C/°F Przycisk °C/°F Buton °C/°F Tlačidlo °C/°F
Tlačítko - Taste - - button Κουμπί - Przycisk - Buton - Tlačidlo -
Knoík napájení Netztaste Power button Πλήκτρο ισχύος Przycisk zasilania Buton alimentare Tlačidlo napájania
Tlačítko + Taste + + button Κουμπί + Przycisk + Buton + Tlačidlo +
Úložný prostor pro
kabel Kabelaufbewahrung Cord storage Αποθήκευση
καλωδίου
Schowek na
przewód
Suport pentru
cablu
de alimentare
Úložný priestor na
kábel
Kolečka Rollen Castors Τροχοί Kółka Roți pentru
6 deplasare Kolieska
1
2
4
5
6
7
8
9
3
8
9
3
5
46
7
1
2

CS
Návod k obsluze4
Děkujeme, že jste si koupili zařízení TEESA. Před použitím si pečlivě přečtěte uživatelskou
příručku a uložte ji pro pozdější použití. Výrobce neodpovídá za nesprávné používání a
provoz tohoto zařízení.
OTÁZKY BEZPEČNOSTI
Aby nedošlo k poškození nebo zranění, dodržujte základní bezpečnostní opatření
používaná k provozu elektrických zařízení, včetně následujících:
• Před použitím si pečlivě přečtěte návod k obsluze, a to i v případě, že jste dříve používali
podobné zařízení.
• Zařízení nepoužívejte k jiným účelům, než je popsáno v níže uvedeném návodu.
• Před připojením zařízení zkontrolujte kompatibilitu napájecího napětí síťové zásuvky a
zařízení.
• Zařízení vždy vypněte a odpojte od napájení:
• pokud přístroj nefunguje správně,
• pokud zvuky činnosti zařízení nejsou standardní nebo indikují anomálie,
• před demontáží,
• před čištěním,
• před prováděním servisních činností.
• Upozornění: Při prvním použití může zařízení vydávat specický zápach z topných prvků
a izolace – je to normální jev.
• Během prvního použití, nebo pokud je radiátor zapnutý po dlouhém období nepoužívání,
může přístroj vydávat různé zvuky – to je normální jev, který po chvíli přestane.
• Při odpojování zařízení od zdroje napájení uchopte a zatáhněte za zástrčku, nikdy za
kabel / vodič.
• Umístěte zařízení na plochý, stabilní a tepelně odolný povrch. Zařízení by mělo být
používáno pouze ve svislé poloze. Nenechávejte zařízení během provozu bez dozoru.
• Uchovávejte zařízení a napájecí kabel mimo dosah tepla, vody, vlhkosti, ostrých hran a
dalších faktorů, které by mohly poškodit toto zařízení nebo kabel.
• Nepoužívejte zařízení mokrýma rukama. Zařízení neponořujte do vody nebo jiné
tekutiny, ani jej nepoužívejte ve vlhkém prostředí. Nepoužívejte zařízení v blízkosti vany,
sprchy nebo bazénu! Zařízení není vhodné pro použití v koupelně!
• Nepoužívejte zařízení v blízkosti hořlavých nebo výbušných látek nebo v místech, kde se
používají laky nebo lepidla.
• Nezakrývejte ani neblokujte vstupy a výstupy vzduchu (nebezpečí přehřátí). Ujistěte se,
že nejsou žádné překážky alespoň 1 metr od vstupu / výstupu vzduchu. Nepokládejte
ohřívač přímo u stěny, nábytku, záclon atd. Umístěte zařízení na místo s řádnou cirkulací
vzduchu.
• Radiátor neslouží k sušení tkanin / oděvů.
• Nepoužívejte toto zařízení v prostorách s plochou menší než 5 m2.
• Neumisťujte toto zařízení přímo pod síťovou zásuvkou.
• Nepoužívejte zařízení na prašném místě.
• Zařízení by mělo být skladováno na čistém, chladném a suchém místě. Před uskladněním
se ujistěte, že se teplota zařízení již vrátila na původní hodnotu.
• Zařízení uchovávejte na místě nedostupném dětem. Je zakázáno, aby zařízení používaly
děti bez dohledu dospělých.
• Chraňte zařízení před pádem.

Návod k obsluze 5
CS
• Toto zařízení smí používat děti mladší 8 let a osoby s omezenými fyzickými, smyslovými
nebo duševními schopnostmi, stejně jako osoby, které nemají žádné zkušenosti a nejsou
seznámeny se zařízením, pokud je zajištěn dohled nebo školení týkající se používání
zařízení takovým způsobem, aby rizika s ním spojená byla srozumitelná. Je nutné poučit
děti, aby zařízením nepovažovaly za hračku. Děti by neměly provádět čištění a údržbu
zařízení bez dozoru.
• Důležité! Kryt zařízení může během provozu zvýšit teplotu (zejména mřížka pro výstup
vzduchu). Děti a zvířata by měly být pod dozorem, pokud je ohřívač v provozu.
• Síťový kabel neveďte pod radiátorem nebo v blízkostí výstupů / vstupů vzduchu.
• Do větracích otvorů zařízení nevkládejte žádné předměty.
• Vždy odpojte zařízení od zdroje napájení, pokud se nepoužívá.
• Je-li napájecí kabel poškozen nebo zařízení nefunguje správně, je zakázáno jej používat.
• Je zakázáno samostatně opravovat zařízení. Zařízení mohou opravit pouze autorizované
a kvalikované osoby. Je zakázáno zařízení rozebírat.
• Radiátor byl předem naplněn odpovídajícím množstvím oleje. V případě úniku oleje se
obraťte na autorizované servisní středisko za účelem opravy. Je zakázáno samostatně
opravovat zařízení.
• Neodpojitelný napájecí kabel lze vyměnit pouze v autorizovaném servisním středisku.
• Zařízení je určeno pouze pro domácí použití. Výrobek není určen pro komerční použití.
• Zařízení čistěte podle pokynů uvedených v části “Čištění” a “Skladování”. Radiátor by
měl být udržován v čistotě. Je třeba dbát na to, aby se do vstupních / výstupních mřížek
nedostaly žádné předměty, protože by to mohlo způsobit požár nebo poškození zařízení.
MONTÁŽ KOLEČEK
Před použitím namontujte do korpusu radiátoru přiložená kolečka.
1. Umístěte radiátor spodní částí nahoru, na rovný, stabilní povrch.
2. Umístěte upevnění koleček mezi první a druhé žebro (u předního panelu) a mezi
poslední a předposlední žebro.
3. Připevněte je k radiátoru pomocí upevňovacích šroubů ve tvaru písmene U a křídlových
matic.
4. Utáhněte křídlové matice.
Poznámka: Matice nedotahujte příliš silně!
5. Umístěte radiátor na kolečka.
UPOZORNĚNÍ:
• Nezapínejte radiátor bez namontovaných koleček.
• Radiátor by měl být používán pouze ve svislé poloze (kolečky dolů); jiné použití může
představovat riziko.

CS
Návod k obsluze6
OBSLUHA
Upozornění: Pokud je zařízení odpojeno od napájení, restartuje se s výchozím nastavením,
tedy třetím stupněm ohřevu, 24°C. Zařízení se spustí s posledním zapamatovaným
nastavením, pokud nebylo předtím odpojeno od napájení.
Nastavení výkonu ohřevu
1. Stiskněte tlačítko MODE. Zařízení zapípá a začne ohřívat na vysoké úrovní výkonu .
Při zachování tohoto nastavení bude ohřívač pracovat na vysoké úrovni výkonu, dokud
nebude zařízení vypnuto nebo dokud nebude překročena hodnota nastavené teploty.
V tomto případě bude vytápění zastaveno a obnoveno v okamžiku, kdy bude pokojová
teplota nižší než nastavená teplota.
2. Stiskněte a podržte tlačítko MODE. Zařízení zapípá a začne ohřívat na střední výkon
. Při zachování tohoto nastavení bude ohřívač pracovat na středním nastavení, dokud
nebude zařízení vypnuto nebo dokud nebude překročena hodnota nastavené teploty.
V tomto případě bude vytápění zastaveno a obnoveno v okamžiku, kdy bude pokojová
teplota nižší než nastavená teplota.
3. Stiskněte a podržte tlačítko MODE. Zařízení zapípá a začne ohřívat při nízkém výkonu .
Při zachování tohoto nastavení bude ohřívač pracovat na nízkém výkonu, dokud nebude
zařízení vypnuto nebo dokud nebude překročena hodnota nastavené teploty. V tomto
případě bude vytápění zastaveno a obnoveno v okamžiku, kdy bude pokojová teplota
nižší než nastavená teplota.
Upozornění: Při nízkém nastavení vytápění nebude zařízení poskytovat příliš mnoho topného
výkonu, ale spotřeba energie bude nižší. Aby nedošlo k přetížení, nepřipojujte ohřívač k
elektrické zásuvce, ke které jsou již připojena jiná zařízení.
Nastavení teploty (teplotní kompenzace 15 stupňů)
1. Když zařízení je zapnuté stiskněte tlačítka + a - pro nastavení teploty (rozsah teplot
13 °C až 30 °C).
2. Po dosažení nastavené teploty se zařízení vypne.
3. Pokud je teplota v místnosti nižší než nastavená teplota, ohřívač se automaticky zapne.
Nastavení jednotky teploty
1. Teplota se zobrazuje pouze na displeji nastavení topného výkonu a teploty.
2. Stisknutím tlačítka °C/°F vyberte jednotku teploty.
Nastavení časovače (automatické vypnutí)
Při použití této funkce bude ohřívač pracovat po stanovenou dobu (od 1 do 24 hodin) a poté
se automaticky vypne.
Upozornění: Nastavení teploty před nastavením časovače způsobí, že ohřívač se vypne,
když dosáhne nastavené teploty.
1. Stiskněte tlačítko MODE, dokud nezačne blikat ikona časovače. * Na displeji se zobrazí
ikona času a automatického vypnutí.

Návod k obsluze 7
CS
2. Pomocí tlačítek + a - nastavte časovač (v rozsahu od 0 do 24 hodin). Když ikona časovače
přestane blikat, časovač se aktivuje. Střídavě se zobrazují obrazovky odpočítávání a
ohřevu.
3. Po uplynutí nastaveného času se zařízení automaticky vypne.
Upozornění: Pokud nastavíte teplotu před nastavením časovače se ohřívač bude zapínat a
vypínat, aby byla udržena nastavená teplota, a po uplynutí nastaveného času se zcela vypne
(výchozí nastavení je 0 hodin).
* Pokud uživatel po dobu 5 sekund neprovede žádné změny, zařízení tento displej nastavení
automaticky uzavře.
Nastavení časovače (automatické vypnutí)
Existují dva možné způsoby:
1. Zařízení odpojeno a poté znovu připojeno ke zdroji napájení
Když je jednotka vypnutá, stiskněte tlačítko MODE, jednotka přejde na obrazovku nastavení
automatického zapnutí (rozsah nastavení od 0 do 24 hodin). Pokud uživatel po dobu 5
sekund neprovede žádné změny, zařízení tento displej nastavení automaticky uzavře.
Poznámka: Automatické zapnutí použije nastavení vysokého ohřevu a výchozí teplotu 24°C.
1. Stiskněte tlačítko MODE, dokud nezačne blikat ikona časovače a na displeji se nezobrazí
čas.
2. Pomocí tlačítek + a - nastavte časovač (rozsah nastavení od 0 do 24 hodin). Když ikona
časovače přestane blikat, časovač se aktivuje.
3. Po uplynutí nastaveného času se zařízení automaticky zapne.
2. Zařízení je vypnuto, ale není odpojeno od napájení
Když je zařízení vypnuto, stiskněte tlačítko MODE, zařízení přejde na obrazovku nastavení
automatického zapnutí a automaticky se spustí topení. Pokud uživatel po dobu 5 sekund
neprovede žádné změny, zařízení tento displej nastavení automaticky uzavře.
Poznámka: zařízení začne pracovat podle nastavené teploty a úrovně topení.
1. Stiskněte tlačítko MODE, dokud nezačne blikat ikona časovače a na displeji se nezobrazí
čas.
2. Pomocí tlačítek + a - nastavte časovač (rozsah nastavení od 0 do 24 hodin). Když ikona
časovače přestane blikat, časovač se aktivuje.
3. Po uplynutí nastaveného času se zařízení automaticky zapne.
POZOR:
Zvýšení a snížení teploty prostřednictvím olejového radiátoru nějakou dobu trvá. Pokud je
teplota v místnosti vyšší než nastavená teplota, ohřívač se vypne. Pokud je teplota v místnosti
nižší než nastavená teplota, zařízení bude nadále topit.

CS
Návod k obsluze8
SPECIFIKACE
Jmenovitý výkon: 2500 W
Počet žeber: 11
Rozměry žeber: 120 x 550 mm
3 režimy topení
Nastavitelný termostat
Automatická regulace teploty
24hodinový časovač
LCD displej
Materiál pouzdra: kov + plast
Úchyt
Úložný prostor pro napájecí kabel
Bezpečnostní vypínač v případě převrácení
Ochrana proti přehřátí
Délka napájecího kabelu: 145 cm
Napájení: 220-240 V; 50/60 Hz
Čeština
Správná likvidace výrobku
(opotřebované elektrické a elektronické vybavení)
Označení umístěné na výrobku anebo v textech, které se ho týkají, poukazuje na skutečnost, že po vypršení doby
používání je zakázáno likvidovat tento výrobek společně s ostatním domovním odpadem. Pro to, abyste se vyhnuli
škodlivému vlivu na přírodní prostředí a lidské zdraví v důsledku nekontrolované likvidace odpadů, oddělte tento
výrobek od odpadů jiného typu a zodpovědně ho recyklujte za účelem propagace opětovného využití hmotných
zdrojů coby stálé praxe. Pro více informací ohledně místa a způsobu recyklace tohoto výrobku, která bude bezpečná
pro životní prostředí, domácí uživatelé mohou kontaktovat maloobchodní prodejnu, v níž výrobek zakoupili, nebo
orgán místní samosprávy. Firemní uživatelé mohou kontaktovat dodavatele a zkontrolovat podmínky kupní smlouvy.
Neodstraňujte výrobek společně s ostatními komerčními
odpady.
Vyrobeno v ČLR pro LECHPOL ELECTRONICS Sp. z o.o. Sp.k., ul. Garwolińska 1, 08-400 Miętne, Polsko.
ČIŠTĚNÍ
Zařízení pravidelně čistěte.
1. Odpojte zařízení od zdroje napájení a nechte je zcela vychladnout.
2. Očistěte kryt zařízení měkkým, lehce navlhčeným hadříkem.
3. Nepoužívejte chemické ani abrazivní prostředky.
4. Před uskladněním zaviňte napájecí kabel kolem prostoru na kabel. Zařízení skladujte na
suchém a čistém místě.

Bedienungsanleitung 9
DE
SICHERHEITSANLEITUNGEN
Danke für den Kauf des TEESA Gerätes.Vor dem ersten Gebrauch des Produktes lesen Sie bitte
diese Bedienungsanleitung sorgfältig und bewahren diese auf für späteres Nachschlagen.
Der Hersteller übernimmt keine Verantwortung für Schäden, die durch unsachgemäße
Handhabung und Verwendung des Produktes verursacht wurden.
Um die Gefahr von Beschädigungen, Feuer, Stromschlag oder anderen Verletzungen zu
vermeiden, befolgen Sie die grundlegenden Sicherheitsvorkehrungen bei der Verwendung
elektrischer Geräte, einschließlich der folgenden:
• Lesen Sie diese Bedienungsanleitung sorgfältig, auch wenn Sie mit dem Gerät vertraut
sind. Bewahren Sie die Bedienungsanleitung auf für späteres Nachschlagen
• Das Produkt nicht für andere Zwecke verwenden, als in dieser Bedienungsanleitung
angegeben.
• Vor dem Anschluss des Gerätes an die Netzsteckdose, stellen Sie sicher, dass die auf dem
Gerät angegebene Spannung mit der Spannung der Steckdose übereinstimmt.
• Schalten Sie das Gerät IMMER aus und trennen Sie es von der Stromversorgung:
• Wenn es nicht richtig funktioniert
• Wenn ein seltenes Geräusch bei der Verwendung gibt
• Vor der Reinigung
• Bei Nichtgebrauch
• Hinweis: Während des ersten Gebrauchs kann das Gerät einen besonderen Geruch von
den Heiz- und Isolationselementen abgeben - dies ist ein normales Phänomen.
• Beim ersten Gebrauch oder wenn es eingeschaltet wird, nachdem es längere Zeit nicht
benutzt wurde, kann das Gerät zunächst einen Ton ausgeben - es ist ein normales
Phänomen, es wird nach einer Weile gestoppt.
• Ziehen Sie beimTrennen des Netzkabels von der Steckdose, am Stecker und nicht am Kabel.
• Stellen Sie das Gerät auf eine ache, stabile und hitzebeständige Oberäche. Nur in
aufrechter Position benutzen und nicht unbeaufsichtigt lassen!
• Halten Sie das Gerät und sein Kabel fern von Hitze, Wasser, Feuchtigkeit, scharfen Kanten
und andere Faktoren, die das Gerät oder das Netzkabel beschädigen könnten.
• Stellen Sie das Gerät nicht ins Wasser oder andere Flüssigkeiten; nicht in feuchter oder
nasser Umgebung, oder mit nassen oder feuchten Händen verwenden. Benutzen Sie
dieses Heizgerät nicht in der unmittelbaren Umgebung eines Bades, einer Dusche oder
eines Schwimmbads!
• Verwenden Sie das Gerät nicht in der Nähe von brennbaren, explosiven, Lack, Klebsto
oder wärmeempndlichen Gegenständen.
• Das Gerät nicht bedecken oder Lüftungsgitter abdecken oder einschränken
(Überhitzungsgefahr). Halten Sie den Lufteinlass und den Auslass frei von Hindernissen.
Stellen Sie sicher, dass sich keine Gegenstände in der Nähe des Gerätes im Abstand von
mindestens 1 Meter benden. Stellen Sie es nicht gegen Wände, Möbel, Vorhänge usw.
auf. Stellen Sie das Gerät an einem gut belüfteten Ort auf.
• Verwenden Sie das Gerät nicht um Kleider zu trocknen.
• Verwenden Sie das Gerät nicht in Räumen unter 5 m2Fläche.
• Das Heizgerät nicht direkt unter einer Steckdose aufstellen.
• Nicht in staubigen Umgebungen verwenden.

DE
Bedienungsanleitung10
ROLLENMONTAGE
• Bei Nichtgebrauch in sauberem, kühlem und trockenem Bereich lagern. Denken Sie
daran, das Heizgerät vor dem Lagern abkühlen zu lassen.
• Halten Sie das Gerät außerhalb der Reichweite von Kindern. Lassen Sie Kinder nicht
unbeaufsichtigt mit dem Produkt.
• Schützen Sie das Produkt vor starken Stößen und mechanischen Belastungen.
• Das Gerät kann von Kindern benutzt werden, die älter als 8 Jahre alt sind und von
Personen mit eingeschränkten physischen, sensorischen oder geistigen Fähigkeiten oder
Mangel an Erfahrung und Wissen, wenn sie von einer Person beaufsichtigt und geleitet
werden, die für ihre Sicherheit zuständig ist, in einer vorsichtigen Art und Weise und die
alle Sicherheitsvorkehrungen verstanden hat und befolgen wird. Kinder sollten nicht mit
diesem Gerät spielen. Kinder sollten nicht die Reinigung und Wartung des Gerätes ohne
Aufsicht durchführen.
• Achtung! Die Oberäche dieses Gerätes kann heiß werden; Um Verbrennungen und
Verletzungen zu vermeiden, darf die nackte Haut keine heißen Oberächen berühren.
Verwenden Sie Grie, wenn Sie das Produkt bewegen. Beaufsichtigen Sie alle Kinder und
Haustiere, wenn das Heizgerät in Betrieb ist.
• Verlegen Sie das Netzkabel nicht unter das Heizgerät oder vor den Lüftungsgittern oder
der Steckdose.
• Keine Gegenstände in den Lüftungsgittern einstecken!
• IMMER das Gerät von der Stromversorgung trennen, wenn es nicht verwendet wird.
• VERWENDEN SIE NICHT das Gerät wenn das Kabel oder der Netzstecker beschädigt ist,
oder das Gerät defekt ist.
• Versuchen Sie nicht, dieses Gerät selbst zu reparieren, nur autorisiertes und qualiziertes
Personal darf dieses Produkt reparieren. Das Gerät nie zerlegen.
• Dieses Heizgerät ist mit einer genauen Menge an Spezialöl gefüllt. Im Falle einer Öllecks
wenden Sie sich an einen autorisierten Kundendienst zur Reparatur. Reparieren Sie das
Gerät nicht selbst!
• Defektes Stromkabel darf nur von einem autorisierten Kundendienst ersetzt werden.
• Gerät ist nur für den Innenbereich und Hausgebrauch ausgelegt.
• Reinigen Sie das Gerät gemäß den Anweisungen im Abschnitt„Reinigung und Wartung“.
Halten Sie das Heizgerät sauber. Lassen Sie keine Gegenstände in die Belüftungs- oder
Auslassönung gelangen, da dies einen elektrischen Schlag verursachen kann, oder zu
Feuer oder Beschädigung des Heizgerätes führen kann.
Vor dem Benutzen, montieren Sie die mitgelieferten Rollen an das Heizgerät.

Bedienungsanleitung 11
DE
BEDIENUNG
1. Stellen Sie den Heizkörper Kopfüber auf eine sichere, stabile Oberäche.
2. Positionieren Sie die Rollenplatten zwischen den zwei äußersten Rippen an der
Vorderseite und am Ende des Heizgeräts.
3. Befestigen Sie diese mit den mitgelieferten U-Bolzen und Flügelmuttern am Heizgerät.
4. Flügelmuttern festziehen.
Hinweis: nicht überzeihen, da dieses den Heizkörper beschädigen kann.
5. Drehen Sie den Heizkörper wieder aufrecht um.
WARNUNG:
• Nicht ohne montierte Rollen benutzen.
• Heizgerät nur in aufrechter Position betreiben (Rollen auf der Unterseite); Jede andere
Position könnte eine gefährliche Situation schaen.
Hinweis: Nach dem Ausschalten startet die Heizung standardmäßig in der dritten Stufe und
die eingestellte Temperatur beträgt 24 Grad. Wird die Heizung wieder eingeschaltet, ohne
vorher ausgeschaltet zu sein, werden die Parameter der letzten Inbetriebnahme benutzt.
Heizeinstellungen
1. Drücken Sie die Taste MODUS. Der Summer piept und die dritte Stufe wird
ausgewählt. Wird diese Einstellung beibehalten, läuft das Heizgerät in der höchsten
Stufe, bis es manuell ausgeschaltet wird oder die eingestellte Temperatur überschritten
wird. In diesem Fall wird die Heizung gestoppt und automatisch wiederhergestellt,
wenn die Temperatur niedriger als die eingestellte Temperatur ist.
2. Drücken Sie lange die Taste MODUS. Der Summer piept und die zweite Stufe wird
ausgewählt. Wird diese Einstellung beibehalten, läuft das Heizgerät in der mittleren
Stufe, bis es manuell ausgeschaltet wird oder die eingestellte Temperatur überschritten
wird. In diesem Fall wird die Heizung gestoppt und automatisch wiederhergestellt,
wenn die Temperatur niedriger als die eingestellte Temperatur ist.
3. Drücken Sie erneut lange auf die Taste MODUS. Der Summer piept und die erste Stufe
wird ausgewählt. Wird diese Einstellung beibehalten, läuft das Heizgerät in der
niedrigsten Stufe, bis es manuell ausgeschaltet wird oder die eingestellte Temperatur
überschritten wird. In diesem Fall wird die Heizung gestoppt und automatisch
wiederhergestellt, wenn die Temperatur niedriger als die eingestellte Temperatur ist.
Hinweis: Wenn die erste Stufe verwendet wird, liefert das Heizgerät nicht die hohe
Heizleistung, benötigt jedoch nicht so viel Strom, um in niedriger Stufe zu funktionieren. Um
eine Überlastung des Stromkreises zu vermeiden, schließen Sie das Heizgerät nicht an den
Stromkreis an, an dem bereits andere Elektrogeräte funktionieren.
Hinweis: Die Taste MODUS kann zyklisch eingestellt werden.
Temperatureinstellung (Temperaturkompensation 15 Grad)
1. Nach einschalten des Heizgerätes, benutzen Sie die Tasten + / - um die gewünschte
Temperatur einzustellen im Bereich von 13°C bis 30°C.
2. Wenn die eingestellte Temperatur erreicht wird, schaltet sich die Heizung aus.

DE
Bedienungsanleitung12
3. Wenn die Temperatur unter die eingestellte Temperatur sinkt, schaltet sich die Heizung
wieder ein.
Fahrenheit/Celsius Temperatureinstellung
1. DieTemperaturwirdnur beimeinstellenderHeizstufe undam Bildschirm zurTemperatur-
Einstellung angezeigt.
2. Drücken Sie die Taste °C/°F zum umschalten zwischen Fahrenheit und Celsius.
Timereinstellung (automatisches ausschalten)
Verwenden Sie diese Funktion, wenn Sie möchten, dass die Heizung für einen bestimmten
Zeitraum (von 1 bis 24 Stunden) betrieben wird und sich dann automatisch abschaltet.
Hinweis: Bitte stellen Sie dieTemperatur ein, bevor Sie die automatische Abschaltfunktion
des Timers einstellen, damit das Heizgerät die Heizfunktion ausschalten kann, wenn es
Ihre gewünschte Temperatur erreicht.
1. Drücken Sie die Taste MODUS, bis das Timer-Symbol blinkt. Die Anzahl der Stunden wird
auf dem Bildschirm angezeigt und das Symbol für die automatische Abschaltung wird
ebenfalls angezeigt.
2. Mit den Tasten „+“ und „-“ die Heizlaufzeit einstellen (Einstellbereich 0 bis 24
Stunden). Sobald das Timer-Symbol aufhört zu blinken, wird die eingestellte Timer-
Abschaltfunktion aktiviert.
3. Wenn die eingestellte Zeit abgelaufen ist, schaltet sich die Heizung automatisch aus. Der
Zeitanzeige- und Heizbildschirm werden abwechselnd angezeigt.
Hinweis: Wenn die Temperatur vor dem Einstellen der Timer-Automatik-Abschaltfunktion
eingestellt wird, schaltet sich das Heizgerät entsprechend der eingestellten Temperatur ein
und aus, bis die Timer-Abschalt-Zeit abgelaufen ist (der voreingestellte Anfangswert der
Timer-Abschalt-Zeit ist„0“ Stunden).
* Erfolgt innerhalb von 5 Sekunden keine Bedienung, wird die Funktion automatisch beendet.
Timereinstellung (automatisches einschalten)
Diese Funktion kann auf zwei Arten verwendet werden:
1. Das Heizgerät vom Stromnetz trennen und wieder verbinden.
Drücken Sie die Taste MODUS, wenn das Heizgerät ausgeschaltet ist, um zum automatischen
Start-Einstellungsprogramm zu gelangen (der Einstellbereich beträgt 0 ~ 24 Stunden)
und startet dann automatisch den Heizvorgang. Erfolgt innerhalb von 5 Sekunden keine
Bedienung, wird die Funktion automatisch beendet.
Hinweis: Die Funktion zum Einstellen des Timers bedeutet automatisch, dass das Heizgerät in
der dritten Stufe mit der Standard-Temperatureinstellung (24°C) verwendet wird.
1. Drücken Sie die Taste MODUS, bis das Timer-Symbol blinkt und die Stundenzahl auf dem
Bildschirm angezeigt wird.
2. Stellen Sie mit den Tasten "+" und "-" die automatische Startzeit der Heizung ein (der
Einstellbereich beträgt 0 ~ 24 Stunden). Sobald das Timer-Symbol aufhört zu blinken,

Bedienungsanleitung 13
DE
wird die automatische Startfunktion des Timers aktiviert.
3. Wenn die eingestellte Zeit abgelaufen ist, schaltet sich die Heizung automatisch ein.
2. Das Heizgerät ausgeschaltet, doch ohne dieses vom Stromnetz zu trennen.
Drücken Sie die Taste MODUS, wenn das Heizgerät ausgeschaltet ist, es geht in das
automatische Start-Einstellungsprogramm (der Einstellbereich beträgt 0 ~ 24 Stunden)
und startet dann automatisch den Heizvorgang. Erfolgt innerhalb von 5 Sekunden keine
Bedienung, wird die Funktion automatisch beendet.
Hinweis: Bei der Funktion des Einstellens des Timers auf automatisches starten, wird das
Heizgerät entsprechend der Temperatureinstellung und Stufe betrieben, wenn es gestartet
wird.
1. Drücken Sie die Taste MODUS, bis das Timer-Symbol blinkt und die Stundenzahl auf dem
Bildschirm angezeigt wird und auch das Symbol für automatisches Einschalten wird
angezeigt.
2. Stellen Sie mit den Tasten "+" und "-" die automatische Startzeit der Heizung ein (der
Einstellbereich beträgt 0 ~ 24 Stunden). Sobald das Timer-Symbol aufhört zu blinken,
wird die automatische Startzeitfunktion des Timers aktiviert.
3. Wenn die eingestellte Zeit abgelaufen ist, schaltet sich die Heizung automatisch ein.
HINWEIS:
Es dauert eine Weile, bis die Ölheizung die Temperatur erhöht oder verringert. Wenn die
Raumtemperatur höher als die eingestellte Temperatur ist, stoppt die Heizung. Wenn die
Raumtemperatur niedriger als die eingestellte Temperatur ist, heizt die Heizung weiter auf.
REINIGUNG UND WARTUNG
Reinigen Sie regelmäßig Ihr Gerät.
1. Vor dem Reinigen, immer den Netzstecker aus der Steckdose ziehen und lassen das
Gerät vollständig abkühlen.
2. Das Gerätegehäuse zuerst mit einem weichen, leicht angefeuchteten Tuch und danach
mit einem trockenen Tuch abwischen.
3. Verwenden Sie keine Reinigungsmittel oder Scheuermittel und vermeiden Sie dass
Wasser in das Gerät gelangt.
4. Vor dem Aufbewahren des Heizgerätes das Kabel auf der Kabelspeicherspule aufwickeln
und die Heizung an einem sauberen und trockenen Ort abstellen.

DE
Bedienungsanleitung14
TECHNISCHE DATEN
Nennleistung: 2500 W
Rippen: 11
Elementgröße: 120 x 550 mm
3 Heizmodi
Einstellbarerer Thermostat
Automatische Temperaturkontrolle
24 Stunden Timer
LCD Display
Gehäusematerial: Metall + Plastik
Gri
Kabelaufbewahrung
Kippschalter
Überhitzungsschutz
Kabellänge: 145 cm
Stromversorgung: 220-240 V, 50/60 Hz
Deutsch
Korrekte Entsorgung dieses Produkts
(Elektromüll)
(Anzuwenden in den Ländern der Europäischen Union und anderen europäischen Ländern mit einem separaten
Sammelsystem)
Die Kennzeichnung auf dem Produkt bzw. auf der dazugehörigen Literatur gibt an, dass es nach seiner Lebensdauer
nicht zusammen mit dam normalen Haushaltsmüll entsorgt werden darf. Entsorgen Sie dieses Gerät bitte getrennt von
anderen Abfällen, um der Umwelt bzw. der menschilchen Gesundheit nicht durch unkontrollierte Müllbeseitigung zu
schaden. Recyceln Sie das Gerät, um die nachhaltige Wiederverwertung von stoichen Ressourcen zu fördern. Private
Nutzer sollten den Händler, bei dem das Produkt gekauft wurde, oder die zuständigen Behörden kontaktieren, um in
Erfahrung zu bringen, wie sie das Gerät auf umweltfreundliche Weise recyceln können. Gewerbliche Nutzer sollten
sich an Ihren Lieferanten wenden und die Bedingungen des Verkaufsvertrags konsultieren. Dieses Produkt darf nicht
zusammen mit anderem Gewerbemüll entsorgt werden.
Hergestellt in China für LECHPOL ELECTRONICS Sp. z o.o. Sp.k., ul. Garwolińska 1, 08-400 Miętne.

Owner’s manual 15
EN
SAFETY INSTRUCTIONS
Thank you for purchasing TEESA appliance. Please read this operation instruction carefully
before use, and keep it for future reference. Producer does not take responsibility for damages
caused by inappropriate handling and use of the product.
In order to reduce the risk of injuries or damages, follow basic safety precautions applied
when using any electrical device, including the following:
• Read this instruction manual carefully, even if you are familiar with the appliance. Keep
the manual for future reference.
• Do not use the product for purposes dierent from displayed in this operating manual.
• Before connecting the device to power supply socket, make sure the voltage indicated
on the appliance corresponds to the voltage in the power supply socket.
• ALWAYS turn o the device and disconnect it from the mains supply:
• if it’s not operating correctly
• if there’s an uncommon voice when using
• before cleaning
• when not in use
• Note: during rst use, the device may give o peculiar smell and fumes from heating and
isolation elements – it is a normal phenomenon.
• During rst use or when they are turned on after having not been used for a long period
of time, the device may initially emit a sound – it is a normal phenomenon, it will stop
after a while.
• When you disconnect the power cord of the device, grasp and pull the plug, not the cord/cable.
• Place the device on at, stable and heat resistant surface. Use in upright position only and
do not leave unattended!
• Keep the device and its cord/cable away from heat, water, moisture, sharp edges and any
other factor which may damage the appliance or its cord.
• Do not handle/use the device with wet or moist hands. Do not place it the device in water
or any liquid, nor use it in humid or wet environments/rooms. Do not use this heater in
the immediate surroundings of a bath, a shower or a swimming pool!
• Do not use heater near ammables, explosives, varnish, glue or heat sensitive items.
• Do not cover the device or block its ventilation grilles (danger of overheating); keep them
free from obstacles (at least 1 meter away). Do not place the device up against walls,
furniture, curtains, etc. Place it in a properly ventilated place.
• Do not use the heater to dry clothes.
• Do not use the appliance in rooms less than 5 m2area.
• Do not place the heater directly beneath power mains socket.
• Do not use in dusty environments.
• When not in use, store in clean, cool and dry area. Remember to cool the heater before storing.
• Protect the product from strong impact and mechanical stress.
• Keep the device out of the reach of children. Do not leave children unsupervised with
the product.
• This appliance may be used by children who are above 8 years old and by persons with
reduced physical, sensory or mental capabilities, or lack of experience and knowledge,
if they are supervised and guided by a person who is responsible for their safety in a

EN
Owner’s manual16
ASSEMBLING CASTORS
cautious manner, and all the safety precautions are understood and followed. Children
should not play with this device. Children should not perform cleaning and servicing of
the device unsupervised.
• Pay attention! The surface of this device will get hot. To avoid burns and personal injury,
do not let bare skin touch hot surfaces. Use handles when moving the product. Closely
supervise any children and pets when in use.
• Do not route power cord underneath the heater or in front of air ventilation grilles.
• Do not insert anything into the ventilation grill!
• ALWAYS disconnect the product form the mains supply when it is not in use.
• DO NOT use this device if the cord or the plug is damaged, or the appliance is broken.
• Do not attempt to repair this appliance yourself. Only authorized and qualied personnel
may repair this device. Never disassemble this device.
• This heater is lled with a precise quantity of special oil. In case of an oil leakage, contact
an authorized service point for repair. Do not repair this device yourself!
• Fixed power cable may only be replaced in an authorized service point.
• This product is only suitable for well insulated spaces or occasional use.
• Clean this device in accordance to instructions listed in “Cleaning and Maintenance”
section. Keep the heater clean. Do not allow any objects to enter any ventilation or
exhaust opening as this may cause electric shock, re or damage to the heater.
Before use, mount the attached castors to the body of the heater.
1. Place the radiator body upside-down on a safe, stable surface.
2. Position the wheel base assemblies between the end ns on the front and at the end of
the heater.
3. Attach them to the heater using the U-bolts and wing nuts supplied.
4. Tighten the wheel nuts.
Note: Do not overtighten as it may cause the damage of heater ange.
5. Turn the heater the right way up.
WARNING:
• Do not operate without castors attached.
• Operate the heater only in an upright position (castors on the bottom); any other position
could create hazardous situation.

Owner’s manual 17
EN
OPERATION
Note: After power o, the heater starts by default at three gears and the set temperature
is 24 degrees. If the heater is turned on again without previously being powered o, the
parameters of the last startup operation will be remembered.
Heating setting
1. Press the MODE button. The buzzer will beep and enter the third gear . If this setting
is maintained, the heater will run at the highest gear until it is manually turned o or
when the set temperature is exceeded. In that case, the heating will be stopped and
then automatically restored when the temperature is lower than the set temperature.
2. Long press the MODE button. The buzzer will beep and enter the second gear . If this
setting is maintained, the heater will run at the middle gear until it is manually turned o
or when the set temperature is exceeded. In that case, the heating will be stopped and
then automatically restored when the temperature is lower than the set temperature.
3. Long press the MODE button again. The buzzer will beep and enter rst gear . If this
setting is maintained, the heater will run at the low gear until it is manually turned o
or when the set temperature is exceeded. In that case, the heating will be stopped and
then automatically restored when the temperature is lower than the set temperature.
Note: When use the rst gear, the heater will not provide as high heat output, however, it
does not require as much electric current to run in low gear. To avoid circuit overload, do not
connect the heater to the circuit where other electrical appliances are already working.
Temperature setting (temperature compensation 15 degrees)
1. When the heater enters the heating state,“+” and “-” buttons can be directly used to set
the required temperature, the setting range is from 13°C to 30°C.
2. When the set temperature is reached, the heater will stop.
3. When the temperature is lower than the set temperature, the heater automatically turns
on to heat again.
Fahrenheit/Celsius temperature setting
1. The temperature is only displayed on the heating gear setting and temperature setting
screen.
2. Press the °C/°F button to switch between Fahrenheit and Celsius.
Timer setting (automatic turn o)
Use this function if you want the heater to operate for a certain period of time (from 1 to 24
hours) and then automatically turn o.
Note: Please set the temperature before setting the timer automatic shutdown function,
so that the heater can turn o the heating function when it reaches your required
temperature.
1. Press the MODE button until the timer icon blinks. The number of hours will appear on
the screen and the automatic shutdown icon will also appear.

EN
Owner’s manual18
2. Use the “+” and “-” buttons to set the heating running time (the setting range is 0 to 24
hours). Once the timer icon stops ashing, the preset timer o function will be activated.
3. When the set time runs out, the heater will turn o automatically.The timing and heating
screen are displayed alternately.
Note: If the temperature is set before setting the timer automatic o function, the heater
will run on and o according to the set temperature until the timer automatic o and time is
exhausted (the default initial value of the timer automatic o time is“0”hours).
*If there is no operation within 5 seconds, the function will automatically exit.
Timer setting (automatic turn on)
This function have two ways to use it:
1. The heater plug out, then plug in again.
Press the MODE button when the heater is o, it will enter to the automatic startup setting
program (the setting range is 0 ~ 24 hours) and then automatically start the heating process.
If no operation is performed within 5 seconds, the function will automatically exit.
Note: The function of setting timer on automatically means that the heater will use in the
third gear according to the default temperature setting (24°C).
1. Press the MODE button until the timer icon blinks and the number of hours on the
screen is displayed.
2. Use“+”and“-”buttons to set the automatic opening time of the heater (the setting range
is 0 ~ 24 hours). Once the timer icon stop ashing, the automatic opening function of the
timer will be activated.
3. When the set time runs out, the heater will turn on automatically.
2.The heater turn o, but without disconnecting the power.
Press the MODE button when the heater is not open, it will enter to the automatic startup
setting program (the setting range is 0 ~ 24 hours) and then automatically start the heating
process. If no operation is performed within 5 seconds, the function will automatically exit.
Note: The function of setting timer to automatically open, the heater will operate according
to the temperature setting and gear when it is started.
1. Press the MODE button until the timer icon blinks and the number of hours on the screen
is displayed and also will have the icon for automatic open.
2. Use“+”and“-”buttons to set the automatic opening time of the heater (the setting range
is 0 ~ 24 hours). Once the timer icon stops ashing, the automatic opening function of
the timer will be activated.
3. When the set time runs out, the heater will turn on automatically.
NOTE:
It takes time for the oil heater to increase or decrease the temperature. When the room
temperature is higher than the set temperature, the heater would stop. When the room
temperature is lower than the set temperature, the heater would continue to heat up.

Owner’s manual 19
EN
SPECIFICATION
English
Correct Disposal of This Product
(Waste Electrical & Electronic Equipment)
(Applicable in the European Union and other European countries with separate collection systems) This marking
shown on the product or its literature, indicates that it should not be disposed with other household wastes at the
end of its working life. To prevent possible harm to the environment or human health from uncontrolled waste
disposal, please separate this from other types of wastes and recycle it responsibly to promote the sustainable reuse of
material resources. Household users should contact either the retailer where they purchased this product, or their local
government oce, for details of where and how they can take this item for environmentally safe recycling. Business
users should contact their supplier and check the terms and conditions of the purchase contract. This product should
not be mixed with other commercial wastes for disposal.
Made in China for LECHPOL ELECTRONICS Sp. z o.o. Sp.k., ul. Garwolińska 1, 08-400 Miętne.
Rated power: 2500 W
Fins: 11
Fins size: 120 x 550 mm
3 heating modes
Adjustable thermostat
Automatic control temperature
24 hour timer
LCD display
Casing material: metal + plastic
Handle
Cord storage
Tip-over switch
Protections against: overheat
Power cord length: 145 cm
Power supply: 220-240 V, 50/60 Hz
Clean your device regularly.
1. Always unplug the heater from the wall socket and allow it to cool down before cleaning.
2. Clean the outside of the heater by wiping with a soft, slightly damp cloth and bu with
a dry cloth.
3. Do not use any detergents or abrasives and do not allow any water to enter the heater.
4. Before storing the heater, wind the cable round cable storage bobbin and place the
heater in a clean and dry place.
CLEANING AND MAINTENANCE

GR
Εγχειρίδιο χρήσης20
Σας ευχαριστούμε για την αγορά της συσκευήςTEESA. Διαβάστε προσεκτικά αυτές τις οδηγίες
χρήσης πριν τη χρήση και φυλάξτε τες για μελλοντική χρήση. Ο παραγωγός δεν αναλαμβάνει
την ευθύνη για ζημιές που προκλήθηκαν από ακατάλληλο χειρισμό και χρήση του προϊόντος.
ΟΔΗΓΙΕΣ ΑΣΦΑΛΕΙΑΣ
Για να μειώσετε τον κίνδυνο τραυματισμού, ακολουθήστε τις βασικές προφυλάξεις
ασφαλείας που εφαρμόζονται κατά τη χρήση οποιασδήποτε ηλεκτρικής συσκευής,
συμπεριλαμβανομένων των παρακάτω:
• Διαβάστε αυτό το εγχειρίδιο οδηγιών προσεκτικά, ακόμα και αν είστε εξοικειωμένοι με
τη συσκευή.
• Μην χρησιμοποιείτε το προϊόν για σκοπούς / χρήσεις διαφορετικούς από αυτούς που
εμφανίζονται σε αυτό το εγχειρίδιο χρήσης.
• Πριν συνδέσετε τη συσκευή στην πρίζα, βεβαιωθείτε ότι η τάση που αναγράφεται στη
συσκευή αντιστοιχεί στη τάση στη πρίζα παροχής ρεύματος.
• ΠΑΝΤΑ σβήστε τη συσκευή και αποσυνδέστε την από την παροχή ρεύματος:
• εάν δεν λειτουργεί σωστά,
• εάν ακούγεται ένας ασυνήθιστος ήχος κατά τη χρήση,
• πριν από την αποσυναρμολόγηση της συσκευής,
• πριν τον καθαρισμό,
• πριν από τη συντήρηση.
• Σημείωση:κατάτη διάρκειατης πρώτηςχρήσης,η συσκευή μπορείναεκπέμπειιδιόμορφη
οσμή από στοιχεία θέρμανσης και απομόνωσης - είναι ένα φυσιολογικό φαινόμενο.
• Κατά τη διάρκεια της πρώτης χρήσης ή όταν ενεργοποιείται αφού δεν έχει χρησιμοποιηθεί
για μεγάλο χρονικό διάστημα, η συσκευή μπορεί αρχικά να εκπέμπει ήχο - είναι ένα
φυσιολογικό φαινόμενο, θα σταματήσει μετά από λίγο.
• Όταν αποσυνδέετε το καλώδιο τροφοδοσίας της συσκευής, πιάστε και τραβήξτε το
βύσμα και όχι το καλώδιο.
• Τοποθετήστε τη συσκευή σε επίπεδη, σταθερή και ανθεκτική στη θερμότητα επιφάνεια.
Χρησιμοποιείτε μόνο σε όρθια θέση και μην αφήνετε χωρίς επιτήρηση.
• Κρατήστε τη συσκευή και το καλώδιο μακριά από θερμότητα, νερό, υγρασία, αιχμηρές
άκρες και οποιοδήποτε άλλο παράγοντα που μπορεί να βλάψει τη συσκευή ή το καλώδιο
της.
• Μη χειρίζεστε / χρησιμοποιείτε τη συσκευή με υγρό ή βρεγμένο χέρι. Μην τοποθετείτε τη
συσκευή σε νερό ή οποιοδήποτε υγρό, ούτε να τη χρησιμοποιείτε σε υγρό περιβάλλον.
Μην χρησιμοποιείτε αυτόν τον αερόθερμο στο άμεσο περιβάλλον του μπάνιου, του
ντους ή της πισίνας! Η συσκευή δεν είναι κατάλληλη για χρήση σε μπάνιο.
• Μη χρησιμοποιείτε το αερόθερμο κοντά σε εύφλεκτα υλικά, εκρηκτικά, βερνίκια, κόλλα
ή θερμότητα.
• Μην καλύπτετε ή περιορίζετε τις γρίλιες εισόδου και εξόδου (κίνδυνος υπερθέρμανσης).
Κρατήστε την είσοδο και την έξοδο αέρα ελεύθερα από εμπόδια. βεβαιωθείτε ότι δεν
υπάρχουν αντικείμενα κοντά στη συσκευή σε απόσταση τουλάχιστον 1 μέτρου. Μην το
τοποθετείτε σε τοίχους, έπιπλα, κουρτίνες κλπ. Τοποθετήστε τη συσκευή σε κατάλληλα
αεριζόμενο χώρο.
• Μη χρησιμοποιείτε το αερόθερμο για να στεγνώσετε τα ρούχα.
• Μην χρησιμοποιείτε τη συσκευή σε χώρους κάτω των 5 m2.
Table of contents
Languages:
Other Teesa Heater manuals

Teesa
Teesa TSA8050 User manual

Teesa
Teesa TSA8038 User manual

Teesa
Teesa TSA8028-2 User manual

Teesa
Teesa TSA8028-2 User manual

Teesa
Teesa TSA8039 User manual

Teesa
Teesa TSA8051 User manual

Teesa
Teesa TSA8054 User manual

Teesa
Teesa TSA8050 User manual

Teesa
Teesa TSA8025 User manual

Teesa
Teesa TSA8025 User manual
Popular Heater manuals by other brands

HeatStar
HeatStar HSU200NG Operating instructions and owner's manual

Veil
Veil Atlas installation guide

Dimplex
Dimplex TDTR 175 W Installation and operating instructions

flowair
flowair ELIS G E-150 manual

Beretta
Beretta Tivano Series installation manual

Aito
Aito VERKKO 6kW Installation and instruction manual