12 13Bedienungsanleitung Bedienungsanleitung
DEDE
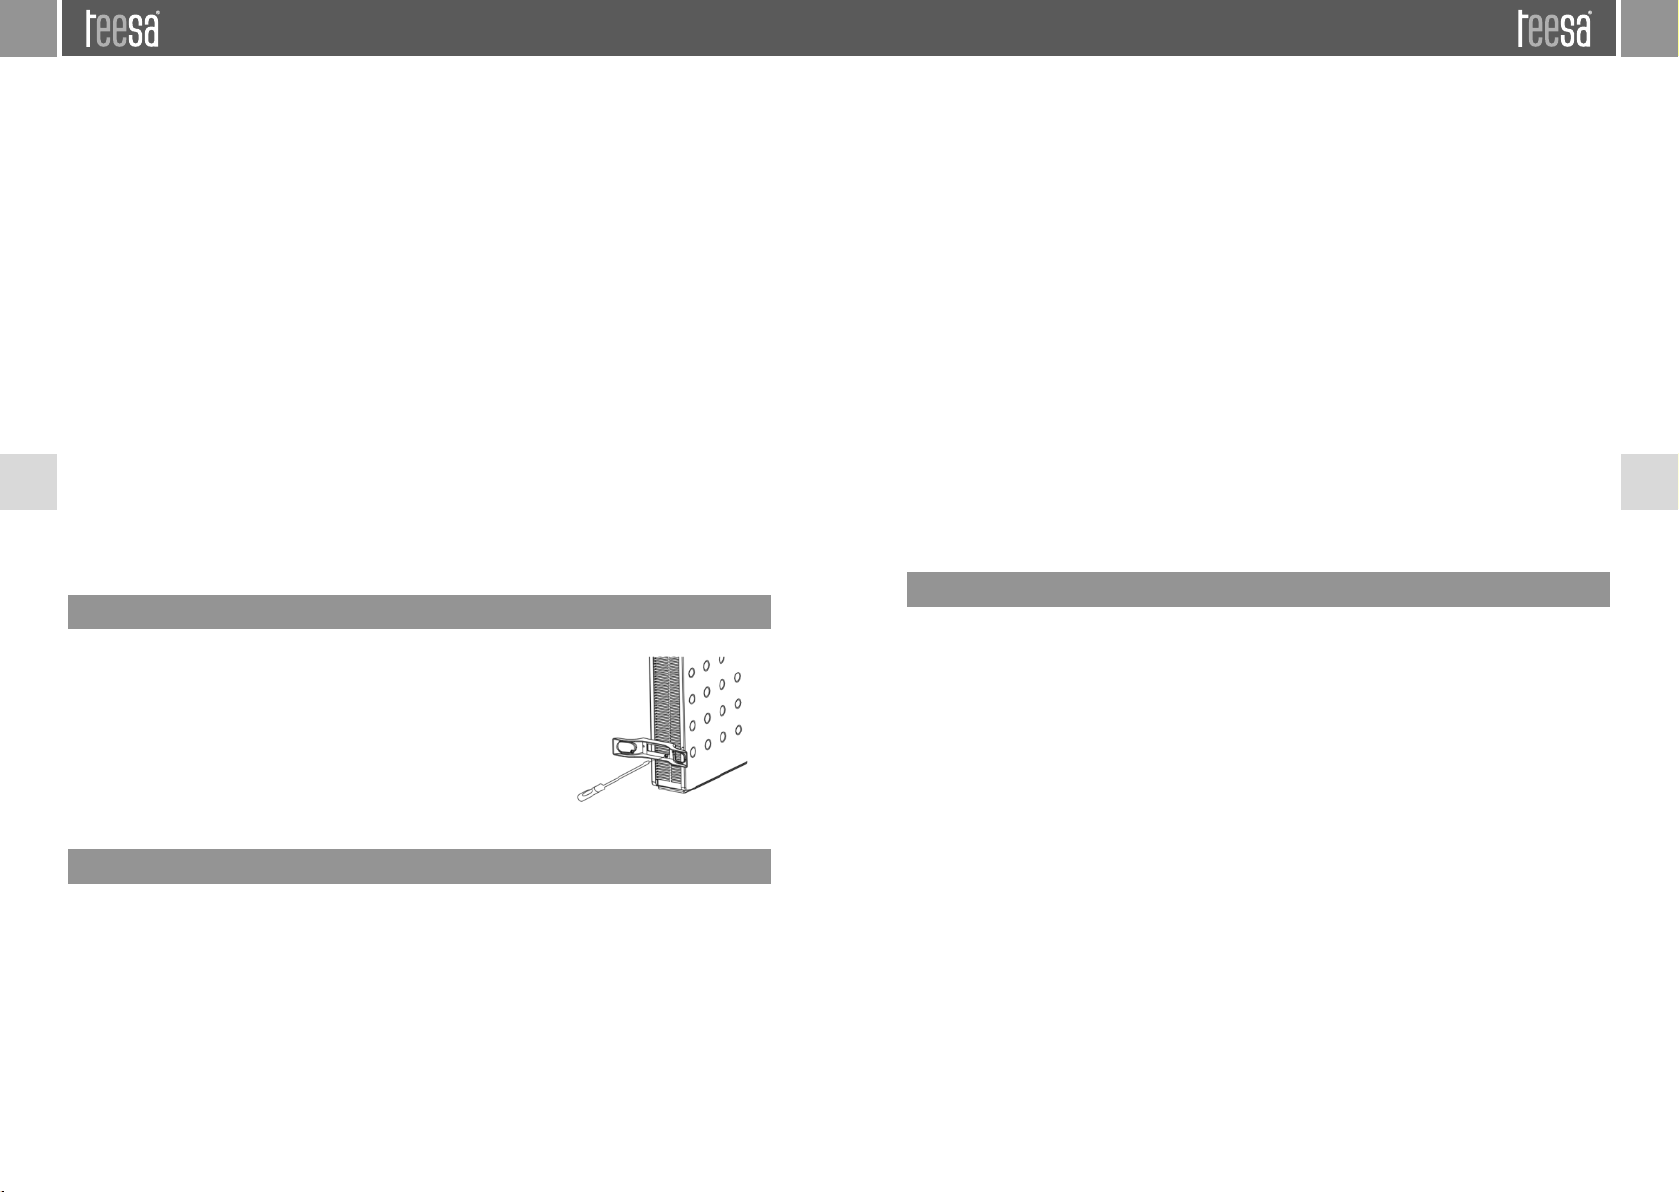
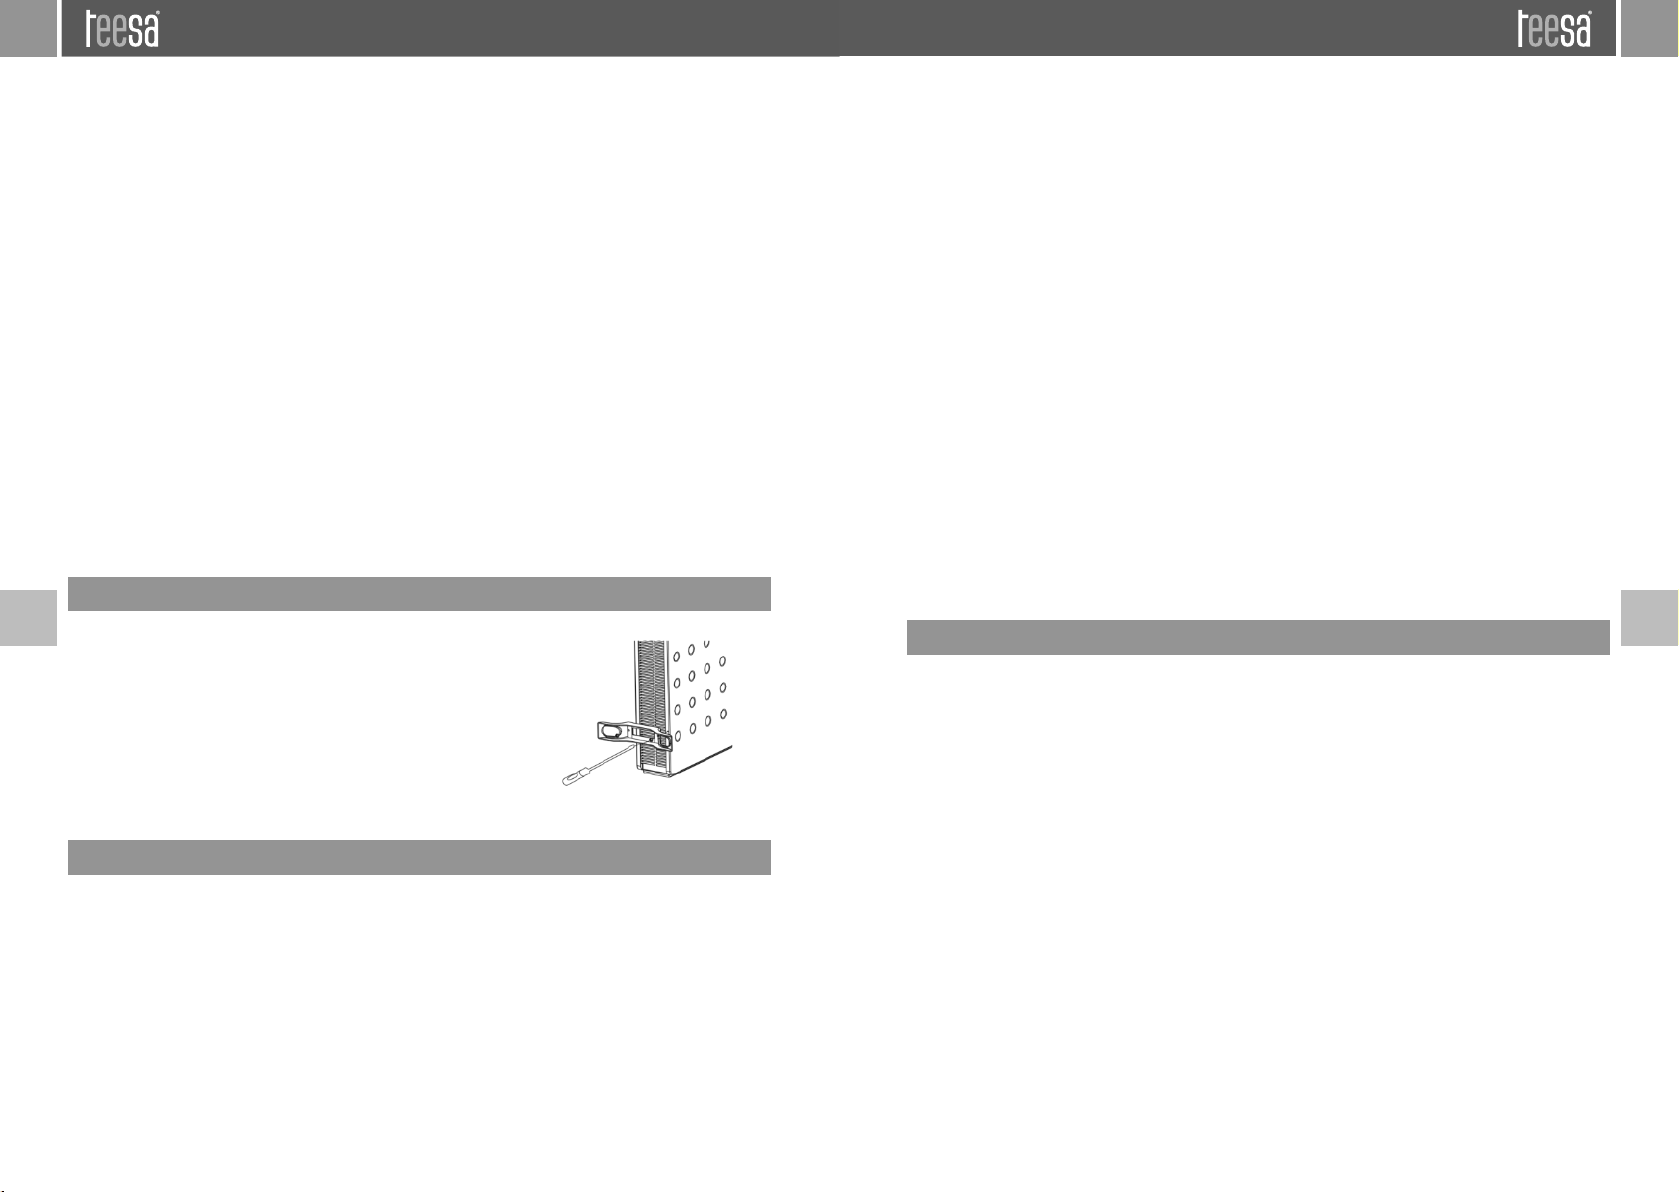
MONTAGE DER FÜSSE
20.Schützen Sie das Produkt vor starken Stößen.
21. alten Sie das Gerät außerhalb der Reichweite von Kindern. Lassen Sie Kinder nicht
unbeaufsichtigt mit dem Produkt.
22.Das Gerät kann von Kindern benutzt werden, die älter als 8 Jahre alt sind und von
Personen mit eingeschränkten physischen, sensorischen oder geistigen Fähigkeiten oder
Mangel an Erfahrung und Wissen, wenn sie von einer Person beaufsichtigt und geleitet
werden, die für ihre Sicherheit zuständig ist, in einer vorsichtigen Art und Weise und die
alle Sicherheitsvorkehrungen verstanden hat und befolgen wird. Kinder sollten nicht mit
diesem Gerät spielen. Kinder sollten nicht die Reinigung und Wartung des Gerätes ohne
Aufsicht durchführen.
23.Wichtig! Das Gehäuse des Geräts erhöht seine Temperatur während des Betriebs. Um
Verbrennungen und Beschädigungen zu vermeiden, heiße Oberächen nicht berühren!
Verwenden Sie Grie, wenn Sie das Produkt bewegen. alten Sie während des Betriebs
des Geräts Kinder und Tiere davon fern.
24.Verlegen Sie das Netzkabel nicht unter das eizgerät oder vor dem Lufteinlass oder der
Steckdose.
25.Keine Gegenstände in den Lüftungsgittern einstecken.
26.IMMER das Gerät von der Stromversorgung trennen, wenn es nicht verwendet wird.
27.VERWENDEN SIE NIC T das Gerät wenn das Kabel oder der Netzstecker beschädigt ist,
oder das Gerät defekt ist.
28.Versuchen Sie nicht, dieses Gerät selbst zu reparieren, nur autorisiertes und qualiziertes
Personal darf dieses Produkt reparieren. Das Gerät nie zerlegen.
29.Versuchen Sie nicht das Gerät selbst zu reparieren.
30.Defektes Stromkabel darf nur von einem autorisierten Kundendienst ersetzt werden.
31.Dieses Produkt ist nur für den gelegentlichen Gebrauch oder für den Gebrauch in gut
isolierten Räumen geeignet.
32.Reinigen Sie das Gerät gemäß den Anweisungen im Abschnitt Reinigung und Wartung.
alten Sie das eizgerät sauber. Lassen Sie keine Gegenstände in die Lüftungsönungen
gelangen, da dies einen elektrischen Schlag verursachen kann, oder zu Feuer oder
Beschädigung des eizgerätes führen kann.
BMontieren Sie vor dem Gebrauch die beigefügten Füße am Körper
des eizgeräts. Stellen Sie das eizgerät auf eine ache, stabile
Oberäche, um zu prüfen, ob es stabil steht.
WARNUNG
• Nicht ohne angebrachte Füße betreiben.
• Betreiben Sie das eizgerät nur in aufrechter Position (Füße
auf dem Boden); Jede andere Position könnte zu einer
gefährlichen Situation führen.f
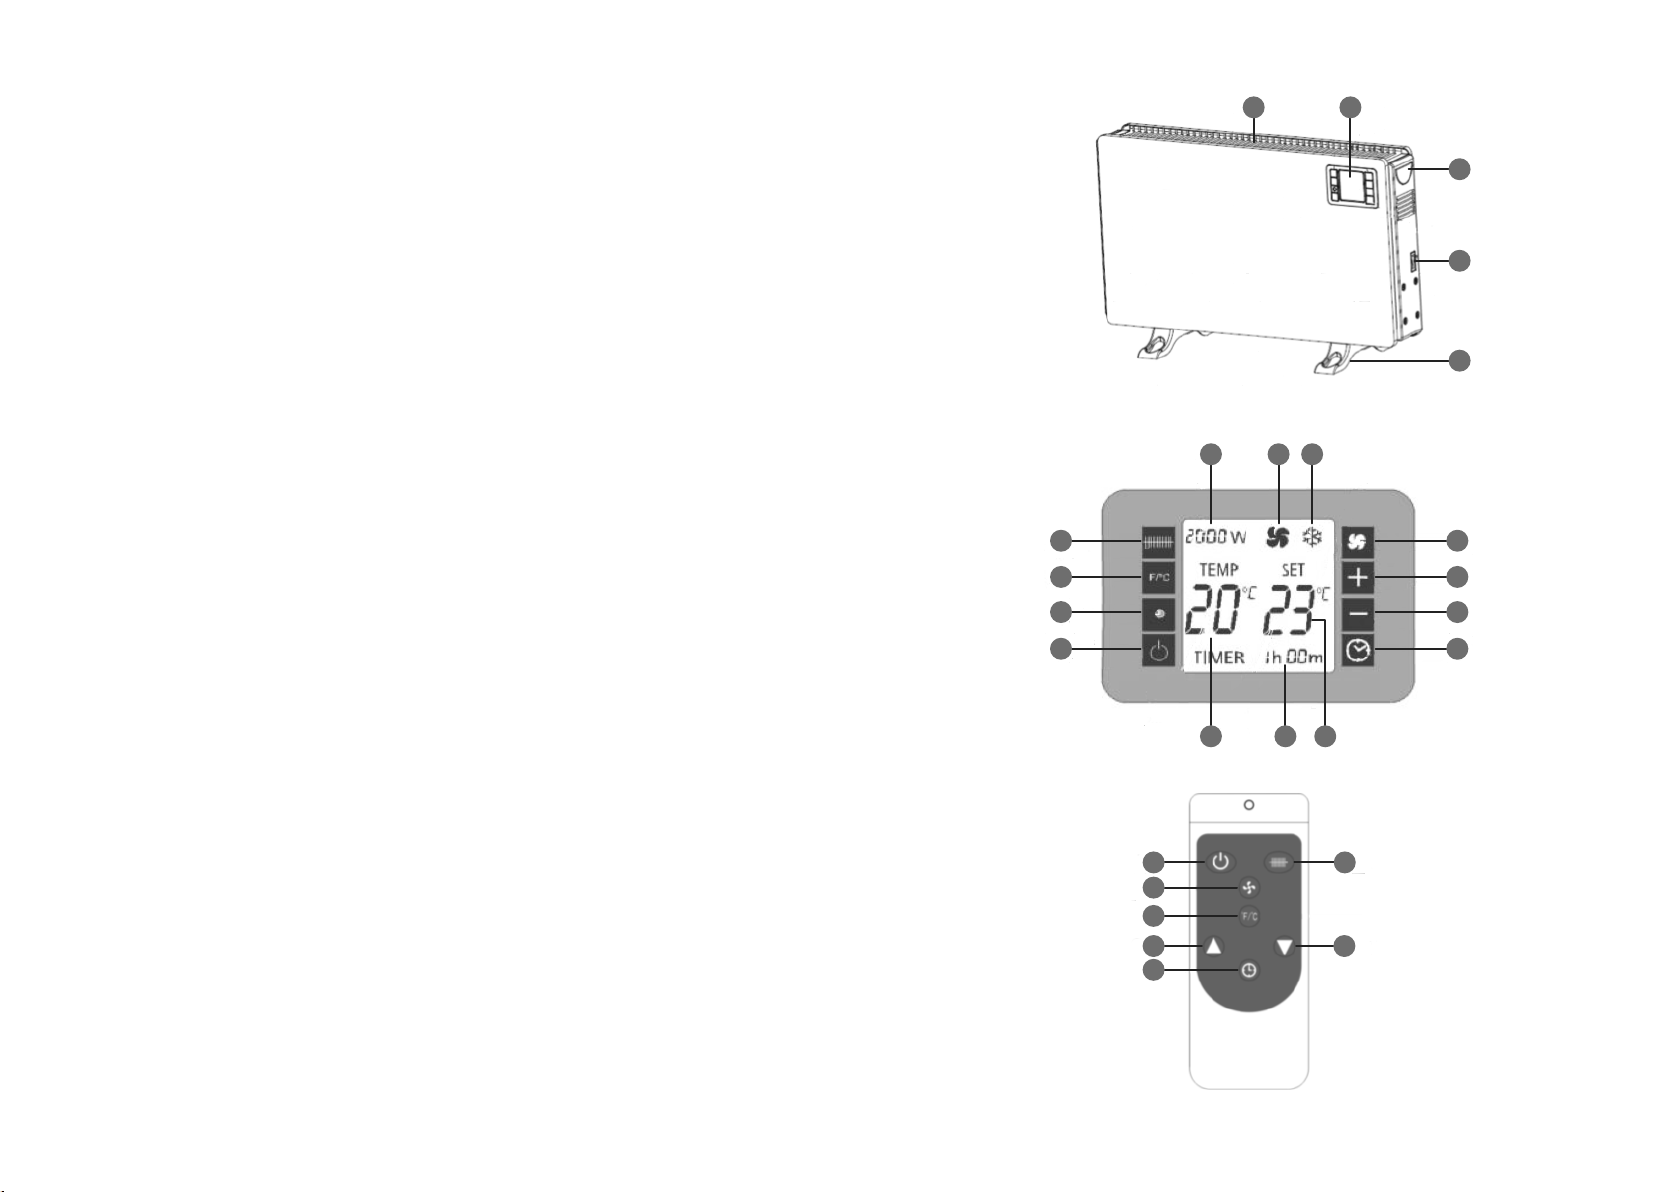
BETRIEB
1. Bevor Sie das eizgerät verwenden, stellen Sie sicher, dass es auf einer ebenen und
stabilen Oberäche steht.
2. Stecken Sie den Stecker des Netzkabels des eizgeräts in eine geeignete Steckdose.
3. Stellen Sie den Netzschalter auf Position I. Das Display schaltet sich ein. Die aktuelle
Umgebungstemperatur wird auf dem Bildschirm angezeigt.
4. Um in den Arbeitsmodus zu wechseln, drücken Sie die Taste Ein/Aus auf der
Fernbedienung oder dem Bedienfeld des Geräts.
5. Der zweiteWert erscheint auf dem Bildschirm - dies ist die eingestellte Temperatur, auf die
der eizkörper die Umgebung erwärmt. Um diesen zu ändern, drücken Sie die Tasten
Temperatur erhöhen/verringern auf der Fernbedienung oder dem Bedienfeld am Gerät,
bis Sie den gewünschten Wert im Bereich von 5 - 37ºC ausgewählt haben.
6. Drücken Sie die Taste eizen auf der Fernbedienung oder dem Bedienfeld am Gerät, um
den eizmodus einzuschalten. Das erste Drücken schaltet die eizung mit 750 W Leistung
ein, das zweite Drücken schaltet die eizung mit 1250 W Leistung ein, das dritte Drücken
schaltet die eizung mit 2000 W Leistung ein, das vierte Drücken schaltet den Anti-Frost-
Modus ein, das fünfte Drücken schaltet den eizmodus aus . Nach diesem Vorgang
schaltet sich die eizung mit der eingestellten Leistung ein, wenn die
Umgebungstemperatur um 1°C unter den eingestellten Wert fällt. Das Gerät schaltet sich
aus, wenn die Umgebungstemperatur den eingestellten Wert erreicht.
7. Im Anti-Frost-Modus stellt das Gerät die eingestellte Temperatur automatisch auf 5ºC ein.
Wenn die Umgebungstemperatur unter diesen Wert fällt, schaltet die eizung
automatisch in den Modus mit maximaler eizleistung von 2000 W und arbeitet, bis die
Umgebungstemperatur 9ºC beträgt.
8. Drücken Sie die Taste Lüfter auf der Fernbedienung oder dem Bedienfeld des Geräts, um
den Lüfter ein-/auszuschalten.
9. Die eizung hat einen eingebauten Timer, dessen Bereich von 1 bis 24 Stunden reicht.
Zum Einschalten drücken Sie bei eingeschaltetem eizmodus die Taste Timer auf der
Fernbedienung oder dem Bedienfeld des Gerätes, bis der entsprechende Zeitwert
eingestellt ist. Fünf Sekunden nach Auswahl des entsprechenden Werts beginnt der Timer
mit dem erunterzählen. Nach Ablauf der eingestellten Zeit schaltet das eizgerät den
eizbetrieb ab, unabhängig davon, ob es die am Thermostat eingestellte Temperatur
erreicht hat.
Hinweis:
• Schließen Sie Fenster und Türen, um einen optimalen Nutzen zu erzielen.
• Decken Sie die Lüftungsönungen nicht ab, da dies zu Überhitzung führt und die
Abschaltung aktiviert.